

You don’t need cameras. You don’t need WiFi. You don’t need a monthly subscription to some security company that’ll call the cops 20 minutes after someone’s already inside your house.
What you do need is awareness. Specifically, you need to know when something crosses your perimeter — whether that’s a person, a vehicle, or a 200-pound hog tearing up your garden at 3 AM.
Today I’m going to walk you through how to build a layered, low-tech perimeter alert system that works without electricity, without internet, and without any monthly fees. Most of this you can set up in a single afternoon with stuff you already have or can grab for under $50.
Why Low-Tech?
Here’s the thing nobody in the security industry wants you to think about: high-tech systems fail at the worst possible times. Power goes out during a storm — cameras go dark. Internet drops — your app-based alerts are useless. Someone who actually knows what they’re doing can jam wireless signals with a $30 device off the internet.
Low-tech doesn’t fail because there’s nothing to fail. A tripwire doesn’t need firmware updates. A gravel path doesn’t lose WiFi signal. A dog doesn’t need to reboot.
I’m not saying ditch your Ring doorbell. I’m saying: build the foundation first. Then add tech on top if you want.
Layer 1: The Noise Barrier
Your first line of defense isn’t a wall. It’s sound. You want to make it physically impossible for someone to approach your home without making noise.
Gravel Paths and Beds
This is the single most underrated security measure for any property. A 3-4 inch layer of pea gravel or crushed stone around your home’s perimeter — especially under windows and along walkways — is loud enough to wake a light sleeper from inside.
- Width: At least 3 feet out from the foundation. Wider is better.
- Depth: 3-4 inches minimum. Too shallow and it’s easy to step quietly.
- Best material: Crushed angular stone (not smooth river rock). The irregular edges grind against each other and create more noise.
- Bonus: It also improves drainage around your foundation and looks good. Your HOA can’t complain about a landscaping feature.
Dry Leaf Zones
If you’re in a wooded area or on acreage, let the leaves accumulate in strategic areas — especially along tree lines and natural approach routes. Dry leaves are nature’s alarm system. A 150-pound human cannot walk through dry oak leaves quietly. Period.
Layer 2: Tripwire Alerts
Now we’re getting into actual alert devices. These are simple mechanical systems that tell you when a line has been crossed.
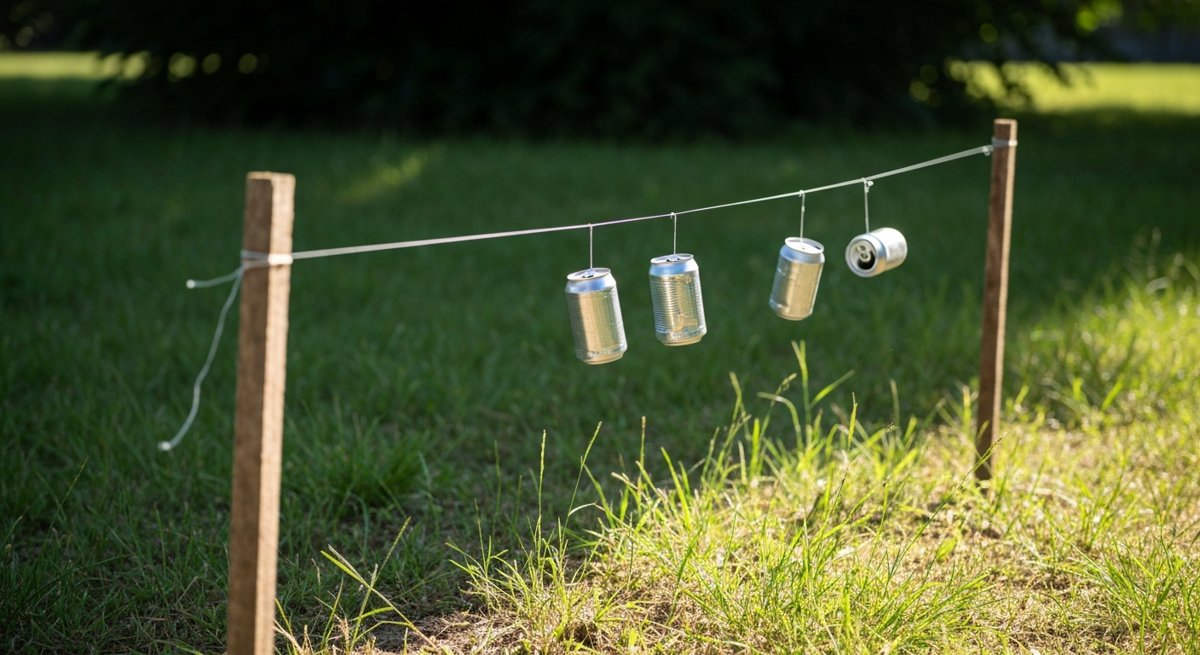
The Fishing Line + Can Method
Old-school, dead simple, and it works:
- Tie 20-pound monofilament fishing line between two stakes or trees at about 8-10 inches off the ground.
- Attach a few empty aluminum cans with pebbles inside to the line.
- When something hits the line, the cans rattle and drop.
Pro tip: Use clear mono line, not paracord. You want this to be invisible. Run it across natural approach paths — game trails, gaps in fence lines, the space between your shed and the tree line.
Perimeter Trip Alarms (12-Gauge Blanks)
These are commercially available trip alarm devices that fire a 12-gauge blank shotgun shell when a tripwire is pulled. They’re loud — we’re talking 100+ decibels. You’ll hear it from inside your house, and whoever tripped it will absolutely not stick around to find out what happened.
They run about $10-15 each. Set them at choke points — gates, gaps in fencing, the back side of outbuildings. Replace the blanks every 6 months since moisture degrades them.
Important: Check your local ordinances. These are legal almost everywhere for property protection, but some municipalities have noise rules. Know your area.
Layer 3: Visual Deterrents and Deception
Most intruders — human ones, at least — are looking for the easiest target. Your job isn’t to build Fort Knox. It’s to make your property look like more trouble than it’s worth.
- Security signs and stickers — even if you don’t have the system. Sounds cheap, but studies consistently show these reduce break-in attempts. A “Protected by ADT” sign costs $5 and creates doubt.
- Motion-activated solar lights — technically “tech,” but they’re self-contained, no wiring, no WiFi. A 4-pack runs about $25 and lasts years. Place them at corners, gates, and driveways.
- Thorny landscaping under windows — holly bushes, barberry, roses, or hawthorn planted under first-floor windows. Nobody is climbing through a holly bush voluntarily. This is centuries-old security design and it works as well now as it did in medieval England.
- Dummy cameras — a $8 fake camera with a blinking red LED mounted at your front gate. Is it real? They don’t know. And that uncertainty is the whole point.
Layer 4: The Human Element
No system replaces situational awareness. Here’s how to build it into your routine:
- The nightly walkthrough. Every night before bed, take 5 minutes to walk your perimeter. Check gates, check locks, check your alert devices. This isn’t paranoia — it’s maintenance. You check your oil and tire pressure, right? Same idea.
- Know your baseline. What does your property sound like at 2 AM on a Tuesday? What animals are normally moving around? You can’t detect “abnormal” if you don’t know what “normal” is. Spend a few nights actually listening.
- Talk to your neighbors. The best perimeter alert system is a neighbor who calls you when they see something weird. Build those relationships. Bring over some eggs or a six-pack. Community is the oldest security system in human history.
Putting It All Together: A Sample Layout
Here’s how I’d set up a basic property — say a quarter-acre suburban lot with a house, detached garage, and backyard:
- Gravel bed — 4 feet wide around the entire house perimeter, especially under windows.
- Holly bushes under the two most vulnerable windows (usually side-yard windows that aren’t visible from the street).
- Solar motion lights at all four corners of the house and one at the garage.
- Fishing line tripwire across the side gate and along the back fence line.
- One 12-gauge trip alarm at the back gate (the one nobody uses but everyone forgets to lock).
- Security signs at the front and side of the property.
- Dummy camera at the front, pointed at the driveway.
Total cost: maybe $60-80 if you’re buying the gravel. Half that if you already have landscaping stone.
What About Rural and Large Properties?
Scale the same principles. You can’t gravel 40 acres, obviously. But you can:
- Identify the 2-3 most likely approach routes (driveways, trails, road frontage gaps) and focus your tripwires there.
- Use natural barriers — brush piles, fallen trees, thorny hedgerows — to funnel movement toward your monitored points.
- Consider a driveway alarm (a battery-powered IR sensor that sends a wireless alert to a receiver in your house). These are semi-tech but run on batteries and don’t need WiFi. The Dakota Alert DCPA-4000 is the gold standard — about $100 and it’ll cover a quarter-mile.
The Takeaway
Security isn’t a product you buy. It’s a system you build. And the best systems start with the simplest, most reliable layers — noise, physical barriers, and human awareness — before you ever plug anything in.
Your challenge this weekend: Walk your property with fresh eyes. Pretend you’re trying to approach your own house without being noticed. Where would you come from? What would you avoid? Now make those easy routes harder. Start with gravel and a pair of solar lights. You’ll be ahead of 90% of homeowners by Sunday night.
Security is about layers, not gadgets. Build the foundation first. Everything else is optional.