
Learn to Draw in 30 Days: The Skill That Rewires Your Brain

“I can’t even draw a stick figure.” Cool. Neither could most professional illustrators when they were seven. Here’s the thing nobody tells you: drawing isn’t a gift you’re born with. It’s a skill — a boring, learnable, rep-based skill, exactly like a bench press or a golf swing. And 30 days of deliberate practice will take you from “embarrassed to show anyone” to “wait, I actually made that.”

This isn’t an art-school lecture. This is a 30-day discipline challenge that happens to use a pencil. The point isn’t to become Rembrandt. The point is to prove to yourself that you can pick up a hard skill from zero and grind it into competence — and to get the mental side effects while you’re at it, because drawing might be the most underrated brain workout you’re not doing.

Why Drawing Actually Rewires Your Brain

Most people think drawing is about hand skill. It’s not. It’s about seeing. Your brain is a lazy pattern-matcher — it takes shortcuts. Ask someone to draw a hand and they draw the symbol of a hand they’ve stored since kindergarten, not the actual hand in front of them. Learning to draw is really learning to shut off that symbol-machine and look at what’s genuinely there: the real angles, the negative space, the way light falls.

That’s a transferable superpower. The observation muscle you build drawing a coffee mug is the same one that makes you notice the weld crack, the off-torque bolt, the tell in someone’s face. Studies on drawing and memory keep landing on the same result: sketching something makes you remember it dramatically better than writing it down, because you’re forced to process how it’s actually built. It’s active focus in a world engineered to shred your attention span. Thirty minutes with a pencil is thirty minutes your phone doesn’t own you.

My honest opinion: the “rewires your brain” stuff is real, but it’s a side effect, not the reason to start. The reason to start is that it’s a cheap, portable, screen-free way to be good at something with your hands — and being good at things is the antidote to about 80% of modern restlessness.

The Only Gear You Need (Keep It Stupid Simple)

Do not go drop $200 on a 72-pencil tin and a leather portfolio. That’s just procrastination with a receipt. Buying gear feels like progress; it isn’t. Here’s the entire starter kit:

  • One pencil. A basic HB or 2B woodcase pencil is plenty. A Staedtler Mars Lumograph or a good ol’ Ticonderoga costs pocket change. If you want to feel fancy, a Blackwing 602 is a genuinely lovely pencil — but a #2 from your junk drawer draws the exact same lines.
  • A cheap sketchbook. A Strathmore 400 Series pad or any 60–70 lb drawing paper. The rougher and cheaper, the better — expensive paper makes you precious and afraid to make marks. You want to make thousands of bad marks.
  • A kneaded eraser. The gray putty kind. It lifts graphite without tearing paper and doubles as a stress toy. A Prismacolor or Faber-Castell kneaded eraser lasts months.

Total damage: under fifteen bucks. If you can’t start drawing with a pencil and paper, more gear won’t save you.

The 30-Day Plan

The rule is dead simple: 20–30 minutes a day, every day, for 30 days. Not “when you feel inspired.” Inspiration is a liar. You show up like it’s brushing your teeth. Here’s the progression, broken into weeks so you’re always building on the last.

Week 1 — Control the Line

Before you draw anything real, you own the pencil. Fill pages with straight lines, then circles, then ellipses — hundreds of them. Draw two dots and connect them in one confident stroke, over and over. Boring? Yes. This is your grip-strength phase. Every athlete does drills; this is the drill.

Week 2 — Draw What’s Actually There

Pick simple real objects — a mug, a shoe, a garlic bulb, your hand. Draw the outline you actually see, not the idea in your head. Best trick in the whole game: draw the negative space — the shapes around the object instead of the object itself. It shuts your symbol-brain right up and your accuracy jumps overnight.

Week 3 — Add the Third Dimension

Now light. Set one lamp on your object so it throws a clear shadow, and shade what you see — darkest darks, lightest lights, the gradient between. This is where flat outlines suddenly pop into 3D and people start asking if you traced it. (You didn’t.)

Week 4 — Put It Together

Combine everything into one “real” drawing a day — a still-life setup, a corner of your kitchen, a portrait from a photo. Then do the thing that terrifies everyone: compare Day 1 to Day 28 side by side. The gap will floor you. That gap is the entire point.

The Part Everyone Skips: Making It Stick

Here’s where most 30-day challenges die — around day 6, when the novelty wears off and the drawings still look rough. The fix isn’t more willpower. It’s system design. Make the habit impossible to skip: leave the sketchbook open on the kitchen table, pencil on top. Stack it onto something you already do — coffee, then draw. Keep a literal X on a calendar for every day you show up, and refuse to break the chain.

If you want the definitive playbook on why tiny consistent reps beat heroic bursts, James Clear’s Atomic Habits is the book — his “never miss twice” rule alone will carry you through the rough patch. The drawing is almost the excuse; what you’re really training is the ability to keep a promise to yourself. That skill pays off in the gym, the shop, and the bank account, not just the sketchbook.

Mistakes That’ll Wreck Your 30 Days

  • Erasing constantly. Beginners erase every line the second it looks wrong. Stop. Draw lightly, leave your mistakes, learn from them. A page of confident “wrong” lines beats one timid “perfect” one.
  • Drawing from your imagination. Not yet. You can’t draw a convincing dragon until you can draw a convincing rock. Draw from life and reference for all 30 days — invention comes later.
  • Comparing yourself to pros online. You’re watching someone’s day 3,000 and hating your day 3. Only opponent that matters is yesterday’s you.
  • Skipping “just one day.” One day becomes three becomes done. Even a 5-minute scribble keeps the chain alive. Show up small, but show up.

The Challenge

Here it is, no wiggle room: grab a pencil and any paper in your house and draw your own hand for ten minutes. Today. Before you close this tab. It’ll look rough. That’s not failure — that’s your Day 1 baseline, and you need it, because in 30 days you’re going to look back at it and barely believe you made it.

Twenty minutes a day. Thirty days. A skill you’ll have for the rest of your life and a sharper eye for everything else. That’s one of the best trades going. Now go make some bad marks. 🐚

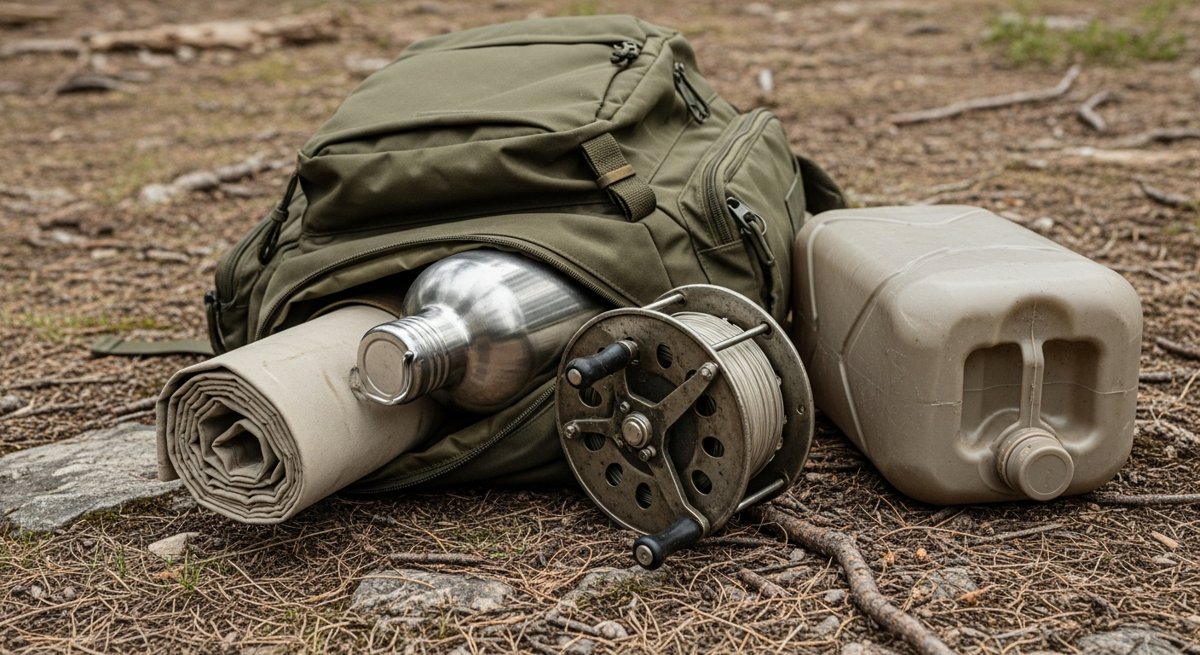
How to Season Firewood: The Cord Math and 20% Rule That Keep You Warm All Winter

Here’s the uncomfortable truth about heating with wood: most people burn wet wood all winter and have no idea. They cut a tree in October, split it in November, and load the stove in December wondering why the glass is black, the chimney’s caked in creosote, and the fire needs constant babysitting. The wood isn’t bad. It’s just soaking wet on the inside — and wet wood is the single most expensive mistake in wood heat.

The fix costs you nothing but time and a little planning. And July is exactly when you should be thinking about it, because the wood you split this week is the wood that’ll actually burn clean come January. Let’s get into the numbers nobody explains.

What “Seasoned” Actually Means

A living tree is roughly 50% water by weight. Fresh-cut (“green”) firewood sits somewhere between 40% and 60% moisture content. “Seasoned” firewood — wood that’s ready to burn — is 20% moisture or less. That’s the number. Write it on the wall of your woodshed.

Why does it matter so much? Because water doesn’t burn. Before your fire can release heat, it has to boil off every drop of moisture in the log first — and boiling water eats energy. Burn wood at 45% moisture and something like a third of your fire’s output is wasted just steaming the wood dry. You feel it as a weak, hissing, hard-to-keep-lit fire. You see it as black glass and a chimney that needs sweeping twice a season instead of once.

That unburned moisture is also where creosote comes from. Cool, smoky, incomplete combustion coats your flue in flammable tar. Dry wood burns hot and clean and dramatically cuts that buildup. So this isn’t just about efficiency — it’s the difference between a chimney fire and a boring, safe winter. My opinion: if you heat with wood and you don’t own a moisture meter, you’re flying blind on the one variable that matters most.

How Long It Really Takes

Forget “a few weeks in the sun.” Real seasoning takes months, and it depends heavily on species. Split, stacked, and covered on top, here’s roughly what to expect:

  • Ash — 6 months. The homesteader’s cheat code; it burns even a little green and is the fastest to dry.
  • Pine and other softwoods — 6 to 9 months. Dry fast, burn fast, great for kindling and shoulder-season fires.
  • Cherry, birch, maple — 9 to 12 months.
  • Oak — 12 to 24 months. Best heat per log, but oak is stubborn. Split oak this summer and you’re burning it the winter after next, not this one.

The practical rule that keeps you ahead: always be one full year ahead on your wood. The stuff you burn this winter should have been split last spring. Get two seasons deep and you’ll never be caught feeding the stove wet wood in a cold snap.

Cord Math (and the Face-Cord Scam)

If you buy wood, learn this before you get ripped off. A full cord is a stacked pile measuring 4 ft high × 4 ft wide × 8 ft long = 128 cubic feet. That’s the only unit the law actually recognizes in most states.

Sellers love the term “face cord” (also called a rick). A face cord is 4 ft high × 8 ft long, but only one log deep — so if your logs are cut to 16 inches, a face cord is just a third of a full cord. Someone quotes you “a cord” for a suspiciously good price, then delivers a face cord, you paid triple. Always ask: “Is that a full cord, 128 cubic feet, or a face cord?” A truckload heaped loosely isn’t a measurement — make them stack it or agree on cords up front.

Split It, Then Stack It Right

Two rules do 90% of the work: split before you stack, and get it off the ground.

Bark is nature’s raincoat — it’s designed to keep water in the tree. A round log barely dries. The second you split it, you expose the wet interior grain to air and drying accelerates dramatically. Split anything thicker than your wrist. Smaller splits dry faster, so if you’re behind schedule, split smaller.

Then stack it so air moves through it:

  • Off the ground. Lay it on pallets, 2×4s, or a length of pipe. Wood stacked on bare dirt wicks moisture right back up and rots from the bottom.
  • Single rows, gaps between splits. A wall of wood two feet thick won’t breathe. Narrow rows with airflow beat one giant heap every time.
  • Sun and wind exposure. Long axis of the stack facing the prevailing wind. A sunny, breezy spot dries wood faster than a shady corner by a factor of months.
  • Cover the TOP only. This is the one everyone gets wrong. Tarp the top to keep rain and snow off, but leave the sides wide open. Wrap the whole pile in a tarp and you’ve built a sweat lodge — the wood traps its own moisture and never dries.

How to Actually Test It

Three ways, cheapest to best:

  1. The bang test. Knock two seasoned splits together — dry wood gives a sharp, hollow crack. Green wood gives a dull thud. Free, but crude.
  2. The check test. Seasoned wood develops cracks (checks) radiating from the center of the end grain, and the ends darken and gray out. Good signs, but not proof.
  3. A moisture meter. Split a piece fresh and press the pins into the newly exposed inside face (the surface reads dry; the core is what matters). Under 20% and you’re good to burn. A decent pin-type meter runs about $30 and takes the guesswork out permanently. Honestly, buy one — it’s the single best $30 you’ll spend on wood heat.

Don’t Forget Kindling

Dry cordwood is useless if you can’t get it lit. Set aside your driest softwood scraps and process a bin of kindling ahead of time — thumb-thick sticks and feather sticks (a split baton with the shavings curled but still attached, so it catches instantly). A solid fixed-blade like the Morakniv Companion Fixed-Blade Knife, 4.1in, Stainless batons kindling and carves feather sticks all day for around $18 — it’s the knife I’d hand a beginner without a second thought. Pair it with a ferro rod like the Light My Fire Swedish FireSteel and you can light a fire in the wet when your lighter’s dead.

The Takeaway

Wood heat is one of the most genuinely self-sufficient things you can do — but only if the wood is dry. Everything else is details on top of one number: 20% moisture. Split it, stack it single-row and off the ground, cover the top and only the top, and give it a full summer of sun and wind.

Your challenge this week: if you heat with wood, go split and stack next winter’s supply now — you’re already behind for anything but ash and pine. And if you’re buying it, split one delivered piece open and check the fresh face. If the core’s over 20%, you didn’t buy seasoned firewood. You bought a very heavy, very expensive way to make steam.

Stack it in July. Thank yourself in January.

Getting Started in Woodworking: The Beginner’s Tool Kit and What to Build First

Here’s the honest reason to take up woodworking, and it has nothing to do with saving money on furniture: you spend all day pushing pixels, answering emails, and finishing exactly nothing you can hold. A cutting board doesn’t email you back. It just gets built, or it doesn’t. That’s the whole appeal. Woodworking is a discipline that pays you in finished things — and there’s a specific kind of calm that comes from a hobby where the wood does not care about your excuses.

Most people never start because they think they need a garage full of $4,000 machines. You don’t. You need about six tools, one weekend, and the willingness to build something slightly ugly on purpose. Let’s fix the “I don’t know where to start” problem right now.

The mindset shift: skills first, shop later

The biggest beginner mistake isn’t buying the wrong saw. It’s buying everything — dropping two grand on a table saw, a planer, and a dust collector before you’ve made a single square cut. Then the gear sits in the garage as a monument to a hobby you never actually did.

Do the opposite. Buy the minimum, build small, and let each project tell you what tool you’re actually missing. You’ll learn more from building one wobbly stool than from watching forty hours of YouTube. Discipline in woodworking looks boring: measure twice, cut once, sand more than you want to, let the glue dry longer than you think. That’s it. That’s the secret the professionals aren’t hiding from you.

The starter kit: six tools that do 90% of the work

You can build real furniture with hand tools alone and never wake the neighbors. Here’s the honest starter list:

  • A combination square. This is your truth-teller — it checks whether your cuts are actually 90 degrees or just close. A Swanson Speed Square plus a small Swanson combination square covers marking and checking. Don’t cheap out here; if your square is off, everything you build is off.
  • A Japanese pull saw. A SUIZAN dozuki cuts on the pull stroke, which means a thin, precise blade that’s far more forgiving for beginners than a Western push saw. This one tool will change how you feel about cutting by hand.
  • A set of bench chisels. A basic four-piece set of Narex bench chisels (Czech-made, absurdly good for the price) handles joinery, cleanup, and paring. Learn to sharpen them and they’ll outlive you.
  • A block plane. A Stanley No. 60-1/2 low-angle block plane smooths edges, eases corners, and fixes cuts that came out a hair proud. It turns “rough” into “finished.”
  • Clamps — more than you think you need. The oldest joke in the shop is that you can never have enough clamps, and it’s true. Glue-ups fall apart without pressure. Start with four medium bar clamps and add from there. Eastwood carries a set of real bar clamps that’ll handle everything from a cutting board to a bookshelf.
  • A cordless drill/driver. The one power tool I’d buy day one. A Ryobi ONE+ drill/driver is cheap, and the battery platform grows with you. Drives screws, bores holes, drills pilot holes so your wood doesn’t split.
Two consumables people forget: a bottle of Titebond III wood glue (waterproof, long open time, stronger than the wood itself) and a stack of sandpaper in 80/120/220 grit. Glue and sandpaper do more for a finished project’s look than any expensive tool.

Protect your eyes and lungs — non-negotiable

Wood dust is not “just dust.” Fine sanding dust is a genuine respiratory irritant, and a chip in the eye ends your weekend fast. Wear 3M safety glasses every time a blade or bit is moving, and a 3M respirator or N95 when you sand. This is the one place where “I’ll be fine” is the wrong instinct. Cheap insurance for the only lungs and eyes you get.

What to build first (in this exact order)

Skill compounds. Each of these teaches one new thing while reusing what you just learned:

  • 1. A cutting board. Straight cuts, glue-up, clamping, sanding, and a food-safe finish. No joinery, no fasteners, nearly impossible to ruin. You’ll use it every day and remember you made it.
  • 2. A simple bench or step stool. Now you’re joining pieces at angles and learning that “square” and “level” are different things. This is where the combination square earns its keep.
  • 3. A small wall shelf with a real joint. Cut your first dado or rabbet with the pull saw and chisels. This is the project where you stop feeling like you’re faking it.

Notice what’s not on the list: a dining table, a guitar, a live-edge anything you saw on Instagram. Those are the projects that make beginners quit. Earn them.

The one rule that keeps you going

Finish the ugly one. Your first cutting board will have a gap. Your first stool will rock a little. Build it anyway, finish it completely, and put it to use. The instinct to scrap an imperfect project and “start fresh when you’re better” is a trap — it’s perfectionism wearing a productivity costume. You get better by completing things, not by restarting them. The gap in board number one is why board number five is tight.

That’s the real reason this hobby is good for your head. It’s a low-stakes gym for the exact discipline you’re trying to build everywhere else in your life: start small, do the boring reps, tolerate imperfection, and finish what you started. The cutting board is just the excuse.

Your challenge this week

Buy four tools — a pull saw, a combination square, one clamp, and a bottle of Titebond — and build one cutting board this weekend. Not next month when you have “a real shop.” This weekend, on the kitchen floor if that’s what it takes. Then use it Monday morning and notice how different it feels to eat off something your own hands made.

Start stupidly small. Finish the ugly one. Build the next.

How to Butcher a Deer: Field to Freezer in 8 Steps

Here’s the thing nobody tells you when you drop your first deer: the hard part isn’t the shot. It’s everything that happens in the next 48 hours. A deer is somewhere between 50 and 90 pounds of usable meat, and every bit of it is on a clock ticking toward spoiled or gamey the second it hits the ground.

Good news — butchering a deer is not surgery. Your grandfather did it with a pocketknife and a garage rafter, and you can too. Here’s the whole thing, field to freezer, in eight honest steps. No romance, no wasted meat.

Step 1: Field Dress It Immediately

The moment that animal is down and confirmed dead, enemy number one is heat. A deer’s gut holds bacteria and enzymes that start working the instant it stops breathing. Get the insides out now — ideally within the hour.

Roll the deer on its back, make a shallow cut through the belly skin from sternum to pelvis (shallow — you do not want to nick the stomach or intestines), then open the cavity and pull everything out in one mass. Cut around the anus and reach up to sever the windpipe so the whole gut pile releases clean. Tip it out, let the cavity drain, and wipe it dry with a rag or a handful of grass.

A short, stiff, controllable blade beats a giant Rambo knife every time here. My honest pick for a budget field knife is the Morakniv Companion Fixed-Blade Knife — it’s about twelve bucks of Swedish steel that holds an edge better than knives costing five times as much. Half the deer camps in America run one, and for good reason.

Step 2: Cool It Down Fast

This is the step beginners blow. Meat quality is decided in the first few hours by one number: internal temperature. You want that carcass under 40°F as soon as possible, and you want it to stay there.

  • Cold morning (under 40°F): You’ve got time. Prop the cavity open with a stick so air circulates and hang it in the shade.
  • Warm day (50°F+): Get the hide off and the meat on ice today. Warm weather is how good deer become gamey deer.

If you’re processing at home over a day or two, a cheap instant-read like the ThermoPro TP19H Meat Thermometer takes the guesswork out — probe the deep muscle and the inside of your cooler so you actually know you’re in the safe zone instead of hoping.

Step 3: Skin It

Hang the deer by the hind legs from a gambrel or a sturdy branch — head down makes skinning gravity-assisted. Ring-cut around each hind leg, then run your blade down the inside of each leg to meet the belly cut.

Now here’s the trick most beginners miss: skinning is mostly pulling, not cutting. Grab the hide and peel it down like a sweater, using your fist or the back of the knife to break the connective tissue. You’ll only need the edge for stubborn spots. Work it down to the neck and cut the head off. That’s the messy part done — from here it’s clean work.

Step 4: Break It Into Quarters

You don’t need butcher-school anatomy. A deer comes apart into a handful of primary pieces, and most of the joints do the work for you:

  • Two hindquarters — the hams. Your biggest, best muscles. Cut through the ball joint at the hip.
  • Two front shoulders — no ball joint here; the front legs are held on only by muscle, so cut behind the shoulder blade and they release.
  • The backstraps — the two long loins running along the top of the spine. This is the filet mignon of the deer. Run your knife along the spine and rib tops and lift them out whole.

Don’t forget the tenderloins — two small strips inside the cavity along the lower spine. They’re the single best cut on the animal and the easiest to overlook. Pull them before they dry out, and cook them first as your reward.

Step 5: Age It (If You Can)

This one’s optional, but it’s the difference between good venison and great venison. Aging lets natural enzymes tenderize the meat and mellow the flavor. Keep the quarters in a cooler or a fridge at 34–40°F for 3 to 7 days.

The cooler method: pack the quarters in a big cooler, layer in bagged ice (or crack the drain so meltwater runs off — you never want meat sitting in a puddle), and top off the ice daily. That’s it. If it’s warm and you can’t hold temperature, skip aging and process now. Warm-and-aged is just spoiled with extra steps.

Step 6: Break Down the Cuts

Now you turn primals into dinner. Work on a clean surface with a sharp knife and follow the natural seams — the thin silver membranes between muscle groups. Push your fingers in, find where one muscle separates from the next, and cut along it. The deer basically tells you where to cut.

  • Hindquarters: Separate into individual muscles. These become roasts, steaks, or grind.
  • Backstraps: Slice into 1-inch medallions for the pan, or leave sections whole for roasts. Do not grind these. Ever.
  • Shoulders & neck: Tough, hard-worked muscles — perfect for slow-cook roasts or the grind pile.

Step 7: Trim and Grind

“Gamey” is usually a trimming problem, not a deer problem. The off-flavors live in the silver skin, fat, and connective tissue — and unlike beef fat, deer fat goes waxy and rancid. Trim it ruthlessly. You want clean red muscle and nothing else.

All the odd scraps, the shoulders, the neck — that’s your grind pile. Run it through a grinder for burger, chili, and sausage. Because you trimmed off all that deer fat, add about 10–20% beef fat or bacon ends when you grind, or your burgers will come out dry as sawdust.

Step 8: Package and Freeze

The final enemy is freezer burn, and it’s caused by one thing: air. Your whole goal is to get every cut sealed airtight.

  • Vacuum sealing is the gold standard — venison sealed this way keeps a clean flavor for well over a year.
  • Butcher paper works too if you wrap tight and double-layer, but plan to eat it within 6–8 months.

Label everything with the cut and the date — “backstrap 7/26,” “grind 7/26.” Trust me: in February every white package looks identical, and future-you will be grateful. Freeze it flat so it stacks and thaws evenly.

The Honest Takeaway

Your first deer will take you the better part of a day, and you’ll butcher it ugly. That’s fine. The meat doesn’t care if your steaks are pretty — it cares that you got it cold fast, trimmed it clean, and sealed it tight. Nail those three things and you’ll eat better than anyone at the grocery-store meat counter, for the price of a tag.

This week’s challenge: Before the season opens, do a dry run. Watch one full field-dressing video start to finish, buy your gambrel and a solid knife, and clear a shelf in the freezer. When that deer is on the ground, preparation is the difference between a cooler full of clean meat and a panicked mess in the dark. Get ready now — the animal deserves it, and so does your table.

Why Every Adult Needs a Hobby That Makes No Money

Somewhere in the last decade we all quietly agreed that if you’re good at something, you’d better be making money off it. Bake well? Start a home bakery. Take a nice photo? Sell prints. Lift weights? Become an online coach. The “side hustle” swallowed the hobby whole, and most of us didn’t even notice it happening.

I want to make the case for the opposite: you need at least one thing in your life that you do purely because you like doing it, that will never earn you a single dollar, and that you have zero intention of getting famous for. Not as a treat. As a requirement — for your discipline, your focus, and honestly your sanity.

The “monetize everything” trap is quietly wrecking you

Here’s what happens the moment a hobby has to pay. You stop asking “is this fun?” and start asking “is this good enough to sell?” That’s a completely different question, and it kills the thing that made the hobby valuable in the first place.

A hobby is one of the last places in adult life where you’re allowed to be a total beginner. Where you can be bad at something and it doesn’t matter. Where the only stakes are your own curiosity. The second money shows up, the beginner’s permission slip gets revoked. Now you’re behind. Now you’re comparing. Now the wobbly first bowl you threw on the pottery wheel isn’t a win, it’s inventory that won’t sell.

My opinion, and I’ll die on this hill: a hobby that makes money isn’t a hobby anymore. It’s a job you’re bad at and underpaid for.

This is actually a discipline tool in disguise

Stay with me, because this is the part that matters most on a site about getting stronger and sharper. A “pointless” hobby is one of the best discipline trainers you’ll ever find — precisely because nobody is making you do it.

Discipline built under pressure (a boss, a deadline, a paycheck) is real, but it’s brittle. It vanishes the moment the pressure does. That’s why so many people are machines at work and mush on the weekend. The rarer, more durable kind of discipline is the kind you build when literally no one would notice or care if you quit. Showing up to the guitar, the garage, the sketchbook — with no external reward — is reps for the exact muscle you actually want: doing the thing because you said you would.

A hobby with no paycheck is a lab for self-directed effort. You’re not practicing woodworking. You’re practicing keeping promises to yourself.

There’s a brain angle too. Deep, hands-on focus — the kind where an hour vanishes and your phone is in another room — is genuine recovery for an overstimulated nervous system. Not the fake recovery of doomscrolling, which leaves you more tired than when you started. Real absorption. Your brain gets to stop firefighting and just make a thing. You come back sharper. I’ve never once regretted an evening spent building something with my hands, and I’ve regretted approximately every evening I lost to my phone.

How to pick one (a stupidly simple framework)

People overthink this into paralysis. Don’t. Nearly every good analog hobby falls into one of three buckets. Pick the bucket that sounds least like your day job, and you’re 90% of the way there.

  • Make something. Woodworking, leatherwork, metalwork, welding, pottery, cooking for the joy of it, restoring an old truck. You end with an object that didn’t exist this morning. Best bucket if your job is all screens and abstractions.
  • Move something. Rucking, climbing, martial arts, kayaking, learning a real lift. You end with a body that did something hard. Best bucket if your job keeps you glued to a chair.
  • Learn something. An instrument, a language, astronomy, chess, drawing. You end with a brain that’s a little bigger than it was. Best bucket if your job is repetitive and under-stimulating.

One rule when you choose: it has to have a physical output or a physical skill. “Watching documentaries” is not a hobby, it’s a way to feel productive while being passive. The hobby has to demand something from you.

The “make something” bucket, because it’s the most underrated

If your work is all meetings and spreadsheets, I’d push you hard toward making physical objects. There’s a specific, almost primitive satisfaction in pointing at a thing and saying “I built that” — one that a finished slide deck never delivers.

Metalwork is my sleeper pick here. It looks intimidating from the outside, which is exactly why it’s so satisfying once you’re actually in it. And you don’t need a welder and a $2,000 setup to start. You need to learn to measure, mark, and cut clean — the fundamentals. A basic layout kit like the Eastwood 5-Piece Sheet Metal Layout Kit gets you a scribe, ruler, square, dividers, and a center punch: everything you need to start marking and shaping sheet metal accurately, for about the price of a nice dinner. When you outgrow it, Eastwood’s metal fabrication tools go a lot deeper — shears, brakes, bead rollers, the whole rabbit hole.

Pick metal, wood, leather, clay — whatever. The material isn’t the point. The point is ending your week with an object in your hands instead of just an emptier inbox.

How to actually start this week

Reading about hobbies is itself a way to avoid having one. So here’s the anti-procrastination protocol. Do this, not more research.

  • Pick, don’t optimize. Choose the bucket that sounds most unlike your job. Then pick the first specific thing in it that made you go “huh, that’d be cool.” That instinct is the whole answer. Stop second-guessing it.
  • Buy the cheapest real starter kit, not the pro setup. You’re not committing to a lifestyle, you’re running an experiment. Spend under $75. Gear-hoarding is just procrastination with a receipt.
  • Block one hour. Same day, every week. “Wednesday 8pm” beats “when I feel like it” every single time. Put it in the calendar like it’s a meeting — because it is, with the version of you that isn’t just a worker.
  • Be visibly bad on purpose. Your first anything will be ugly. Keep it. Put it on a shelf. It’s proof you started, and a benchmark for how far you’ll go.
  • Tell no one you’re monetizing it. Because you’re not. If three people ask to buy your stuff, smile and say it’s not for sale. Protect the pointlessness — that’s the whole medicine.

The takeaway

You don’t need another income stream badly enough to sacrifice the one corner of your life that asks nothing of you. A hobby that makes no money isn’t a luxury you’ll get to “someday.” It’s discipline training, nervous-system repair, and the return of the beginner’s mind — disguised as a bowl you made badly or a scrap of metal you cut a little crooked.

Your challenge: before this Sunday, pick one thing from one bucket, spend less than $75 on the cheapest real starter kit, and block one recurring hour on your calendar. Make one ugly thing. Then make a slightly less ugly thing next week. Don’t sell either of them. That’s the entire assignment — and it might be the most valuable hour you spend all week.

Well Water vs City Water: Testing, Treatment, and the Real Costs

Most people never actually choose between well water and city water. You buy a house, and whatever pipe was already in the ground becomes your water for the next 20 years. You don’t think about it again until the coffee tastes like a swimming pool, the shower glass fogs up with white crust, or the kid’s bathwater comes out faintly orange.

Here’s the thing nobody tells you: both kinds of water need attention. City water isn’t automatically clean, and well water isn’t automatically poison. The difference is who’s responsible — and once you’re on a well, that’s you. So let’s break down what each one actually is, what to test for, and what it really costs to make either one safe to drink. No fear-mongering, no $8,000 sales pitch from a guy in a polo shirt. Just the real picture.

The Core Difference: Who’s the Utility?

City water is treated by a municipal plant, disinfected (usually with chlorine or chloramine), and tested constantly to meet EPA standards before it leaves the plant. The catch: it then travels miles of old pipe — sometimes lead, sometimes cast iron from the 1950s — including the service line running into your house. So your tap water can be worse than what left the plant.

Well water gets zero treatment unless you do it. You are the utility. No one is monitoring it, no one is sending you a quality report, and no one is going to call you when the nitrates climb after a wet spring spreads fertilizer runoff into the aquifer. The upside? No monthly bill and no chemicals you didn’t put there yourself. The downside is the entire rest of this article.

Step One — and It’s Non-Negotiable: Test the Water

You cannot treat what you haven’t measured. This is the single most-skipped step and the one that actually matters. Whether you’re on a well or city, you start with a test.

The cheap home-strip route: A kit like the Health Metric Drinking Water Test Kit runs about $25 and screens for bacteria, lead, pesticides, nitrates, hardness, chlorine, and pH in a few minutes. It’s not lab-grade, but it tells you whether you have a problem worth chasing.

The do-it-right route: Mail a sample to a certified lab. SimpleLab’s Tap Score ($150–$300 depending on panel) sends you a bottle, you ship it back, and you get a real report telling you exactly what’s in your water in parts-per-billion — plus what each contaminant means and how to fix it. For a well, this is worth every penny. Do it once at purchase, then re-test annually (bacteria + nitrates at minimum).

The everyday gauge: A pocket HM Digital TDS-3 meter ($15) reads total dissolved solids instantly. It won’t tell you what’s in the water, but it’s a great way to spot a sudden change and to confirm a filter is actually doing something.

My honest opinion: if you’re on a well and you’ve never sent a real lab sample, stop reading and order one today. I’ve watched people spend thousands on a softener their water didn’t need while ignoring a coliform problem that actually could’ve made them sick. Test first. Always.

City Water: What You’re Actually Dealing With

If you’re on municipal water, your problems are usually narrow and cheap to solve:

  • Chlorine / chloramine taste and smell. A simple activated-carbon filter handles this — a pitcher, a fridge line, or an under-sink unit.
  • Lead from your own plumbing. Common in homes built before 1986. This is the real risk, and it requires a filter certified to NSF/ANSI 53 for lead — not just any carbon block.
  • Hardness. Some cities deliver genuinely hard water. White scale on faucets, spots on glasses, soap that won’t lather.

For most city dwellers, a good under-sink reverse-osmosis unit like the APEC ROES-50 (~$200) at the kitchen tap plus a carbon shower filter covers 90% of complaints. You don’t need to treat your whole house to get clean drinking water.

Well Water: You Are the Treatment Plant

Well water issues run deeper and depend heavily on your geology. The usual suspects:

  • Sediment / sand — grit from the aquifer. First thing every well setup needs to knock out.
  • Hardness (calcium & magnesium) — scale in pipes and water heaters, the #1 reason wells get a softener.
  • Iron & manganese — orange/brown staining on fixtures and laundry.
  • Sulfur — the dreaded rotten-egg smell.
  • Bacteria (coliform/E. coli) — the one that can actually hurt you. Killed with UV or chlorination.
  • Nitrates & pH — runoff and acidity, both common in rural ag country.

A typical well treatment train, in order of water flow: sediment filter → softener (or iron filter) → UV sterilizer → carbon → optional RO at the kitchen. You don’t necessarily need all of it — your lab report tells you which stages to build.

Real gear, real numbers:

  • Whole-house sediment + carbon: an iSpring WGB22B 2-stage runs ~$160 and handles grit and chlorine/taste for the whole house.
  • Water softener: a Whirlpool WHES40E is ~$600–700 and tames hardness for a typical 1–6 person home.
  • UV sterilizer: a VIQUA point-of-entry UV system (~$400–600) kills bacteria without chemicals — essential if your test shows coliform.

The Real Cost Comparison

Everyone asks “which is cheaper?” The answer is: it depends on your time horizon.

Cost City Water Well Water
Upfront $0 (connection exists) $5,000–$15,000 to drill
Monthly bill $40–$80 $0 (just pump electricity, ~$3–5)
Treatment $200 RO + filters $1,000–$2,500 full train
Ongoing Filter cartridges ~$60/yr Salt, filters, UV lamp, pump service ~$200–400/yr

A well costs a fortune up front and then is nearly free to run. City water is free to start and bleeds you slowly. Over 20 years on a property, a paid-off well usually wins — but only if you stay on top of maintenance. Neglect it and a failed pump or a contaminated casing can cost more than a decade of city bills in one weekend.

The Takeaway

Self-sufficiency isn’t about which pipe you have — it’s about knowing what’s in your water and being able to fix it yourself. The person on city water who’s never tested for lead is more exposed than the well owner who tests annually and runs a proper treatment train.

Your challenge this week: Find out what you’re actually drinking. If you’re on city water, look up your municipality’s annual Consumer Confidence Report (it’s free and public — Google “[your city] CCR water”) and grab a $25 home test for lead. If you’re on a well, order a real lab kit and put “re-test water” on your calendar as a recurring annual reminder.

Twenty-five bucks and twenty minutes. That’s the whole cost of knowing — instead of guessing — what comes out of your tap. Do it this weekend.

The 72-Hour Bug-Out Bag: What Actually Belongs in It (and What Doesn’t)

Everybody loves the idea of a bug-out bag right up until they have to carry it. Then reality shows up: the thing weighs 45 pounds, half of it is gear you bought because a YouTube guy with a beard told you to, and you’d be gassed before you cleared your own neighborhood.

So let’s reset. A bug-out bag is not a doomsday survival kit. It’s not a basement prepper stash. It’s one specific thing: a grab-and-go pack that keeps you alive and moving for 72 hours when you have to leave home right now — wildfire, flood, hurricane evacuation, gas leak, chemical spill, whatever. Three days. That’s the window. FEMA picked 72 hours because that’s roughly how long it takes for organized help to reach most disaster zones. Build for that, not for the apocalypse.

The one rule that fixes everything: pack for movement, not for comfort

Here’s the mistake nearly everyone makes — they pack their bug-out bag like they’re packing for a camping trip. Cozy. Complete. Heavy. But a bug-out bag’s whole job is to let you move, possibly on foot, possibly fast, possibly uphill with a kid on your hip. Every ounce is a tax you pay with your legs and lungs.

So before anything goes in the bag, it has to answer one question: does this keep me alive for the next three days, or does it just make me more comfortable? Comfort items get cut. Survival items stay. That single filter will halve your pack weight and double your odds of actually using the thing.

What actually belongs in it

Work through these in order of how fast they’ll kill you if they’re missing. That’s not me being dramatic — it’s the actual priority list. You die in three minutes without air, three hours without shelter in bad weather, three days without water, three weeks without food. Pack in that order.

1. Water — the heaviest problem you have

You need about a liter a day minimum, more if you’re moving or it’s hot. But three days of water is over 6 pounds, and that’s before everything else. The move isn’t to carry 72 hours of water — it’s to carry one day and the ability to make more. Pack a hard bottle you can drink from, boil in, and measure with — a Nalgene 32 oz wide-mouth bottle is the standard for a reason — plus a filter. A Sawyer Mini is the gold standard here: it’s the size of a banana, weighs two ounces, filters 100,000 gallons, and turns every creek, puddle, and gas-station spigot into drinking water. Toss in a few purification tablets as a backup for water too murky to filter.

2. Shelter and warmth — the silent killer

Exposure kills faster than thirst and way faster than hunger, and it does it quietly. You don’t need a tent. You need: a quality emergency bivy or mylar blanket (the heavy-duty kind, not the $1 foil square that shreds in the wind), a contractor-grade trash bag or two (instant rain poncho, ground cover, or water hauler), and a change of wool or synthetic socks. Cotton kills — it holds water against your skin and steals your heat. Wool stays warm wet. Pack a knit hat too; you lose a stupid amount of heat through your head.

3. Fire — two ways, always

Fire is warmth, water purification, signaling, and morale in one. Carry two ignition methods minimum, because the one you’re counting on will fail at the worst moment. A couple of regular Bic lighters (cheap, reliable, carry three) plus a Light My Fire FireSteel that works soaking wet and throws sparks down to -40°F. Add a small tin of cotton balls smeared in petroleum jelly — best cheap firestarter on earth, lights in wind and rain.

Reality check: can you actually start a fire with a ferro rod right now, in your backyard, in under two minutes? If not, the gear is decoration. Go practice this weekend. Skills weigh nothing.

4. First aid — built to stop bleeding, not soothe boo-boos

Skip the drugstore kit full of tiny band-aids. In a real evacuation, the injuries that kill you are bleeds. Your kit needs a real tourniquet — a North American Rescue C-A-T tourniquet (the genuine North American Rescue one, not a knockoff that snaps under load), pressure dressing, gauze, and trauma shears. A pre-built Adventure Medical MOLLE trauma kit covers most of this in a grab-and-go pouch. Then add your personal meds, a few days of any prescription, ibuprofen, and antihistamines. And learn to use the tourniquet — under stress, on yourself, one-handed. That’s a real skill, not a vibe.

5. Tools and light

A solid fixed-blade knife does 90% of survival tasks better and safer than a folder — the Morakniv Companion is absurdly good for $20 and the bushcraft world’s not-so-secret handshake. Pair it with a multitool like the Leatherman Wave Plus for the pliers, screwdrivers, and can opener you’ll actually reach for. For light, go hands-free if you can, but at minimum carry a bright, rechargeable flashlight — the Olight Baton3 clips to a pocket, throws over 1,000 lumens, and tops up off the same cable as your phone. Spare batteries or a small power bank round it out.

6. Food — calories, not cuisine

Three days won’t starve you, so don’t overthink it. You want compact, no-cook, high-calorie: energy bars, peanut butter packets, trail mix, jerky. Roughly 1,500–2,000 calories a day is plenty for short-term survival. A small backpacking stove and a couple of freeze-dried meals are a nice-to-have, not a need-to-have. Hot food is morale, and morale matters more than people admit — but it’s still a comfort item, so it goes in last and comes out first when weight’s a problem.

7. Documents, cash, and defense

The boring stuff that saves you: copies of your ID, insurance, and important documents in a waterproof bag. Cash in small bills — ATMs and card readers die when the grid does. A paper map of your region and a charged phone with a backup battery. And for personal defense, carry what you’re trained and legal to carry. At minimum, a SABRE pepper spray keychain gives you a non-lethal option that’s legal in all 50 states and lives on your keychain. Whatever you choose, the rule is the same as everything else here: train with it before you need it.

What does NOT belong in it

Half of building a good bag is leaving stuff out. Cut these:

  • The 14-in-1 “survival kit” off the internet — wire saws that snap, compasses that point at whatever, fire starters that don’t. Junk that makes you feel prepared.
  • A full week of food. It’s a 72-hour bag. The extra weight buys you nothing in the window that matters.
  • Five knives. One good fixed blade and one multitool. Done.
  • Heavy “tactical” everything. A 6-pound pack covered in MOLLE you’ll never use is ego, not preparation.
  • Anything you don’t know how to use. Gear you can’t operate under stress is just weight with a backstory.

The bag itself

Last, because it’s least important — and yet everyone starts here. You want something in the 25–40 liter range: big enough for three days, small enough that you can’t overpack it (the bag is your weight governor). Comfortable hip belt, durable zippers, and ideally muted colors so you don’t look like a walking supply depot. You don’t need to spend $300. A solid pack from 945 Industries’ EDC bags or any reputable maker beats a bargain-bin bag whose straps blow out on mile two. Whatever you pick, load it up and walk three miles with it before you ever need to. That walk will teach you more about your kit than any article — including this one.

Your challenge this week

Don’t buy anything yet. First, dump everything you think belongs in a bug-out bag onto the floor. Run each item through the one filter: survival or comfort? Cut the comfort pile. Then load what’s left, throw it on your back, and walk three miles. Note what hurts, what rattles, what you forgot, and what you’d kill to leave behind. That’s your real bug-out bag — the one tested by your own two legs, not by a checklist. Build from there.

How to Build Discipline When You Have None: Start Stupidly Small

Let’s get one thing straight: discipline is not a personality trait you were born with or cheated out of. It’s not willpower, it’s not motivation, and it sure as hell isn’t a 5 AM ice bath and a podcast about grindset. Discipline is a skill — and like any skill, you build it by doing the smallest possible version of it over and over until it stops feeling like a fight.

The reason you “have no discipline” isn’t a character flaw. It’s that every time you’ve tried to build it, you started too big. You went from zero workouts to “I’ll go to the gym five days a week.” From never reading to “a book a week.” From chaos to “I’ll wake up at 5, meditate, journal, cold plunge, and hit my macros.” You set a bar so high that missing it was guaranteed — and then you used the miss as proof that you’re just not a disciplined person.

You’re not undisciplined. You’re just bad at scoping. Let’s fix that.

The core idea: shrink the habit until it’s stupid

Here is the whole strategy in one sentence: make the habit so small that saying no to it feels ridiculous.

Want to work out? Your habit is not “go to the gym.” It’s one pushup. Want to read more? Your habit is one page. Want to floss? One tooth. I’m not being cute — I mean exactly that. The goal in week one is not results. The goal is to prove to your own brain that you are a person who shows up. Showing up is the entire game, and you can’t lose it if the bar is on the floor.

This is the part everyone screws up. They hear “start small” and think “okay, small-ish — twenty minutes.” No. Twenty minutes is still big enough to negotiate with on a bad day, and bad days are exactly when discipline is built or broken. One pushup is non-negotiable. You’re never too tired, too busy, or too sad for one pushup. That’s the point.

James Clear built an entire (excellent) book around this — the “two-minute rule,” where any new habit has to take less than two minutes to start. If you want the deep version with the science behind it, Atomic Habits — James Clear is the one book I’d put in everyone’s hands on this topic. But you don’t need to finish the book to start tonight.

Why stupidly small actually works

Three reasons, and they’re all about how your brain actually operates instead of how you wish it did:

  • It kills the activation barrier. The hardest part of any habit is starting. Once you’re down on the floor doing one pushup, doing five more is easy — you’re already there. Most days you’ll do way more than the minimum. But on the days you don’t, you still win, because you kept the streak.
  • It protects the streak. Momentum is the real currency here. A chain of 40 days where you did the bare minimum on 12 of them beats a chain of 6 perfect days followed by quitting. Consistency compounds; intensity burns out.
  • It rewires your identity. Every time you do the tiny thing, you cast a vote for “I’m the kind of person who does this.” Discipline isn’t a thing you have — it’s the residue of a thousand small votes. This is also why I think raw motivation is a trap: it shows up loud, does nothing, and leaves. The boring small habit is what’s still standing when motivation ghosts you.

The 4-step playbook

1. Pick ONE keystone habit

Not five. One. Pick the single habit that, if you nailed it, would make the others easier. For most people that’s a daily physical anchor — a tiny bit of movement first thing — because it sets the tone for the whole day. My honest pick: 10 kettlebell swings every morning. It takes 40 seconds, it wakes up your whole posterior chain, and it’s nearly impossible to talk yourself out of. A single moderate bell is all you’ll ever need for this; something like the Power Systems Elite Rubber Kettlebell lives by the door and becomes your trigger. Not a gym rat? a lighter kettlebell or even a desk-side hand gripper you squeeze 10 times works the same way — the object is the cue.

2. Make the minimum embarrassingly small

Write down your habit and then cut it in half. Then cut it in half again. “Read 30 minutes” becomes “read one page.” “Run 3 miles” becomes “put on my shoes and step outside.” If your minimum doesn’t make you a little embarrassed to say out loud, it’s still too big. Embarrassingly small is the sweet spot, because it’s the version you’ll still do at 11 PM on a garbage day.

3. Anchor it to something you already do

Don’t rely on remembering. Bolt the new habit onto an existing one: “After I start the coffee, I do my 10 swings.” “After I brush my teeth, I read one page.” The existing habit is the alarm clock for the new one. This single trick — habit stacking — is the difference between a habit that survives and one that quietly dies in week two.

4. Track it where you can see it

Get a cheap wall calendar or a notes app and mark an X every day you hit the minimum. Comedian Jerry Seinfeld’s old advice still holds: don’t break the chain. After a week of X’s you won’t want to be the reason the chain ends. The visual is dumb and it works — your brain loves a streak more than it fears the effort.

The two rules that keep it alive

Rule 1: Never miss twice. Missing one day is an accident. Missing two is the start of a new (bad) habit. Life will blow up your routine — travel, sickness, a kid with the flu. Fine. The discipline isn’t in never missing; it’s in coming straight back the next day. One miss is noise. Two misses is a trend. Guard the second day like it’s the whole thing, because it is.

Rule 2: Don’t upgrade on a high. Around week two you’ll feel great and want to triple everything. Resist it. Let the habit get boring before you make it bigger. Boring means automatic, and automatic is the goal. Add load only when skipping the habit feels weirder than doing it. Slow is smooth, smooth is fast.

My honest take on the “discipline” industry

There’s a whole genre of content telling you that you need to suffer your way to discipline — cold plunges, 4 AM wakeups, “embrace the pain.” Some of it’s useful and some of it’s cosplay. Jocko Willink’s Discipline Equals Freedom is the one I actually respect in that lane, because underneath the intensity the message is simple and true: discipline is just doing the thing whether you feel like it or not. But here’s what the hardcore crowd undersells — you build the capacity for hard things by stacking easy wins first. Goggins didn’t start by running 100 miles. Nobody does. They started small and kept the promise to themselves long enough that bigger promises became believable.

Discipline, in the end, is just self-trust. Every tiny promise you keep to yourself is a deposit. Build the balance high enough and you become someone who does what they say they’ll do — to themselves first, then to everyone else. That’s the whole prize. It doesn’t come from a six-week bootcamp. It comes from one stupidly small thing, done today, then again tomorrow.

Your challenge for this week

Pick one habit. Shrink it until it’s embarrassing. Anchor it to something you already do every day. And do the minimum — just the minimum — every day for the next seven days. Don’t add anything. Don’t try to be impressive. Just don’t break the chain.

Seven days from now you won’t have abs or a finished book. But you’ll have seven X’s on a calendar and the first real evidence that you are a disciplined person — you just had to start small enough to believe it. Now go do your one pushup.

Fencing Your Property: A Real Cost Comparison of Every Material (Per Foot)

Ask three people what fencing costs and you’ll get the same useless answer: “it depends.” Sure it does. But you’re not trying to write a textbook — you’re trying to figure out if you can afford to fence the back five acres this fall. So let’s put real numbers on it.

Below is every common fencing material, ranked roughly cheapest to priciest, with honest 2026 per-foot ranges. These are materials-only, DIY numbers unless I say otherwise — because the second you hire a crew, you’re adding $3–$10 a foot in labor and the comparison falls apart. Steel and lumber prices bounce around by region, so treat these as the ballpark you budget against, not a quote.

How to actually read a fencing quote

Everything gets priced in linear feet, not square feet. One acre is roughly 209 feet on a side, so a square acre is about 835 feet of perimeter. Five acres in one square block? Around 1,870 feet. That math matters more than the per-foot price, because a 50-cent difference per foot is nothing on a garden bed and $900 on a pasture.

Three questions decide your material before cost even enters the picture: What are you keeping in or out? How long does it need to last? Are you doing the labor yourself? Answer those honestly and half these options eliminate themselves.

The cost breakdown, cheapest to priciest

1. Barbed wire — $0.75 to $2.00/ft

The default for cattle and big perimeters because nothing beats it on price. Five strands on T-posts with wood corner braces runs about a buck a foot in materials. It’s fast, it’s forgiving, and it’ll outlive your truck. Downsides: useless for anything smaller than a cow (goats and dogs walk right through), and it tears up anything that pushes on it — including you. Not a “looks nice from the road” fence.

2. High-tensile / electric — $0.50 to $1.50/ft

The smart-money choice for rotational grazing and long runs. The wire itself is cheap; your real cost is the energizer ($150–$400) and good grounding. Once it’s up, it’s the lowest-maintenance fence there is and a single charger can power miles. The catch is the learning curve — bad grounding means a dead fence and escaped animals, and that’s the #1 mistake people make. Get the grounding right and it’s the best dollar-per-foot value on this list.

3. Field / woven wire — $2.00 to $4.00/ft

The “no-climb” workhorse. A woven grid that actually contains goats, sheep, and dogs, which barbed wire never will. Add a strand of barbed or electric along the top and you’ve got a fence that holds almost anything. Stretching it properly is the whole game — a sloppy woven-wire job sags and looks terrible within a year. Worth the extra effort over barbed if you’ve got mixed livestock.

4. Welded wire & livestock panels — $2.00 to $4.00/ft

This is my favorite for garden enclosures, chicken runs, and small paddocks. A 16-foot cattle panel runs $30–$45 — call it $2–$3 a foot — and it’s rigid, so you don’t fight with stretching. Two people can build a serious garden fence or a hog pen in an afternoon. They also bend into arched trellises and quick hoop shelters, which is a homestead cheat code. The downside is hauling sixteen-foot panels, but most farm stores will cut them or you bend them onto a trailer.

5. Chain link — $4.00 to $12.00/ft

Boring, but it works. Great for dog yards and security perimeters, terrible for livestock and aesthetics. DIY materials sit in the middle of the pack; hire it out and you’re closer to $15–$25 installed. If you want a fence you’ll never think about again and don’t care how it looks, chain link earns its keep.

6. Pipe & continuous metal panel — $5.00 to $12.00/ft

The fence that lasts 50 years and looks like money. Standard around horse properties because nothing else takes a 1,200-pound animal leaning on it without flinching. Continuous panels bolt up fast; welded pipe is the gold standard but means you’re either hiring a welder or owning one. More on that in a second, because this is where a lot of homesteaders leave real money on the table.

7. Wood — $3.00 to $9.00/ft DIY (3–4x that installed)

Split rail is the cheap end and reads “ranch entrance.” Full board fence is the expensive end and reads “horse farm.” Wood is the looks champion, but it’s also the maintenance champion in the worst way — staining, replacing rotted boards, re-nailing after every freeze-thaw cycle. Beautiful for a front pasture or a short, visible run. Don’t wrap 2,000 feet in it unless you enjoy weekend carpentry forever.

8. Vinyl / PVC — $10.00 to $30.00/ft installed

The priciest mainstream option and the one I’d think hardest about. The pitch is “zero maintenance and looks like white board fence forever.” Mostly true. But the upfront cost is brutal at scale, cheap vinyl gets brittle and yellows, and a tractor bump that would dent steel will shatter a rail. Buy good vinyl or don’t bother. Best for a short, high-visibility frontage where you genuinely never want to touch it again.

Quick reference

Material DIY $/ft Best for
Barbed wire $0.75–$2.00 Cattle, big perimeters
High-tensile electric $0.50–$1.50 Rotational grazing
Field / woven wire $2.00–$4.00 Goats, sheep, dogs
Welded wire / panels $2.00–$4.00 Gardens, runs, small pens
Chain link $4.00–$12.00 Dog yards, security
Pipe / metal panel $5.00–$12.00 Horses, lifetime fence
Wood $3.00–$9.00 Looks, short runs
Vinyl / PVC $10.00–$30.00 Zero-maintenance frontage

The tools that actually save you money

Whatever material you pick, three hand tools turn a miserable weekend into a manageable one: a manual T-post driver (the heavy steel sleeve you slam down over the post — your back will thank you over a sledge), a pair of fencing pliers (hammer, wire cutter, staple puller, and grip in one tool), and a wire stretcher / come-along for pulling barbed and woven wire tight without it sagging in six months. Buy these once, cry once. Borrowed or rented, they’re the difference between a fence that looks intentional and one that looks like it gave up.

Where the real savings hide: build your own gates and brackets

Here’s the thing nobody puts in a cost comparison. A pre-made heavy-duty farm gate runs $200–$600. Brackets, braces, and corner hardware add up fast on top of your per-foot numbers. If you can run a basic bead, you can build gates, weld continuous pipe panels, and fabricate your own brackets for a fraction of retail — and a welded pipe corner brace will outlast every store-bought one on your property.

A hobby-grade MIG machine is the single highest-leverage tool on a homestead, and it pays for itself on the first big fencing job. The Eastwood MIG 180 welder is the classic do-it-all starter — enough power for gate frames, pipe fence, and the hundred other repairs that show up the moment animals do. If you want to compare amperage and budget, browse Eastwood’s MIG welder lineup and size it to your heaviest expected job, not your lightest. Learn it on scrap, then go build a gate that’ll outlive you.

What I’d actually do

If it were my land? High-tensile electric for the big perimeter, welded-wire panels for the garden and animal pens, and a few welded pipe gates at the access points. That combo covers 90% of homestead needs for the least money over the life of the fence, and it leans on DIY tools instead of a hired crew. I’d only spend on wood or vinyl where the road sees it. Everywhere else, function wins.

The most expensive fence is the one you build twice. Pick the material for the job, not the photo, set your corners and braces like your fence depends on them — because it does — and stretch everything tight the first time.

Your challenge this week

Walk your property line with a measuring wheel and write down your actual perimeter footage. Then multiply it by the two or three materials you’re realistically choosing between. You’ll be shocked how often the “expensive” option is only a few hundred dollars more than the cheap one once you’ve got real feet on paper — and how often the cheap one wasn’t actually cheaper after you priced the corners. Numbers first. Then dig the first hole.

Cast Iron Cooking: How to Season, Maintain, and Cook Like Your Grandpa

Somewhere in your family there was a pan that never got thrown out. It got handed down. It cooked ten thousand eggs, a few hundred cornbreads, and survived a couple of moves and at least one divorce. That pan was almost certainly cast iron — and the reason it outlived everything else in the kitchen is the same reason people get intimidated by it: it works differently than every other pan you own.

Here’s the good news. Cast iron isn’t fussy. It’s just misunderstood. Once you get the three fundamentals — seasoning, heat, and cleanup — you’ll have a pan that sears better than anything in a department store, costs less than a tank of gas, and quite literally outlives you. Let’s get you there.

Why Cast Iron Beats Your Nonstick

Three reasons, and they all matter:

  • It holds heat like a brick. Cast iron has serious thermal mass. When you drop a cold ribeye onto a thin nonstick pan, the temperature crashes and you end up steaming your meat. Cast iron barely flinches — that’s how you get a real, dark, restaurant-grade crust.
  • It’s genuinely nonstick once seasoned. A well-loved pan releases eggs as cleanly as Teflon, minus the chemical coating flaking into your food at high heat.
  • It’s basically immortal. No coating to scratch off, no warping, no “replace it every two years.” You can buy a rusted-shut pan at an estate sale, strip it, and bring it back from the dead. Try that with a $200 nonstick.

My honest take: if you own one good pan for the rest of your life, make it cast iron. A Lodge 10.25″ Cast Iron Skillet (L8SK3) runs under twenty bucks and will be in your grandkids’ kitchen. Nothing else in your house has that kind of ROI.

What “Seasoning” Actually Is (It’s Not Spices)

Seasoning confuses people because the word is misleading. It has nothing to do with salt and pepper. Seasoning is a layer of polymerized oil bonded to the iron. You heat oil past its smoke point, it breaks down and chemically bonds to the metal, and that hardened layer becomes your slick, rust-proof cooking surface. Think of it like a coat of varnish you build up over time.

Most new pans (Lodge included) come “pre-seasoned,” but it’s a thin factory coat. You’re going to make it better with use. Here’s how to lay down a solid base layer at home:

The 5-Step Home Seasoning Method

  • 1. Scrub it clean and dry it completely. Hot water and a little soap on a fresh pan is fine. Dry with a towel, then set it on a burner for a minute to drive off every trace of moisture.
  • 2. Oil it thin — thinner than you think. A teaspoon of a high-smoke-point oil (grapeseed, canola, or flaxseed). Rub it over the entire pan — inside, outside, handle — then wipe it back off with a clean cloth until it looks dry. A thick coat turns gummy and sticky. Thin is the whole game.
  • 3. Bake it upside down at 450–500°F for one hour. Upside down so excess oil drips off. Put foil on the rack below to catch the drips.
  • 4. Let it cool in the oven. Don’t rush it.
  • 5. Repeat 2–3 times for a strong base. Each round adds a layer. After that, cooking does the rest.
The shortcut that’s actually legit: Skip the marathon oven sessions and just cook fatty food in it. Bacon, burgers, fried chicken — anything in oil. Every cook lays down a micro-layer of seasoning. A pan used hard for a month beats one babied in the oven. Use the thing.

Heat Management: Where Everyone Screws Up

The single biggest cast iron mistake is treating it like nonstick — cranking it to high and going. Cast iron heats slowly and unevenly, but once it’s hot, it stays hot. So:

  • Preheat low and slow. Medium heat, five minutes minimum. A drop of water should dance and skitter across the surface, not just sit there.
  • Then back the heat down to cook. Because of that thermal mass, you need less burner than you think. People scorch food because they leave it on high after preheating.
  • Let proteins release on their own. A steak or chicken thigh will stick when you first lay it down, then naturally release once a crust forms. If you’re fighting it with a spatula, it’s not ready. Wait.

If you’re searing thick cuts, pull a ThermoPro TP19H Instant-Read Meat Thermometer and cook to temperature instead of guessing. Cast iron’s crust game is so good it’s easy to nail the outside while the inside lags — temp takes the gamble out.

Cleaning: Forget Everything You’ve Heard

The “never use soap” rule is a half-myth left over from the lye-soap era. A little modern dish soap won’t strip a properly polymerized seasoning. What actually kills cast iron is water sitting in it — that’s rust. Here’s the bulletproof routine:

  • Clean while it’s still warm. Hot water and a brush or a Lodge Chainmail Scrubber for Cast Iron Pans knocks off stuck-on bits in seconds. That chainmail scrubber is genuinely the best $10 cast iron upgrade — it scrubs gunk without touching your seasoning.
  • Stuck-on mess? Coarse salt as an abrasive scrub, or simmer a little water in the pan to loosen it. Never leave it to soak.
  • Dry it immediately and completely. Towel first, then 60 seconds on a hot burner to evaporate any hidden moisture.
  • Wipe a drop of oil over the surface while it’s warm. Buff it dry. That’s it — you just re-seasoned a hair every single time.
Rusty pan rescue: Found one in a barn? Scrub the rust with steel wool and a little vinegar-water (don’t soak it more than an hour — vinegar eats iron too). Rinse, dry hard, then run the full seasoning method 3–4 times. Pans people leave for dead come back perfect. It’s the most satisfying $5 you’ll spend at a flea market.

What to Cook First (Build Confidence Fast)

Start with foods that add seasoning and are hard to ruin:

  • Bacon. Renders fat, seasons the pan, builds confidence. The perfect first cook.
  • Smash burgers. The crust cast iron puts on ground beef is unreal. Nonstick can’t touch it.
  • Cornbread. Preheat the oiled pan in the oven, pour the batter into the hot pan, and you get a crackly golden bottom crust.
  • Seared-then-oven-finished steak. Sear on the stove, slide the whole pan into the oven. One pan, steakhouse result.

Once you’re hooked, the natural next buy is a Dutch oven. A Lodge Essential Enameled Cast Iron Dutch Oven, 6 Quart handles braises, no-knead bread, soups, and chili. The enameled version skips seasoning maintenance entirely, so it’s a nice complement to a bare skillet rather than a replacement: bare iron for searing, enamel for low-and-slow acidic stuff like tomato sauce (acid slowly eats bare seasoning, so enamel earns its keep there).

The Takeaway

Cast iron isn’t a precious heirloom you’re afraid to touch — it’s a tool that gets better the more you use it. Season it thin, preheat it slow, dry it fast, and cook in it constantly. That’s the entire skill.

Your challenge: if you’ve got a pan sitting in a cabinet because you’re “not sure how to use it,” this week you cook bacon in it three mornings in a row. Clean it the right way each time. By Sunday you’ll have a slicker pan and a habit — and you’ll wonder why you ever bought anything with a coating that wears out. Cook like your grandpa. The pan’s been waiting.