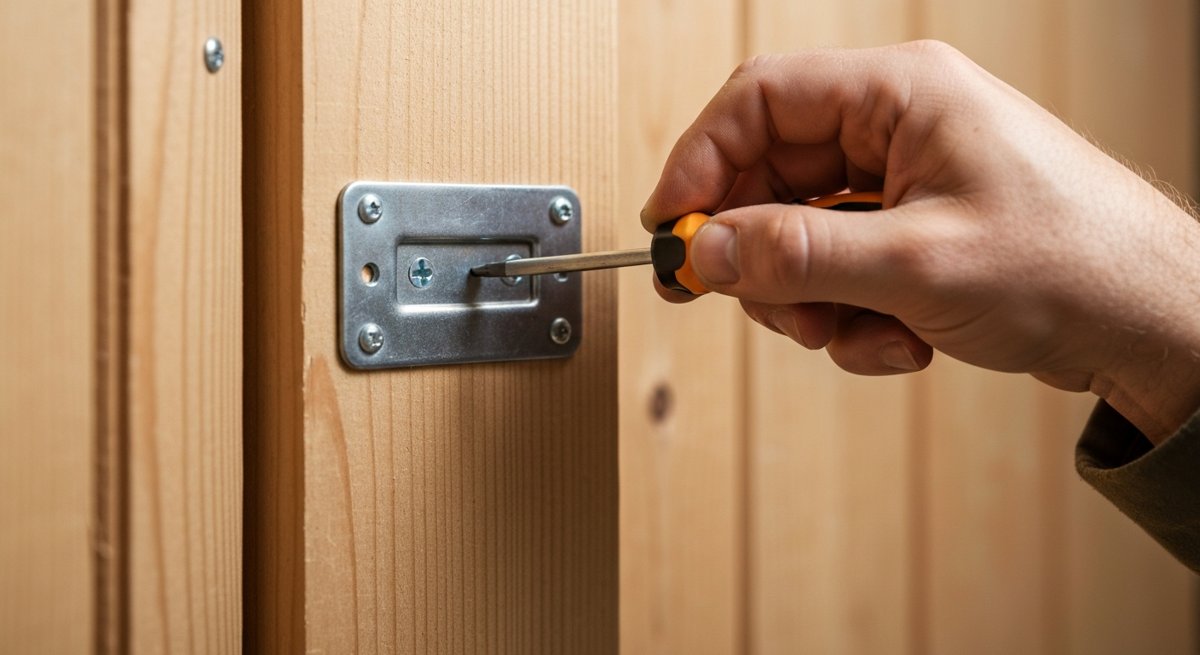
Door Reinforcement 101: The $30 Fix That Stops Most Home Break-Ins

Here’s a stat that should make you uncomfortable: the FBI estimates that 34% of burglars enter through the front door. Not a window. Not a side entrance. The front door — the one you lock every night and assume is doing its job.

The problem isn’t your lock. It’s the frame. Most residential door frames are held together by 3/4-inch screws driven into soft pine trim. One solid kick — sometimes less — and the whole thing splits like firewood. Your deadbolt is still locked. It’s just lying on the floor with a chunk of wood attached to it.

The good news? Fixing this is absurdly cheap, takes about an hour, and requires nothing more than a drill and a screwdriver. This is hands-down the highest-impact home security upgrade you can make this weekend.

Why Your Door Frame Is the Weak Link

Builders don’t frame doors for security. They frame them for cost and speed. The typical interior and exterior door frame setup uses:

  • Short screws (3/4″ to 1″) that only bite into the soft door jamb trim — not the structural framing behind it
  • A tiny strike plate held by two small screws — the little metal rectangle where your deadbolt tongue goes
  • No reinforcement around the hinge side, which is just as vulnerable to forced entry

When someone kicks a door, the force concentrates on the strike plate area. Those short screws rip out of the trim instantly. It doesn’t matter if you have a $200 smart lock — the frame gives up before the lock does.

The Fix: A Door Reinforcement Kit (Under $30)

What you need is a door jamb reinforcement kit. Several companies make them — Door Armor, StrikeMaster, EverJamb — and they all work on the same principle: replace the weak points with heavy-gauge steel plates secured by 3.5-inch screws that anchor into the wall studs.

A typical kit includes three components:

  1. A full-length strike plate — Instead of that little 1×3-inch plate, you get a steel plate that runs 36-48 inches along the door jamb. It distributes kick force across a much larger area and is held by multiple 3.5″ screws sunk into the stud.
  2. Hinge reinforcement plates — Steel plates that sit behind your existing hinges, again anchored with long screws into the stud. This prevents the door from being pried from the hinge side.
  3. A door edge shield — Some kits include a steel wrap for the door edge itself around the deadbolt area, preventing the door from splitting at the bolt.

Total cost: $25-$45 depending on the kit. Total install time: 45 minutes to an hour if you take your time.

Step-by-Step Install

Tools you need: drill/driver, a #2 Phillips or square bit (usually included), a pencil, and maybe a chisel if you’re fitting a recessed plate.

Step 1: Replace the Strike Plate

Remove your existing strike plate (the two screws next to the deadbolt hole in the frame). Hold the new reinforcement plate in position — it should center over the deadbolt and knob holes. Mark your screw holes with a pencil. Pre-drill pilot holes using a 1/8″ bit, going at least 3 inches deep. Drive the 3.5″ screws in until snug. Don’t overtighten — you want firm contact, not crushed wood.

Step 2: Reinforce the Hinges

Remove one hinge at a time (don’t take them all off — your door will fall). Pull the short screws and replace them with the 3.5″ screws from the kit. If your kit includes hinge shield plates, slide them behind the hinge before re-securing. Do this for all three hinges (or however many you have).

Step 3: Install the Door Edge Shield (If Included)

This is a U-shaped steel channel that wraps around the edge of the door where the deadbolt passes through. It prevents the wood from splitting if someone tries to spread the frame apart. Slide it over the edge, mark, drill, and screw it in place.

Step 4: Test Everything

Close the door. Lock and unlock the deadbolt. Make sure nothing binds or rubs. If the deadbolt is tight, you may need to slightly adjust the plate position or enlarge the bolt pocket with a chisel. Close, lock, and shoulder-check the door gently — it should feel noticeably more solid.

Don’t Forget Your Other Entry Points

Once the front door is hardened, walk your property and think about these:

  • Back door and side doors: Same reinforcement kit treatment. Every exterior door gets one.
  • Garage entry door: This is the one people forget. The door from your garage into your house is often a hollow-core interior door with a basic knob lock. If someone gets into your garage (opener cloned, side door forced), they’re walking through this door without even trying. Replace it with a solid-core door and deadbolt, then reinforce the frame.
  • Sliding glass doors: A reinforcement kit won’t help here, but a simple security bar (the rod that sits in the track) is cheap insurance. You can also install a secondary lock that pins the door to the frame.

The Layered Thinking

Door reinforcement isn’t a silver bullet. Nothing is. But it fits into what security professionals call defense in depth — layers that each buy you time and deter a different threat level.

  • Layer 1 — Deterrence: Lighting, visible cameras, signs, maintained property (signals someone is home and paying attention)
  • Layer 2 — Delay: Reinforced doors, quality locks, window security film, thorny landscaping under windows
  • Layer 3 — Detection: Alarm system, motion sensors, dogs, alert neighbors
  • Layer 4 — Response: Your plan for what happens when layers 1-3 fail

Door reinforcement lives in Layer 2. Its job is to make forced entry take longer and make more noise — long enough for detection systems to trigger and for you to respond. A reinforced door doesn’t have to be impenetrable. It just has to be harder than the next house.

My Honest Take

I think most people drastically overspend on cameras and smart home gadgets while ignoring the physical basics. A $300 Ring setup watching your front door doesn’t stop anyone from kicking it in — it just gives you a nice video of it happening. Meanwhile, $30 of steel and long screws would have actually prevented the entry.

Cameras are great for Layer 1 (deterrence) and Layer 3 (detection). But if you haven’t addressed Layer 2 first, you’ve built a very expensive notification system for a problem you could have physically prevented.

Start with the physical. Reinforce your doors. Then add the tech on top.

Your Weekend Challenge

Do this before Sunday night:

  1. Walk to your front door. Look at the strike plate. Count the screws and estimate their length.
  2. Open the door and look at the hinge screws. Are they short brass/gold screws? Those are the builder-grade ones.
  3. Go to your hardware store or order a door reinforcement kit online. Budget: $25-$45.
  4. Install it. One hour. One drill. Done.
  5. Then do the same for every exterior door in your house, including the one from the garage.

Bottom line: Your front door is probably held together by hope and half-inch screws. For less than the cost of a pizza, you can make it genuinely resistant to forced entry. That’s not prepper fantasy — that’s just smart homeownership.

Why Your Phone Flashlight Is Getting You Killed (And the $30 Fix)

Here’s something that bugs me: people spend $1,200 on a phone, use it as their only flashlight, and then act surprised when they’re stumbling around in the dark with 8% battery at 11 PM.

Your phone flashlight is a parlor trick. It’s fine for finding the keyhole on your front door. But the moment you actually need light — a power outage, a flat tire on a rural highway, checking a weird noise outside at 2 AM — that little LED on the back of your phone is dangerously inadequate.

A dedicated flashlight is the single most underrated piece of everyday carry gear. Not a knife. Not a multitool. A light. And I’m going to tell you exactly why, what to look for, and how to pick one you’ll actually carry every day.

The Phone Flashlight Problem

Let’s get specific about why your phone light fails when it matters:

  • It eats your battery. Running that LED at full brightness drains your phone fast. In an emergency, your phone is your communication lifeline — burning battery on light is a terrible trade.
  • It’s a flood, not a throw. Phone lights blast a wide, weak wash of light. Try spotting a trail marker 50 feet away or reading a house number from your car. You can’t. The beam has zero reach.
  • It ties up your hands. You’re holding your $1,200 glass slab in one hand while trying to work with the other. Change a tire like that. Fix a breaker. Not happening.
  • It’s fragile. Drop your phone face-down on gravel while using it as a flashlight, and now you’ve got a cracked screen AND no light.
  • Zero output control. You get one brightness level. No low mode for reading without blinding yourself. No strobe for signaling. No red mode for preserving night vision.

I’m not saying your phone light is useless. It’s a backup to your backup. But carrying it as your primary light source is like using a butter knife as your only blade — technically it cuts, but you’re kidding yourself.

What a Real EDC Flashlight Gives You

A proper pocket flashlight — even a budget one — is a different universe:

  • 300-1000+ lumens on demand. That’s 10-30x brighter than your phone. You can light up an entire backyard or throw a beam 200+ meters down a road.
  • Multiple modes. A good EDC light gives you moonlight mode (1-5 lumens for reading in a tent without waking everyone), medium for walking, high for searching, and turbo for “what the hell was that” moments.
  • Dedicated battery. Your phone stays charged. Your light does its job. Two separate systems, zero conflict.
  • Pocket clip carry. Clips right next to your knife. You forget it’s there until you need it, and then it’s instantly in your hand.
  • Built tough. Aluminum body, impact-rated, usually waterproof to IPX8. Drop it, kick it, use it in the rain. It doesn’t care.

How to Pick an EDC Flashlight (Without Getting Lost in Flashlight Nerd Territory)

The flashlight world has a rabbit hole that rivals mechanical keyboards. People mod drivers, swap emitters, debate color temperatures like sommeliers argue about wine. You don’t need any of that. Here’s what actually matters for a daily carry light:

1. Size: It Has to Disappear in Your Pocket

If you won’t carry it, it’s worthless. The best EDC flashlights are roughly the size of your thumb — maybe 3-4 inches long. They run on a single AA, AAA, or rechargeable 14500/16340 battery. If it’s bigger than a Sharpie marker, it’s not EDC — it’s a bag light.

2. Lumens: 300-600 Is the Sweet Spot

Ignore the lumen wars. You don’t need 5,000 lumens in your pocket (and that much output generates heat that’ll step down in seconds anyway). For daily use, 300-600 lumens on high is plenty. What you really want is a good low mode — somewhere around 1-15 lumens — because that’s the mode you’ll use 80% of the time. Walking the dog, checking a fuse box, finding something under the seat.

3. Battery: Rechargeable or Common

Two schools of thought, both valid:

  • USB-C rechargeable — most convenient for daily use. Plug it in when you charge your phone. Lithium-ion gives you higher output.
  • AA/AAA compatible — you can find these batteries literally anywhere on earth. If grid-down is part of your planning, this matters. Some lights take both lithium-ion AND standard alkaline — best of both worlds.

My personal lean: USB-C rechargeable for your pocket light, AA-compatible for your get-home bag or truck kit.

4. UI: Simple Beats Clever

Some flashlights have user interfaces more complicated than a fighter jet. You don’t want to be clicking through 14 sub-modes at 2 AM. The ideal UI: click on (starts at last used mode or a sensible default), hold to cycle brightness, double-click for turbo. That’s it. If you need to read a manual to turn it on, pass.

5. Pocket Clip and Tail Stand

A reversible pocket clip lets you carry it bezel-up or bezel-down (personal preference — I like bezel-down so I can pull it and it’s already in a forward grip). Tail-standing means you can set it on its end and bounce light off a ceiling for area lighting. It’s a small feature that you’ll use constantly during power outages.

Solid Picks at Every Budget

I’m not going to name one flashlight and call it the best. Your budget and use case matter. But here are reliable tiers:

  • Under $30: Lumintop Tool AA 3.0, Wurkkos FC11. Both are rechargeable, well-built, and punch way above their price. This is the “no excuses” tier — anyone can afford this.
  • $30-60: Skilhunt M150 V3, Fenix E09R. Better build quality, nicer emitters (meaning the light looks more natural, less blue/green), smoother UIs.
  • $60-100: Zebralight SC64c LE, Malkoff MDC. This is “buy once, carry forever” territory. Bombproof construction, efficient drivers, regulated output. You’ll hand these down to your kids.

Honestly? Start at the under-$30 tier. Carry it for a month. You’ll be shocked how often you use it — and you’ll wonder how you ever got by without one.

Where Most People Go Wrong

Three mistakes I see constantly:

  1. Buying a tactical flashlight for EDC. Those 6-inch, 2,000-lumen weapon lights are awesome — mounted on a rifle. In your pocket, they’re a brick. Get something small enough to actually carry.
  2. Chasing max lumens. Runtime matters more than peak output for daily carry. A light that does 500 lumens for 2 hours beats one that does 2,000 lumens for 3 minutes before stepping down to 200.
  3. Keeping it in a bag instead of on-body. If it’s in your backpack, it’s not EDC — it’s “stuff in your bag.” True EDC means it’s on your person. Pocket clip, every day, no exceptions.

The Takeaway

A dedicated flashlight is the highest-impact, lowest-cost upgrade you can make to your everyday carry. For $25-30, you get a tool that outperforms your phone light by an order of magnitude, preserves your phone battery for communication, and works in conditions that would wreck your phone.

Here’s your challenge: This week, order a budget EDC flashlight — a Lumintop Tool AA or a Wurkkos FC11 — and commit to carrying it in your pocket for 30 days. Clip it right next to where your knife goes. By day 10, you’ll reach for it instinctively. By day 30, you’ll feel naked without it.

Stop using a $1,200 computer as a $2 flashlight. Carry a real light.

How to Harden Every Entry Point in Your Home This Weekend — No Contractor Needed

Most break-ins don’t involve sophisticated lock picks or Hollywood-style alarm bypasses. They involve a boot to a hollow-core door, a pry bar on a cheap strike plate, or a slider lifted off its track. The average residential burglary takes under 60 seconds from entry to inside.

The good news? You can dramatically increase your home’s resistance to forced entry in a single weekend with about $150 in hardware store materials and zero specialized skills. No contractor. No permit. No excuse.

Here’s the room-by-room, door-by-door playbook.

Why Entry Point Hardening Matters More Than Alarms

Alarms are reactive. They tell you (or a monitoring center) that someone already got in. Entry point hardening is preventive — it makes getting in harder, slower, and louder. Most burglars operate on opportunity. If your door takes 30 seconds of noise and effort instead of 2 seconds, they move on. Period.

I’m not saying ditch your alarm system. I’m saying that if you have a $40/month monitoring service but your front door has the original builder-grade strike plate with half-inch screws, you’ve got your priorities backwards.

Step 1: The Front Door — Your Biggest Vulnerability

Your front door is the #1 point of forced entry in residential break-ins. Here’s exactly what to fix:

Replace the Strike Plate

The strike plate is the small metal piece on your door frame where the deadbolt and latch engage. Most builder-installed strike plates are held by two 3/4-inch screws that only bite into the soft door jamb — not the structural framing behind it.

  • Buy a heavy-duty strike plate (sometimes called a “security strike plate” or “box strike”). Brands like Door Armor, StrikeMaster, or even the generic heavy-duty ones at your local hardware store work fine.
  • Install it with 3-inch screws. This is the single most important upgrade. Three-inch screws go through the jamb and into the structural stud behind it. A door held by 3/4-inch screws can be kicked in with one solid hit. A door anchored to the stud takes multiple hits and makes a ton of noise.
  • Time: 15 minutes. Cost: $10-25.

Upgrade the Hinges

While you’ve got the drill out, replace the hinge screws too. Same principle — pull out the short screws, put in 3-inch ones. At least one screw per hinge should anchor into the stud. This prevents the hinge side from being pried or kicked in.

Check Your Deadbolt Throw

Lock your deadbolt and look at how far the bolt extends into the frame. It should be at least one full inch. If it’s less, replace the deadbolt. A Grade 2 deadbolt is fine for most homes — Grade 1 if you want the best. Skip the smart locks that sacrifice bolt throw for convenience.

The Door Itself

If your front door is a hollow-core interior door (yes, some builders do this), no amount of hardware will save you. Knock on it. If it sounds hollow, you need a solid-core wood or steel door. That’s a bigger project, but it’s non-negotiable for security. A steel door in a reinforced frame is extremely difficult to breach without power tools.

Step 2: Sliding Glass Doors — The Overlooked Weak Point

Sliding doors are easy to breach because many can simply be lifted off their tracks from the outside. Here’s how to fix that:

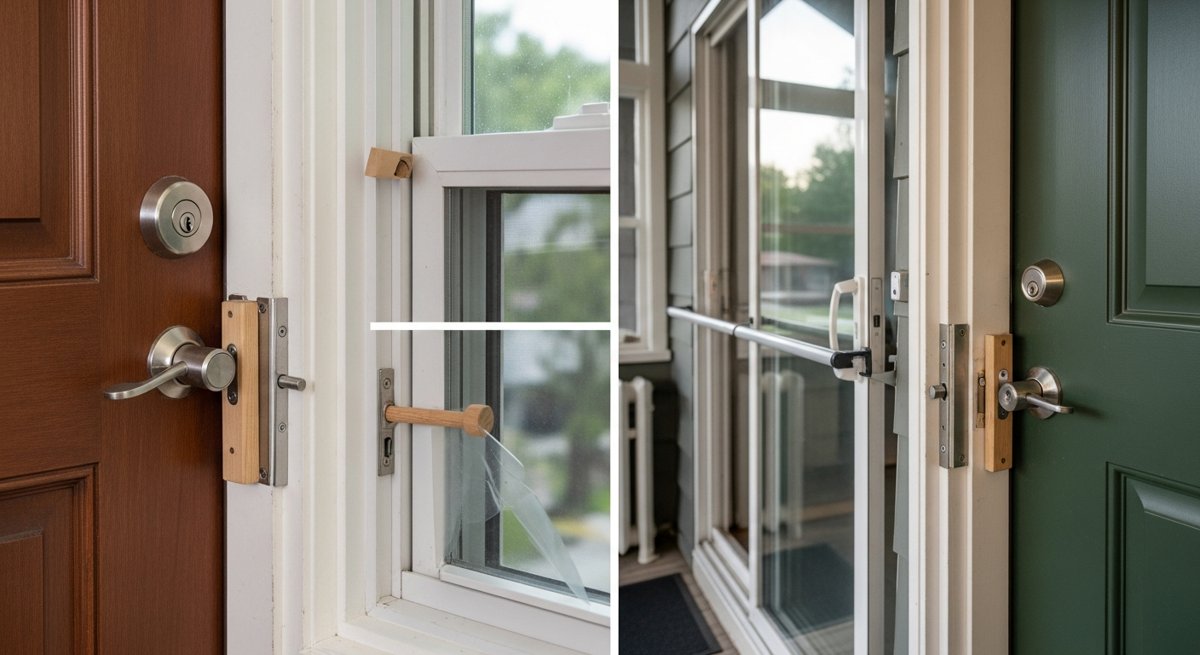
  • Install anti-lift pins. Drill a small angled hole through the inside frame where the door overlaps when closed, and drop in a pin or nail. This prevents the door from being lifted. You can buy purpose-built security pins, or a 16d nail works just fine.
  • Use a security bar or dowel. A cut-to-length wooden dowel or a Charlie bar in the track prevents the door from being slid open even if the latch is defeated. Adjust the length so it fits snugly.
  • Install a secondary foot lock. These bolt into the track and flip up to block the door. Cheap insurance — about $8.

Time for all three: 30 minutes. Cost: under $20.

Step 3: Windows — Simple Fixes, Big Impact

Most windows aren’t forced open — they’re found unlocked. But for ground-floor and basement windows that are locked, here’s what to do:

  • Pin your windows. For double-hung windows, drill a small downward-angled hole through the inner sash into the outer sash where they overlap when closed. Insert a nail or eye bolt. The window can’t be opened from outside even if the latch is flipped. Drill a second hole with the window cracked 4 inches for ventilation with security.
  • Apply security film. Window security film (3M, BDF, or similar) won’t stop a determined intruder, but it holds shattered glass together, turning a quick “smash and reach in” into a loud, time-consuming mess. Apply it to ground-floor windows, especially any near door locks.
  • Don’t forget basement windows. Window well covers and interior-mounted security bars or grates make basement windows nearly impossible to use as entry points. If you go with bars, make sure they have a quick-release interior latch for fire egress.

Step 4: The Garage — Your Biggest Blind Spot

If your garage has an entry door into your house, treat it exactly like your front door — heavy-duty strike plate, 3-inch screws, solid deadbolt. Most people don’t, because it “feels” like an interior door. It’s not. It’s a perimeter door with a giant, motor-operated window next to it.

  • Disable the emergency release. That red cord hanging from your garage door opener? An intruder can trip it from outside with a coat hanger and a 6-inch gap at the top of the door. Either zip-tie the release mechanism so it can’t be triggered remotely, or install a garage door defender shield over it. There are YouTube tutorials for your exact opener model.
  • Add a manual lock or slide bolt to the garage door tracks for when you’re home or away for extended periods.
  • Keep the interior garage door locked — always, not just when you’re away. This is the most commonly neglected rule in home security.

Step 5: Your Weekend Checklist

Print this. Walk your house. Check everything off.

Entry Point Fix Cost Time
Front door Strike plate + 3″ screws + hinge screws $15-30 20 min
Back door Same as front door $15-30 20 min
Sliding doors Anti-lift pins + bar + foot lock $15-20 30 min
Ground-floor windows Pin + security film $40-60 1-2 hrs
Garage (interior door) Strike plate + deadbolt + emergency release fix $25-40 30 min
Basement windows Well covers + security bars (with egress release) $30-50 30 min

Total estimated cost: $100-200. Total time: a relaxed Saturday afternoon.

The Honest Take

Home security is one of those things people overthink and underspend on. They’ll drop $300 on a Ring doorbell and leave the strike plate held in by screws shorter than a toothpick. The camera will give you great footage of someone kicking your door in. The $15 strike plate upgrade would have stopped them.

Cameras and alarms have their place. But physical hardening is the foundation. Without it, everything else is just surveillance of your own break-in.

Your Challenge

This weekend, walk every exterior entry point in your home. Every door, every window, every sliding door, the garage. Knock on each door — solid or hollow? Check the screws in every strike plate — short or long? Try to wiggle your sliding door up off its track. Check if your garage emergency release can be fished from outside.

Then go to the hardware store and fix the weakest link. Just one. That single upgrade puts you ahead of 90% of homes on your street.

Stay sharp. Stay prepared. Security isn’t about paranoia — it’s about making smart, small investments that buy you time, options, and peace of mind. And unlike that gym membership you’re not using, this one actually works the first day you install it.