Water Glassing Eggs: How to Store Fresh Eggs for a Year Without Refrigeration

Right now, at the tail end of July, your hens (or your farm-stand buddy’s) are drowning you in eggs. Thirty, forty, fifty a week. Then December rolls around, daylight tanks, the birds slow to a trickle, and you’re paying grocery prices for pale factory eggs. That swing is one of the oldest problems in homesteading — and people solved it a hundred years ago with a bucket, some water, and a scoop of lime.

It’s called water glassing, and it will keep fresh, unwashed eggs edible for 12 to 18 months on a shelf — no refrigeration, no power, no freezer space. I’ve had glassed eggs come out of the crock tasting fresher than three-week-old store eggs. Here’s exactly how to do it, and the three rules you cannot break.

Heads up — affiliate disclosure: This post contains an affiliate link. If you buy through it, we earn a small commission at no extra cost to you. We only point you to stuff we’d actually use. That’s it.

What Water Glassing Actually Is (The 30-Second Science)

A fresh, unwashed egg comes out of the hen wearing an invisible coat called the bloom — a natural antibacterial layer that seals the shell’s thousands of tiny pores. Wash it off and the egg starts breathing air and losing moisture. That’s why store eggs (all washed by law in the US) have to be refrigerated.

Water glassing keeps that bloom intact and then adds a second seal. You submerge the eggs in a solution of pickling lime (calcium hydroxide) and water. The lime does two things: it plugs the shell pores with a fine mineral layer, and it makes the whole solution strongly alkaline — a pH where bacteria simply won’t set up shop. The egg inside goes into suspended animation. Air can’t get in, moisture can’t get out, nothing rots.

It is genuinely low-tech. People did this in stoneware crocks in root cellars long before electricity existed. You’re just borrowing their homework.

Why It Beats the Alternatives

  • vs. freezing: Freezing eggs means cracking, whisking, and burning freezer space and electricity. Lose power for three days and you lose the lot. Glassed eggs need zero power.
  • vs. dehydrating: Powdered eggs work, but you need a dehydrator, and rehydrated eggs cook up rubbery. Glassed eggs behave like fresh eggs.
  • vs. just refrigerating: Fresh unwashed eggs keep maybe 2–3 months in the fridge. Glassing gets you a year-plus and frees the fridge for real perishables.

My honest take: if you keep chickens and you’re not doing this, you’re leaving free winter breakfasts on the table. It costs about ten bucks in supplies to preserve six dozen eggs.

The 3 Rules You Cannot Break

Water glassing is nearly foolproof if you respect these. Break one and you’re growing a science experiment instead of storing food.

  1. Unwashed eggs only. The bloom is the whole game. If you washed them, scrubbed off dirt, or bought them from a store — they will not work. Collect clean, and if an egg is genuinely filthy, eat that one now; don’t glass it.
  2. Fresh eggs only. Glass them within a week or two of laying, sooner is better. You’re pressing pause — you can’t rewind. An old egg going in is an old egg coming out.
  3. Intact shells only. Candle or eyeball each egg. Any crack, star fracture, or thin spot lets the solution in and the egg out. Cracked eggs get cooked today, not stored.

What You Need

  • Pickling lime (calcium hydroxide, food grade). Look for it near the canning supplies — Mrs. Wages makes a common one. Do not substitute agricultural/garden lime or hydrated lime meant for masonry.
  • A clean, food-safe container — a half-gallon or gallon wide-mouth glass jar, a stoneware crock, or a food-grade 5-gallon bucket with a gamma lid for big batches.
  • Distilled or filtered water. Hard tap water can cloud the solution; it won’t ruin the eggs but distilled is cleaner.
  • A scale or a level measuring spoon and your fresh, unwashed, uncracked eggs.

The Ratio and the Steps

The magic ratio is dead simple: 1 ounce of pickling lime per 1 quart of water (roughly 1 slightly-heaping tablespoon per quart, or about 6–7 oz of lime per gallon). Scale up in that proportion for a bigger crock.

  1. Mix the solution. Stir the lime into the water in your container. It won’t fully dissolve — that’s normal. A layer of undissolved lime settling on the bottom is exactly what you want; it means the water is fully saturated.
  2. Add eggs gently, pointy-end down. Lower them in so they don’t crack against each other. Stack in layers until the container is full but the eggs stay submerged.
  3. Top off with solution so every egg sits under at least an inch of liquid. Any egg poking above the surface will spoil.
  4. Lid it loosely and label the date. Store somewhere cool, dark, and stable — a pantry, basement, or root cellar at 50–70°F. Don’t seal airtight; it doesn’t need to be.
  5. Leave it alone. No stirring, no checking daily. You can add more fresh eggs over the next couple weeks as the hens produce — just keep them submerged and top off the solution.

How to Use Them Months Later

When you want eggs in January, fish out what you need with a clean spoon (skip your bare hands — lime water is alkaline enough to dry your skin). Rinse each egg under cool water. Then run two quick checks:

  • The float test: Drop it in a bowl of water. Sinks and lays flat = good. Stands on end = use soon. Floats = toss it, no questions.
  • Crack into a separate bowl first, not straight into the pan. One-in-a-hundred surprises are rare but not worth ruining a whole skillet.

Two cooking notes from experience: glassed eggshells get a little more brittle over time, so crack gently. And if you’re hard-boiling them, prick the fat end with a pin first — the sealed shells are prone to cracking in boiling water otherwise. For scrambling, baking, and frying they behave exactly like day-one eggs.

Common Mistakes That Sink a Batch

  • Using washed or store eggs (dead on arrival — see Rule 1).
  • Grabbing the wrong lime. Pickling lime = calcium hydroxide, food grade. Not garden lime, not “hydrated lime” from the hardware aisle.
  • Letting eggs poke above the waterline. Submerge everything.
  • Glassing a cracked egg and contaminating its neighbors. Inspect every single one.
  • Overthinking it. This is a 200-year-old peasant technique, not lab work. Mix, submerge, wait.

Want the Whole Playbook?

Egg preservation is one skill in a much bigger self-sufficiency toolkit — food storage, off-grid water, home remedies, the works. If you want the full old-school reference on your shelf, The Self-Sufficient Backyard is the one I point people to. It’s the kind of book our grandparents didn’t need because they lived it — and the rest of us have to relearn.

Your Challenge This Week

Don’t overthink it — start small. This weekend, grab a half-gallon jar, one ounce of pickling lime, a quart of water, and one dozen of your freshest unwashed eggs. Mix, submerge, date the lid, and tuck it in the pantry. That’s your test batch. Come Thanksgiving, run the float test and cook them up. Once you see it works, scale to a five-gallon bucket and preserve the whole summer glut.

The homesteader’s whole game is turning today’s surplus into next season’s security. A jar of eggs on a shelf is exactly that — and it starts with one dozen.
Everyday Carry for Self-Defense: The Non-Gun Tools That Actually Work

Let’s clear something up before we go one sentence further: a gun is a tool, not a plan. It’s the loudest, most legally consequential, most situation-specific tool in the box — and it’s useless for the overwhelming majority of trouble you’ll actually meet. Some drunk gets in your face at a gas station. A dog comes off a porch at you on a run. You round a dark corner in a parking garage and something feels off. Pulling a firearm in any of those either escalates a nothing-burger into a felony or gets you nowhere at all.

Self-defense is a layered problem, and most of the layers don’t go bang. I’d argue the non-gun layer is the one worth building first, because it’s the one you’ll use. Here’s the everyday-carry kit that actually earns its pocket space — plus how to carry it so it’s on you when it counts, not in a drawer at home.

Layer 1: Awareness (the free one you’re skipping)

The best fight is the one you saw coming from a block away and walked around. No gadget beats attention. Phone in the pocket in a parking lot, head up, know where the exits are, clock the guy who’s clocking you. Predators pick soft targets, and “soft” mostly means distracted. This is the layer that costs zero dollars and prevents ninety percent of the situations the other layers exist for. If you do nothing else this post recommends, close the app and lift your eyes.

Layer 2: A genuinely bright flashlight

The single most underrated self-defense tool on earth, and it’s legal literally everywhere — planes, courthouses, campuses, foreign countries. A modern light throws 1,000-plus lumens, and a wall of white light in the face of someone at bad-intentions range does three things at once: it blinds and disorients them, it identifies the threat (is that a mugger or your neighbor?), and it screams “I see you, I’m switched on, pick someone else.”

I carry a Fenix PD36R Pro — 2,800 lumens, USB-C rechargeable, tail switch you can hit with your thumb without looking. It’s also just a fantastic light, which is the point: you’ll use it forty times a week for normal life, so it’s always charged and always on you. That’s the whole game with EDC — the gear you actually carry beats the superior gear you left home.

Layer 3: Pepper spray (the real everyday answer)

If awareness fails and someone closes distance, pepper spray is the tool that fits the widest range of legal, moral, and practical situations. It works at conversational distance, it drops most attackers without you having to touch them, and if you get it wrong — spray a guy who turns out to be harmless — nobody dies and you’re not on trial. That asymmetry is why it lives on my keychain.

Get a real one. The SABRE RED keychain unit has a solid stream (less blowback than a cone in wind), 25 bursts so you can actually practice with an inert can, and a flip-top so it doesn’t dump in your pocket. Two rules that make it useful instead of decorative: keep it in your hand, not your bag, when you’re walking to your car in the dark, and practice the draw until your thumb finds the trigger blind. A tool you fumble under adrenaline is a tool you don’t have.

Layer 4: A tourniquet and the 20 minutes to learn it

This is the layer nobody wants to talk about, and it’s the one most likely to save a life — usually not from an attacker, but from a car wreck, a chainsaw, a kitchen accident, a hunting mishap. Massive bleeding kills in minutes, long before an ambulance arrives. A tourniquet buys those minutes.

Buy a real, TCCC-approved one — the North American Rescue C-A-T, Gen 7. Do not buy the $8 knockoffs off a marketplace; the windlasses snap and the straps tear, and a fake tourniquet is worse than none because it fools you into stopping your search for a real fix. Then — and this matters more than the purchase — spend twenty minutes on a “Stop the Bleed” video and practice putting it on one-handed on your own leg. Gear you can’t deploy under stress is a paperweight. This is the single highest-leverage skill in this whole post.

Layer 5: A blade (mostly a tool, occasionally more)

Everyone romanticizes the knife as a weapon. Reality check: a knife is a terrible primary defensive weapon for an untrained person and a legal minefield in a lot of places. But a good folder earns its clip a hundred other ways every day — cutting a seatbelt to get someone out of a wrecked car, opening packages, prying, general problem-solving. Carry one because it’s the most useful object in your pocket, and understand its defensive role is a distant last resort, not a plan. Know your local blade-length laws before you clip anything.

The part nobody solves: actually carrying it

Here’s where most people’s “kit” falls apart. A flashlight, spray, a tourniquet, a folder, maybe a firearm and a spare mag — that’s a lot to stuff in jeans pockets, and it either prints, jabs you, or gets left home on the days you’re in gym shorts or a suit. The honest fix is a dedicated carry system.

For off-body carry that doesn’t scream “tactical,” I’m a fan of what 945 Industries builds — their Morph expandable concealment bag looks like a normal sling bag but has a molded Kydex holster and organization built in, so your defensive layer travels together and stays accessible instead of scattered across five pockets. If you carry a firearm and want it on your body instead, their custom Kydex holsters are the same made-in-USA Kydex quality. The gear philosophy here is the same as the flashlight: a system you’ll actually wear beats a perfect loadout you leave behind.

Build the layer this week

You don’t need all of this by Friday. Stack it in the order it’ll save you:

  • Free, today: phone down, head up, exits noted. Awareness first.
  • Under $40: a real pepper spray on your keychain — and practice the draw.
  • ~$30 + 20 minutes: a legit tourniquet and a Stop the Bleed video. Highest life-saving leverage in the kit.
  • When you can: a bright rechargeable light you’ll use daily, a decent folder, and a carry system that keeps it all on you.
The challenge: This week, put pepper spray in your hand — not your bag, your hand — every single time you walk to your car after dark. Do it for seven days until it’s automatic. That one habit will do more for your safety than any purchase on this page. The tools matter. The habit of being switched on matters more.

Root Cellar 101: How to Store a Winter’s Worth of Food Without Electricity

Your freezer is a single point of failure. One long power outage, one dead compressor, one ice storm that takes the grid down for four days in January, and a season’s worth of food turns into a garbage bag. People who grow or hunt their own food figure this out eventually — usually the hard way. The fix is older than electricity and it still works better than most people expect: a root cellar. No compressor, no power bill, no moving parts to break. Just physics, doing the job it’s done for a few thousand years.

Here’s the part nobody tells you: you almost certainly don’t need to dig a hole in your yard. A “root cellar” is really just a set of conditions, and there’s a good chance you already own a corner of your house that hits them. This is the whole system — what those conditions are, what actually stores well, and how to build a working setup this weekend for the cost of a couple of buckets.

The Two Numbers That Are the Whole Game

Forget everything fancy. A root cellar is any space that holds 32–40°F and 85–95% humidity. That’s it. That’s the target. Cold slows the enzymes and microbes that rot food; high humidity stops your carrots and potatoes from shriveling into leathery nothing. Get those two numbers right and produce that would last two weeks on your counter will last four to eight months.

Most people’s failures come from missing one of the two. A dry basement corner is cold enough but sucks the moisture out — everything wrinkles. A humid crawlspace holds moisture but sits at 55°F — everything sprouts and molds. You need both, together. Keep that in your head as the pass/fail test for any spot you’re considering.

You Probably Already Have One (Go Look)

Before you buy or build anything, walk your property with a thermometer and find the naturally coldest, most stable spot. The best root cellar is one you didn’t have to make. Candidates, roughly best to worst:

  • An unheated basement corner against a north-facing foundation wall — the gold standard for most homes. The earth on the other side of that wall stays cool and steady year-round.
  • A bulkhead stairwell or the space under an exterior stair — often the coldest pocket in the house in winter.
  • An unheated attached garage in a cold climate — workable, but watch it doesn’t dip below freezing on the worst nights.
  • A closet on an exterior north wall with the heat vent closed off — surprisingly effective in an old, drafty house.
  • A buried trash can or cooler in a shaded spot outside — the “no basement, no problem” option, covered below.

My honest opinion: most people skip this walk-around and jump straight to some Pinterest root-cellar-in-a-hillside project. Don’t. Spend one cold week logging temps in the spots you already have. The winner is usually good enough to start, and you’ll learn what you’re actually working with before you spend a dime.

What Actually Stores (and What’s a Waste of Time)

Not everything belongs in a cellar. Some crops were practically designed for it; others will rot no matter what you do. Know the difference before you fill it.

  • Stars (months of storage): potatoes, carrots, beets, turnips, parsnips, rutabagas, winter squash, onions, garlic, cabbage, and apples. These are the crops that made cellars a survival technology.
  • Do-able with care: pears, leeks, celeriac, and Brussels sprouts on the stalk.
  • Don’t bother: tomatoes, cucumbers, summer squash, berries, and most leafy greens. They’re high-water, thin-skinned, and will slime out in days. Can, freeze, dehydrate, or ferment those instead.

One critical split: squash, onions, and garlic want it drier and a touch warmer (50–60°F, 60–70% humidity), while roots want it cold and damp. If you can create two zones — a colder, wetter floor and a higher, drier shelf — you’ll store both groups happily in the same space.

The Four Rules That Keep Food From Rotting

A good space is half the battle. How you handle the harvest is the other half. Break any of these and you’ll be composting your work by December.

  • 1. Cure first. Potatoes, onions, garlic, and squash need a week or two of curing before they go in — a warm, airy, out-of-sun spot that toughens the skins into a protective barrier. Skipping this is the number-one rookie mistake.
  • 2. Store only the perfect ones. Every bruise, nick, or soft spot is an open door for rot — and one bad potato genuinely spoils the barrel. Eat the damaged produce now; cellar only the flawless. Never wash the dirt off roots either; that soil is a protective coat, and washing invites mold.
  • 3. Keep the ethylene apart. Apples and pears give off ethylene gas that makes everything nearby sprout and age fast. Store fruit in a separate container or a different corner from your vegetables. This one mistake ages a whole cellar prematurely.
  • 4. Check weekly and pull the losers. Ten minutes a week: scan for softness, smell for rot, remove anything turning before it takes its neighbors with it. “Store it and forget it” is how you find a liquefied box in March.

The Weekend Build: A Working Cellar for Under $50

No basement? No excavator? You can still store a real quantity of food with a few dollars of materials. Two proven setups:

The buried can. Sink a clean metal or heavy-duty plastic trash can into the ground on the shaded north side of a building or a hill, up to about four inches below the rim. Drill a few small drainage holes in the bottom, set it on a couple inches of gravel, layer your roots in damp sand or sawdust, cap it with the lid, and pile a foot of straw or leaves on top for insulation. The surrounding earth holds it near ideal all winter. Dig down, grab a week’s carrots, re-cover. It’s crude and it flat-out works.

The basement bin system. In that cold north corner, stack food-grade buckets or wooden crates and pack roots in layers of slightly damp sand — each carrot or beet not touching its neighbor. The sand holds humidity right against the produce, which solves the classic dry-basement shrivel. A shallow pan of water on the floor and a wet towel over the bins buys you extra humidity if the room runs dry. Total cost: a few buckets and a bag of sand.

Whatever you build, get airflow right. A cellar needs a little fresh air — a low intake and a high outlet let cool air in and stale, ethylene-laden air out. Even a couple of screened vents beat a sealed box.

The One Tool You Actually Need

You don’t need much, but you do need to know your numbers instead of guessing. A cheap combination thermometer/hygrometer — ideally one that logs the min and max — is the single most useful thing you can put in a cellar. It tells you whether that corner actually holds 34°F overnight or quietly dips to 28°F and freezes your potatoes, and whether your humidity is 90% or a produce-killing 50%. Set it, read it for a week, and adjust before you commit a harvest. Everything else — buckets, sand, crates — you probably have in the garage already.

Why This Is Worth Doing

A root cellar is one of the highest-leverage self-reliance moves there is. It costs almost nothing, it runs on zero electricity, and it turns a garden or a good sale at the farm stand into food that’s still feeding you in February. It’s also independence in the most literal sense: the freezer needs the grid, the cellar needs the ground. When the power flickers, one of those keeps working.

A root cellar closes one loop — storing what you grow. For the full picture of a self-reliant property — water catchment and storage, growing a year of food, and off-grid power, all in one plan with nobody upselling you — The Self-Sufficient Backyard lays out the whole system start to finish.

Your Challenge This Week

Take a thermometer and find the coldest, most stable spot in or around your home. Log it morning and night for seven days. If it holds anywhere near 32–40°F, you’ve just found your cellar — and this fall, instead of watching the last of the garden go soft on the counter, you’ll be walking downstairs in the dead of winter and pulling out carrots that taste like October. Go find your cold corner.

Situational Awareness: How to See Trouble Before It Sees You

Situational awareness has a marketing problem. Search the term and you get a wall of guys in wraparound sunglasses telling you to keep your head on a swivel, plus a $400 course that will teach you to identify a threat at 200 yards. It’s mostly theater, and it’s exhausting — nobody can live in a state of low-grade dread, so most people try it for a week and quit.

Here’s the actual truth: situational awareness is not a mood. It’s a set of small, boring habits that cost you almost nothing and run in the background. Done right, you’re not more anxious — you’re less anxious, because you’ve replaced vague unease with specific information. This post gives you the mental model and five drills you can start today.

The Only Concept That Matters: Baseline and Anomaly

Forget threat detection for a second. You cannot spot a threat if you don’t know what normal looks like. So the whole skill reduces to two steps:

  • Establish the baseline. What is normal for this place, at this hour? A gas station at 7 a.m. has a rhythm — people move with purpose, pump, pay, leave. A park at 3 p.m. on a Saturday has a different one.
  • Notice the anomaly. Something that doesn’t fit the rhythm. Not something scary — something out of place. A guy in a parka in August. A car idling in a lot where every other car is parked and empty. Someone standing still while everyone else flows.

That’s it. Anomalies are almost never threats — 99% of the time it’s a guy waiting on his wife. But threats are always anomalies, so if you’re tracking anomalies you catch the real thing early enough to matter. And “early enough to matter” is the entire game.

Cooper’s Color Code, Honestly

You’ll run into Jeff Cooper’s color code everywhere in this space. The short version:

  • White — switched off. Phone in your face, headphones in, zero input. This is where most people live in public.
  • Yellow — relaxed alert. You’re aware, not alarmed. Head up, eyes moving, no specific concern.
  • Orange — you’ve identified a specific anomaly and you’re watching it. You start forming a simple plan.
  • Red — the plan executes.

My honest take: the color code is a decent shorthand and a terrible doctrine. People treat it like a ladder they should be climbing. It isn’t. The only real instruction in the whole system is stop living in White when you’re out in the world, and Yellow is not a strain — it’s just what your grandfather called paying attention. Everything above Yellow should be rare and short.

Five Drills You Can Start Today

1. The Baseline Drill (5 minutes, once a day)

Sit somewhere public — a coffee shop, a bench, your truck in a parking lot. Spend five minutes silently answering: What’s the flow of traffic here, on foot and in cars? Who’s working and who’s passing through? What’s the noise level? What would stand out? Then leave. You’re not hunting anybody. You’re training the part of your brain that builds baselines, so it does it automatically later.

2. Exits First (10 seconds, every room)

Walk into any building — restaurant, store, gym — and locate two ways out before you sit down. The one you came in and one other. Kitchens have back doors. Big-box stores have loading docks and fire exits. This takes ten seconds and pays off in fires, medical events, and weather far more often than in violence. Then pick a seat where your back isn’t to the main entrance. Not because you’re expecting trouble — because it costs you nothing.

3. The Phone Rule (the big one)

If I could get you to change exactly one thing, it’s this: no phone and no headphones in transitional spaces. Parking lots, stairwells, ATMs, gas pumps, the walk from the building to your car. Those transitions are where the overwhelming share of opportunistic crime happens, because that’s where people are distracted, loaded down, and briefly isolated.

Phone goes in the pocket when you leave the door and comes out when you’re in the car with the doors locked. That’s the whole rule. It outperforms every tactical skill on this list, and it’s free.

4. Describe the Person (30 seconds, a few times a week)

Pick someone in your environment. Look away. Now describe them: height, build, hair, top, bottoms, shoes, anything they’re carrying. Then check yourself. Most people fail badly the first dozen times — they remember a vibe, not a description. This drill matters for two reasons: it sharpens what you actually register, and if you ever need to give a description to a dispatcher, “average guy in a dark shirt” helps nobody. Shoes, by the way, are the detail people change least and observers notice least.

5. The 360 Pause (3 seconds, every vehicle approach)

Before you unlock your car, stop and take one full look around it — including the back seat, and including under it if you’re the thorough type. Before you back out, check who’s moving in the lot. When you park, back into the spot so you can leave forward. Parking lots are the highest-risk ordinary place most of us go, and three seconds of scanning restores most of your options.

What Actually Precedes Trouble

Predatory behavior has a shape. You don’t need a course to learn it — you need to know what to file as an anomaly:

  • The target glance. Someone looks at you, looks away, and looks back. Especially if they check your surroundings rather than their own.
  • Closing distance without purpose. The single most reliable indicator. Normal people move toward a destination. Watch anyone whose destination appears to be you.
  • The interview. An unsolicited approach with a question — directions, the time, a light, a hard-luck story. It’s a test of whether you’ll engage and comply. Answering politely while continuing to move is a complete response.
  • The split. Two or more people separating to approach from different angles. This one is rarely innocent, and it’s your cue to change direction immediately.
  • Hands you can’t see combined with any of the above.

If you want to go deeper on the intuition side of this, Gavin de Becker’s The Gift of Fear is the one book on the subject I’d tell anybody to read. It’s about listening to the signal your body already sends before your brain builds an excuse for it.

Distance Is the Only Tool That Always Works

Here’s the piece the gear crowd underweights. In 1983, Salt Lake City police officer Dennis Tueller ran a now-famous test and found that an average person can cover roughly 21 feet in about a second and a half — the same time it took trained officers to draw and fire. The lesson people take from it is usually about guns. The lesson I take from it is simpler: inside about seven yards, your reaction time is losing to somebody else’s action.

Which means every tool you own — your voice, your legs, your keys, your carry gun, your training — works better with distance and worse without it. Awareness is not primarily about detecting bad people. It’s about buying yourself space and seconds. Cross the street. Turn around. Go back inside. Get in the car and drive off. Every one of those is a win, and none of them requires you to be right about the guy.

Gear That Supports Awareness (Not Replaces It)

Gear is a distant second to habits. But a few items genuinely extend what you can see and what options you have:

  • A real flashlight. Light is an awareness tool first and a defensive one second — it lets you check a back seat, a stairwell, or a dark walk to the door. The Fenix PD36R Pro is the do-everything choice at 2,800 lumens; if you’d rather carry something you’ll actually keep in a pocket every day, the Olight Baton3 is the one that never gets left at home. The best light is the one on you.
  • A less-lethal option. Most encounters don’t warrant — or legally justify — anything close to lethal force. A SABRE RED pepper spray keychain covers the enormous middle ground between “walk away” and “worst day of your life.” Practice the draw with an inert unit, and know your state’s rules.
  • A carry method you can actually access. If you carry, the failure point is almost never the gun — it’s a setup so uncomfortable or so buried that it lives in the console. Off-body carry gets a bad reputation because people do it badly, but a purpose-built bag with a locked-in Kydex holster beats a pistol rattling loose in a backpack every time. The 945 Industries QAP Magnetic Compact concealment bag is built around exactly that idea — magnetic quick access with the firearm indexed in a fixed holster. They make several sizes; the full 945 Industries concealment bag lineup is worth a look if on-body carry has never stuck for you. Whatever you choose, the rule is the same: if it isn’t on you, it doesn’t exist.

The Part Nobody Sells You

The uncomfortable reality of this topic is that the effective version is deeply unsexy. It’s putting your phone away in the parking garage. It’s parking under the light instead of closer to the door. It’s leaving the bar at midnight instead of two. It’s knowing where the back door is. None of that films well, so nobody builds a business on it — they sell you fear and a course instead.

And there’s a real cost to overdoing it. Chronic hypervigilance is not awareness; it’s a stress disorder with better branding. If you’re scanning every stranger for intent, you’re not safer — you’re just worse at spotting the one thing that actually matters, because everything is pinging. Yellow is a calm state. If yours isn’t calm, you’re doing it wrong.

Your Challenge: Seven Days

One week. Three rules, no gear purchase required:

  • Phone stays pocketed in every transitional space. Lots, stairwells, sidewalks, pumps. Every time.
  • Two exits, every building you enter. Ten seconds, then get on with your life.
  • One baseline drill a day. Five minutes, anywhere.

By day four you’ll start noticing things you’d been walking past for years — and my bet is that the first real payoff won’t be a threat at all. It’ll be a curb you didn’t trip on, a car backing out you saw coming, a friend’s kid wandering toward the road. That’s the actual dividend. Awareness makes you a better participant in the world, and the safety part is almost a side effect.

Start tomorrow morning. Phone in the pocket, head up, walk to the truck. That’s the whole first rep.

The 3-2-1 Meal Prep System: How to Cook a Week of Food in 90 Minutes (Without Eating the Same Sad Meal Twice)

Let’s be honest about why meal prep never sticks for most people. You watch some influencer batch-cook 14 identical containers of chicken, broccoli, and rice on a Sunday, and by Wednesday you’re staring at container number four with the enthusiasm of a man licking a battery. The food is fine. The system is broken. Eating the exact same meal ten times in a row is a psychological endurance test, not a nutrition plan.

Here’s the fix I’ve been using for years, and it’s stupidly simple: don’t prep meals. Prep components. When you cook a rack of interchangeable parts instead of ten finished dinners, you can mix and match all week and never eat the same plate twice. I call it the 3-2-1 system, and you can run the whole thing in about 90 minutes on a Sunday afternoon.

The 3-2-1 Formula

Every good week of food comes down to three moving parts. Cook a batch of each, keep them separate in the fridge, and assemble on demand:

  • 3 proteins — because protein is the one macro everyone under-eats and the thing that actually keeps you full.
  • 2 carb/veg bases — the volume that fills the plate and your stomach.
  • 1 flavor system — two or three sauces that turn the same components into completely different meals.

Do the math on that. Three proteins × two bases × three sauces is eighteen distinct flavor combinations from one cook session. That’s the whole trick. Nothing repeats because nothing was ever a “meal” to begin with — it was a Lego set.

Step 1: The 3 Proteins (the part that matters most)

Pick three proteins that cook differently so you’re not babysitting one pan for an hour. My default rotation:

  • Oven: 2–3 lbs of chicken thighs on a sheet pan. Thighs, not breasts — they don’t turn to chalk when you reheat them. 425°F for about 30 minutes.
  • Stovetop: 1–1.5 lbs of ground beef or turkey, browned with salt and whatever spice blend you like. Ten minutes, done.
  • Hands-off: a dozen hard-boiled eggs, or a batch of beans/lentils simmering in a pot while you do everything else.

The single biggest mistake here is guessing on doneness. Undercooked chicken will make your whole week miserable in a very literal way, and overcooked chicken is why people think meal-prepped protein has to taste like a wallet. Stop guessing. A cheap instant-read thermometer like the ThermoPro TP19H pays for itself the first time you pull chicken at a juicy 165°F instead of an anxious, leathery 185°F. Poultry to 165°F, ground meat to 160°F, and move on with your life.

ShelleB’s take: Season your proteins plainly — just salt, maybe pepper and garlic. All the personality comes from the sauces later. If you marinate the chicken in teriyaki on Sunday, you’ve just locked yourself into eating teriyaki chicken for a week. Keep the base neutral and stay free.

Step 2: The 2 Bases

These are your volume and your carbs. You want one starch and one vegetable, both of which reheat well:

  • One starch: rice, potatoes, or quinoa. Rice cooker or a pot, set it and forget it. Two cups dry makes a week’s worth.
  • One roasted veg: whatever’s cheap. Broccoli, Brussels sprouts, carrots, peppers. Toss in oil and salt, throw it on the sheet pan next to your chicken since the oven’s already hot. Same 425°F, same 30 minutes.

Notice you’re running the oven once for both the chicken and the vegetables. That’s the 90-minute part — you’re stacking jobs, not doing them one at a time. While the oven handles two components, the stovetop handles a third, and a pot handles a fourth. Four things cooking, one cook.

The one pot that earns its shelf space

If you’re going to buy a single piece of gear for batch cooking, make it a heavy Dutch oven. It goes stovetop-to-oven, it’ll simmer a giant batch of chili or beans or shredded chicken without scorching, and it lasts forever. A Lodge 6-quart enameled Dutch oven is the one I reach for — it holds enough to feed you for days and it’s a fraction of the price of the fancy French names doing the exact same job.

Step 3: The 1 Flavor System

This is where the magic and the anti-boredom live. Make (or buy) three sauces that point in completely different directions. Same chicken and rice becomes three different dinners depending on what you pour on it:

  • Something bright/acidic — a lemon-garlic vinaigrette, or salsa.
  • Something rich/savory — a peanut or tahini sauce, or good BBQ.
  • Something with heat — sriracha-mayo, chili crisp, hot honey.

Store sauces in small jars, separate from everything else. The reason your fridge meal-prep goes soggy and grim by day three is that you sauced everything on Sunday. Keep components dry and naked; sauce at the moment you eat. Your Thursday self will thank you.

Assembly: 60 Seconds, Infinite Meals

Now the week runs itself. Grab a protein, grab a base, grab a sauce, heat, done:

  • Chicken + rice + peanut sauce → a Thai-ish bowl.
  • Ground beef + potatoes + salsa + an egg on top → a breakfast-for-dinner hash.
  • Chicken + roasted veg + lemon vinaigrette → a clean, bright plate.
  • Beans + rice + chili crisp → a five-minute lunch that costs about a dollar.

Wrap a tortilla around any of those combos and it’s a different meal again. You are never eating “leftovers.” You’re assembling.

Covering the Protein Gap

Most guys who lift or ruck or just want to hold onto muscle past 40 are chronically short on protein — the common target is around 0.7–1 gram per pound of bodyweight, and hitting it with whole food alone is genuinely hard. The gap-filler that’s survived every fad is plain whey. A scoop of Optimum Nutrition Gold Standard Whey in a BlenderBottle is 24 grams of protein in about a minute, which quietly rescues the days your cooking didn’t quite get you there. It’s not a meal, it’s insurance — treat it that way.

The Two Tools That Make or Break This

You don’t need a kitchen full of gadgets. You need exactly two things to work well, and most people are fighting a losing battle on both:

  • A sharp chef’s knife. Ninety percent of “I hate cooking” is really “I’m sawing at an onion with a dull, dangerous knife.” A single good blade like the Victorinox Fibrox Pro 8-inch cuts your actual prep time in half and is what half the professional kitchens in the country use. Get one, keep it sharp, and prep stops feeling like a chore.
  • A thermometer, for the reasons above. Guessing on protein is how the whole system falls apart.
The real cost breakdown: Three proteins, two bases, three sauces — call it 12–15 meals for roughly $35–$50 in groceries, depending on your protein choices. That’s $3-ish a meal, versus $12–$18 every time you cave and order out. The system pays for the gear inside a month.

Your Challenge This Sunday

Don’t overthink it. Block 90 minutes this Sunday and run the 3-2-1 exactly once: three proteins, two bases, three sauces. Don’t assemble a single “meal” while you cook — just fill separate containers with the raw components and sauces in their own jars. Then let the week surprise you. Track how many days you go without repeating a plate, and how many times you didn’t order takeout because dinner was already 60 seconds away.

Nail it one week and you’ll never go back to sad-container meal prep again. Component cooking isn’t a diet — it’s just a smarter way to run your kitchen. Go build your Lego set.

Vehicle Self-Defense: What to Keep in Your Truck (Legal in All 50 States)

Let’s be clear about what this post is and isn’t. It’s not a “how to turn your truck into a gun cabinet” article. It’s the opposite: a practical, legal-in-all-50-states approach to defending yourself in and around your vehicle using tools that won’t get you arrested at a traffic stop in a state you didn’t grow up in.

Here’s the thing most people miss — you are more vulnerable in your car than almost anywhere else. You’re seated, belted, distracted, and often boxed in by other vehicles. Carjackings, road-rage escalations, and parking-lot approaches all happen when you have the least room to move. So the goal isn’t to be Rambo. It’s to buy yourself options and seconds. That’s what everything below does.

The mindset first: your car is the weapon

Before we talk about a single piece of gear, understand the hierarchy. Your best self-defense tool in a vehicle is the vehicle itself, followed by distance, followed by awareness. Three thousand pounds of steel that does 0–30 in a few seconds beats anything you can hold in your hand.

  • Leave room to bug out. When you stop in traffic, stop far enough behind the car ahead that you can see its rear tires touching the pavement. That gap is your escape lane.
  • Doors locked, always. The single most effective, free, legal defensive habit there is. Most vehicle attacks start with someone opening your door.
  • Drive away from problems. No object in this post is worth more than a clear exit. If you can leave, leave. Gear is the backup plan, not the plan.

Now — the stuff. I’ve split it into two buckets, because “self-defense” in a car really means two different emergencies: someone trying to hurt you, and you needing to get out or patch someone up. You need both.

Bucket 1: Defensive tools (legal everywhere, if you use them right)

1. Pepper spray (OC)

This is the single best legal defensive tool for a vehicle, full stop. It works at a distance, it doesn’t require you to be strong or trained, it stops a threat without killing anyone, and it’s legal in all 50 states with only minor size/formulation restrictions (a couple of states cap canister size or require you to be 18). Keep a keychain-sized unit clipped somewhere you can reach it while belted — center console or door pocket, not the glovebox where you can’t reach across.

My pick is a compact, name-brand unit with a real flip-top so it doesn’t discharge into your pocket lint: the SABRE RED Pepper Spray Keychain (Max Strength, 25 bursts). Buy a fresh one every couple of years — OC loses pressure and potency, and an expired can is a false sense of security.

Quick legal note: A few states (looking at you, NY and MA historically) restrict where and how you buy pepper spray. Nothing here is legal advice — spend five minutes confirming your state’s OC rules before you carry. It’s genuinely a five-minute read.

2. A serious flashlight

Underrated as a defensive tool and completely legal everywhere. A high-output light does three jobs: it lets you identify who’s approaching before you decide anything, a momentary blast of 1,000+ lumens to the eyes buys you disorienting seconds, and the crenellated steel bezel doubles as a striking/glass-breaking tool. It’s also just useful 300 days a year, which means you’ll actually keep it charged.

Get something rechargeable with real output — a Fenix PD36R Pro (2,800 lumens) throws a genuinely blinding beam and has a stainless bezel. If you want lower cost, any 1,000+ lumen rechargeable from a reputable brand will do. The point is bright and charged, not fancy.

3. A multitool (the boring hero)

Not a “weapon,” but it earns its spot. A good multitool handles the 100 small problems that create the situations you don’t want — a loose battery terminal, a dead flashlight, cutting a jammed seatbelt in a pinch, prying, gripping. A Leatherman Wave Plus lives in my center console and has bailed me out more times than any tactical anything. It’s legal everywhere because it’s exactly what it looks like: a tool.

Notice what’s not on this list: fixed blades staged as weapons, brass knuckles, batons, anything that’s a felony in one state and a keychain in another. If a tool’s legality flips when you cross a state line, it doesn’t belong in a truck that crosses state lines.

Bucket 2: Escape & trauma (the stuff that actually saves lives)

Real talk: you are vastly more likely to need this bucket than the first one. Car crashes, a friend’s arterial bleed, a submerged vehicle, a stuck seatbelt after a rollover — these are the emergencies that actually happen. If you only buy from one bucket, buy from this one.

4. A window breaker + seatbelt cutter

5. A tourniquet — and knowing how to use it

This is the one that separates people who think about preparedness from people who are actually prepared. A tourniquet stops a life-threatening limb bleed — from a crash, from broken glass, from a work accident — in under a minute. A shirt and a stick is a myth; you need a real windlass tourniquet. Get a genuine North American Rescue C-A-T Tourniquet, Gen 7 (beware the flood of counterfeits — buy from a source that guarantees authenticity) and, this matters, watch a 10-minute video on applying it and practice on your own leg twice. Gear you can’t use under stress is just decoration.

6. A real trauma kit (not a box of Band-Aids)

Your dollar-store “first aid kit” is for paper cuts. A vehicle trauma kit is for the stuff that kills you before the ambulance arrives — massive bleeding, a chest wound. A compact IFAK like the Adventure Medical Kits MOLLE Trauma Kit 1.0 packs a tourniquet, hemostatic gauze, a pressure bandage, and gloves into something that fits under a seat. Pair it with the CAT above and you’ve covered the two things that actually kill people at the roadside: they can’t breathe or they’re bleeding out.

How to store it so it’s actually usable

The best kit in the world is worthless in the trunk under a spare tire when the emergency is in the driver’s seat. Organize by reach:

  • Arm’s reach while belted (console, door pocket): pepper spray, flashlight, window breaker/seatbelt cutter. These are the “right now, can’t unbuckle” tools.
  • One reach away (under-seat or seat-back pouch): tourniquet + trauma kit + multitool.
  • Grab-and-go bag (behind the seat): everything consolidated so you can take it with you if you have to abandon the vehicle.

For that grab-and-go piece, a low-profile bag beats a loud “tactical” one covered in MOLLE and morale patches — you don’t want your truck advertising that it’s worth breaking into. I like a discreet zip bag for this; 945 Industries’ Morph concealment bags are built as concealment-first EDC bags and pull double duty as a clean, unremarkable vehicle grab bag. Whatever you use, the rule is the same: looks boring, opens fast.

The one-hour setup challenge

Here’s your assignment, and it’s genuinely doable this weekend:

  • Hour 1, first 15 min: Lock your doors habit + confirm your state’s pepper spray rules. Free, and the highest-leverage thing on this list.
  • Next 30 min: Order the four essentials you’re missing — spray, light, window breaker, tourniquet. Under $150 total for name-brand gear.
  • Final 15 min (when it arrives): Watch one tourniquet video, practice twice, then stage everything by reach using the map above.

That’s it. You’re now better prepared for the emergencies that actually happen in a vehicle than 95% of drivers on the road — and you did it without a single thing that’ll get you in trouble crossing a state line. The goal was never to be dangerous. It was to be the person who has options when everyone else is frozen. Go stage your truck.

Snakebite First Aid: What to Do, What to Skip, and the Movie Myths That Get People Hurt

It’s June. The ground is warm, the grass is high, and every snake in North America is awake, hungry, and moving. If you spend any time outdoors — hiking, working a property, clearing brush, or just reaching into a woodpile — you will cross paths with one eventually. And almost everything Hollywood taught you about what to do next is wrong. Some of it is just useless. Some of it will get a limb amputated.

Here’s the real playbook — the stuff that actually keeps fingers, feet, and lives intact.

Know What Bit You (It Probably Wasn’t Lethal)

Roughly 7,000–8,000 people get bitten by venomous snakes in the U.S. every year. About 5 die. Read that again. With prompt hospital care, a snakebite in this country is almost never a death sentence — but it can wreck the tissue around the bite if you do something dumb in the first 30 minutes.

Two families matter here:

  • Pit vipers — copperheads, cottonmouths (water moccasins), and rattlesnakes. This is the overwhelming majority of U.S. bites. Their venom is mostly hemotoxic: it destroys tissue and messes with your blood’s ability to clot. You’ll see swelling, bruising, and serious pain fast.
  • Coral snakes — rare, shy, small-mouthed, and found mostly in the Southeast. Their venom is neurotoxic — it attacks the nervous system, and symptoms can be sneaky and delayed. Remember the rhyme: “Red touches yellow, kills a fellow.” This is the one exception that changes the first-aid rules (more on that below).

My honest take: if you live in most of the country, your realistic threat is a copperhead, and a copperhead bite is the snake world’s equivalent of a bad bee sting that lands you in the ER for observation. Painful, scary, rarely catastrophic. Don’t panic — panic is what makes people do the stupid stuff.

What to Actually DO

  1. Back away. Most bites happen when people try to handle, kill, or “get a better look” at the snake. Give it five feet and it loses all interest in you.
  2. Call 911 or get moving to a hospital — now. Antivenom (CroFab or Anavip for pit vipers) is the actual treatment, and it works best early. Time is tissue.
  3. Take off rings, watches, and tight clothing near the bite immediately. That limb is going to swell, and you do not want a wedding band acting as a tourniquet on a finger in 20 minutes.
  4. Keep still and keep the limb roughly at heart level. Lower your heart rate, slow the venom’s spread. Walk only if you have to in order to reach help.
  5. Mark the swelling. Take a pen and draw a line at the leading edge of the swelling, write the time next to it, and repeat every 15–30 minutes. This gives the ER a precise timeline of how fast the venom is progressing. It’s the single most useful thing a bystander can do, and it costs nothing but a Sharpie.
  6. Snap one photo from a safe distance if the snake is still around — but never delay treatment or risk a second bite to do it. The hospital does not need the actual snake to treat you.

What Movies Got Dead Wrong

Every one of these has been studied, and every one of these is either useless or actively harmful. Burn them out of your brain:

  • Cut and suck. No. Cutting the wound spreads damage and invites infection, and your mouth is a bacterial swamp. You’ll remove a trivial amount of venom and add a nasty infection on top of envenomation.
  • Suction devices (the Sawyer Extractor pump). Famous, widely sold, and proven worthless. Peer-reviewed studies show these pumps remove a negligible amount of venom — and may worsen local tissue damage at the suction site. Don’t waste pack space on one.
  • Tourniquets. This is the one that costs people their limbs. Cutting off all blood flow concentrates hemotoxic venom in one spot and turns “swollen hand” into “dead hand that gets amputated.” Do not apply a tourniquet to a pit viper bite. Ever.
  • Ice. Cold constricts blood vessels and concentrates venom in already-damaged tissue. It makes the local destruction worse, not better.
  • The shot of whiskey. Alcohol speeds circulation and dehydrates you — exactly backwards. Same goes for caffeine.
  • Aspirin or ibuprofen for the pain. Pit viper venom already attacks your clotting. NSAIDs thin the blood further. If you need something for pain, acetaminophen (Tylenol) is the safer choice — but let the ER guide you.
  • Electric shock. Yes, this was a real “remedy” people tried with car batteries and stun guns. It does nothing but burn you. I wish I were joking.

The One Exception: Coral Snakes

Here’s where it gets nuanced, and where bad blanket advice gets dangerous. For neurotoxic bites — coral snakes specifically — the pressure immobilization technique (a firm, wide elastic wrap over the bite and up the limb, splinted to keep it still) can slow the spread of venom and is genuinely recommended.

But you must NOT use pressure immobilization on a pit viper bite. Wrapping a copperhead or rattlesnake bite traps the tissue-destroying venom locally and makes the damage far worse. So the rule is simple: if you’re not 100% certain it was a coral snake, treat it as a pit viper and skip the wrap. When in doubt, don’t wrap — just get to the hospital.

Gear That Actually Helps

Snakebite first aid is mostly about not doing things, so the gear list is short and honest:

  • A real trauma kit. Not for the bite itself — for the brush cuts, the splinting, and having a marker and gloves on hand when something goes sideways in the field. The Adventure Medical Kits MOLLE Trauma Kit 1.0 is a solid, compact one that lives in my truck and pack. Just remember: the tourniquet inside it is for arterial bleeding from trauma, never for a snakebite.
  • Snake gaiters. Far and away the best money you can spend if you work tall grass or rocky country. Most copperhead and rattlesnake strikes land below the knee, and a good pair of gaiters stops the fangs cold. Brands like ForEverlast SnakeGuard and Crackshot make proven, field-tested pairs. This is prevention beating cure — wear them when you’re clearing brush or walking unknown ground.
  • A permanent marker. The humble Sharpie is more useful in a real bite than any gimmick suction pump ever made. Put one in every kit.
  • Your phone, charged. Calling ahead so the ER can have antivenom ready is worth more than anything in your pack.

Prevention Beats All of It

The best snakebite first aid is the bite that never happens. Watch where you put your hands and feet. Don’t reach blindly into woodpiles, rock crevices, or tall grass. Step on logs and then over, never blindly over. Use a light at night — snakes love warm summer evenings. Keep your yard’s grass cut and the brush piles away from the house. And teach your kids the same: look before you reach.

The Takeaway

If you remember nothing else, remember this short list: back away, take off the jewelry, stay calm, mark the swelling, and get to a hospital. Don’t cut, don’t suck, don’t wrap (unless it’s a confirmed coral snake), don’t ice, don’t tourniquet. The venom is rarely the thing that hurts people worst — the panic-driven “remedies” are.

Your challenge this week: find out which venomous snakes actually live in your county — it’s a two-minute search — and put a permanent marker in your hiking pack and your truck kit tonight. Two minutes and a Sharpie is a better snakebite plan than 90% of the people you’ll ever meet on a trail.

This is field first-aid guidance, not medical advice. Any venomous snakebite is a medical emergency — call 911 or get to an emergency room immediately.

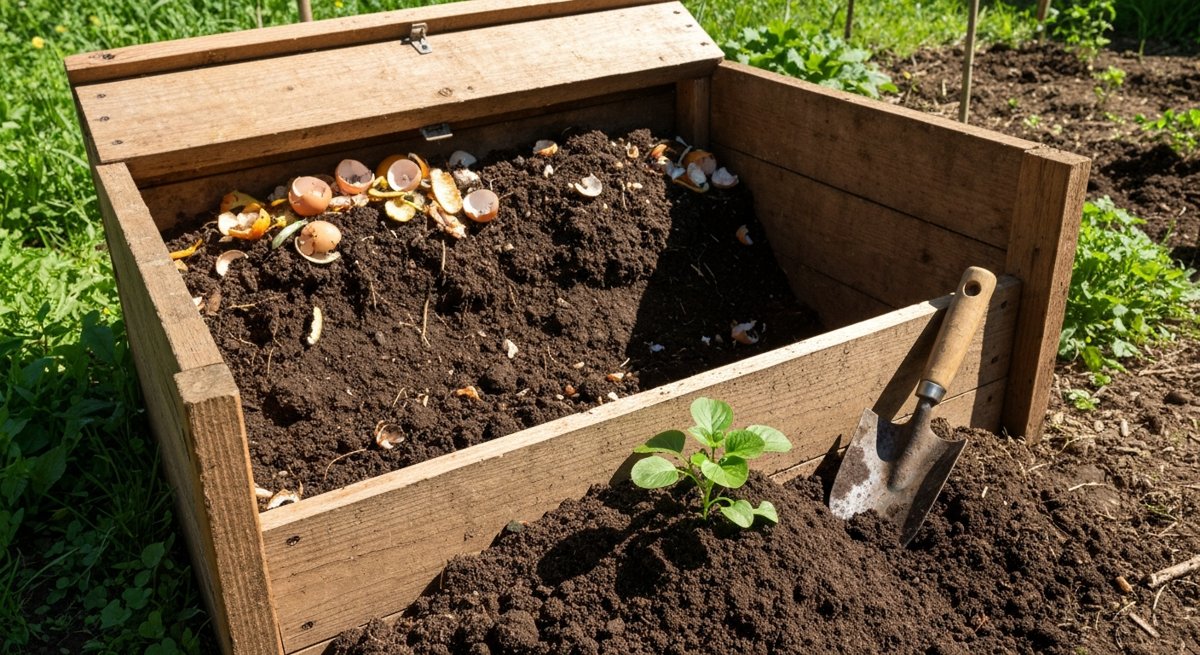
Composting 101: How to Turn Kitchen Waste Into Garden Gold in 90 Days

Here’s a stat that should annoy you: the average American household throws out roughly 500 pounds of food scraps a year. You pay to buy it. You pay to throw it away. Then in spring, you drive to the garden center and pay $8 a bag for compost that’s basically the same thing you just trashed.

Composting fixes this. And no, you don’t need a fancy tumbler, a degree in soil science, or a half-acre back forty. You need a corner of your yard, a pitchfork, and about 90 days. That’s it.

I’ve watched people overthink this for years. The slimy stink pile. The bone-dry stack of leaves that just sat there. The one forgotten for six months. Here’s what actually works, stripped of the gardening-blog fluff.

The 60-second version: Layer “browns” (carbon — dry leaves, cardboard) and “greens” (nitrogen — kitchen scraps, grass) at roughly 3:1 by volume. Keep it damp like a wrung-out sponge. Turn it once a week. In 90 days, you’ve got black gold. That’s the whole skill.

Why Bother? The Honest Pitch

Look, I’m not going to sell you on composting like it’s going to save the planet. The actual benefits are smaller and more practical:

  • Free soil amendment. Finished compost retails for $5-10 per cubic foot. A modest pile produces 10-20 cubic feet a year. That’s $100+ of garden soil you didn’t buy.
  • Half the trash. Food scraps and yard waste are 30-40% of household garbage by weight. Smaller bags, fewer trips, less stink in the can during summer.
  • Plants actually like it more than fertilizer. Compost adds microbes and slow-release nutrients. Synthetic fertilizer is just a salt blast — works fast, dead soil after.
  • It’s a closed loop on your property. Self-sufficiency isn’t a vibe, it’s a habit. Composting is one of the easiest habits to lock in.

If you grow anything — vegetables, fruit trees, a lawn, even houseplants — you should be composting. The math is too good to ignore.

The Only Rule That Matters: Browns and Greens

Forget everything you’ve read about C:N ratios of 30:1. You don’t need to weigh anything. Here’s the only mental model you need:

BROWNS (carbon) — 3 parts GREENS (nitrogen) — 1 part
Dry leaves Vegetable & fruit scraps
Shredded cardboard Coffee grounds (yes, they’re “green”)
Newspaper (no glossy) Grass clippings
Straw / hay Tea bags (staples out)
Sawdust (untreated wood) Eggshells (crushed)
Wood chips Garden trimmings, dead annuals
Pine needles (sparingly) Plant-based food prep scraps

Rough rule: three buckets of brown for every one bucket of green. If your pile is wet and stinky, add browns. If it’s dry and doing nothing, add greens (and water).

What NEVER Goes In

  • Meat, fish, bones. They’ll compost eventually, but they bring raccoons, rats, and a smell your neighbors will remember.
  • Dairy. Same reason. Cheese on the pile = wildlife party.
  • Greasy / oily food. Coats material, blocks airflow, smells.
  • Pet waste (dogs, cats). Carries pathogens that survive a normal backyard pile. Chickens and rabbits are fine.
  • Diseased plants. If a tomato plant got blight, burn it or bag it. Don’t reward the spores.
  • Walnut leaves/wood. Contain juglone, which kills tomatoes, peppers, and a lot of garden crops.
  • Glossy paper, “compostable” plastic. The first leaches chemicals; the second is a lie unless you have a 160°F industrial composter.

The Setup: Three Options, Cheapest to Best

Option 1: Open Pile (Free)

Pick a spot. Dump stuff. Done. Works fine if you have space and don’t care how it looks. Downside: spreads out, harder to turn, raccoons might dig.

Option 2: Pallet Bin ($0-30)

Four wood pallets, zip-tied or wired at the corners, makes a 4’x4′ bin. Hardware stores and warehouses give pallets away. This is what 90% of serious gardeners use. Add a second bin next to it for the “finishing” pile and you’re set for life.

Option 3: Tumbler ($120-250)

Enclosed plastic drum on a crank. Pros: keeps animals out, looks tidy, easy to turn. Cons: small capacity, plastic degrades in UV, you’ll outgrow it the first year you garden seriously. Buy a tumbler if you’re in a suburb and worried about appearances. Build a pallet bin if you actually want compost.

My take: Pallet bin every time. Tumblers look great on Instagram but produce a fraction of the volume. A double pallet bin setup (active + curing) costs under $30 and outlasts three tumblers.

The 90-Day Build

Day 1: Lay the Base

Drop 4-6 inches of coarse browns on the ground — twigs, corn stalks, rough mulch. This creates airflow underneath. Don’t skip this. A compacted pile is a dead pile.

Days 1-30: Build the Pile

Add material in alternating layers as you generate it. Bucket of kitchen scraps from the week? Cover it with two buckets of dry leaves or shredded cardboard. Always finish a fresh addition with browns on top — that’s what keeps the smell down and the flies out.

Your target size is a cube roughly 3 feet on each side. Smaller piles don’t generate enough internal heat. Bigger gets hard to turn. Three feet cubed is the sweet spot.

Days 30-60: Turn and Wait

Once the pile is built, stop adding to it. Start a second pile for new scraps. The first pile is now “finishing.”

Turn it once a week with a pitchfork or compost aerator. “Turning” means moving the outside material to the inside. The center cooks at 130-150°F when it’s working right. You’ll see steam rising on cool mornings — that’s the win.

Check moisture every turn. Squeeze a handful. Water should bead but not drip. Too dry? Hose it down. Too wet? Add browns and fluff it.

Days 60-90: Cure

By day 60 the pile has shrunk by half and most material is unrecognizable. Stop turning. Let it sit. The microbes do their last work and the pile cools down.

By day 90 you’ve got dark, crumbly, earthy-smelling compost. If it still smells like rotten anything, it’s not done. Give it another two weeks.

Reality check: 90 days is the fast version, assuming summer heat, good carbon/nitrogen balance, and weekly turning. In winter or with a neglected pile, it’s 6-12 months. Both work. The microbes don’t care about your timeline.

The Five Mistakes That Kill 90% of Backyard Piles

  1. Too much green, not enough brown. Result: slimy, stinky, attracts flies. Fix: dump in shredded cardboard or dry leaves and turn it.
  2. Pile too small. A 2-foot pile never gets hot enough. Build to 3x3x3 or bigger.
  3. Bone dry. Microbes need moisture. If it looks like a leaf pile, hose it down until it’s sponge-damp.
  4. Never turning it. A pile that doesn’t get turned still composts — in 18 months instead of 3. Turn weekly.
  5. Putting in stuff that doesn’t belong. Meat, dairy, dog poop. You’ll regret it within a week.

The Kitchen Side: Make It Effortless

If walking out to the pile every time you peel a carrot sounds annoying, that’s because it is. Here’s the system that actually sticks:

  • Counter caddy. A small lidded container (1 gallon) on the counter. Charcoal filter in the lid kills smell. Empty it every 3-5 days. Stainless or ceramic — plastic stains and holds odors.
  • Freezer trick (game changer). Keep a gallon zip bag in the freezer. Toss scraps in as you cook. Empty it weekly. Zero smell, zero fruit flies, zero excuses. This is the move.
  • Outdoor 5-gallon bucket with lid. If you generate a lot of yard waste, stage it next to the pile so you only have to walk out once a week.

What to Do With Finished Compost

Once it’s done, the use cases are endless:

  • Top-dress garden beds with 1-2 inches in spring and fall.
  • Mix into potting soil at a 1:3 ratio for container plants.
  • Side-dress tomatoes, peppers, squash mid-season for a nitrogen boost.
  • Compost tea. One shovelful in a 5-gallon bucket of water, steep 24 hours, water plants. Cheap liquid fertilizer.
  • Lawn topdressing. Quarter-inch layer in early fall. Best lawn treatment that exists, period.

The Honest Tradeoffs

Composting isn’t free time-wise. You’re looking at maybe 30 minutes a week — 5 minutes emptying the counter caddy, 10-15 minutes turning the pile, plus occasional sourcing of browns (free leaves in fall, cardboard from any delivery).

It’s also not magic. A bad pile won’t ruin anything, but it also won’t produce anything useful. The difference between people who get compost and people who get a wet pile of garbage is one thing: turning the pile. Everything else is forgivable.

Your 90-Day Challenge

This weekend: Build a pallet bin or designate a corner of the yard. Lay your coarse base layer. Put a counter caddy or freezer bag in your kitchen.

Next 30 days: Build the pile. Aim for 3’x3’x3′. Layer browns and greens 3:1. Always finish with browns on top.

Days 30-60: Stop adding. Start pile #2. Turn pile #1 every weekend.

Day 90: Sift out the finished compost. Top-dress one garden bed. Notice it’s the best soil you’ve ever had.

Report back. I want to know how your pile is doing.

Self-sufficiency isn’t about prepping for collapse or going off-grid. It’s about closing small loops on your property — turning waste into resource, reducing what you buy, getting your hands in the dirt. Compost is the most basic, most ancient version of this. It’s literally what soil has been doing since plants existed. You’re just helping it along.

Build the bin. Start the pile. Stop throwing money in the trash.

Composting closes one loop; there are dozens more. For the full playbook on the rest — water, food, soil, and power — The Self-Sufficient Backyard walks through the whole system.

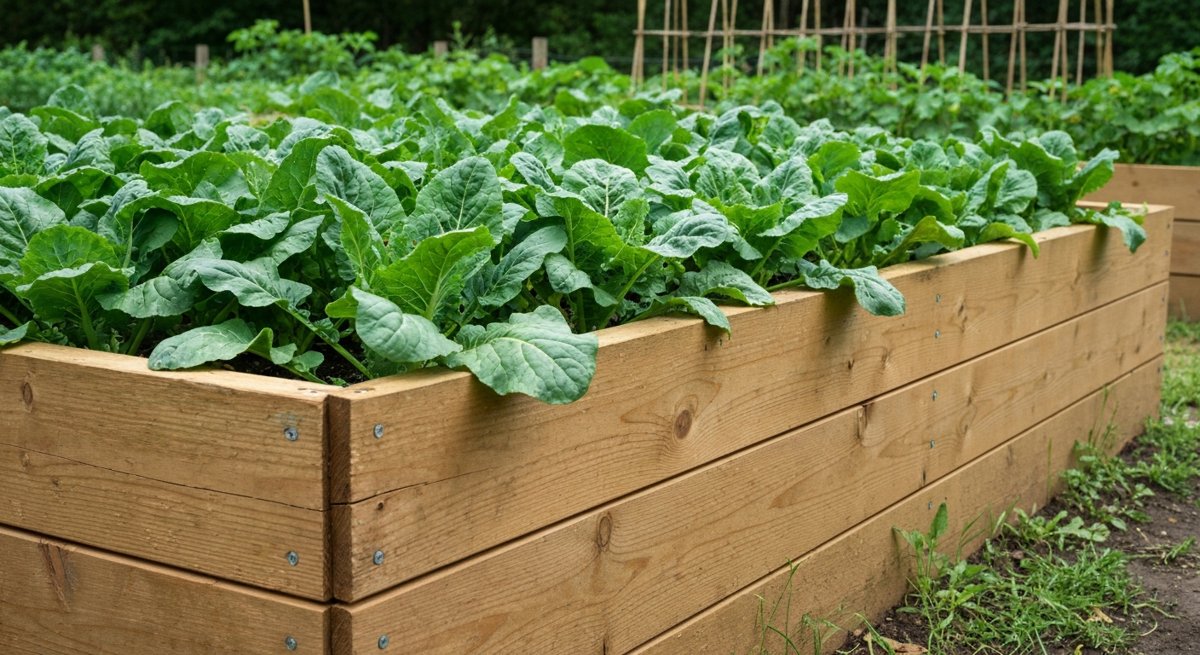
How to Build Raised Garden Beds That Last 10+ Years (Without Cedar Premium)

I’ve built raised beds three times in my life. The first set rotted in 4 years. The second set warped and split in 6. The third set is still standing strong at year 11 — and I’d bet on another decade easy. The difference wasn’t expensive lumber. It was four specific decisions I didn’t know to make the first two times around.

If you’re about to drop $400 on a single 4×8 cedar bed because that’s what every “homesteading expert” on Instagram swears by — pump the brakes. There’s a better way. It’s cheaper, lasts longer, and doesn’t require a single board of cedar.

Why Most Raised Beds Fail So Fast

Before we talk materials, let’s talk about what actually kills a raised bed. It’s not what most people think.

  • Wet wood-to-soil contact — Soil holds moisture against the wood 24/7. Even rot-resistant species lose to constant moisture.
  • Fasteners that fail before the wood does — Drywall screws and bright steel rust out in 2-3 years. Your bed falls apart while the boards are still solid.
  • Bowing from soil pressure — A full 4×8 bed has roughly 1,000 lbs of wet soil pushing outward. No bracing = bulging walls = cracked corners.
  • Ground contact at the bottom edge — That bottom board is sitting in a wet sponge year-round. It’s always the first thing to go.

Fix those four things and your bed will outlive your interest in gardening. Here’s how.

The Material Decision: Skip Cedar

Cedar is the default recommendation because it’s naturally rot-resistant and looks beautiful. Both true. But at $8-12 per linear foot of 2×10, a single 4×8 bed runs $300+ in lumber alone. And in wet climates, even cedar gives you 8-10 years tops.

My honest opinion after building dozens of beds: ground-contact rated pressure-treated lumber is the best value for a long-lasting bed. The modern stuff (ACQ or MCA-treated since 2003) does NOT use arsenic. The EPA, USDA, and multiple peer-reviewed studies have found no measurable health risk for growing food in modern PT lumber. I’ll die on this hill.

If you can’t get past the mental hurdle (totally fair — I’ve been there), the runner-up options ranked by longevity per dollar:

  1. Concrete block (CMU) — Lasts effectively forever. ~$2.50/block. Looks industrial but functional.
  2. Cinder/landscape block — Stackable, no mortar needed for short beds. 50+ year life.
  3. Black locust or Osage orange — If you can source it locally, these natives outlast cedar 3:1. Hard to find.
  4. Cedar — Beautiful, expensive, 8-12 years.
  5. Douglas fir or pine, untreated — Don’t bother. You’ll be rebuilding in 4 years.

For the rest of this guide, I’ll assume you’re going with 2×10 ground-contact PT lumber. The technique transfers to any wood.

The Build: A 4×8 Bed That Outlives the Dog

Materials List (~$95-110)

  • (3) 2x10x8′ ground-contact PT lumber — one cut in half for the short sides
  • (4) 4x4x12″ PT post offcuts for inside corner blocks
  • (1) box of 3″ structural screws — get the hot-dipped galvanized or ceramic-coated ones, NOT bright steel drywall screws
  • (2) 24″ lengths of #4 rebar for cross-bracing the middle
  • (1) roll of 6-mil black plastic sheeting or pond liner offcuts
  • (1) roll of hardware cloth (1/2″) if you have gophers/voles

Step 1 — Level the Ground (Don’t Skip This)

A bed that’s 2″ out of level will pool water on one side and dry out the other. Stake the corners, run a string line, and remove sod where needed. You’re not building a foundation — you just want the four corners within 1/2″ of each other.

Step 2 — Pre-Drill and Use the Right Screws

This is the single biggest upgrade from typical bed builds. Pre-drill every screw hole — PT lumber splits if you don’t, especially near the ends. Use 3″ structural screws rated for ACQ-treated wood (the box will say so). Bright steel drywall screws will literally dissolve in PT lumber within 18 months due to the copper in the treatment.

Step 3 — Inside Corner Blocks Instead of End Screws

Don’t screw the side boards into the end grain of the short boards. End grain holds screws about as well as wet cardboard. Instead, cut four 4×4 PT offcuts to your bed height and screw both adjoining boards into the 4×4. Now you have side grain holding everything together — roughly 5x stronger.

Step 4 — Brace the Middle with Rebar

For any bed longer than 6 feet, the long sides will bow outward as soil saturates. Drive two pieces of #4 rebar deep into the ground on the outside of each long board, at the 1/3 and 2/3 marks. Total cost: $4. Total bow over 10 years: zero.

Step 5 — The Plastic Liner Trick That Doubles Lifespan

Here’s the move that separates a 5-year bed from a 15-year bed: line the inside walls (not the bottom) with 6-mil black plastic or pond liner. Staple it to the top edge of the boards so soil moisture never touches the wood. You leave the bottom open for drainage and worm migration. The wood stays dry on the inside face. The outside dries quickly after rain. Decay rate drops by an order of magnitude.

If you’re in gopher or vole country, lay 1/2″ hardware cloth across the entire bottom before filling. Tack it up the sides 4 inches. Saves your root crops from being eaten from below — I learned this the expensive way after losing an entire carrot harvest in 2019.

Fill It Right (Hugelkultur-Lite)

A 4x8x10″ bed needs about 27 cubic feet of soil. At $8-10/bag for quality topsoil mix, you’re looking at $200+ to fill it. There’s a better way: layer it.

  1. Bottom 4-5 inches: Logs, branches, sticks, woody yard waste. Free. Decomposes slowly and acts like a sponge, holding water for dry spells.
  2. Next 2-3 inches: Leaves, grass clippings, kitchen scraps, cardboard. Free.
  3. Top 4-6 inches: Quality topsoil + compost mix. This is your actual root zone. Spend the money here.

First year, the wood layer settles and you’ll need to top it up with another inch or two of compost. By year two, you’ve got the best soil on the block.

The Annual Maintenance That Buys You Decades

Once a year — pick a date you’ll remember, mine is the first Saturday in November — do these three things:

  • Walk the bed and tighten any loose screws. PT lumber expands and contracts; corners will eventually back out slightly.
  • Top up with 2-3″ of compost. Beds shrink. Don’t fight it, just feed them.
  • Re-staple any loose liner sections. UV will eventually eat the top edge of exposed plastic — fold it inward under the soil if you see it cracking.

That’s it. 20 minutes per bed per year. In exchange, you get a structure that’ll feed your family for a decade or more.

The Real Cost Comparison

Here’s what 20 years of gardening actually costs by material choice for a single 4×8 bed:

  • Untreated pine: ~$60 every 4 years = $300 + 5 rebuilds of labor
  • Cedar: ~$320 every 10 years = $640 + 1 rebuild
  • PT lumber with liner method: ~$100 every 15+ years = $100-200 total
  • Concrete block: ~$120 once = $120 forever

Pretty straightforward math.

Your Weekend Challenge

Build one bed. Just one. Pick a 4×8 footprint, pick your material, and commit a Saturday to it. Don’t overthink the location — you’ll learn more from one season of actually growing something than from another year of “planning the garden.” The best raised bed is the one that’s actually in the ground.

If you build one this weekend using the techniques above, message me on the site or tag us — I want to see it. And in 15 years when you’re still pulling tomatoes out of it, you’ll thank yourself for spending the extra hour on the corner blocks and the liner.

— Shelle

Once the beds are built, the question is what to put in them. If you want plants that pull double duty — food and natural medicine — the Medicinal Garden Kit is a solid start on a backyard apothecary.

Raising Chickens for Eggs: Startup Costs, Timeline, and What Nobody Tells You

Everybody romanticizes backyard chickens. Fluffy hens, fresh eggs, kids learning where food comes from. It’s a great picture. The reality is dirtier, louder, and a lot more expensive than the Pinterest version — but it’s also one of the most rewarding things you can do on a quarter acre or more. I’ve raised chickens long enough to know the rosy version is a lie of omission. Here’s the real math, the real timeline, and the stuff most “starter guides” leave out because it would scare you off.

The Real Startup Cost (Not the Fantasy)

Online guides love to tell you that you can start raising chickens for “under $200.” That number is either dishonest or assumes you already have a pile of free pallets, scrap lumber, and a chicken-friendly neighbor giving you hens. Here’s what it actually costs to start a small backyard flock of 4–6 hens, doing it right the first time:

Item Budget Build Do-It-Right Build
Coop (4–6 hens) $300 (DIY) $800–1,200 (prefab or quality DIY)
Run / fencing (hardware cloth, posts) $150 $350
Feeders, waterers, nest boxes $60 $120
Brooder setup (heat plate, tub, bedding) $80 $130
6 chicks (sexed pullets) $30 $45
First 6 months of feed $120 $160 (organic)
TOTAL ~$740 ~$1,605–$2,005

My honest opinion: the budget build is where 80% of new chicken keepers start, and 60% of them rebuild within two years because their first coop fell apart, leaked, or got compromised by a raccoon. Spend the money on the coop and the hardware cloth. You can cheap out on feeders. You cannot cheap out on what’s keeping predators from eating your hens at 2 a.m.

The Timeline From Chick to First Egg

This is where the romantic picture gets wrecked. You don’t get eggs in a month. You get eggs in five to seven months, and even then they’re tiny and inconsistent for the first few weeks. Here’s the realistic timeline:

  • Week 0–6: Brooder phase. Chicks live indoors (garage, mudroom, spare bathtub) under a heat plate. They smell. They generate dust. They double in size every week. You will be cleaning a brooder every other day.
  • Week 6–10: Awkward teenager phase. They’re feathered enough to move outside but too small to be fully predator-safe. Most losses happen here.
  • Week 10–18: Pullet phase. They look like chickens. They act like chickens. They produce zero eggs. You’re spending ~$30/month on feed and getting nothing back.
  • Week 18–24: First eggs. Usually small, sometimes shell-less, occasionally laid in weird places. Production ramps over 4–6 weeks.
  • Week 24–28: Reliable laying. A healthy hen now lays 4–6 eggs per week.

If you start chicks in March, you’ll get reliable eggs in late August. Plan accordingly.

The Cost Per Egg Is Not Cheaper Than the Store

Let’s just kill this myth right now. Six hens at peak production give you about 24 eggs per week. That’s 1,250 eggs per year. Annual feed cost runs around $400–$500 for a small flock. Add bedding, supplements, mite treatments, and the inevitable replacement of one hen per year, and you’re at $600/year minimum.

$600 ÷ 1,250 eggs = about $0.48 per egg. That’s $5.76 a dozen. Store eggs are cheaper most weeks. Pasture-raised organic eggs at the farmer’s market are about the same.

So why do it? You’re not raising chickens to save money. You’re raising them because:

  • You know exactly what they ate.
  • The yolks are orange, not yellow — and they taste like food, not Styrofoam.
  • You have eggs when the supply chain hiccups.
  • Kids learn where food comes from in the most direct way possible.
  • The flock turns kitchen scraps and yard pests into protein.

Those are real benefits. Saving money is not.

What Nobody Tells You

This is the section most “how to raise chickens” articles skip. Here’s what you’ll actually deal with:

1. Predators are relentless and creative

Raccoons can open simple latches. Hawks watch your run from the trees. A single weasel can wipe out an entire flock in a night through a hole the size of a quarter. You need hardware cloth, not chicken wire — chicken wire keeps chickens in, not predators out. Bury it 12 inches down and out, or use an apron skirt. Use carabiners on every coop latch.

2. They stop laying in winter

Hens need ~14 hours of daylight to lay consistently. From November through February in most of the U.S., production drops 60–80%. You can run a coop light on a timer to keep production up, but it shortens the hen’s productive lifespan. Your call.

3. They get sick in ways that look like nothing, then die fast

A chicken that “looks a little off” today is often dead by tomorrow. They hide illness until they can’t anymore. Common issues: respiratory infections, egg binding, sour crop, mites, and Marek’s disease. Find a vet or experienced keeper before you need one — most regular vets won’t see chickens.

4. The smell is real

A clean, well-ventilated coop with deep-litter management barely smells. A neglected coop smells like an outhouse on day three. The difference is one bag of pine shavings every few weeks and stirring the bedding once a week. Don’t be the neighbor who ruins backyard chickens for everyone.

5. You’re going to have to deal with death

Hens get old, get sick, get eaten, or stop laying around year 4. You’ll either be culling, paying for vet visits, or burying birds. Know that going in. It’s part of the deal. If you can’t, get your eggs from someone who can.

Best Breeds for Beginners

Stick with dual-purpose, cold-hardy, docile breeds for your first flock. These are the workhorses:

  • Buff Orpington — calm, cold-hardy, good layers (~200 eggs/year), great with kids.
  • Black Australorp — the production champion. 250–300 eggs/year. Quiet and friendly.
  • Plymouth Rock (Barred Rock) — hardy, beautiful, ~250 eggs/year. Tolerates heat and cold.
  • Easter Egger — lays blue/green eggs. Hardy, friendly, great novelty bird in the mix.
  • Rhode Island Red — tough, productive, but can be bossy. Avoid in mixed flocks if you’re new.

Skip the fancy breeds (Silkies, Polish, Frizzles) for your first flock. They’re harder to keep healthy and lay fewer eggs.

Your First-Year Checklist

If you’re seriously considering this, here’s the order of operations:

  1. Check local zoning. Many cities allow hens but ban roosters. HOAs vary wildly.
  2. Build or buy the coop before you order chicks. You’ll need it sooner than you think.
  3. Order sexed pullets from a hatchery in late winter for spring delivery.
  4. Set up the brooder with a heat plate (not a heat lamp — fire risk is real).
  5. Predator-proof the run with hardware cloth, buried apron, and locking latches.
  6. Find a chicken-savvy vet or experienced keeper in your network before an emergency.
  7. Plan for vacation coverage — chickens need daily care.

The Takeaway

Backyard chickens are not a money-saving project. They’re a food sovereignty project. You’re trading dollars for control, knowledge, and the kind of skill that doesn’t get returned to the manufacturer. That’s a deal I’ll take every time.

If you’re going to do it, do it once and do it right. Build the coop you won’t have to rebuild. Buy the breeds that actually lay. Predator-proof like a raccoon’s reading the blueprints. And know that your first egg, sometime around month six, will probably be the most expensive egg you’ve ever eaten — and the best one.

Your challenge this week: Walk your property. Pick the spot for a coop. Measure it. Check your zoning rules. Don’t buy anything yet. Just commit to whether this is real or romantic. The answer determines everything else.

Chickens are usually the first livestock on a self-reliant property — rarely the last. The Self-Sufficient Backyard maps out how eggs, garden, water, and energy fit together into one working homestead.