Root Cellar 101: How to Store a Winter’s Worth of Food Without Electricity

Your freezer is a single point of failure. One long power outage, one dead compressor, one ice storm that takes the grid down for four days in January, and a season’s worth of food turns into a garbage bag. People who grow or hunt their own food figure this out eventually — usually the hard way. The fix is older than electricity and it still works better than most people expect: a root cellar. No compressor, no power bill, no moving parts to break. Just physics, doing the job it’s done for a few thousand years.

Here’s the part nobody tells you: you almost certainly don’t need to dig a hole in your yard. A “root cellar” is really just a set of conditions, and there’s a good chance you already own a corner of your house that hits them. This is the whole system — what those conditions are, what actually stores well, and how to build a working setup this weekend for the cost of a couple of buckets.

The Two Numbers That Are the Whole Game

Forget everything fancy. A root cellar is any space that holds 32–40°F and 85–95% humidity. That’s it. That’s the target. Cold slows the enzymes and microbes that rot food; high humidity stops your carrots and potatoes from shriveling into leathery nothing. Get those two numbers right and produce that would last two weeks on your counter will last four to eight months.

Most people’s failures come from missing one of the two. A dry basement corner is cold enough but sucks the moisture out — everything wrinkles. A humid crawlspace holds moisture but sits at 55°F — everything sprouts and molds. You need both, together. Keep that in your head as the pass/fail test for any spot you’re considering.

You Probably Already Have One (Go Look)

Before you buy or build anything, walk your property with a thermometer and find the naturally coldest, most stable spot. The best root cellar is one you didn’t have to make. Candidates, roughly best to worst:

  • An unheated basement corner against a north-facing foundation wall — the gold standard for most homes. The earth on the other side of that wall stays cool and steady year-round.
  • A bulkhead stairwell or the space under an exterior stair — often the coldest pocket in the house in winter.
  • An unheated attached garage in a cold climate — workable, but watch it doesn’t dip below freezing on the worst nights.
  • A closet on an exterior north wall with the heat vent closed off — surprisingly effective in an old, drafty house.
  • A buried trash can or cooler in a shaded spot outside — the “no basement, no problem” option, covered below.

My honest opinion: most people skip this walk-around and jump straight to some Pinterest root-cellar-in-a-hillside project. Don’t. Spend one cold week logging temps in the spots you already have. The winner is usually good enough to start, and you’ll learn what you’re actually working with before you spend a dime.

What Actually Stores (and What’s a Waste of Time)

Not everything belongs in a cellar. Some crops were practically designed for it; others will rot no matter what you do. Know the difference before you fill it.

  • Stars (months of storage): potatoes, carrots, beets, turnips, parsnips, rutabagas, winter squash, onions, garlic, cabbage, and apples. These are the crops that made cellars a survival technology.
  • Do-able with care: pears, leeks, celeriac, and Brussels sprouts on the stalk.
  • Don’t bother: tomatoes, cucumbers, summer squash, berries, and most leafy greens. They’re high-water, thin-skinned, and will slime out in days. Can, freeze, dehydrate, or ferment those instead.

One critical split: squash, onions, and garlic want it drier and a touch warmer (50–60°F, 60–70% humidity), while roots want it cold and damp. If you can create two zones — a colder, wetter floor and a higher, drier shelf — you’ll store both groups happily in the same space.

The Four Rules That Keep Food From Rotting

A good space is half the battle. How you handle the harvest is the other half. Break any of these and you’ll be composting your work by December.

  • 1. Cure first. Potatoes, onions, garlic, and squash need a week or two of curing before they go in — a warm, airy, out-of-sun spot that toughens the skins into a protective barrier. Skipping this is the number-one rookie mistake.
  • 2. Store only the perfect ones. Every bruise, nick, or soft spot is an open door for rot — and one bad potato genuinely spoils the barrel. Eat the damaged produce now; cellar only the flawless. Never wash the dirt off roots either; that soil is a protective coat, and washing invites mold.
  • 3. Keep the ethylene apart. Apples and pears give off ethylene gas that makes everything nearby sprout and age fast. Store fruit in a separate container or a different corner from your vegetables. This one mistake ages a whole cellar prematurely.
  • 4. Check weekly and pull the losers. Ten minutes a week: scan for softness, smell for rot, remove anything turning before it takes its neighbors with it. “Store it and forget it” is how you find a liquefied box in March.

The Weekend Build: A Working Cellar for Under $50

No basement? No excavator? You can still store a real quantity of food with a few dollars of materials. Two proven setups:

The buried can. Sink a clean metal or heavy-duty plastic trash can into the ground on the shaded north side of a building or a hill, up to about four inches below the rim. Drill a few small drainage holes in the bottom, set it on a couple inches of gravel, layer your roots in damp sand or sawdust, cap it with the lid, and pile a foot of straw or leaves on top for insulation. The surrounding earth holds it near ideal all winter. Dig down, grab a week’s carrots, re-cover. It’s crude and it flat-out works.

The basement bin system. In that cold north corner, stack food-grade buckets or wooden crates and pack roots in layers of slightly damp sand — each carrot or beet not touching its neighbor. The sand holds humidity right against the produce, which solves the classic dry-basement shrivel. A shallow pan of water on the floor and a wet towel over the bins buys you extra humidity if the room runs dry. Total cost: a few buckets and a bag of sand.

Whatever you build, get airflow right. A cellar needs a little fresh air — a low intake and a high outlet let cool air in and stale, ethylene-laden air out. Even a couple of screened vents beat a sealed box.

The One Tool You Actually Need

You don’t need much, but you do need to know your numbers instead of guessing. A cheap combination thermometer/hygrometer — ideally one that logs the min and max — is the single most useful thing you can put in a cellar. It tells you whether that corner actually holds 34°F overnight or quietly dips to 28°F and freezes your potatoes, and whether your humidity is 90% or a produce-killing 50%. Set it, read it for a week, and adjust before you commit a harvest. Everything else — buckets, sand, crates — you probably have in the garage already.

Why This Is Worth Doing

A root cellar is one of the highest-leverage self-reliance moves there is. It costs almost nothing, it runs on zero electricity, and it turns a garden or a good sale at the farm stand into food that’s still feeding you in February. It’s also independence in the most literal sense: the freezer needs the grid, the cellar needs the ground. When the power flickers, one of those keeps working.

A root cellar closes one loop — storing what you grow. For the full picture of a self-reliant property — water catchment and storage, growing a year of food, and off-grid power, all in one plan with nobody upselling you — The Self-Sufficient Backyard lays out the whole system start to finish.

Your Challenge This Week

Take a thermometer and find the coldest, most stable spot in or around your home. Log it morning and night for seven days. If it holds anywhere near 32–40°F, you’ve just found your cellar — and this fall, instead of watching the last of the garden go soft on the counter, you’ll be walking downstairs in the dead of winter and pulling out carrots that taste like October. Go find your cold corner.

Well Water vs City Water: Testing, Treatment, and the Real Costs

Most people never actually choose between well water and city water. You buy a house, and whatever pipe was already in the ground becomes your water for the next 20 years. You don’t think about it again until the coffee tastes like a swimming pool, the shower glass fogs up with white crust, or the kid’s bathwater comes out faintly orange.

Here’s the thing nobody tells you: both kinds of water need attention. City water isn’t automatically clean, and well water isn’t automatically poison. The difference is who’s responsible — and once you’re on a well, that’s you. So let’s break down what each one actually is, what to test for, and what it really costs to make either one safe to drink. No fear-mongering, no $8,000 sales pitch from a guy in a polo shirt. Just the real picture.

The Core Difference: Who’s the Utility?

City water is treated by a municipal plant, disinfected (usually with chlorine or chloramine), and tested constantly to meet EPA standards before it leaves the plant. The catch: it then travels miles of old pipe — sometimes lead, sometimes cast iron from the 1950s — including the service line running into your house. So your tap water can be worse than what left the plant.

Well water gets zero treatment unless you do it. You are the utility. No one is monitoring it, no one is sending you a quality report, and no one is going to call you when the nitrates climb after a wet spring spreads fertilizer runoff into the aquifer. The upside? No monthly bill and no chemicals you didn’t put there yourself. The downside is the entire rest of this article.

Step One — and It’s Non-Negotiable: Test the Water

You cannot treat what you haven’t measured. This is the single most-skipped step and the one that actually matters. Whether you’re on a well or city, you start with a test.

The cheap home-strip route: A kit like the Health Metric Drinking Water Test Kit runs about $25 and screens for bacteria, lead, pesticides, nitrates, hardness, chlorine, and pH in a few minutes. It’s not lab-grade, but it tells you whether you have a problem worth chasing.

The do-it-right route: Mail a sample to a certified lab. SimpleLab’s Tap Score ($150–$300 depending on panel) sends you a bottle, you ship it back, and you get a real report telling you exactly what’s in your water in parts-per-billion — plus what each contaminant means and how to fix it. For a well, this is worth every penny. Do it once at purchase, then re-test annually (bacteria + nitrates at minimum).

The everyday gauge: A pocket HM Digital TDS-3 meter ($15) reads total dissolved solids instantly. It won’t tell you what’s in the water, but it’s a great way to spot a sudden change and to confirm a filter is actually doing something.

My honest opinion: if you’re on a well and you’ve never sent a real lab sample, stop reading and order one today. I’ve watched people spend thousands on a softener their water didn’t need while ignoring a coliform problem that actually could’ve made them sick. Test first. Always.

City Water: What You’re Actually Dealing With

If you’re on municipal water, your problems are usually narrow and cheap to solve:

  • Chlorine / chloramine taste and smell. A simple activated-carbon filter handles this — a pitcher, a fridge line, or an under-sink unit.
  • Lead from your own plumbing. Common in homes built before 1986. This is the real risk, and it requires a filter certified to NSF/ANSI 53 for lead — not just any carbon block.
  • Hardness. Some cities deliver genuinely hard water. White scale on faucets, spots on glasses, soap that won’t lather.

For most city dwellers, a good under-sink reverse-osmosis unit like the APEC ROES-50 (~$200) at the kitchen tap plus a carbon shower filter covers 90% of complaints. You don’t need to treat your whole house to get clean drinking water.

Well Water: You Are the Treatment Plant

Well water issues run deeper and depend heavily on your geology. The usual suspects:

  • Sediment / sand — grit from the aquifer. First thing every well setup needs to knock out.
  • Hardness (calcium & magnesium) — scale in pipes and water heaters, the #1 reason wells get a softener.
  • Iron & manganese — orange/brown staining on fixtures and laundry.
  • Sulfur — the dreaded rotten-egg smell.
  • Bacteria (coliform/E. coli) — the one that can actually hurt you. Killed with UV or chlorination.
  • Nitrates & pH — runoff and acidity, both common in rural ag country.

A typical well treatment train, in order of water flow: sediment filter → softener (or iron filter) → UV sterilizer → carbon → optional RO at the kitchen. You don’t necessarily need all of it — your lab report tells you which stages to build.

Real gear, real numbers:

  • Whole-house sediment + carbon: an iSpring WGB22B 2-stage runs ~$160 and handles grit and chlorine/taste for the whole house.
  • Water softener: a Whirlpool WHES40E is ~$600–700 and tames hardness for a typical 1–6 person home.
  • UV sterilizer: a VIQUA point-of-entry UV system (~$400–600) kills bacteria without chemicals — essential if your test shows coliform.

The Real Cost Comparison

Everyone asks “which is cheaper?” The answer is: it depends on your time horizon.

Cost City Water Well Water
Upfront $0 (connection exists) $5,000–$15,000 to drill
Monthly bill $40–$80 $0 (just pump electricity, ~$3–5)
Treatment $200 RO + filters $1,000–$2,500 full train
Ongoing Filter cartridges ~$60/yr Salt, filters, UV lamp, pump service ~$200–400/yr

A well costs a fortune up front and then is nearly free to run. City water is free to start and bleeds you slowly. Over 20 years on a property, a paid-off well usually wins — but only if you stay on top of maintenance. Neglect it and a failed pump or a contaminated casing can cost more than a decade of city bills in one weekend.

The Takeaway

Self-sufficiency isn’t about which pipe you have — it’s about knowing what’s in your water and being able to fix it yourself. The person on city water who’s never tested for lead is more exposed than the well owner who tests annually and runs a proper treatment train.

Your challenge this week: Find out what you’re actually drinking. If you’re on city water, look up your municipality’s annual Consumer Confidence Report (it’s free and public — Google “[your city] CCR water”) and grab a $25 home test for lead. If you’re on a well, order a real lab kit and put “re-test water” on your calendar as a recurring annual reminder.

Twenty-five bucks and twenty minutes. That’s the whole cost of knowing — instead of guessing — what comes out of your tap. Do it this weekend.

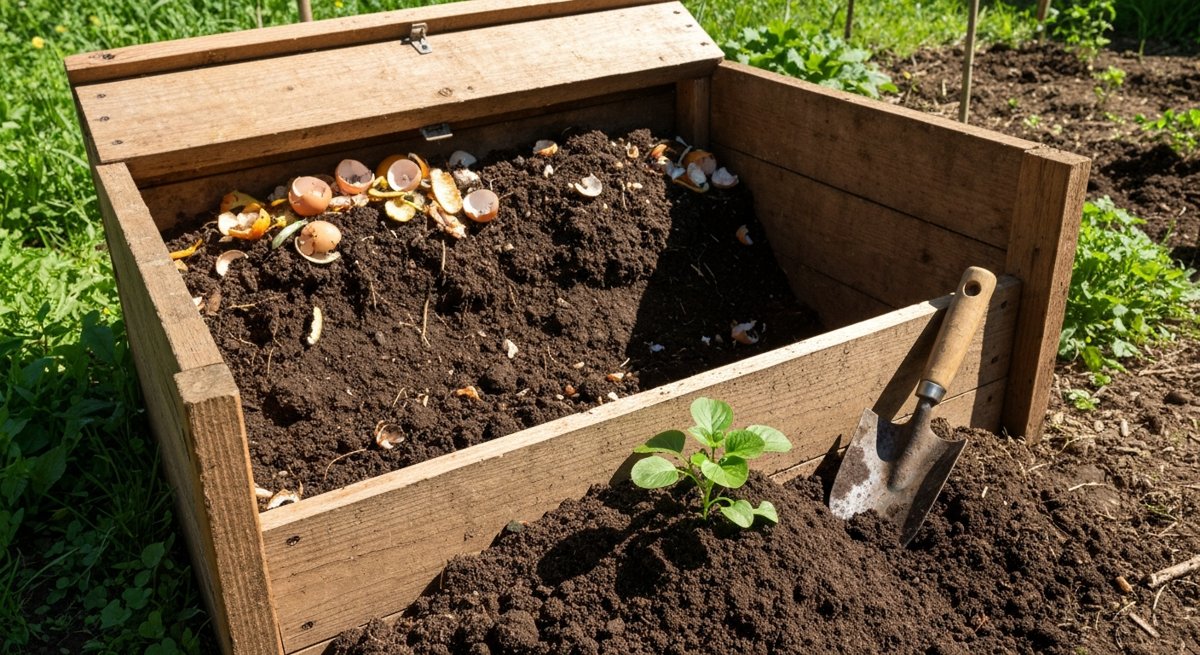
Composting 101: How to Turn Kitchen Waste Into Garden Gold in 90 Days

Here’s a stat that should annoy you: the average American household throws out roughly 500 pounds of food scraps a year. You pay to buy it. You pay to throw it away. Then in spring, you drive to the garden center and pay $8 a bag for compost that’s basically the same thing you just trashed.

Composting fixes this. And no, you don’t need a fancy tumbler, a degree in soil science, or a half-acre back forty. You need a corner of your yard, a pitchfork, and about 90 days. That’s it.

I’ve watched people overthink this for years. The slimy stink pile. The bone-dry stack of leaves that just sat there. The one forgotten for six months. Here’s what actually works, stripped of the gardening-blog fluff.

The 60-second version: Layer “browns” (carbon — dry leaves, cardboard) and “greens” (nitrogen — kitchen scraps, grass) at roughly 3:1 by volume. Keep it damp like a wrung-out sponge. Turn it once a week. In 90 days, you’ve got black gold. That’s the whole skill.

Why Bother? The Honest Pitch

Look, I’m not going to sell you on composting like it’s going to save the planet. The actual benefits are smaller and more practical:

  • Free soil amendment. Finished compost retails for $5-10 per cubic foot. A modest pile produces 10-20 cubic feet a year. That’s $100+ of garden soil you didn’t buy.
  • Half the trash. Food scraps and yard waste are 30-40% of household garbage by weight. Smaller bags, fewer trips, less stink in the can during summer.
  • Plants actually like it more than fertilizer. Compost adds microbes and slow-release nutrients. Synthetic fertilizer is just a salt blast — works fast, dead soil after.
  • It’s a closed loop on your property. Self-sufficiency isn’t a vibe, it’s a habit. Composting is one of the easiest habits to lock in.

If you grow anything — vegetables, fruit trees, a lawn, even houseplants — you should be composting. The math is too good to ignore.

The Only Rule That Matters: Browns and Greens

Forget everything you’ve read about C:N ratios of 30:1. You don’t need to weigh anything. Here’s the only mental model you need:

BROWNS (carbon) — 3 parts GREENS (nitrogen) — 1 part
Dry leaves Vegetable & fruit scraps
Shredded cardboard Coffee grounds (yes, they’re “green”)
Newspaper (no glossy) Grass clippings
Straw / hay Tea bags (staples out)
Sawdust (untreated wood) Eggshells (crushed)
Wood chips Garden trimmings, dead annuals
Pine needles (sparingly) Plant-based food prep scraps

Rough rule: three buckets of brown for every one bucket of green. If your pile is wet and stinky, add browns. If it’s dry and doing nothing, add greens (and water).

What NEVER Goes In

  • Meat, fish, bones. They’ll compost eventually, but they bring raccoons, rats, and a smell your neighbors will remember.
  • Dairy. Same reason. Cheese on the pile = wildlife party.
  • Greasy / oily food. Coats material, blocks airflow, smells.
  • Pet waste (dogs, cats). Carries pathogens that survive a normal backyard pile. Chickens and rabbits are fine.
  • Diseased plants. If a tomato plant got blight, burn it or bag it. Don’t reward the spores.
  • Walnut leaves/wood. Contain juglone, which kills tomatoes, peppers, and a lot of garden crops.
  • Glossy paper, “compostable” plastic. The first leaches chemicals; the second is a lie unless you have a 160°F industrial composter.

The Setup: Three Options, Cheapest to Best

Option 1: Open Pile (Free)

Pick a spot. Dump stuff. Done. Works fine if you have space and don’t care how it looks. Downside: spreads out, harder to turn, raccoons might dig.

Option 2: Pallet Bin ($0-30)

Four wood pallets, zip-tied or wired at the corners, makes a 4’x4′ bin. Hardware stores and warehouses give pallets away. This is what 90% of serious gardeners use. Add a second bin next to it for the “finishing” pile and you’re set for life.

Option 3: Tumbler ($120-250)

Enclosed plastic drum on a crank. Pros: keeps animals out, looks tidy, easy to turn. Cons: small capacity, plastic degrades in UV, you’ll outgrow it the first year you garden seriously. Buy a tumbler if you’re in a suburb and worried about appearances. Build a pallet bin if you actually want compost.

My take: Pallet bin every time. Tumblers look great on Instagram but produce a fraction of the volume. A double pallet bin setup (active + curing) costs under $30 and outlasts three tumblers.

The 90-Day Build

Day 1: Lay the Base

Drop 4-6 inches of coarse browns on the ground — twigs, corn stalks, rough mulch. This creates airflow underneath. Don’t skip this. A compacted pile is a dead pile.

Days 1-30: Build the Pile

Add material in alternating layers as you generate it. Bucket of kitchen scraps from the week? Cover it with two buckets of dry leaves or shredded cardboard. Always finish a fresh addition with browns on top — that’s what keeps the smell down and the flies out.

Your target size is a cube roughly 3 feet on each side. Smaller piles don’t generate enough internal heat. Bigger gets hard to turn. Three feet cubed is the sweet spot.

Days 30-60: Turn and Wait

Once the pile is built, stop adding to it. Start a second pile for new scraps. The first pile is now “finishing.”

Turn it once a week with a pitchfork or compost aerator. “Turning” means moving the outside material to the inside. The center cooks at 130-150°F when it’s working right. You’ll see steam rising on cool mornings — that’s the win.

Check moisture every turn. Squeeze a handful. Water should bead but not drip. Too dry? Hose it down. Too wet? Add browns and fluff it.

Days 60-90: Cure

By day 60 the pile has shrunk by half and most material is unrecognizable. Stop turning. Let it sit. The microbes do their last work and the pile cools down.

By day 90 you’ve got dark, crumbly, earthy-smelling compost. If it still smells like rotten anything, it’s not done. Give it another two weeks.

Reality check: 90 days is the fast version, assuming summer heat, good carbon/nitrogen balance, and weekly turning. In winter or with a neglected pile, it’s 6-12 months. Both work. The microbes don’t care about your timeline.

The Five Mistakes That Kill 90% of Backyard Piles

  1. Too much green, not enough brown. Result: slimy, stinky, attracts flies. Fix: dump in shredded cardboard or dry leaves and turn it.
  2. Pile too small. A 2-foot pile never gets hot enough. Build to 3x3x3 or bigger.
  3. Bone dry. Microbes need moisture. If it looks like a leaf pile, hose it down until it’s sponge-damp.
  4. Never turning it. A pile that doesn’t get turned still composts — in 18 months instead of 3. Turn weekly.
  5. Putting in stuff that doesn’t belong. Meat, dairy, dog poop. You’ll regret it within a week.

The Kitchen Side: Make It Effortless

If walking out to the pile every time you peel a carrot sounds annoying, that’s because it is. Here’s the system that actually sticks:

  • Counter caddy. A small lidded container (1 gallon) on the counter. Charcoal filter in the lid kills smell. Empty it every 3-5 days. Stainless or ceramic — plastic stains and holds odors.
  • Freezer trick (game changer). Keep a gallon zip bag in the freezer. Toss scraps in as you cook. Empty it weekly. Zero smell, zero fruit flies, zero excuses. This is the move.
  • Outdoor 5-gallon bucket with lid. If you generate a lot of yard waste, stage it next to the pile so you only have to walk out once a week.

What to Do With Finished Compost

Once it’s done, the use cases are endless:

  • Top-dress garden beds with 1-2 inches in spring and fall.
  • Mix into potting soil at a 1:3 ratio for container plants.
  • Side-dress tomatoes, peppers, squash mid-season for a nitrogen boost.
  • Compost tea. One shovelful in a 5-gallon bucket of water, steep 24 hours, water plants. Cheap liquid fertilizer.
  • Lawn topdressing. Quarter-inch layer in early fall. Best lawn treatment that exists, period.

The Honest Tradeoffs

Composting isn’t free time-wise. You’re looking at maybe 30 minutes a week — 5 minutes emptying the counter caddy, 10-15 minutes turning the pile, plus occasional sourcing of browns (free leaves in fall, cardboard from any delivery).

It’s also not magic. A bad pile won’t ruin anything, but it also won’t produce anything useful. The difference between people who get compost and people who get a wet pile of garbage is one thing: turning the pile. Everything else is forgivable.

Your 90-Day Challenge

This weekend: Build a pallet bin or designate a corner of the yard. Lay your coarse base layer. Put a counter caddy or freezer bag in your kitchen.

Next 30 days: Build the pile. Aim for 3’x3’x3′. Layer browns and greens 3:1. Always finish with browns on top.

Days 30-60: Stop adding. Start pile #2. Turn pile #1 every weekend.

Day 90: Sift out the finished compost. Top-dress one garden bed. Notice it’s the best soil you’ve ever had.

Report back. I want to know how your pile is doing.

Self-sufficiency isn’t about prepping for collapse or going off-grid. It’s about closing small loops on your property — turning waste into resource, reducing what you buy, getting your hands in the dirt. Compost is the most basic, most ancient version of this. It’s literally what soil has been doing since plants existed. You’re just helping it along.

Build the bin. Start the pile. Stop throwing money in the trash.

Composting closes one loop; there are dozens more. For the full playbook on the rest — water, food, soil, and power — The Self-Sufficient Backyard walks through the whole system.

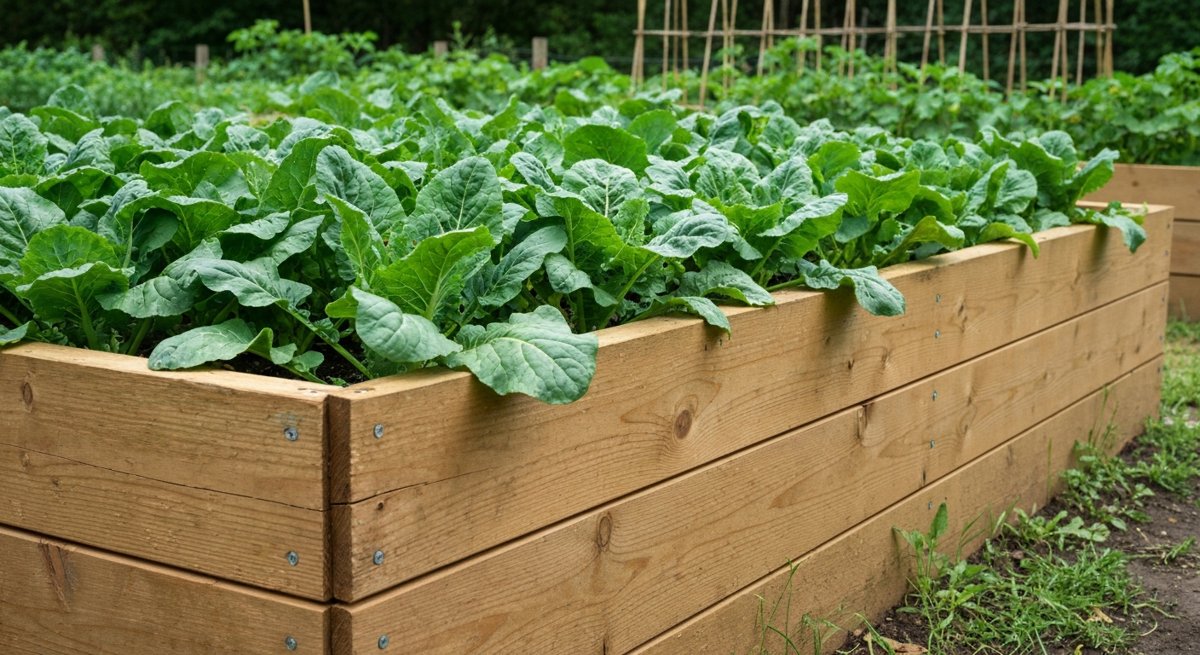
How to Build Raised Garden Beds That Last 10+ Years (Without Cedar Premium)

I’ve built raised beds three times in my life. The first set rotted in 4 years. The second set warped and split in 6. The third set is still standing strong at year 11 — and I’d bet on another decade easy. The difference wasn’t expensive lumber. It was four specific decisions I didn’t know to make the first two times around.

If you’re about to drop $400 on a single 4×8 cedar bed because that’s what every “homesteading expert” on Instagram swears by — pump the brakes. There’s a better way. It’s cheaper, lasts longer, and doesn’t require a single board of cedar.

Why Most Raised Beds Fail So Fast

Before we talk materials, let’s talk about what actually kills a raised bed. It’s not what most people think.

  • Wet wood-to-soil contact — Soil holds moisture against the wood 24/7. Even rot-resistant species lose to constant moisture.
  • Fasteners that fail before the wood does — Drywall screws and bright steel rust out in 2-3 years. Your bed falls apart while the boards are still solid.
  • Bowing from soil pressure — A full 4×8 bed has roughly 1,000 lbs of wet soil pushing outward. No bracing = bulging walls = cracked corners.
  • Ground contact at the bottom edge — That bottom board is sitting in a wet sponge year-round. It’s always the first thing to go.

Fix those four things and your bed will outlive your interest in gardening. Here’s how.

The Material Decision: Skip Cedar

Cedar is the default recommendation because it’s naturally rot-resistant and looks beautiful. Both true. But at $8-12 per linear foot of 2×10, a single 4×8 bed runs $300+ in lumber alone. And in wet climates, even cedar gives you 8-10 years tops.

My honest opinion after building dozens of beds: ground-contact rated pressure-treated lumber is the best value for a long-lasting bed. The modern stuff (ACQ or MCA-treated since 2003) does NOT use arsenic. The EPA, USDA, and multiple peer-reviewed studies have found no measurable health risk for growing food in modern PT lumber. I’ll die on this hill.

If you can’t get past the mental hurdle (totally fair — I’ve been there), the runner-up options ranked by longevity per dollar:

  1. Concrete block (CMU) — Lasts effectively forever. ~$2.50/block. Looks industrial but functional.
  2. Cinder/landscape block — Stackable, no mortar needed for short beds. 50+ year life.
  3. Black locust or Osage orange — If you can source it locally, these natives outlast cedar 3:1. Hard to find.
  4. Cedar — Beautiful, expensive, 8-12 years.
  5. Douglas fir or pine, untreated — Don’t bother. You’ll be rebuilding in 4 years.

For the rest of this guide, I’ll assume you’re going with 2×10 ground-contact PT lumber. The technique transfers to any wood.

The Build: A 4×8 Bed That Outlives the Dog

Materials List (~$95-110)

  • (3) 2x10x8′ ground-contact PT lumber — one cut in half for the short sides
  • (4) 4x4x12″ PT post offcuts for inside corner blocks
  • (1) box of 3″ structural screws — get the hot-dipped galvanized or ceramic-coated ones, NOT bright steel drywall screws
  • (2) 24″ lengths of #4 rebar for cross-bracing the middle
  • (1) roll of 6-mil black plastic sheeting or pond liner offcuts
  • (1) roll of hardware cloth (1/2″) if you have gophers/voles

Step 1 — Level the Ground (Don’t Skip This)

A bed that’s 2″ out of level will pool water on one side and dry out the other. Stake the corners, run a string line, and remove sod where needed. You’re not building a foundation — you just want the four corners within 1/2″ of each other.

Step 2 — Pre-Drill and Use the Right Screws

This is the single biggest upgrade from typical bed builds. Pre-drill every screw hole — PT lumber splits if you don’t, especially near the ends. Use 3″ structural screws rated for ACQ-treated wood (the box will say so). Bright steel drywall screws will literally dissolve in PT lumber within 18 months due to the copper in the treatment.

Step 3 — Inside Corner Blocks Instead of End Screws

Don’t screw the side boards into the end grain of the short boards. End grain holds screws about as well as wet cardboard. Instead, cut four 4×4 PT offcuts to your bed height and screw both adjoining boards into the 4×4. Now you have side grain holding everything together — roughly 5x stronger.

Step 4 — Brace the Middle with Rebar

For any bed longer than 6 feet, the long sides will bow outward as soil saturates. Drive two pieces of #4 rebar deep into the ground on the outside of each long board, at the 1/3 and 2/3 marks. Total cost: $4. Total bow over 10 years: zero.

Step 5 — The Plastic Liner Trick That Doubles Lifespan

Here’s the move that separates a 5-year bed from a 15-year bed: line the inside walls (not the bottom) with 6-mil black plastic or pond liner. Staple it to the top edge of the boards so soil moisture never touches the wood. You leave the bottom open for drainage and worm migration. The wood stays dry on the inside face. The outside dries quickly after rain. Decay rate drops by an order of magnitude.

If you’re in gopher or vole country, lay 1/2″ hardware cloth across the entire bottom before filling. Tack it up the sides 4 inches. Saves your root crops from being eaten from below — I learned this the expensive way after losing an entire carrot harvest in 2019.

Fill It Right (Hugelkultur-Lite)

A 4x8x10″ bed needs about 27 cubic feet of soil. At $8-10/bag for quality topsoil mix, you’re looking at $200+ to fill it. There’s a better way: layer it.

  1. Bottom 4-5 inches: Logs, branches, sticks, woody yard waste. Free. Decomposes slowly and acts like a sponge, holding water for dry spells.
  2. Next 2-3 inches: Leaves, grass clippings, kitchen scraps, cardboard. Free.
  3. Top 4-6 inches: Quality topsoil + compost mix. This is your actual root zone. Spend the money here.

First year, the wood layer settles and you’ll need to top it up with another inch or two of compost. By year two, you’ve got the best soil on the block.

The Annual Maintenance That Buys You Decades

Once a year — pick a date you’ll remember, mine is the first Saturday in November — do these three things:

  • Walk the bed and tighten any loose screws. PT lumber expands and contracts; corners will eventually back out slightly.
  • Top up with 2-3″ of compost. Beds shrink. Don’t fight it, just feed them.
  • Re-staple any loose liner sections. UV will eventually eat the top edge of exposed plastic — fold it inward under the soil if you see it cracking.

That’s it. 20 minutes per bed per year. In exchange, you get a structure that’ll feed your family for a decade or more.

The Real Cost Comparison

Here’s what 20 years of gardening actually costs by material choice for a single 4×8 bed:

  • Untreated pine: ~$60 every 4 years = $300 + 5 rebuilds of labor
  • Cedar: ~$320 every 10 years = $640 + 1 rebuild
  • PT lumber with liner method: ~$100 every 15+ years = $100-200 total
  • Concrete block: ~$120 once = $120 forever

Pretty straightforward math.

Your Weekend Challenge

Build one bed. Just one. Pick a 4×8 footprint, pick your material, and commit a Saturday to it. Don’t overthink the location — you’ll learn more from one season of actually growing something than from another year of “planning the garden.” The best raised bed is the one that’s actually in the ground.

If you build one this weekend using the techniques above, message me on the site or tag us — I want to see it. And in 15 years when you’re still pulling tomatoes out of it, you’ll thank yourself for spending the extra hour on the corner blocks and the liner.

— Shelle

Once the beds are built, the question is what to put in them. If you want plants that pull double duty — food and natural medicine — the Medicinal Garden Kit is a solid start on a backyard apothecary.

Raising Chickens for Eggs: Startup Costs, Timeline, and What Nobody Tells You

Everybody romanticizes backyard chickens. Fluffy hens, fresh eggs, kids learning where food comes from. It’s a great picture. The reality is dirtier, louder, and a lot more expensive than the Pinterest version — but it’s also one of the most rewarding things you can do on a quarter acre or more. I’ve raised chickens long enough to know the rosy version is a lie of omission. Here’s the real math, the real timeline, and the stuff most “starter guides” leave out because it would scare you off.

The Real Startup Cost (Not the Fantasy)

Online guides love to tell you that you can start raising chickens for “under $200.” That number is either dishonest or assumes you already have a pile of free pallets, scrap lumber, and a chicken-friendly neighbor giving you hens. Here’s what it actually costs to start a small backyard flock of 4–6 hens, doing it right the first time:

Item Budget Build Do-It-Right Build
Coop (4–6 hens) $300 (DIY) $800–1,200 (prefab or quality DIY)
Run / fencing (hardware cloth, posts) $150 $350
Feeders, waterers, nest boxes $60 $120
Brooder setup (heat plate, tub, bedding) $80 $130
6 chicks (sexed pullets) $30 $45
First 6 months of feed $120 $160 (organic)
TOTAL ~$740 ~$1,605–$2,005

My honest opinion: the budget build is where 80% of new chicken keepers start, and 60% of them rebuild within two years because their first coop fell apart, leaked, or got compromised by a raccoon. Spend the money on the coop and the hardware cloth. You can cheap out on feeders. You cannot cheap out on what’s keeping predators from eating your hens at 2 a.m.

The Timeline From Chick to First Egg

This is where the romantic picture gets wrecked. You don’t get eggs in a month. You get eggs in five to seven months, and even then they’re tiny and inconsistent for the first few weeks. Here’s the realistic timeline:

  • Week 0–6: Brooder phase. Chicks live indoors (garage, mudroom, spare bathtub) under a heat plate. They smell. They generate dust. They double in size every week. You will be cleaning a brooder every other day.
  • Week 6–10: Awkward teenager phase. They’re feathered enough to move outside but too small to be fully predator-safe. Most losses happen here.
  • Week 10–18: Pullet phase. They look like chickens. They act like chickens. They produce zero eggs. You’re spending ~$30/month on feed and getting nothing back.
  • Week 18–24: First eggs. Usually small, sometimes shell-less, occasionally laid in weird places. Production ramps over 4–6 weeks.
  • Week 24–28: Reliable laying. A healthy hen now lays 4–6 eggs per week.

If you start chicks in March, you’ll get reliable eggs in late August. Plan accordingly.

The Cost Per Egg Is Not Cheaper Than the Store

Let’s just kill this myth right now. Six hens at peak production give you about 24 eggs per week. That’s 1,250 eggs per year. Annual feed cost runs around $400–$500 for a small flock. Add bedding, supplements, mite treatments, and the inevitable replacement of one hen per year, and you’re at $600/year minimum.

$600 ÷ 1,250 eggs = about $0.48 per egg. That’s $5.76 a dozen. Store eggs are cheaper most weeks. Pasture-raised organic eggs at the farmer’s market are about the same.

So why do it? You’re not raising chickens to save money. You’re raising them because:

  • You know exactly what they ate.
  • The yolks are orange, not yellow — and they taste like food, not Styrofoam.
  • You have eggs when the supply chain hiccups.
  • Kids learn where food comes from in the most direct way possible.
  • The flock turns kitchen scraps and yard pests into protein.

Those are real benefits. Saving money is not.

What Nobody Tells You

This is the section most “how to raise chickens” articles skip. Here’s what you’ll actually deal with:

1. Predators are relentless and creative

Raccoons can open simple latches. Hawks watch your run from the trees. A single weasel can wipe out an entire flock in a night through a hole the size of a quarter. You need hardware cloth, not chicken wire — chicken wire keeps chickens in, not predators out. Bury it 12 inches down and out, or use an apron skirt. Use carabiners on every coop latch.

2. They stop laying in winter

Hens need ~14 hours of daylight to lay consistently. From November through February in most of the U.S., production drops 60–80%. You can run a coop light on a timer to keep production up, but it shortens the hen’s productive lifespan. Your call.

3. They get sick in ways that look like nothing, then die fast

A chicken that “looks a little off” today is often dead by tomorrow. They hide illness until they can’t anymore. Common issues: respiratory infections, egg binding, sour crop, mites, and Marek’s disease. Find a vet or experienced keeper before you need one — most regular vets won’t see chickens.

4. The smell is real

A clean, well-ventilated coop with deep-litter management barely smells. A neglected coop smells like an outhouse on day three. The difference is one bag of pine shavings every few weeks and stirring the bedding once a week. Don’t be the neighbor who ruins backyard chickens for everyone.

5. You’re going to have to deal with death

Hens get old, get sick, get eaten, or stop laying around year 4. You’ll either be culling, paying for vet visits, or burying birds. Know that going in. It’s part of the deal. If you can’t, get your eggs from someone who can.

Best Breeds for Beginners

Stick with dual-purpose, cold-hardy, docile breeds for your first flock. These are the workhorses:

  • Buff Orpington — calm, cold-hardy, good layers (~200 eggs/year), great with kids.
  • Black Australorp — the production champion. 250–300 eggs/year. Quiet and friendly.
  • Plymouth Rock (Barred Rock) — hardy, beautiful, ~250 eggs/year. Tolerates heat and cold.
  • Easter Egger — lays blue/green eggs. Hardy, friendly, great novelty bird in the mix.
  • Rhode Island Red — tough, productive, but can be bossy. Avoid in mixed flocks if you’re new.

Skip the fancy breeds (Silkies, Polish, Frizzles) for your first flock. They’re harder to keep healthy and lay fewer eggs.

Your First-Year Checklist

If you’re seriously considering this, here’s the order of operations:

  1. Check local zoning. Many cities allow hens but ban roosters. HOAs vary wildly.
  2. Build or buy the coop before you order chicks. You’ll need it sooner than you think.
  3. Order sexed pullets from a hatchery in late winter for spring delivery.
  4. Set up the brooder with a heat plate (not a heat lamp — fire risk is real).
  5. Predator-proof the run with hardware cloth, buried apron, and locking latches.
  6. Find a chicken-savvy vet or experienced keeper in your network before an emergency.
  7. Plan for vacation coverage — chickens need daily care.

The Takeaway

Backyard chickens are not a money-saving project. They’re a food sovereignty project. You’re trading dollars for control, knowledge, and the kind of skill that doesn’t get returned to the manufacturer. That’s a deal I’ll take every time.

If you’re going to do it, do it once and do it right. Build the coop you won’t have to rebuild. Buy the breeds that actually lay. Predator-proof like a raccoon’s reading the blueprints. And know that your first egg, sometime around month six, will probably be the most expensive egg you’ve ever eaten — and the best one.

Your challenge this week: Walk your property. Pick the spot for a coop. Measure it. Check your zoning rules. Don’t buy anything yet. Just commit to whether this is real or romantic. The answer determines everything else.

Chickens are usually the first livestock on a self-reliant property — rarely the last. The Self-Sufficient Backyard maps out how eggs, garden, water, and energy fit together into one working homestead.

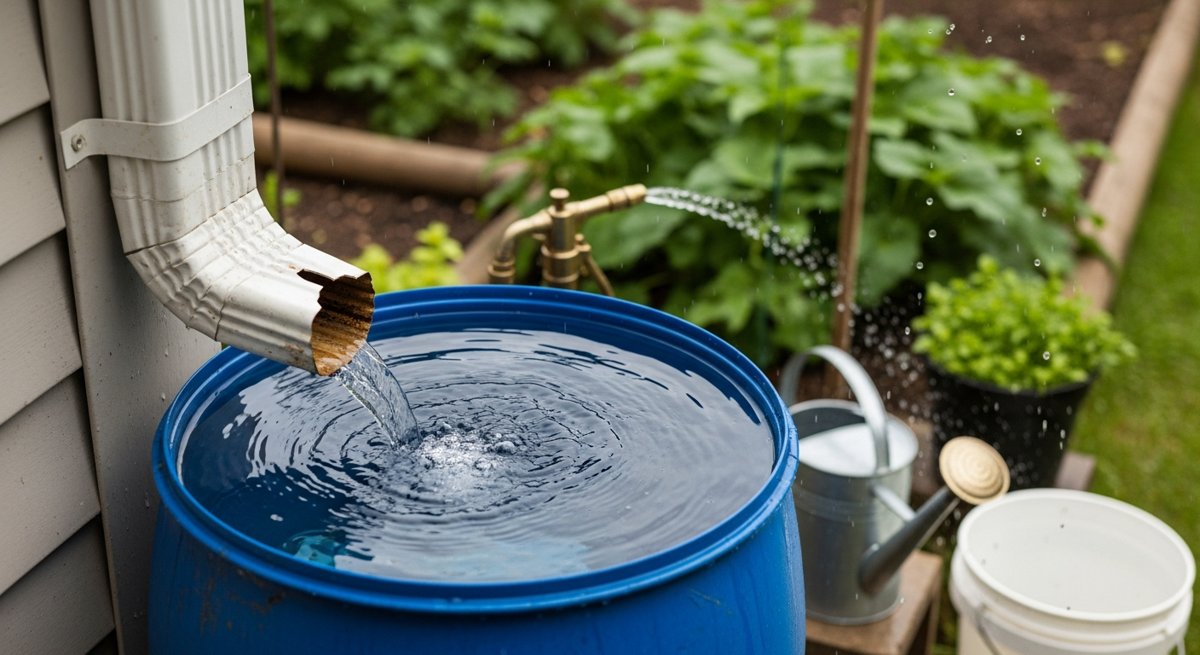
How to Build a Rainwater Collection System for Under $50 (Step-by-Step)

Most people look at their roof during a rainstorm and think nothing of it. Meanwhile, thousands of gallons of free, clean-enough water are pouring off the edges and disappearing into the ground. That’s water you could be using for your garden, your livestock, washing gear, or — with proper filtration — even drinking.

A basic rainwater collection system isn’t complicated. It isn’t expensive. And once it’s set up, it works every single time it rains without you lifting a finger. Here’s how to build one this weekend for under fifty bucks.

Why Bother Collecting Rainwater?

Let’s put some numbers on it. A 1,000-square-foot roof section in an area that gets 30 inches of rain per year will yield roughly 18,000 gallons annually. That’s not a typo. The formula is simple: 1 inch of rain on 1,000 sq ft of roof = about 600 gallons.

Even a modest setup with a single barrel captures 50+ gallons per decent rainstorm. That’s enough to keep a small garden watered for a week in the summer.

Beyond the free water, there are real practical reasons:

  • Rainwater is better for plants. No chlorine, no fluoride, no mineral buildup. Your garden will genuinely grow better with it.
  • It reduces your water bill. Outdoor watering can account for 30-50% of residential water use in summer months.
  • It’s a backup supply. Municipal water fails. Wells run dry. Having 200 gallons stored isn’t paranoia — it’s planning.
  • It reduces runoff. Less water flooding your yard, less erosion, less strain on storm drains.

What You Need (The Sub-$50 Shopping List)

You don’t need a fancy commercial rain barrel system. Here’s what actually works:

Item Approx Cost Where to Find
55-gallon food-grade barrel $15–25 Facebook Marketplace, car washes, food distributors
3/4″ brass spigot $6–8 Hardware store
3/4″ bulkhead fitting (or rubber washers + lock nut) $4–6 Hardware store
Window screen mesh (for inlet filter) $4 Hardware store
Downspout diverter OR flexible downspout adapter $8–12 Hardware store / Amazon
Overflow fitting + short hose $5 Hardware store
Teflon tape, silicone sealant $3 Already in your garage, hopefully
Total $35–50

Pro tip on the barrel: Food-grade is non-negotiable. You want barrels that held juice concentrate, soy sauce, vinegar — not chemicals. Most car washes sell their used soap barrels for $10-15 and those work great too. Avoid anything that held industrial chemicals, obviously.

The Build: Step by Step

Step 1: Pick Your Location

Find a downspout that drains from the largest roof section possible — more square footage means more water per storm. The ground needs to be level and firm. A full 55-gallon barrel weighs about 460 pounds, so don’t put it on soft dirt or a wobbly deck.

Ideally, you want it elevated. Even 12-18 inches of elevation (a couple of cinder blocks or a small wooden platform) gives you gravity-fed pressure through the spigot. This matters if you want to run a hose from it without a pump.

Step 2: Prep the Barrel

You need three holes:

  1. Inlet hole (top): Cut a hole in the lid large enough for your downspout adapter to fit through — typically 3-4 inches. If the barrel has a removable lid, even easier. Secure window screen mesh over this opening with a hose clamp or zip ties. This keeps mosquitoes, leaves, and debris out.
  2. Spigot hole (bottom): Drill a 7/8″ hole about 3-4 inches from the bottom of the barrel. Install the bulkhead fitting from inside, add the spigot on the outside. Teflon tape on all threads, silicone around the exterior seal. Let it cure 24 hours.
  3. Overflow hole (top): Drill another hole about 2 inches from the top on the opposite side from the inlet. Install a bulkhead fitting and attach a short garden hose to direct overflow away from your foundation. This is the hole people skip — and then wonder why water is pouring over the top and pooling next to their house.

Step 3: Connect to the Downspout

You have two options here:

Option A — Flexible adapter (easiest): Cut the downspout above barrel height. Attach a flexible corrugated adapter that runs from the cut downspout into the top of your barrel. Takes about 10 minutes.

Option B — Diverter (better): Install an inline diverter on the downspout. These redirect water to the barrel when it’s raining and automatically bypass when the barrel is full. Slightly more work to install, but much cleaner and you don’t lose your normal downspout function.

I’d go with Option B if you can. The extra 15 minutes of installation saves you from having to think about it ever again.

Step 4: Set It and Forget It

Place the barrel on your platform, connect everything, and wait for rain. After the first rain, check for leaks around the spigot and overflow fittings. Tighten as needed. That’s it. You’re collecting water.

Mistakes That’ll Bite You

  • Skipping the screen mesh. Congratulations, you just built a mosquito breeding facility. Always screen the inlet. No exceptions.
  • No overflow plan. Water WILL overflow. Direct it somewhere intentional — a garden bed, a rain garden, or at minimum away from your foundation.
  • Using a non-food-grade barrel. Those blue chemical drums are cheap for a reason. The residue leaches into the water. If you’re watering food crops, this matters a lot.
  • Forgetting about winter. In freeze zones, drain your barrel before the first hard freeze or the expanding ice will crack it. Disconnect the downspout adapter and store the barrel upside down.
  • Not checking local regulations. Most states allow residential rainwater collection, but a handful have restrictions (looking at you, Colorado — though even they relaxed their rules). Spend 5 minutes checking before you build.

Scaling Up (When You’re Hooked)

One barrel is a start. Most people who build one end up with three within a year. You can daisy-chain barrels by connecting the overflow of one to the inlet of the next. Same concept, just more capacity.

For serious storage, 275-gallon IBC totes (Intermediate Bulk Containers) show up on Marketplace for $50-75. They’re ugly, but one tote holds five times what a barrel does. Paint it dark or build a simple screen fence around it.

And if you’re thinking about drinking the water — you absolutely can, but you need proper filtration. A first-flush diverter (dumps the first gallon of dirty roof water), a sediment filter, and a quality activated carbon or ceramic filter will get you there. That’s a separate project, but the collection system is the same.

The Takeaway

Here’s my honest take: rainwater collection is one of the highest-return, lowest-effort self-sufficiency projects you can do. You spend a Saturday afternoon and $40, and from that point forward, the sky literally delivers free water to your property every time it rains. No ongoing cost. No maintenance beyond cleaning the screen once a season.

It won’t make you fully water-independent, but it changes how you think about resources on your property. And that shift in thinking — from consumer to collector — is where real self-sufficiency starts.

Your challenge: This weekend, go look at your downspouts during the next rain. Pick the one dumping the most water. That’s where your first barrel goes. Get the barrel this week, build it next Saturday. By the end of the month, you’ll be collecting water without thinking about it.

Rain catchment is the first step toward water independence. For the bigger picture — storage, filtration, gravity feed, and the rest of an off-grid water plan — The Self-Sufficient Backyard lays it out start to finish.