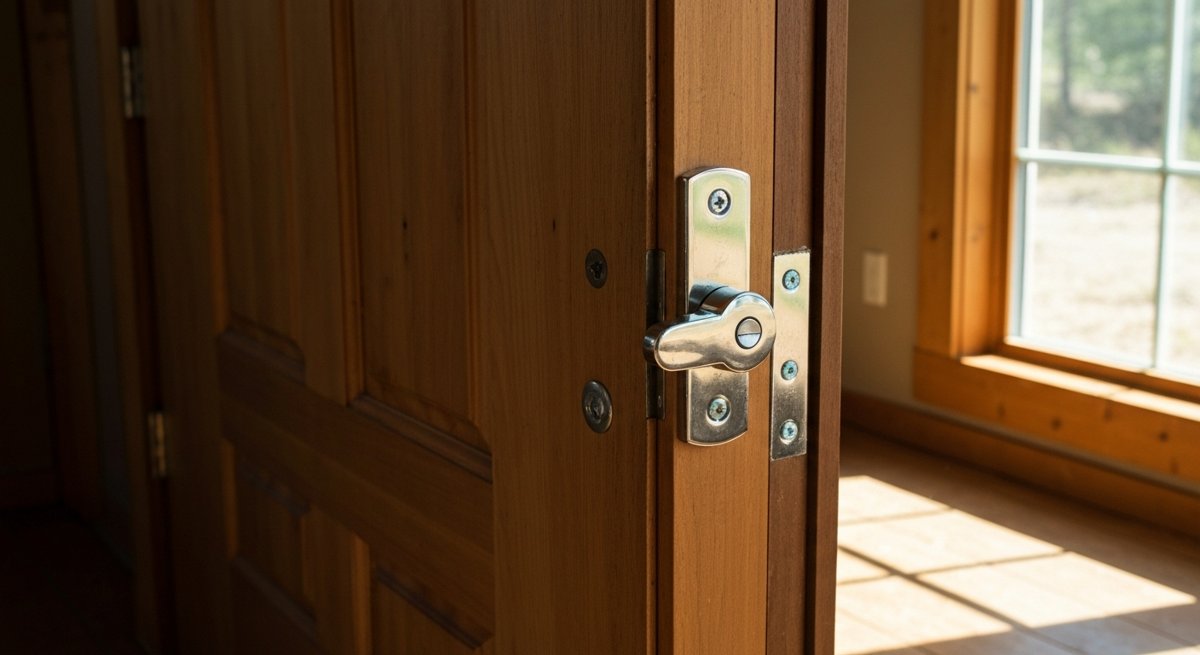
Door Reinforcement 101: The $30 Fix That Stops Most Home Break-Ins

Here’s a stat that should make you uncomfortable: the FBI estimates that 34% of burglars enter through the front door. Not a window. Not a side entrance. The front door — the one you lock every night and assume is doing its job.

The problem isn’t your lock. It’s the frame. Most residential door frames are held together by 3/4-inch screws driven into soft pine trim. One solid kick — sometimes less — and the whole thing splits like firewood. Your deadbolt is still locked. It’s just lying on the floor with a chunk of wood attached to it.

The good news? Fixing this is absurdly cheap, takes about an hour, and requires nothing more than a drill and a screwdriver. This is hands-down the highest-impact home security upgrade you can make this weekend.

Why Your Door Frame Is the Weak Link

Builders don’t frame doors for security. They frame them for cost and speed. The typical interior and exterior door frame setup uses:

  • Short screws (3/4″ to 1″) that only bite into the soft door jamb trim — not the structural framing behind it
  • A tiny strike plate held by two small screws — the little metal rectangle where your deadbolt tongue goes
  • No reinforcement around the hinge side, which is just as vulnerable to forced entry

When someone kicks a door, the force concentrates on the strike plate area. Those short screws rip out of the trim instantly. It doesn’t matter if you have a $200 smart lock — the frame gives up before the lock does.

The Fix: A Door Reinforcement Kit (Under $30)

What you need is a door jamb reinforcement kit. Several companies make them — Door Armor, StrikeMaster, EverJamb — and they all work on the same principle: replace the weak points with heavy-gauge steel plates secured by 3.5-inch screws that anchor into the wall studs.

A typical kit includes three components:

  1. A full-length strike plate — Instead of that little 1×3-inch plate, you get a steel plate that runs 36-48 inches along the door jamb. It distributes kick force across a much larger area and is held by multiple 3.5″ screws sunk into the stud.
  2. Hinge reinforcement plates — Steel plates that sit behind your existing hinges, again anchored with long screws into the stud. This prevents the door from being pried from the hinge side.
  3. A door edge shield — Some kits include a steel wrap for the door edge itself around the deadbolt area, preventing the door from splitting at the bolt.

Total cost: $25-$45 depending on the kit. Total install time: 45 minutes to an hour if you take your time.

Step-by-Step Install

Tools you need: drill/driver, a #2 Phillips or square bit (usually included), a pencil, and maybe a chisel if you’re fitting a recessed plate.

Step 1: Replace the Strike Plate

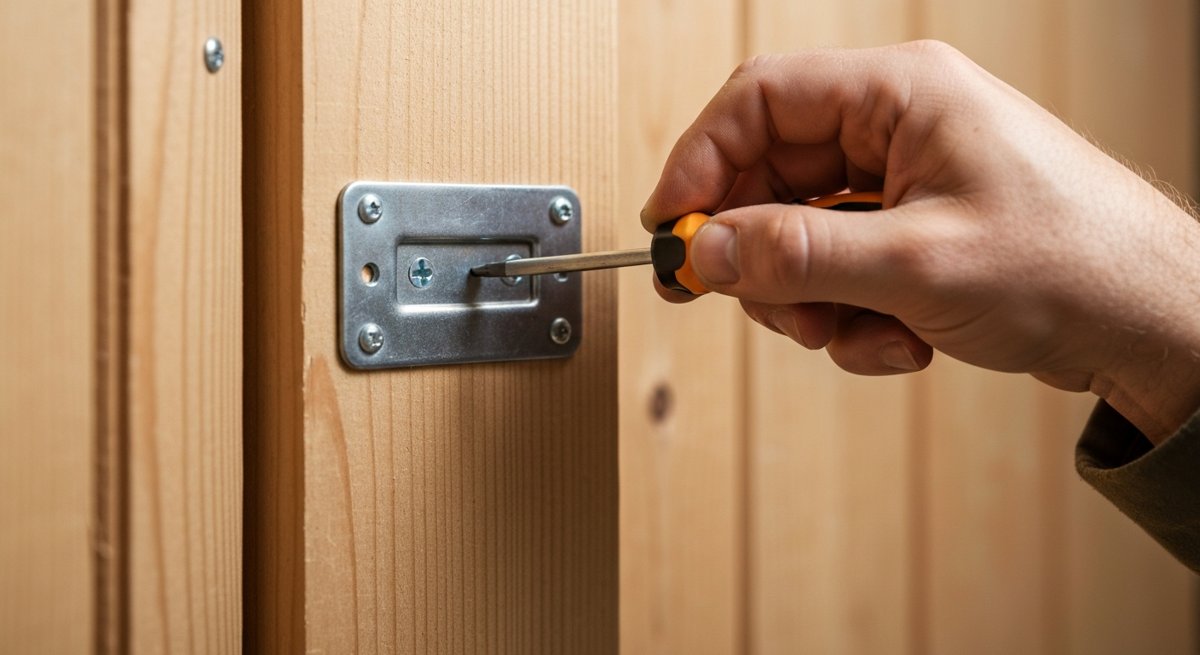
Remove your existing strike plate (the two screws next to the deadbolt hole in the frame). Hold the new reinforcement plate in position — it should center over the deadbolt and knob holes. Mark your screw holes with a pencil. Pre-drill pilot holes using a 1/8″ bit, going at least 3 inches deep. Drive the 3.5″ screws in until snug. Don’t overtighten — you want firm contact, not crushed wood.

Step 2: Reinforce the Hinges

Remove one hinge at a time (don’t take them all off — your door will fall). Pull the short screws and replace them with the 3.5″ screws from the kit. If your kit includes hinge shield plates, slide them behind the hinge before re-securing. Do this for all three hinges (or however many you have).

Step 3: Install the Door Edge Shield (If Included)

This is a U-shaped steel channel that wraps around the edge of the door where the deadbolt passes through. It prevents the wood from splitting if someone tries to spread the frame apart. Slide it over the edge, mark, drill, and screw it in place.

Step 4: Test Everything

Close the door. Lock and unlock the deadbolt. Make sure nothing binds or rubs. If the deadbolt is tight, you may need to slightly adjust the plate position or enlarge the bolt pocket with a chisel. Close, lock, and shoulder-check the door gently — it should feel noticeably more solid.

Don’t Forget Your Other Entry Points

Once the front door is hardened, walk your property and think about these:

  • Back door and side doors: Same reinforcement kit treatment. Every exterior door gets one.
  • Garage entry door: This is the one people forget. The door from your garage into your house is often a hollow-core interior door with a basic knob lock. If someone gets into your garage (opener cloned, side door forced), they’re walking through this door without even trying. Replace it with a solid-core door and deadbolt, then reinforce the frame.
  • Sliding glass doors: A reinforcement kit won’t help here, but a simple security bar (the rod that sits in the track) is cheap insurance. You can also install a secondary lock that pins the door to the frame.

The Layered Thinking

Door reinforcement isn’t a silver bullet. Nothing is. But it fits into what security professionals call defense in depth — layers that each buy you time and deter a different threat level.

  • Layer 1 — Deterrence: Lighting, visible cameras, signs, maintained property (signals someone is home and paying attention)
  • Layer 2 — Delay: Reinforced doors, quality locks, window security film, thorny landscaping under windows
  • Layer 3 — Detection: Alarm system, motion sensors, dogs, alert neighbors
  • Layer 4 — Response: Your plan for what happens when layers 1-3 fail

Door reinforcement lives in Layer 2. Its job is to make forced entry take longer and make more noise — long enough for detection systems to trigger and for you to respond. A reinforced door doesn’t have to be impenetrable. It just has to be harder than the next house.

My Honest Take

I think most people drastically overspend on cameras and smart home gadgets while ignoring the physical basics. A $300 Ring setup watching your front door doesn’t stop anyone from kicking it in — it just gives you a nice video of it happening. Meanwhile, $30 of steel and long screws would have actually prevented the entry.

Cameras are great for Layer 1 (deterrence) and Layer 3 (detection). But if you haven’t addressed Layer 2 first, you’ve built a very expensive notification system for a problem you could have physically prevented.

Start with the physical. Reinforce your doors. Then add the tech on top.

Your Weekend Challenge

Do this before Sunday night:

  1. Walk to your front door. Look at the strike plate. Count the screws and estimate their length.
  2. Open the door and look at the hinge screws. Are they short brass/gold screws? Those are the builder-grade ones.
  3. Go to your hardware store or order a door reinforcement kit online. Budget: $25-$45.
  4. Install it. One hour. One drill. Done.
  5. Then do the same for every exterior door in your house, including the one from the garage.

Bottom line: Your front door is probably held together by hope and half-inch screws. For less than the cost of a pizza, you can make it genuinely resistant to forced entry. That’s not prepper fantasy — that’s just smart homeownership.
How to Harden Every Entry Point in Your Home This Weekend — No Contractor Needed

Most break-ins don’t involve sophisticated lock picks or Hollywood-style alarm bypasses. They involve a boot to a hollow-core door, a pry bar on a cheap strike plate, or a slider lifted off its track. The average residential burglary takes under 60 seconds from entry to inside.

The good news? You can dramatically increase your home’s resistance to forced entry in a single weekend with about $150 in hardware store materials and zero specialized skills. No contractor. No permit. No excuse.

Here’s the room-by-room, door-by-door playbook.

Why Entry Point Hardening Matters More Than Alarms

Alarms are reactive. They tell you (or a monitoring center) that someone already got in. Entry point hardening is preventive — it makes getting in harder, slower, and louder. Most burglars operate on opportunity. If your door takes 30 seconds of noise and effort instead of 2 seconds, they move on. Period.

I’m not saying ditch your alarm system. I’m saying that if you have a $40/month monitoring service but your front door has the original builder-grade strike plate with half-inch screws, you’ve got your priorities backwards.

Step 1: The Front Door — Your Biggest Vulnerability

Your front door is the #1 point of forced entry in residential break-ins. Here’s exactly what to fix:

Replace the Strike Plate

The strike plate is the small metal piece on your door frame where the deadbolt and latch engage. Most builder-installed strike plates are held by two 3/4-inch screws that only bite into the soft door jamb — not the structural framing behind it.

  • Buy a heavy-duty strike plate (sometimes called a “security strike plate” or “box strike”). Brands like Door Armor, StrikeMaster, or even the generic heavy-duty ones at your local hardware store work fine.
  • Install it with 3-inch screws. This is the single most important upgrade. Three-inch screws go through the jamb and into the structural stud behind it. A door held by 3/4-inch screws can be kicked in with one solid hit. A door anchored to the stud takes multiple hits and makes a ton of noise.
  • Time: 15 minutes. Cost: $10-25.

Upgrade the Hinges

While you’ve got the drill out, replace the hinge screws too. Same principle — pull out the short screws, put in 3-inch ones. At least one screw per hinge should anchor into the stud. This prevents the hinge side from being pried or kicked in.

Check Your Deadbolt Throw

Lock your deadbolt and look at how far the bolt extends into the frame. It should be at least one full inch. If it’s less, replace the deadbolt. A Grade 2 deadbolt is fine for most homes — Grade 1 if you want the best. Skip the smart locks that sacrifice bolt throw for convenience.

The Door Itself

If your front door is a hollow-core interior door (yes, some builders do this), no amount of hardware will save you. Knock on it. If it sounds hollow, you need a solid-core wood or steel door. That’s a bigger project, but it’s non-negotiable for security. A steel door in a reinforced frame is extremely difficult to breach without power tools.

Step 2: Sliding Glass Doors — The Overlooked Weak Point

Sliding doors are easy to breach because many can simply be lifted off their tracks from the outside. Here’s how to fix that:

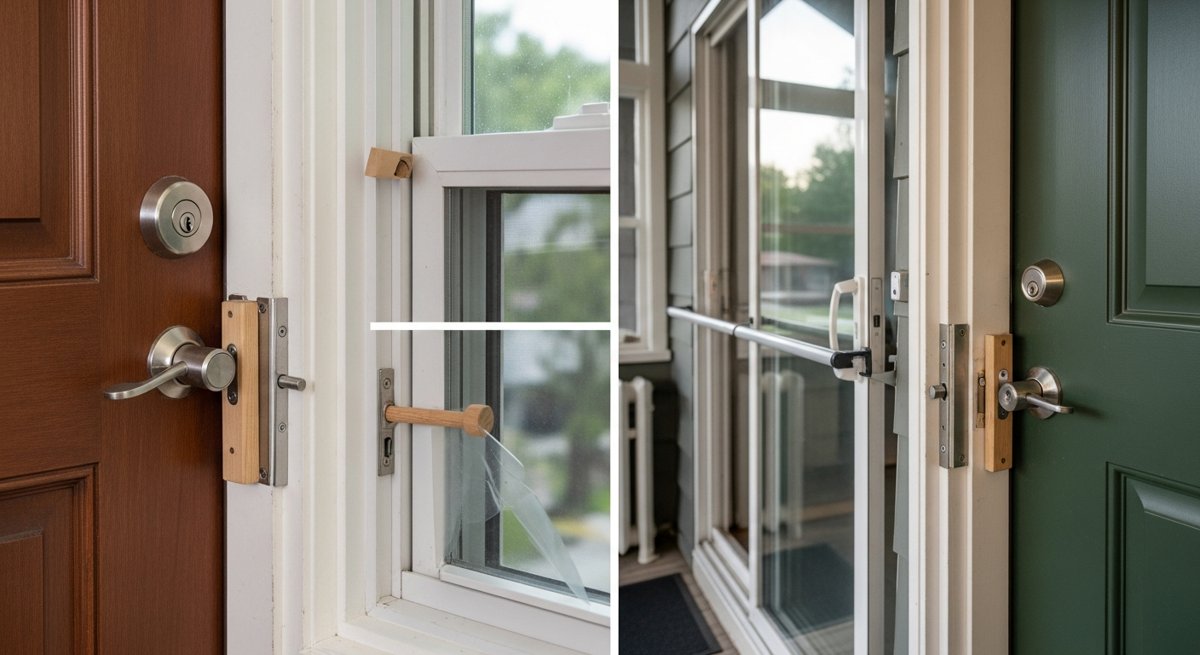
  • Install anti-lift pins. Drill a small angled hole through the inside frame where the door overlaps when closed, and drop in a pin or nail. This prevents the door from being lifted. You can buy purpose-built security pins, or a 16d nail works just fine.
  • Use a security bar or dowel. A cut-to-length wooden dowel or a Charlie bar in the track prevents the door from being slid open even if the latch is defeated. Adjust the length so it fits snugly.
  • Install a secondary foot lock. These bolt into the track and flip up to block the door. Cheap insurance — about $8.

Time for all three: 30 minutes. Cost: under $20.

Step 3: Windows — Simple Fixes, Big Impact

Most windows aren’t forced open — they’re found unlocked. But for ground-floor and basement windows that are locked, here’s what to do:

  • Pin your windows. For double-hung windows, drill a small downward-angled hole through the inner sash into the outer sash where they overlap when closed. Insert a nail or eye bolt. The window can’t be opened from outside even if the latch is flipped. Drill a second hole with the window cracked 4 inches for ventilation with security.
  • Apply security film. Window security film (3M, BDF, or similar) won’t stop a determined intruder, but it holds shattered glass together, turning a quick “smash and reach in” into a loud, time-consuming mess. Apply it to ground-floor windows, especially any near door locks.
  • Don’t forget basement windows. Window well covers and interior-mounted security bars or grates make basement windows nearly impossible to use as entry points. If you go with bars, make sure they have a quick-release interior latch for fire egress.

Step 4: The Garage — Your Biggest Blind Spot

If your garage has an entry door into your house, treat it exactly like your front door — heavy-duty strike plate, 3-inch screws, solid deadbolt. Most people don’t, because it “feels” like an interior door. It’s not. It’s a perimeter door with a giant, motor-operated window next to it.

  • Disable the emergency release. That red cord hanging from your garage door opener? An intruder can trip it from outside with a coat hanger and a 6-inch gap at the top of the door. Either zip-tie the release mechanism so it can’t be triggered remotely, or install a garage door defender shield over it. There are YouTube tutorials for your exact opener model.
  • Add a manual lock or slide bolt to the garage door tracks for when you’re home or away for extended periods.
  • Keep the interior garage door locked — always, not just when you’re away. This is the most commonly neglected rule in home security.

Step 5: Your Weekend Checklist

Print this. Walk your house. Check everything off.

Entry Point Fix Cost Time
Front door Strike plate + 3″ screws + hinge screws $15-30 20 min
Back door Same as front door $15-30 20 min
Sliding doors Anti-lift pins + bar + foot lock $15-20 30 min
Ground-floor windows Pin + security film $40-60 1-2 hrs
Garage (interior door) Strike plate + deadbolt + emergency release fix $25-40 30 min
Basement windows Well covers + security bars (with egress release) $30-50 30 min

Total estimated cost: $100-200. Total time: a relaxed Saturday afternoon.

The Honest Take

Home security is one of those things people overthink and underspend on. They’ll drop $300 on a Ring doorbell and leave the strike plate held in by screws shorter than a toothpick. The camera will give you great footage of someone kicking your door in. The $15 strike plate upgrade would have stopped them.

Cameras and alarms have their place. But physical hardening is the foundation. Without it, everything else is just surveillance of your own break-in.

Your Challenge

This weekend, walk every exterior entry point in your home. Every door, every window, every sliding door, the garage. Knock on each door — solid or hollow? Check the screws in every strike plate — short or long? Try to wiggle your sliding door up off its track. Check if your garage emergency release can be fished from outside.

Then go to the hardware store and fix the weakest link. Just one. That single upgrade puts you ahead of 90% of homes on your street.

Stay sharp. Stay prepared. Security isn’t about paranoia — it’s about making smart, small investments that buy you time, options, and peace of mind. And unlike that gym membership you’re not using, this one actually works the first day you install it.

How to Set Up a Low-Tech Early Warning System Around Your Property (No Electronics Required)

Here’s something that bugs me about the prepper world: everyone jumps straight to cameras, motion sensors, and $400 trail cams before they’ve even thought about the basics. Meanwhile, humans have been securing perimeters for thousands of years with nothing but string, rocks, and common sense.

Today I’m going to walk you through how to set up a layered early warning system around your property using low-tech, no-power methods that actually work. No batteries to die. No Wi-Fi to go down. No apps to crash. Just physics and a little bit of cleverness.

This isn’t about replacing modern security — it’s about building a foundation that works when everything else doesn’t.

Why Low-Tech Still Matters

Power goes out. Internet drops. Batteries die at 3 AM. Every electronic system has a failure mode, and Murphy’s Law says it’ll fail when you need it most.

A low-tech early warning system has exactly one failure mode: someone physically dismantling it — which, by the way, also tells you someone is there.

The real value here is layered awareness. You want to know someone is approaching before they reach your door. Not after they’re already inside. Every second of advance warning changes your options dramatically.

Layer 1: The Outer Perimeter — Ground Alerts

Your first line of detection should be 50-100 feet out from your home — or wherever your property line sits. The goal isn’t to stop anyone. It’s to hear them.

Gravel Pathways and Kill Zones

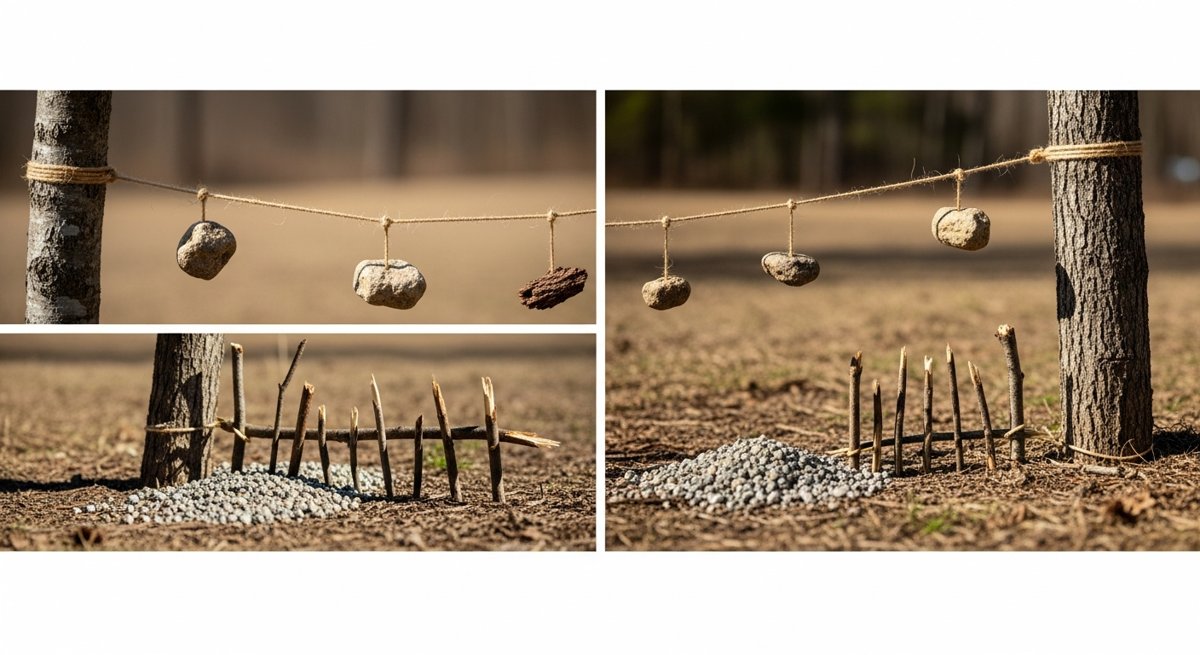
This is the oldest trick in the book, and it’s the oldest trick because it works. Spread a 3-4 foot wide strip of pea gravel along likely approach routes — gates, gaps in fencing, the path from the road to your house. It’s impossible to walk on gravel quietly. Impossible.

Japanese castle designers figured this out centuries ago with nightingale floors — wooden floors engineered to squeak when stepped on. Same principle, cheaper materials. A few bags of gravel from the hardware store and you’ve got an audible perimeter that never needs charging.

Pro tip: Focus gravel on the 2-3 most likely approach paths, not the entire perimeter. Think about where YOU would walk if you were approaching your house for the first time. That’s where the gravel goes.

Dry Brush and Leaf Litter Zones

In wooded areas, stop raking. Seriously. A thick carpet of dry leaves and small branches is a natural noise trap. If you want to get intentional about it, pile dry brush in natural-looking arrangements along tree lines and fence gaps. Anyone moving through it will sound like a deer — and you’ll hear them from inside your house with the windows cracked.

Layer 2: The Mid-Perimeter — Tripwire Alerts

Now we’re getting into the fun stuff. Between your outer noise zone and your home, set up simple tripwire systems that create audible alerts when triggered.

The Can-and-Line System

You’ve seen this in every survival show, and there’s a reason: it works reliably.

  • Run monofilament fishing line (20-30 lb test) between two anchor points at ankle height — about 6-8 inches off the ground
  • Attach empty aluminum cans with a few small rocks or pennies inside
  • When the line gets pulled, the cans rattle and fall — unmistakable sound at night
  • Use dark or green monofilament, not bright yellow

The key is height and tension. Too high and people step over it. Too tight and it snaps instead of pulling. You want slight slack — enough that a leg pushing through creates movement, not enough that it hangs visibly.

The Bell Wire Method

If you want something more discreet than cans, small jingle bells (the kind you find at any craft store) threaded onto monofilament work great. Quieter than cans — you won’t hear them from 200 feet — but perfect for closer-in tripwires near doors, gates, and windows. They’re small, cheap, and surprisingly loud in a quiet house at 2 AM.

Placement Strategy

Don’t run tripwires everywhere — you’ll trip over them yourself. Place them in choke points: gaps in hedges, between outbuildings, along fence lines where the fence is low enough to climb, and across any path you don’t use at night. Map your tripwire locations and walk your family through them. The last thing you want is your teenager triggering your own system at midnight.

Layer 3: The Inner Perimeter — Door and Window Tells

Your last layer is the house itself. Even if someone gets past your outer and mid perimeter, you want to know the moment they touch a door or window.

The Coin-on-Door Method

Balance a coin (or a small stack of coins) on top of a door that’s slightly ajar, or wedge it between the door and the frame. When the door moves, the coins fall and hit the floor. Simple. Effective. Used by travelers in sketchy hotels for decades.

Window Sticks and Glass Tells

A wooden dowel in the window track prevents it from being opened — that’s security 101. But for warning, lean a lightweight object (empty glass, small vase) against the inside of the window frame. If the window gets pushed, the object falls and breaks or clatters. You’re not trying to stop entry. You’re buying yourself seconds of awareness.

Door Barricade with Noise

At night, place a chair with a few empty cans on the seat against interior doors you don’t use. If the door pushes open, the chair moves, cans hit the floor. It’s crude. It’s effective. It’s been working since the frontier days.

Putting It All Together: Your Weekend Project

Here’s how to implement this in one Saturday afternoon:

  1. Walk your property. Identify the 3 most likely approach routes someone would use coming from the road or neighboring properties. Mark them mentally or on a quick sketch.
  2. Set up gravel strips on at least 2 approach paths. Four bags of pea gravel from the hardware store will cover about 20-30 feet of 3-foot-wide path. Cost: ~$20.
  3. Install 2-3 tripwire lines at choke points between the gravel zones and your house. A spool of monofilament and a dozen empty cans cost you basically nothing.
  4. Set up interior tells on all ground-floor doors and windows you don’t use at night. Coins, glasses, cans on chairs — whatever makes noise when disturbed.
  5. Brief your household. Everyone needs to know what’s where so they don’t trigger it themselves. Walk the system together before dark.

Total cost: Under $30. Total time: 2-3 hours. Effectiveness: Dramatically better than nothing, and it works during a power outage when your Ring doorbell is a paperweight.

A Word on Dogs

I’d be a fraud if I didn’t mention this: a dog is the single best low-tech early warning system ever developed. Thousands of years of co-evolution specifically selected for animals that bark when strangers approach. If you have the means to care for one, a dog with good hearing and a loud mouth beats every system on this list combined.

That said, not everyone can have a dog. And even if you do, these layers give you redundancy. Dogs sleep. Dogs get sick. Dogs can be distracted. Your gravel doesn’t take days off.

The Takeaway

Security isn’t about one big expensive system. It’s about layers. And the most reliable layers are the simplest ones — the ones that don’t need power, don’t need updates, and don’t need you to remember a password.

This weekend, give yourself the project. Walk your property. Identify the gaps. Set up at least two layers. You’ll sleep better knowing that nobody is walking up to your house without you hearing about it first.

Your challenge: Set up at least one layer — even if it’s just gravel on one approach path — before Sunday night. Then go outside, walk it yourself, and listen. You’ll immediately understand why this works. Once you hear it, you’ll want to do the rest.

Door Security: 5 Cheap Upgrades That Stop 90% of Break-Ins

Here’s a stat that should bother you: according to FBI data, over 55% of residential burglaries happen through a door. Not a window. Not through some Mission Impossible ceiling vent. The front door. Sometimes the back door. Sometimes the garage entry door. But it’s almost always a door.

And here’s the kicker — most of those doors fail because of cheap hardware, bad installation, or things the homeowner could have fixed in an afternoon for under $100.

I’m not going to tell you to buy a $3,000 security system. I’m going to show you five upgrades you can do this weekend, most with a drill and a screwdriver, that will make your doors genuinely hard to kick in.

1. Replace Your Strike Plate Screws (Cost: $0–$5)

This is the single most important thing on this list, and it costs almost nothing.

Go look at your front door’s strike plate right now — that metal piece on the door frame where the deadbolt slides in. Pull it off. Look at the screws. I’ll bet you a six-pack they’re 3/4-inch screws that only grip the door jamb — a thin piece of pine that splits like kindling when someone puts a boot to it.

The fix: Replace those screws with 3-inch deck screws. That’s it. Three-inch screws pass through the jamb and bite into the structural framing (the jack stud) behind it. You’re going from a screw gripping half an inch of soft wood to one anchored in the actual structure of your house.

While you’re at it, do the same for your hinges. Most doors come with short hinge screws too. Replace at least one screw per hinge with a 3-inch screw. Now the entire door is anchored to the framing, not just hanging on the trim.

Time: 10 minutes. Difficulty: If you can use a drill, you can do this.

2. Install a Reinforced Strike Plate (Cost: $10–$25)

The stock strike plate that came with your door is a joke. It’s a small rectangle of thin metal held by those pathetic short screws we just talked about.

A reinforced strike plate is a heavy-gauge steel plate, usually 12 to 48 inches long, that distributes the force of a kick across a much larger area of the door frame. Brands like Door Armor, StrikeMaster II, and Prime-Line make versions you can find at any hardware store or online.

Why it matters: A standard deadbolt with a standard strike plate can be kicked in with about 100 pounds of force. With a reinforced plate and 3-inch screws, that number jumps to over 800 pounds. That’s the difference between one kick and “I’m going to find a different house.”

Time: 20 minutes. Difficulty: Easy — it’s just screws and a plate.

3. Add a Door Reinforcement Kit to Your Jamb (Cost: $50–$80)

If you want to go a step further — and I think you should, especially on your front and back doors — get a full door reinforcement kit. These typically include:

  • A full-length jamb reinforcement plate (covers the entire lock side of the frame)
  • Hinge reinforcement plates (wraps around each hinge)
  • A door edge shield (reinforces the area around the deadbolt on the door itself)

Brands like EverPlus, Defender Security, and Door Armor make kits that cover all three. They’re painted to match standard door colors, so they’re barely noticeable once installed.

My opinion: This is the best $60 you’ll spend on home security. Period. Better than cameras. Better than alarm stickers. A camera watches someone break in. A reinforced door stops them.

Time: 45 minutes per door. Difficulty: Moderate — you need to be comfortable with a drill and chisel.

4. Upgrade to a Grade 1 or Grade 2 Deadbolt (Cost: $30–$70)

Deadbolts are graded 1 through 3 by ANSI/BHMA standards. Most builder-grade deadbolts are Grade 3 — the lowest tier. They’re designed to meet building code minimums, not to actually resist forced entry.

What the grades mean:

  • Grade 3: Survives 2 strikes in cycle testing. The participation trophy of deadbolts.
  • Grade 2: Survives 4 strikes. Significantly stronger construction. Good for residential.
  • Grade 1: Survives 10 strikes. Commercial-grade. This is what you want if you’re serious.

Schlage B60N (Grade 1) runs about $40-50. That’s not a big investment for a lock that’s actually built to take a hit. Make sure the bolt throw is at least 1 inch — anything less and it’s not fully engaging the strike plate.

Time: 15 minutes if replacing an existing deadbolt. Difficulty: Easy swap.

5. Don’t Forget the Sliding Door (Cost: $10–$30)

Sliding glass doors are a massive weak point that people consistently ignore. The factory latch on most sliders is basically decorative. Here’s what to do:

  • Drop a security bar in the track. A cut piece of broom handle works, but a purpose-built bar like the Master Lock 265D adjusts to fit and won’t roll out. $12.
  • Install anti-lift pins. Drill a small hole at a downward angle through the inside frame into the outside frame (when the door is closed). Drop a nail or pin in. This prevents someone from lifting the door off its track. $0.
  • Add a secondary foot lock. These screw into the bottom track and flip up to block the door from sliding. Cheap, effective, and adds a second point of resistance.

Time: 15 minutes. Difficulty: Dead simple.

The Uncomfortable Truth

Most burglaries are crimes of opportunity. The guy isn’t picking your lock. He’s not disabling your alarm. He’s kicking your door once, hard, and he’s in. The whole thing takes 10 seconds.

Every upgrade on this list makes that kick harder — or impossible. And the total cost for all five? Somewhere between $50 and $200 depending on how many doors you’re hardening. That’s less than one month of a monitored alarm service that does nothing to physically stop entry.

I’m not saying don’t get cameras or an alarm. I’m saying those are layer two. Layer one is making your doors actually hard to get through. Physical security first, electronic security second.

Your Weekend Challenge

Right now — today — go pull the strike plate off your front door and look at those screws. If they’re short, you know what to do. That one upgrade alone makes your door dramatically harder to force open, and it takes less time than scrolling through your phone.

Then work your way down this list. One door per weekend if you want to take it slow. By the end of the month, every entry point in your home will be genuinely hardened — not “security sticker” hardened, but actually hardened.

Stop decorating your doors with security theater. Reinforce them.