The 3-2-1 Meal Prep System: How to Cook a Week of Food in 90 Minutes (Without Eating the Same Sad Meal Twice)

Let’s be honest about why meal prep never sticks for most people. You watch some influencer batch-cook 14 identical containers of chicken, broccoli, and rice on a Sunday, and by Wednesday you’re staring at container number four with the enthusiasm of a man licking a battery. The food is fine. The system is broken. Eating the exact same meal ten times in a row is a psychological endurance test, not a nutrition plan.

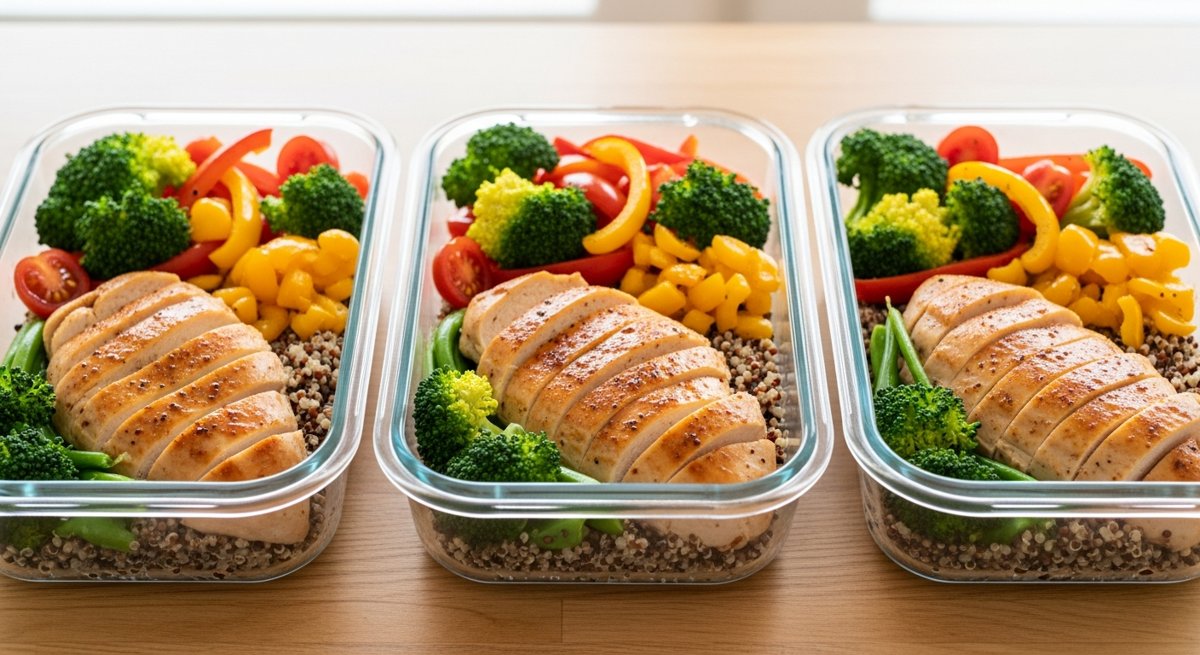
Here’s the fix I’ve been using for years, and it’s stupidly simple: don’t prep meals. Prep components. When you cook a rack of interchangeable parts instead of ten finished dinners, you can mix and match all week and never eat the same plate twice. I call it the 3-2-1 system, and you can run the whole thing in about 90 minutes on a Sunday afternoon.

The 3-2-1 Formula

Every good week of food comes down to three moving parts. Cook a batch of each, keep them separate in the fridge, and assemble on demand:

  • 3 proteins — because protein is the one macro everyone under-eats and the thing that actually keeps you full.
  • 2 carb/veg bases — the volume that fills the plate and your stomach.
  • 1 flavor system — two or three sauces that turn the same components into completely different meals.

Do the math on that. Three proteins × two bases × three sauces is eighteen distinct flavor combinations from one cook session. That’s the whole trick. Nothing repeats because nothing was ever a “meal” to begin with — it was a Lego set.

Step 1: The 3 Proteins (the part that matters most)

Pick three proteins that cook differently so you’re not babysitting one pan for an hour. My default rotation:

  • Oven: 2–3 lbs of chicken thighs on a sheet pan. Thighs, not breasts — they don’t turn to chalk when you reheat them. 425°F for about 30 minutes.
  • Stovetop: 1–1.5 lbs of ground beef or turkey, browned with salt and whatever spice blend you like. Ten minutes, done.
  • Hands-off: a dozen hard-boiled eggs, or a batch of beans/lentils simmering in a pot while you do everything else.

The single biggest mistake here is guessing on doneness. Undercooked chicken will make your whole week miserable in a very literal way, and overcooked chicken is why people think meal-prepped protein has to taste like a wallet. Stop guessing. A cheap instant-read thermometer like the ThermoPro TP19H pays for itself the first time you pull chicken at a juicy 165°F instead of an anxious, leathery 185°F. Poultry to 165°F, ground meat to 160°F, and move on with your life.

ShelleB’s take: Season your proteins plainly — just salt, maybe pepper and garlic. All the personality comes from the sauces later. If you marinate the chicken in teriyaki on Sunday, you’ve just locked yourself into eating teriyaki chicken for a week. Keep the base neutral and stay free.

Step 2: The 2 Bases

These are your volume and your carbs. You want one starch and one vegetable, both of which reheat well:

  • One starch: rice, potatoes, or quinoa. Rice cooker or a pot, set it and forget it. Two cups dry makes a week’s worth.
  • One roasted veg: whatever’s cheap. Broccoli, Brussels sprouts, carrots, peppers. Toss in oil and salt, throw it on the sheet pan next to your chicken since the oven’s already hot. Same 425°F, same 30 minutes.

Notice you’re running the oven once for both the chicken and the vegetables. That’s the 90-minute part — you’re stacking jobs, not doing them one at a time. While the oven handles two components, the stovetop handles a third, and a pot handles a fourth. Four things cooking, one cook.

The one pot that earns its shelf space

If you’re going to buy a single piece of gear for batch cooking, make it a heavy Dutch oven. It goes stovetop-to-oven, it’ll simmer a giant batch of chili or beans or shredded chicken without scorching, and it lasts forever. A Lodge 6-quart enameled Dutch oven is the one I reach for — it holds enough to feed you for days and it’s a fraction of the price of the fancy French names doing the exact same job.

Step 3: The 1 Flavor System

This is where the magic and the anti-boredom live. Make (or buy) three sauces that point in completely different directions. Same chicken and rice becomes three different dinners depending on what you pour on it:

  • Something bright/acidic — a lemon-garlic vinaigrette, or salsa.
  • Something rich/savory — a peanut or tahini sauce, or good BBQ.
  • Something with heat — sriracha-mayo, chili crisp, hot honey.

Store sauces in small jars, separate from everything else. The reason your fridge meal-prep goes soggy and grim by day three is that you sauced everything on Sunday. Keep components dry and naked; sauce at the moment you eat. Your Thursday self will thank you.

Assembly: 60 Seconds, Infinite Meals

Now the week runs itself. Grab a protein, grab a base, grab a sauce, heat, done:

  • Chicken + rice + peanut sauce → a Thai-ish bowl.
  • Ground beef + potatoes + salsa + an egg on top → a breakfast-for-dinner hash.
  • Chicken + roasted veg + lemon vinaigrette → a clean, bright plate.
  • Beans + rice + chili crisp → a five-minute lunch that costs about a dollar.

Wrap a tortilla around any of those combos and it’s a different meal again. You are never eating “leftovers.” You’re assembling.

Covering the Protein Gap

Most guys who lift or ruck or just want to hold onto muscle past 40 are chronically short on protein — the common target is around 0.7–1 gram per pound of bodyweight, and hitting it with whole food alone is genuinely hard. The gap-filler that’s survived every fad is plain whey. A scoop of Optimum Nutrition Gold Standard Whey in a BlenderBottle is 24 grams of protein in about a minute, which quietly rescues the days your cooking didn’t quite get you there. It’s not a meal, it’s insurance — treat it that way.

The Two Tools That Make or Break This

You don’t need a kitchen full of gadgets. You need exactly two things to work well, and most people are fighting a losing battle on both:

  • A sharp chef’s knife. Ninety percent of “I hate cooking” is really “I’m sawing at an onion with a dull, dangerous knife.” A single good blade like the Victorinox Fibrox Pro 8-inch cuts your actual prep time in half and is what half the professional kitchens in the country use. Get one, keep it sharp, and prep stops feeling like a chore.
  • A thermometer, for the reasons above. Guessing on protein is how the whole system falls apart.
The real cost breakdown: Three proteins, two bases, three sauces — call it 12–15 meals for roughly $35–$50 in groceries, depending on your protein choices. That’s $3-ish a meal, versus $12–$18 every time you cave and order out. The system pays for the gear inside a month.

Your Challenge This Sunday

Don’t overthink it. Block 90 minutes this Sunday and run the 3-2-1 exactly once: three proteins, two bases, three sauces. Don’t assemble a single “meal” while you cook — just fill separate containers with the raw components and sauces in their own jars. Then let the week surprise you. Track how many days you go without repeating a plate, and how many times you didn’t order takeout because dinner was already 60 seconds away.

Nail it one week and you’ll never go back to sad-container meal prep again. Component cooking isn’t a diet — it’s just a smarter way to run your kitchen. Go build your Lego set.
Safe Appetite Control: What Actually Works (Supplements, Strategies, and the Science)

Willpower is not your problem. If you’ve ever crushed a “clean” lunch and found yourself elbow-deep in a bag of chips 90 minutes later, you don’t have a character flaw — you have a biology problem. Hunger is driven by hormones, blood sugar, sleep, and what you ate last, not by how disciplined you feel. The good news: those are all levers you can pull. Here’s what actually moves the needle, and what’s just expensive urine.

First, Know What You’re Fighting

Two hormones run the show. Ghrelin is the “I’m hungry” signal — it spikes before meals and when you’re short on sleep. Leptin is the “I’m full, stop eating” signal. When you’re tired, stressed, or eating fast-digesting junk, ghrelin goes up and leptin gets ignored. That’s the whole game. Every real appetite strategy below works by turning ghrelin down or making leptin louder. Anything that doesn’t touch those levers is selling you a story.

The Three Things That Actually Work

1. Eat Protein First, and Eat Enough of It

Protein is the most filling macronutrient by a wide margin. It blunts ghrelin, slows digestion, and costs your body energy just to break down. The research is boringly consistent: front-load protein and you eat less for the rest of the day without trying. My rule of thumb — get 30–40 grams at breakfast. Not a granola bar. Eggs, Greek yogurt, cottage cheese, or a shake.

If mornings are chaos, a shake is the path of least resistance, and that’s the whole point — you want the easy choice to also be the right one. A scoop of Optimum Nutrition Gold Standard 100% Whey gets you ~24g in 30 seconds, and honestly it’s the whey I keep in my own cabinet because it actually mixes instead of clumping. Pair it with a BlenderBottle Classic V2 Shaker so there’s zero excuse on a busy morning. Opinion: protein powder is the single most useful “supplement” most people can buy, because it’s just food you were too busy to cook.

2. Add Volume With Fiber

Fiber fills your stomach, feeds your gut bacteria, and slows the sugar spike-and-crash that makes you hungry again an hour later. Most Americans get about half the fiber they should. Fix that with food first: beans, lentils, oats, berries, and a mountain of vegetables at every meal. Vegetables are the cheat code — they take up enormous stomach real estate for almost no calories.

If you want a supplement lever, psyllium husk or glucomannan (konjac fiber) both have real data behind them for appetite. Glucomannan absorbs water and expands in your stomach; taken with a big glass of water 20–30 minutes before a meal, it takes the edge off. It’s not magic — it’s a physics trick — but it’s a cheap, safe one. Just don’t expect a pill to outrun a bad diet.

3. Sleep, Because Tired People Eat More

This is the one nobody wants to hear. One bad night of sleep raises ghrelin, lowers leptin, and torpedoes your impulse control — studies consistently show sleep-deprived people eat 300–500 extra calories the next day and reach for junk, not broccoli. You cannot out-discipline a sleep deficit. If your appetite is out of control, audit your sleep before you buy a single supplement. Seven-plus hours does more for your waistline than any pill on this list.

The Free Habits That Punch Above Their Weight

  • Drink a glass of water first. Thirst masquerades as hunger constantly. Water before a meal also modestly reduces how much you eat. Cheapest tool you own.
  • Slow down. It takes ~20 minutes for fullness signals to reach your brain. Eat fast and you’ll blow past “full” before you feel it. Put the fork down between bites — sounds dumb, works.
  • Pause 10 minutes before a second helping. Most “I’m still hungry” moments evaporate if you just wait. If you’re still hungry after 10 minutes, eat — usually you won’t be.
  • Don’t drink your calories. Soda, juice, and sugary coffee drinks don’t trigger fullness at all. You’ll eat the same amount of food on top of them.

Supplements: What Has Data vs. What’s Snake Oil

Has real evidence: protein, soluble fiber (psyllium, glucomannan), and caffeine (a modest, short-term appetite suppressant — a black coffee before a meal is a legit tool). Berberine and blood-sugar-stabilizing approaches can help some people with cravings, but that’s a talk-to-your-doctor conversation, not a gas-station-pill one.

Save your money: garcinia cambogia, raspberry ketones, “fat burner” blends, and 90% of the stuff with a shirtless guy on the label. The research on them ranges from “underwhelming” to “flatly doesn’t work,” and some are just caffeine with a 400% markup. My honest take: if a product promises to “melt fat” or “crush cravings” with a proprietary blend, the only thing shrinking is your wallet.

And yes — the GLP-1 drugs (Ozempic, Wegovy, etc.) genuinely crush appetite by mimicking a fullness hormone. They work. But that’s a prescription and a doctor’s call, not a supplement, and they come with real trade-offs. Out of scope for a grocery-store fix.

Make the Right Choice the Default (Meal Prep)

Here’s the part that ties it all together: appetite control isn’t a moment of willpower, it’s a system you set up in advance. When there’s a protein-heavy meal ready to grab, you don’t negotiate with a vending machine. Prep hits your three levers at once — protein, fiber, and not-being-a-tired-hangry-mess at 6 p.m.

A dead-simple Sunday: cook a batch of chicken or ground beef, a pot of rice or beans, and roast two trays of vegetables. Portion it. Keep boiled eggs and Greek yogurt in the fridge for grab-and-go protein. Stash a shaker and a bag of whey at work. That’s it. You’ve now made the hungry-3-p.m. version of yourself choose between “good food that’s already here” and “nothing” — and that’s a fight future-you actually wins.

The Takeaway

Stop treating hunger like a willpower test you keep failing. It’s a system. Hit protein first, add fiber volume, protect your sleep, and set up your environment so the easy choice is the good one. Do that and “appetite control” stops being a daily battle and becomes background noise.

Your challenge this week: nail 30 grams of protein at breakfast, every single day, for seven days. Nothing else. Just that one lever. Then notice how much quieter your afternoon cravings get. If that’s the only thing you take from this post, it’ll still be the highest-leverage change most people can make.

High-Protein Overnight Oats for People Who Think Overnight Oats Are Gross

Let me guess. Someone told you overnight oats were the answer to your rushed, sad weekday breakfasts. You dutifully mixed oats and milk in a jar, slept on it, and woke up to a cold, gray, gelatinous slurry that tasted like wet cardboard with a vague memory of cinnamon. You ate two bites, gagged, and went back to eating nothing until 11 a.m.

I get it. Most overnight oats are genuinely bad. They’re under-seasoned, under-protein’d, and the texture is an actual crime. But the concept is sound — a no-cook, grab-and-go breakfast you build five at a time on Sunday is exactly the kind of boring consistency that keeps your nutrition on the rails. The problem isn’t overnight oats. It’s that nobody told you how to make ones that don’t suck.

Why your overnight oats are gross (the four real problems)

Before recipes, you need to understand why the standard version fails. Fix these four things and everything downstream gets better:

  • Wrong oats. Quick oats turn to paste. Steel-cut stay raw and gritty (they don’t fully soften without heat). You want old-fashioned rolled oats — the big flat flakes. That’s the entire texture battle, right there.
  • No protein. A jar of oats and milk is maybe 10–12g of protein. That’s a snack, not a meal. You’ll be starving by 10. This is the single biggest reason people quit.
  • Too much liquid. A 1:1 oat-to-liquid ratio gives you soup. You want it thick enough to hold a spoon upright-ish.
  • No salt, no acid, no crunch. Every good dish has those. Oats made with just milk and sweetener are flat and one-note. A pinch of salt and a splash of something bright wakes the whole thing up.

The formula (memorize this, ditch the recipes)

Recipes make you dependent. A formula makes you free. Here’s the ratio that works every single time, scaled to one jar (use a wide-mouth pint mason jar — it’s the perfect size and you can eat straight out of it):

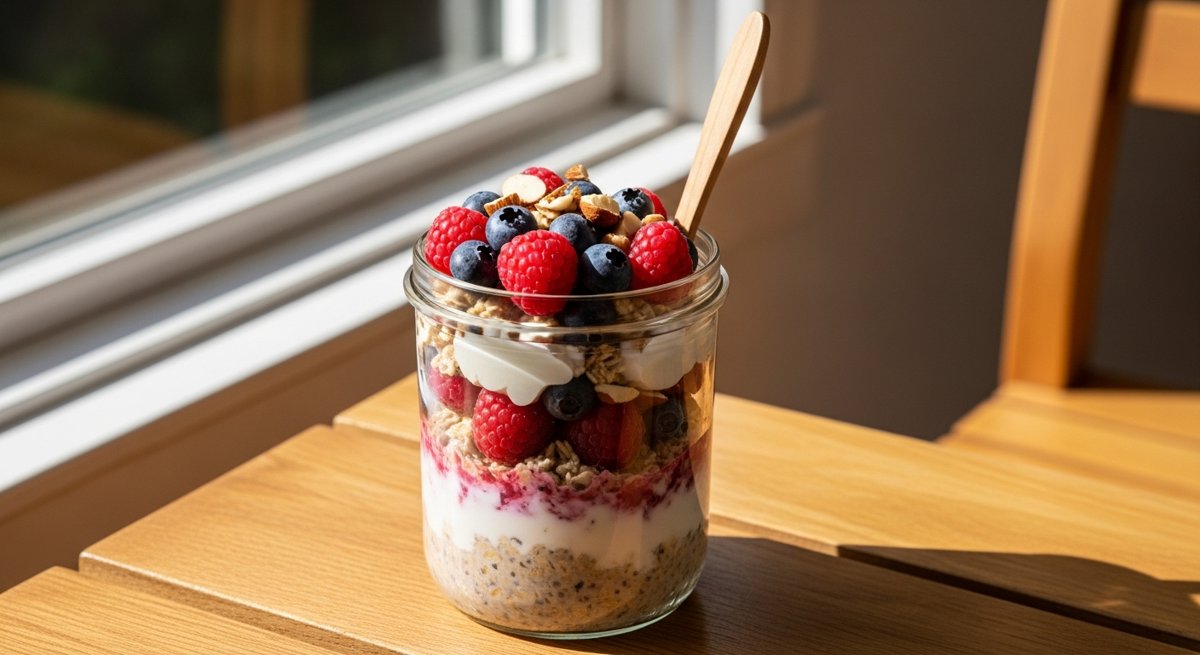
½ cup rolled oats + ½ cup milk + ¼ cup Greek yogurt + 1 scoop protein powder + 1 Tbsp chia seeds + a pinch of salt + flavor & toppings.

That’s it. Roughly 35–42g of protein, depending on your powder, and a texture that’s thick and creamy instead of gluey. Let’s break down why each piece is there, because once you understand the job each ingredient does, you can riff forever.

Greek yogurt + chia: the texture cheat code

This is the move nobody tells you. Plain milk-and-oats is loose and slimy. Add ¼ cup of plain Greek yogurt and the whole thing turns thick, tangy, and almost mousse-like. The chia seeds gel overnight and pull the texture together so it’s spoonable, not soupy. Skip these two and you’re back to slurry. Don’t skip them.

Protein powder: how to actually hit your numbers

One scoop of whey adds 24–25g of protein and does most of the flavoring work for you — a chocolate or vanilla whey basically turns the jar into dessert. I use Optimum Nutrition Gold Standard Whey because it mixes clean and a 5 lb tub lasts forever, which matters when you’re making five jars a week. Here’s the catch: whey thickens overnight and can go pasty if you dump it straight in. The fix is to mix the powder into the milk first — a BlenderBottle Classic V2 shaker bottle does this in ten seconds — then pour the milk over the oats. Smooth every time.

If you don’t tolerate whey, a casein or plant blend works and actually stays thicker. And if you’re already taking creatine monohydrate, the jar is a perfect place to stir in your daily 5g — it’s flavorless and you’ll never forget a dose.

Three jars that don’t taste like wallpaper paste

Build any of these on the formula above. Add the flavor ingredients with everything else, stir, lid, fridge. Toppings that should stay crunchy (nuts, granola) go on in the morning, not the night before.

1. Peanut Butter Cup

  • Chocolate protein powder + 1 Tbsp real peanut butter + pinch of salt
  • Morning topping: a few dark chocolate chips and chopped peanuts
  • Tastes like dessert, hits ~40g protein. This is the gateway jar — make this one first.

2. Apple Pie

  • Vanilla protein + ½ grated apple + ½ tsp cinnamon + tiny pinch of salt
  • Morning topping: chopped walnuts and a drizzle of maple
  • The grated apple melts in and sweetens it naturally. The acid from the apple is what keeps it from tasting flat.

3. PB&J / Berry Blast

  • Vanilla protein + ½ cup frozen mixed berries (they thaw and release juice overnight — built-in flavor) + pinch of salt
  • Morning topping: a spoon of yogurt and a few fresh berries
  • The berries do double duty: sweetener and that bright acid note. Easily my favorite for summer.

The Sunday workflow: five jars in ten minutes

This is where overnight oats actually earn their keep. Don’t make one jar at a time like a chump — batch the whole week:

  • Line up five wide-mouth pint jars. Dry stuff first, assembly-line style: oats, chia, salt, and protein powder into each.
  • Shake your milk + any extra protein in the shaker bottle, pour into each jar to the same line.
  • Spoon in the yogurt, add each jar’s flavor (berries, apple, PB), stir each one, lid, done.
  • They keep 4–5 days in the fridge, so Sunday covers you through Thursday. Make Friday’s fresh or just have eggs.
  • Keep crunchy toppings in a separate little container or just add them at your desk. Soggy granola is sad granola.

Total active time once you’ve got the rhythm: about ten minutes. That’s ten minutes on Sunday for five high-protein breakfasts you don’t have to think about. Compare that to the daily “what do I eat / screw it, nothing” spiral and it’s not close.

The honest caveats

I’m not going to pretend this is magic. Two things to know:

  • Cold breakfast isn’t for everyone. If you genuinely hate cold food in the morning, microwave the jar for 60–90 seconds — it becomes warm protein oatmeal and it’s great. Pull the fresh-fruit toppings off first.
  • Watch the calories if fat loss is the goal. Peanut butter, granola, and maple add up fast. The base jar is lean and high-protein; the toppings are where it can balloon to 600+ calories. Measure them, don’t eyeball.

Your challenge

This Sunday, make three jars — not five, just three, so the bar is stupidly low. Use the Peanut Butter Cup recipe because it’s the most forgiving and the hardest to dislike. Mix your protein into the milk first, use rolled oats, don’t forget the pinch of salt. Eat one Monday, one Tuesday, one Wednesday.

If you still think overnight oats are gross after that, fine — you gave it an honest shot with the texture and protein actually dialed in, and you can go back to skipping breakfast with my blessing. But I’d put money on you making five jars next week. Report back.

How to Smoke a Brisket: The Complete 14-Hour Guide (From Trim to Slice)

A great brisket isn’t a recipe. It’s a relationship. You spend fourteen hours with a piece of meat, and somewhere in hour eight you start having opinions about bark.

Here’s the truth nobody at the BBQ contest will tell you: smoking a brisket is one of the easiest things you’ll ever cook. The technique is simple. The variables are few. What people screw up is patience and panic — they peek too much, they crank the heat when it stalls, they slice it the wrong direction, and then they blame the smoker.

This is the guide I wish someone had given me before my first brisket (which was, for the record, a hockey puck of regret). Follow it and you’ll pull a 12-pound packer off the smoker that makes your neighbors find an excuse to come over.

What You Actually Need (And What You Don’t)

A smoker. That’s it. Offset, pellet, electric, kamado — doesn’t matter. Pitmasters will argue about this for hours and they’re all wrong, because brisket has been cooked over every kind of fire for 200 years and it still tastes great.

Other gear that actually matters:

  • An instant-read thermometer. Not optional. Brisket is done by feel and temperature, not time. If you’re cooking by the clock, you’re going to lose.
  • A leave-in probe thermometer. So you stop opening the lid every 20 minutes. Every peek costs you 15 minutes of cook time.
  • Pink butcher paper (unwaxed). Foil works, but paper gives you better bark. Buy a roll — it’s eight bucks and lasts forever.
  • A sharp boning knife. For trimming. A dull knife will turn a $90 brisket into ribbons of frustration.
  • A cooler. For resting. Yes, a regular Yeti-style cooler. You’ll see.

What you don’t need: injectors, marinades, fancy rubs with 17 ingredients, spritz bottles full of apple juice, or the “Texas crutch” foil boat that’s having a moment on YouTube. Salt, pepper, smoke, time. That’s the assignment.

Step 1: Buy the Right Cut (This Is Where Most People Lose)

You want a whole packer brisket. 12 to 14 pounds, untrimmed, with both the flat and the point still attached. Costco sells these for around $4/lb in a Cryovac bag. Don’t buy just the flat — the point is where the magic lives, and the fat between them is what bastes the meat for 14 hours.

When you pick it up, do the floppy test: hold it horizontally by one end. A good brisket flops like a wet towel. A stiff one means more connective tissue you’ll have to render. Choose grade Choice or Prime if you can. Wagyu is a flex; you don’t need it.

Step 2: Trim (The Night Before, ~30 Minutes)

Take the brisket out cold — cold fat trims clean, warm fat smears. Lay it fat-cap up.

  • Trim the fat cap down to about ¼ inch. Anything thicker won’t render and you’ll end up cutting flabby fat off slices later.
  • Flip it over. Remove the hard chunk of fat between the flat and the point (the “deckle”). Get rid of any silverskin you see.
  • Square off the corners and the thin edge of the flat. Those thin bits will dry out into jerky in hour 10. Save them for chili or trim tallow.
  • Round the corners so they don’t burn.

You should lose 1.5 to 2.5 pounds in trim. That’s normal. Save the fat — we’ll render it into tallow later (more on that).

Step 3: Season (5 Minutes)

Central Texas dry rub. Equal parts by volume of coarse kosher salt and 16-mesh black pepper. That’s it. If you want to get fancy, add a tablespoon of garlic powder. If you want to get stupid, add anything else.

Slather lightly with yellow mustard or hot sauce first — it’s a binder, you won’t taste it. Season heavily. Both sides. Edges too. Refrigerate uncovered overnight if you can — it dry-brines the meat and gives you better bark.

Step 4: The Cook (Hour 0 to ~8)

Fire up the smoker to 225°F. Use post oak if you can find it. Hickory, pecan, or a 50/50 with oak also works. Avoid mesquite unless you like a kick to the teeth.

Brisket goes on fat-side up if your heat source is below (most pellet grills, kamados). Fat-side down if heat comes from above or the side. The point of this rule: protect the meat from direct radiant heat with the fat cap.

Now do the hardest thing in barbecue: leave it alone. No spritzing, no peeking, no “just checking.” Set your leave-in probe in the thickest part of the flat and walk away. Drink coffee. Mow the lawn. Stop opening the lid.

Around hour 6 to 8, your internal temp will hit roughly 165°F and stall. This is the famous “stall.” The meat is sweating and evaporative cooling is keeping the temperature flat. Do not panic. Do not crank the heat. This is when bark forms.

Step 5: The Wrap (Hour 8-ish)

When the bark is dark mahogany and feels set when you poke it — not tacky — it’s wrap time. Internal temp will be 165-175°F.

Lay out two big sheets of pink butcher paper, overlapped. Drizzle a few tablespoons of beef tallow on the paper (this is where the trim from Step 2 pays off — render it down on the stovetop while the brisket cooks). Place brisket fat-side down. Wrap tight, like a burrito. Put it back on the smoker.

Wrapping speeds up the cook and protects against drying out. Paper lets some moisture escape so the bark stays bark instead of turning to mush. Foil traps everything and you’ll get pot-roast brisket. Don’t do it.

Step 6: Cook to Probe-Tender (Hour 10-13)

Now you cook by feel, not temperature. Slide a probe or skewer into the thickest part of the flat. It should slide in like room-temperature butter. Total resistance: zero. Internal temp will usually be 200-205°F — but a brisket done at 198 is done, and one that’s tough at 207 isn’t done.

Probe in three spots. If all three glide, pull it. If any one feels tight, give it another 30 minutes.

Step 7: Rest (Minimum 2 Hours. I’m Serious.)

This is where 80% of home cooks blow it. They pull a perfect brisket, get excited, slice it 20 minutes later, and watch all the juice run onto the cutting board.

Leave it wrapped. Vent the paper for 15 minutes (crack it open to release steam — otherwise it’ll keep cooking and turn mushy). Then close it back up, wrap in an old towel, and put it in an empty cooler. Close the lid.

Rest for at least 2 hours. 4 is better. You can hold it like this for up to 6 hours and it’ll still be over 140°F. The resting time is non-negotiable — it’s when the muscle fibers relax and reabsorb the juices. Skip it and you’ve wasted 14 hours of cooking.

Step 8: Slice (Don’t Mess This Up)

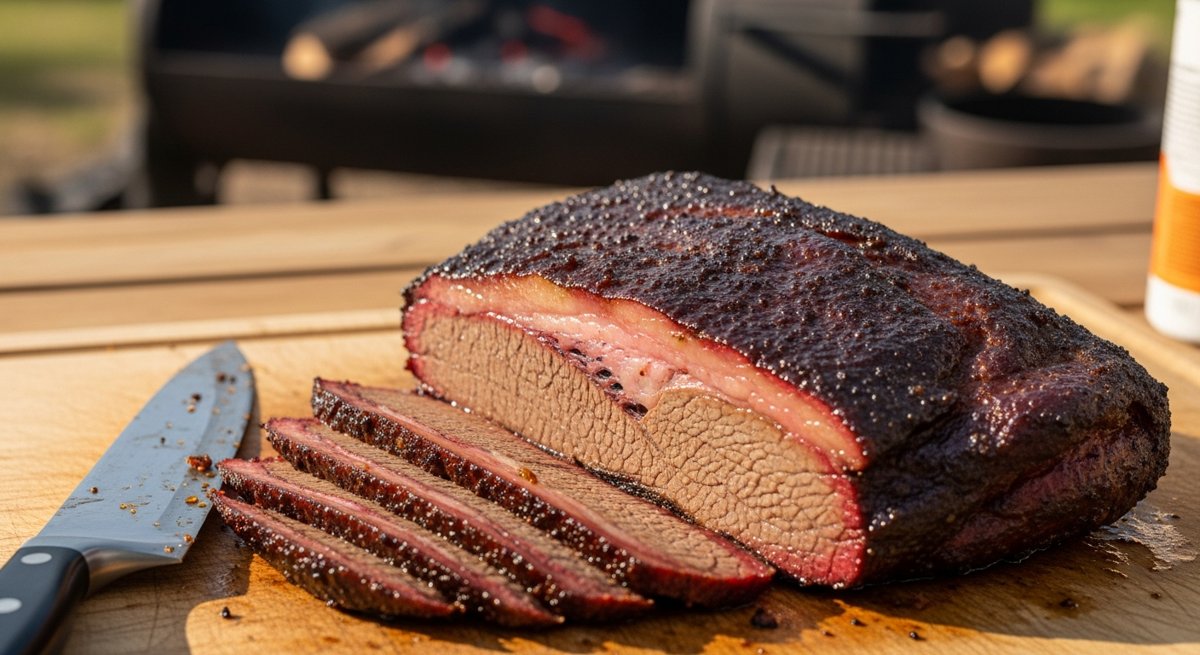
Unwrap on a big cutting board. Separate the point from the flat — you’ll see the fat seam between them. The grain runs different directions in each piece, which is why slicing a whole brisket as one log is amateur hour.

  • Flat: slice against the grain, pencil-thick (about ¼ inch).
  • Point: rotate 90° (the grain runs perpendicular to the flat). Slice thicker, or cube it for burnt ends.

A perfectly cooked slice should hold its shape when you pick it up, then pull apart with the gentlest tug. You want a quarter-inch pink smoke ring just under the bark. Don’t add sauce. If someone asks for sauce, you may judge them silently.

The 5 Mistakes That Ruin 90% of Briskets

  1. Cooking by time instead of temp/feel. “1.5 hours per pound” is a lie. Cook to probe-tender.
  2. Cranking the heat during the stall. Trust the stall. It’s working.
  3. Not resting long enough. 2 hours minimum. Yes, even though it smells incredible.
  4. Slicing with the grain. Look at the meat fibers before you cook. Mark the grain direction with a knife notch.
  5. Trimming too little fat. Quarter-inch cap. No exceptions.

Your Challenge

This weekend, buy a packer brisket. Trim it Friday night. Put it on at 4 AM Saturday. Cook to probe-tender, rest in a cooler until dinner, and feed eight people for less than $50 worth of meat.

The first one might be a 7/10. The second one will be an 8. By your fifth, you’ll be the friend people text on Tuesday asking what you’re doing Saturday.

Salt. Pepper. Smoke. Time. That’s the whole game. Stop overthinking it.

How to Dehydrate Your Own Backpacking Meals (And Stop Paying $12 a Pouch)

Let’s talk about the dirty secret of the outdoor industry: freeze-dried backpacking meals are a racket.

A single pouch of brand-name trail food runs $10-14. For what? Rice, beans, some seasoning, and the water removed. You’re paying premium prices for ingredients that cost $1.50 at the grocery store — minus the moisture.

Here’s the thing: you can dehydrate your own meals at home for a fraction of the cost, control exactly what goes in them, and end up with food that actually tastes like something you’d choose to eat. Not “acceptable because I’m tired and hungry” — genuinely good.

I’m going to walk you through the entire process. By the end of this, you’ll have the knowledge to build a full trip’s worth of custom trail meals for about $2-3 each.

What You Need (And What You Don’t)

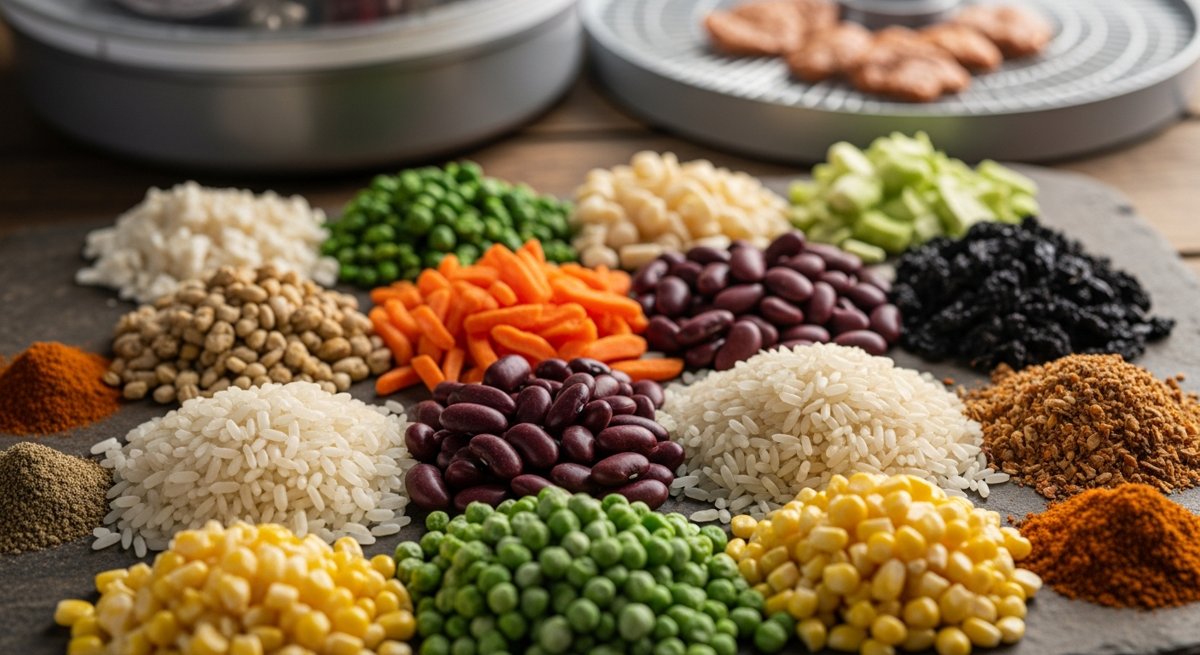
You need a food dehydrator. That’s it for specialized equipment. You don’t need a freeze-dryer ($2,000+), you don’t need vacuum sealers (nice to have, not required), and you don’t need any special training.

The dehydrator: A basic stackable unit (Nesco or equivalent) runs $50-80 and handles everything I’m about to describe. If you’re doing this regularly, a square-tray model with a rear-mounted fan gives more even drying and better capacity. But start with what’s affordable.

Storage: Ziplock bags work fine for meals you’ll eat within 2-3 weeks. For longer storage (months), use mylar bags with oxygen absorbers or vacuum seal them. Most home-dehydrated meals keep 3-6 months in a cool, dark pantry without any special packaging.

The Golden Rule: Cook First, Then Dehydrate

This is where most beginners go wrong. They try to dehydrate raw ingredients and wonder why their trail meals turn into crunchy disappointments that take 30 minutes to rehydrate.

The rule: fully cook your meal at home first, then dehydrate it.

When you cook first:

  • Rehydration takes 10-15 minutes instead of 30+
  • Texture stays close to the original meal
  • You can taste-test before committing to carrying it for three days
  • Food safety is handled — you’re not relying on trail conditions to cook meat through

The only exceptions: rice and pasta. These rehydrate well from their store-bought dried state. Just pre-cook them, spread thin on trays, and dehydrate. They’ll snap back to life with boiling water on trail.

5 Meals That Dehydrate Like a Dream

Not everything dehydrates well. High-fat foods go rancid. Dairy gets weird. Eggs are unpredictable. But these five are nearly foolproof:

1. Chili (The Gateway Meal)

If you’re dehydrating your first meal ever, make it chili. It’s forgiving, rehydrates perfectly, and tastes great on trail.

  • Use lean ground beef or turkey (90% lean minimum — fat doesn’t dehydrate)
  • Heavy on the beans, tomatoes, and spices
  • Spread 2-3 cups across a lined dehydrator tray
  • Dry at 145°F for 6-8 hours until crumbly and brittle
  • Rehydrate: add equal parts boiling water, wait 12 minutes

Trail tip: Pack a few individual hot sauce packets. Game changer.

2. Fried Rice

This one surprised me with how well it works. The soy sauce and sesame oil actually help with flavor retention.

  • Cook your fried rice as normal — scrambled egg, veggies, rice, soy sauce
  • Keep oil to a minimum (1 tsp for the whole batch)
  • Spread thin on trays, dry at 135°F for 8-10 hours
  • Should be completely hard and dry — no soft spots
  • Rehydrate: just-boiling water, 1:1 ratio, 15 minutes in a cozy

3. Black Bean Soup

Soups and stews are dehydrating’s sweet spot. Anything that’s already mostly liquid becomes incredibly lightweight once dried.

  • Blend about half the beans for a thick base, leave the rest whole
  • Season aggressively — cumin, chili powder, garlic, lime juice
  • Spread on lined trays (fruit leather sheets work great)
  • Dry at 145°F for 10-12 hours — it’ll form a leather that breaks into flakes
  • Rehydrate: 1.5x water ratio, 10 minutes

4. Pasta with Meat Sauce

  • Cook pasta al dente (it’ll soften more during rehydration)
  • Make your sauce lean — drain the meat well, use less oil than you normally would
  • Dehydrate the pasta and sauce separately (different dry times)
  • Pasta: 135°F, 6-8 hours. Sauce: 145°F, 8-10 hours.
  • Combine in your trail bag. Rehydrate together with boiling water, 15 min.

5. Coconut Curry Lentils

This is my personal favorite trail meal. Lentils are the perfect dehydration legume — small, uniform, rehydrate fast.

  • Red lentils + coconut milk (light, not full-fat) + curry paste + spinach
  • Cook until lentils are soft and it’s thick
  • Spread on lined trays, dry at 145°F for 10-12 hours
  • Breaks into flakes when done. Should snap, not bend.
  • Rehydrate: equal water, 12 minutes. Add a squeeze of lime if you packed one.

The Process (Step by Step)

  1. Cook your meal completely. Taste it. If it’s not good now, it won’t be good on trail.
  2. Spread thin. No more than ¼ inch on lined dehydrator trays. Thinner = faster = more even drying.
  3. Set temperature. 135-145°F for most meals. Higher isn’t faster — it just cases the outside while the inside stays moist.
  4. Rotate trays every 3-4 hours if your dehydrator doesn’t have a fan.
  5. Test for doneness. Break a piece. It should snap cleanly with no moisture inside. If it bends, keep going.
  6. Cool completely before packaging. Warm food in a sealed bag = condensation = mold.
  7. Package in portions. One bag = one meal = the amount of water you’ll add. Write the water amount and time on the bag.

Common Mistakes (I Made Them So You Don’t Have To)

  • Too much fat. Fat doesn’t dehydrate — it goes rancid. Use lean meats, minimal oil, and light coconut milk. This is the #1 reason homemade trail meals go bad early.
  • Spreading too thick. If your layer is more than ¼ inch, the outside dries and traps moisture inside. You’ll think it’s done when it’s not.
  • Not labeling bags. After a few batches they all look like brown crumbles. Write the meal name, date, water amount, and rehydration time on every single bag.
  • Skipping the test run. Always rehydrate one portion at home before committing it to a trip. Nothing worse than discovering your meal doesn’t work 8 miles from the trailhead.

The Math: Why This Is Worth Your Time

Let’s say you’re planning a 3-night trip. That’s 3 dinners and 3 lunches (6 meals).

Store-bought freeze-dried: 6 meals × $12 average = $72

Homemade dehydrated: 6 meals × $2.50 average = $15

Savings per trip: $57

Do three trips and you’ve paid for the dehydrator. Everything after that is pure savings — plus better food that you actually enjoy eating.

The Takeaway

Dehydrating your own trail meals is one of those skills that feels complicated until you try it once. Then you realize it’s just cooking with one extra step. The barrier isn’t knowledge or equipment — it’s just doing it the first time.

Your challenge: Pick one meal from the list above. Make a double batch of something you’d normally eat for dinner this week. Eat half, dehydrate the other half. Rehydrate it a few days later and see for yourself. That’s it. One meal. That’s your entry point.

Once you eat a trail meal you made yourself — one that actually tastes good, cost you $2, and weighs 4 ounces in your pack — you’re not going back to those overpriced pouches.

Self-reliance isn’t about doing everything the hard way. It’s about doing things the smart way — and keeping more money in your pocket while you’re at it.

Dehydrating is one corner of food self-reliance. The Self-Sufficient Backyard covers the rest — growing, preserving, and storing a year of food without a chest freezer.

Meal Prep Recipes: High-Protein, High-Volume, Low-Calorie Meals That Actually Fill You Up

Simple, high-protein, volume-friendly recipes built for meal prep. New recipes added regularly.

Looking for the science behind these choices? Read How Fat Cells Work to understand why volume eating is the most sustainable approach to body composition.

Chicken & Vegetable Power Bowl

Prep time: 15 min | Cook time: 25 min | Serves: 5 (meal prep)

Per serving: ~380 calories, 42g protein, 28g carbs, 9g fat

Ingredients

  • 2 lbs chicken breast, cubed
  • 1 lb broccoli florets
  • 2 bell peppers, diced
  • 1 large sweet potato, cubed
  • 2 cups cooked brown rice or quinoa
  • 2 tbsp olive oil
  • Salt, pepper, garlic powder, smoked paprika

Instructions

  1. Preheat oven to 425F. Toss sweet potato and broccoli with 1 tbsp olive oil, salt, pepper, and garlic powder. Spread on a sheet pan. Roast 25 minutes.
  2. While veggies roast, heat 1 tbsp olive oil in a large skillet over medium-high. Season chicken with smoked paprika, salt, pepper. Cook 6-7 minutes until golden and cooked through.
  3. Divide rice, chicken, and roasted vegetables into 5 meal prep containers.
  4. Store in fridge up to 5 days. Reheat 2-3 minutes in microwave.

Variations:

  • Tex-Mex: Swap paprika for cumin and chili powder. Add black beans. Top with salsa.
  • Asian: Use soy sauce + ginger on the chicken. Add edamame. Drizzle with sriracha.
  • Mediterranean: Use oregano and lemon. Add cherry tomatoes and cucumber. Top with feta.

Turkey Chili — Big Batch

Prep time: 10 min | Cook time: 35 min | Serves: 8

Per serving: ~290 calories, 32g protein, 24g carbs, 7g fat

Ingredients

  • 2 lbs ground turkey (93% lean)
  • 2 cans (15 oz) kidney beans, drained
  • 1 can (28 oz) crushed tomatoes
  • 1 can (15 oz) diced tomatoes
  • 2 bell peppers, diced
  • 1 large onion, diced
  • 4 cloves garlic, minced
  • 2 tbsp chili powder, 1 tbsp cumin, 1 tsp smoked paprika
  • Salt, pepper to taste

Instructions

  1. Brown turkey in a large pot over medium-high heat, breaking into crumbles. Drain any excess fat.
  2. Add onion, peppers, garlic. Cook 3-4 minutes until softened.
  3. Add all spices, stir 30 seconds until fragrant.
  4. Add all tomatoes and beans. Bring to a boil, then reduce to simmer for 25 minutes.
  5. Portion into containers. Keeps 5 days in fridge, 3 months in freezer.

Top with: Greek yogurt (instead of sour cream), diced avocado, hot sauce, fresh cilantro.


More recipes coming soon. Bookmark this page or check back regularly.

— BaseCampGoods
Recipes · basecampgoods.com

How Fat Cells Work: The Science of Fat Growth, Storage, and Why Volume Eating Wins

Understanding how your body stores fat changes how you fight it. This isn’t a diet plan — it’s the operating manual your body didn’t come with.

Your Fat Cells Are Balloons, Not Boxes

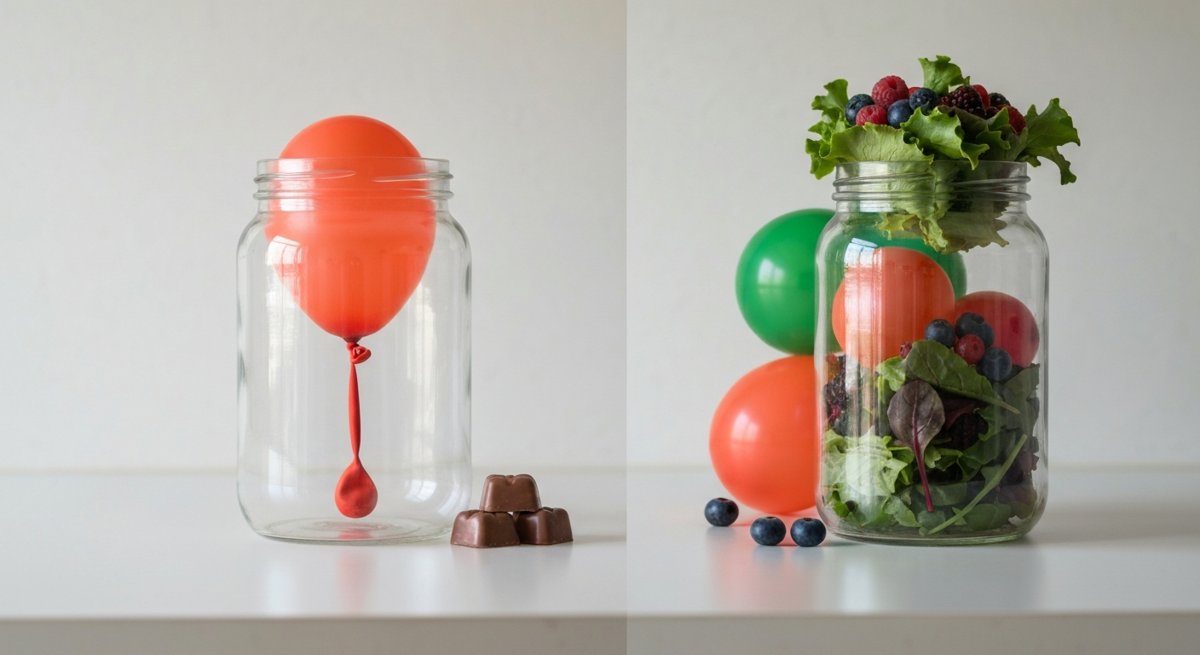
Most people think of fat as a substance you “burn off.” It’s more accurate to think of fat cells as billions of tiny balloons. When you eat more than you use, each balloon inflates with triglycerides. When you eat less than you use, each balloon deflates. The balloons themselves don’t go away — they just change size.

An average adult has roughly 30 billion fat cells. Someone who has been significantly overweight can have 100 billion or more. That difference matters, and we’ll get to why.

Phase 1: Hypertrophy — Cells Get Bigger

When you start gaining weight, your existing fat cells absorb more triglycerides and expand. A single fat cell can swell to roughly 4-6 times its lean volume. This is the primary mechanism behind most weight gain.

The good news: this is fully reversible. Eat less than you burn, and these cells shrink right back down. No permanent damage done.

Phase 2: Hyperplasia — New Cells Are Born

Here’s where it gets serious. When your existing fat cells hit their storage limit — roughly 0.7-0.8 micrograms of lipid per cell — they send out chemical distress signals. These signals trigger stem cells (pre-adipocytes) to differentiate into brand new fat cells.

This typically kicks in when men exceed roughly 25-30% body fat, though genetics, fat distribution, and how long you’ve been at that weight all play a role.

The critical part: once new fat cells are created, you cannot lose them through diet or exercise. You can only shrink them. They sit there, empty and waiting, sending “fill me” signals that make weight regain easier. This is a major reason why people who were once significantly overweight have a harder time maintaining weight loss than people who were never heavy.

The Numbers — Where Are You?

Here’s a rough framework for men (women carry ~8-10% more body fat at equivalent fitness levels):

  • 15-20% body fat: Healthy range. Your existing cells are comfortably filled, no hyperplasia risk. Weight loss from here is straightforward — you’re just deflating balloons.
  • 20-25% body fat: Overfilled but manageable. Still mostly hypertrophy. Cells are stretched but not maxed out. This is the most responsive range for diet changes.
  • 25-30% body fat: Approaching the threshold. Cells are near capacity. The longer you stay here, the higher the risk of triggering new cell creation. This is the “act now” zone.
  • 30%+ body fat: Hyperplasia is likely active, especially if you’ve been here for months or years. Weight loss is still absolutely possible, but your body is building infrastructure that will fight you on the way back down.

Quick estimate: if you know your lean target weight (what you’d weigh at 15% body fat), subtract that from your current weight, divide by current weight, and multiply by 100. That’s your approximate body fat percentage. It’s rough, but it gets you in the right zone.

What This Means for Your Diet

The science points to one clear strategy: don’t stay overfilled for long periods. Brief spikes in weight (holidays, vacations, stressful months) are fine — your cells inflate and deflate without creating new ones. It’s the sustained, months-long surplus that triggers hyperplasia.

But “eat less” is useless advice if you’re hungry all the time. The real answer is volume eating — foods that fill your stomach and keep you satisfied while delivering fewer calories per bite.

Volume Eating: Big Plates, Small Calories

Your stomach doesn’t count calories. It measures volume and weight. Stretch receptors in your stomach wall tell your brain “I’m full” based on how much physical space the food takes up — not how many calories it contains. This is the cheat code.

The High-Volume Playbook

  • Cruciferous vegetables: Broccoli, cauliflower, Brussels sprouts, cabbage. A full pound of broccoli is only 150 calories but fills an entire plate. Roast with garlic and olive oil for flavor without going overboard.
  • Leafy greens: Spinach, kale, arugula. An enormous salad bowl is 30-50 calories before dressing. Use vinaigrette instead of ranch and you stay under 150 for a meal-sized salad.
  • Lean proteins: Chicken breast, turkey, white fish, shrimp, egg whites. High satiety, moderate calories. 8 oz of chicken breast is ~280 calories and keeps you full for hours.
  • Potatoes (yes, potatoes): The most satiating food ever measured on the Satiety Index. A large baked potato is ~280 calories and will keep you fuller than almost anything else you can eat. Skip the butter and sour cream — use Greek yogurt and hot sauce instead.
  • Soups and stews: Water adds volume without calories. A giant bowl of chicken vegetable soup can be 200-300 calories and feel like a feast. This is the ultimate meal-prep food.
  • Berries: Strawberries, blueberries, raspberries. A full cup of strawberries is 50 calories. Compare that to a banana at 100+ or grapes at 100+.
  • Greek yogurt: High protein, thick texture, very satiating. 200g of non-fat Greek yogurt is ~130 calories with 20g of protein.
  • Popcorn (air-popped): 3 cups of air-popped popcorn is 90 calories. That’s a large bowl for the calorie cost of a single handful of chips.

The Calorie Density Trick

Think in terms of calories per pound:

  • Vegetables: 60-200 cal/lb
  • Fruits: 200-350 cal/lb
  • Potatoes, rice, beans: 400-600 cal/lb
  • Lean meat, fish: 500-700 cal/lb
  • Bread, pasta: 1,200-1,500 cal/lb
  • Cheese: 1,600-1,800 cal/lb
  • Nuts: 2,500-3,000 cal/lb
  • Oils, butter: 4,000 cal/lb

Build your plates from the top of this list. The lower you go, the smaller your portions need to be.

Meal Prep That Actually Works

Volume eating is perfect for meal prep because the base ingredients are cheap, keep well, and cook in bulk.

  • Sunday protein cook: Grill or bake 3-4 lbs of chicken breast, portion into containers. Season differently (lemon herb, cajun, teriyaki) to avoid monotony.
  • Big-batch soups: Make a pot of chicken vegetable, turkey chili, or lentil soup. Portions into 5 containers. Reheats perfectly all week.
  • Roasted vegetable trays: Sheet-pan roast a mix of broccoli, bell peppers, zucchini, and sweet potato. 400°F, 25 minutes. Makes 4-5 side portions.
  • Overnight oats: Rolled oats, Greek yogurt, berries, splash of almond milk. Prep 5 jars Sunday night. Grab and go all week. ~300 calories per jar with 20g+ protein.
  • Egg muffins: Whisk eggs with spinach, peppers, turkey sausage. Pour into muffin tins, bake at 375°F for 20 minutes. 12 muffins = 3-4 days of grab-and-go breakfasts at ~70 calories each.

The key to sustainable meal prep: cook the protein and base vegetables in bulk, vary the sauces and seasonings daily. Same chicken breast tastes completely different with salsa verde vs. mustard vs. soy-ginger glaze.

For more meal prep ideas, recipes, and detailed macros, check out our growing recipe collection — we’ll be adding new volume-friendly recipes regularly.


The science is clear: your fat cells are permanent residents, but their size is negotiable. Fill your plates with volume, keep your cells from maxing out, and the biology works in your favor.

— BaseCampGoods
Nutrition & Meal Prep · basecampgoods.com

Stop Buying Electrolyte Packets — Make Your Own for Pennies a Serving

You’re standing in the supplement aisle staring at a wall of brightly colored electrolyte packets — Liquid IV, LMNT, Drip Drop — each one promising to “optimize your hydration” for the low price of two bucks a serving. Maybe more.

Here’s the thing: you’re paying for marketing. The ingredients in those packets cost almost nothing. And once you understand what electrolytes actually are and what your body needs, you can mix your own at home in about 90 seconds for roughly 5 to 8 cents a serving.

This isn’t some weird biohacker trick. It’s basic chemistry that athletes, hikers, and field medics have used for decades. Let me show you exactly how to do it.

Why Electrolytes Matter (The 30-Second Version)

Your muscles, nerves, and heart run on electrical signals. Those signals depend on four key minerals dissolved in your blood and cells:

  • Sodium — the big one. You lose the most of this in sweat. Without enough, you cramp, get dizzy, and your performance tanks.
  • Potassium — works alongside sodium for muscle contraction and fluid balance.
  • Magnesium — involved in 300+ enzymatic reactions. Low magnesium means poor recovery, bad sleep, and muscle twitches.
  • Calcium — you get plenty from food. Not usually the one you need to supplement in a drink.

That’s it. That’s the formula those $2 packets are built around. Sodium, potassium, maybe some magnesium, and a sweetener to make it drinkable. You already have most of this in your kitchen.

The Base Recipe: Everyday Electrolyte Drink

This is your daily driver. Good for workouts, hot days, yard work, hiking — any time you’re sweating.

Per 32 oz (1 quart) of water:

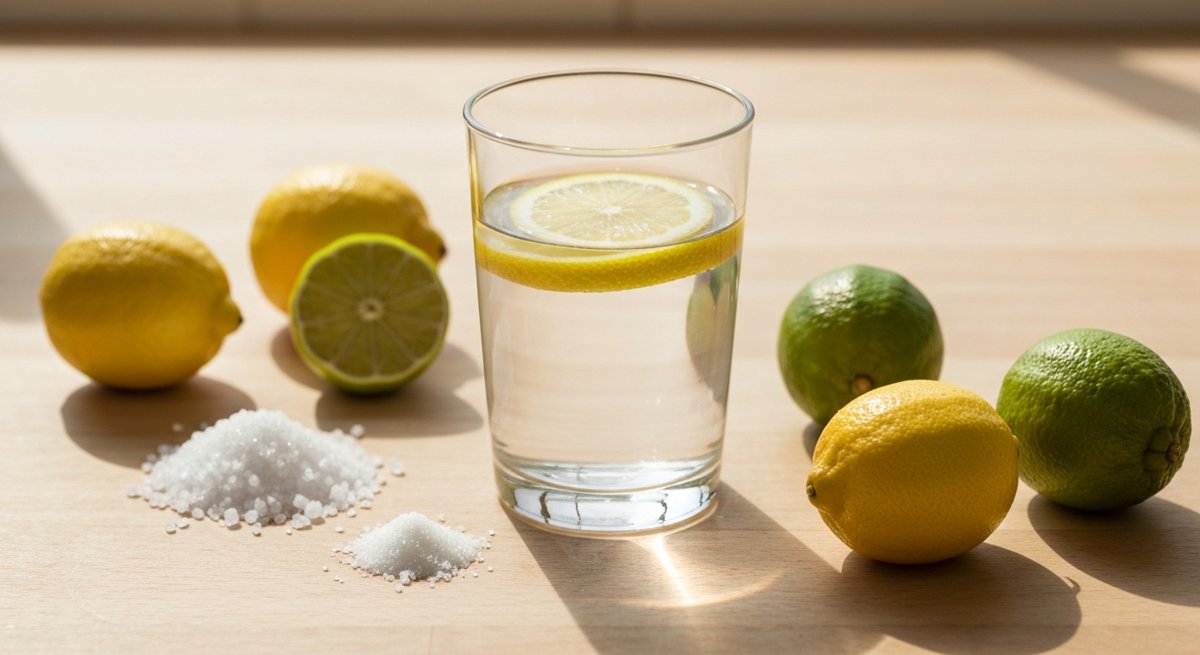
  • ¼ teaspoon sea salt (about 575mg sodium)
  • ⅛ teaspoon salt substitute like Nu-Salt or Morton Lite Salt (about 350mg potassium)
  • 1 tablespoon honey or maple syrup (just enough glucose to aid absorption)
  • Juice of ½ lemon or lime (flavor + a little extra potassium)

Stir it up. That’s it. Total cost per serving: somewhere between a nickel and a dime, depending on what you already have on hand.

My honest take: Does it taste as good as a watermelon LMNT packet? No. It tastes like slightly salty lemonade. But you know what? It works exactly the same — arguably better, because you can dial in the ratios to YOUR sweat rate and YOUR activity level instead of trusting a one-size-fits-all packet designed for the average person who doesn’t exist.

Level Up: The Heavy Sweat Formula

If you’re training hard, working outside in Texas summer heat, or rucking under load, you need more. Here’s the stepped-up version:

Per 32 oz of water:

  • ½ teaspoon sea salt (~1,150mg sodium)
  • ¼ teaspoon salt substitute (~700mg potassium)
  • 1 tablespoon honey
  • Juice of 1 full lemon
  • Pinch of food-grade magnesium citrate powder (optional but recommended — about 200mg)

The magnesium is the one upgrade worth spending a few bucks on. A bag of magnesium citrate powder runs about $12-15 and will last you months. If you’ve ever had leg cramps at night after a hard day, low magnesium is almost always the culprit.

The Shelf-Stable Trail Mix: Make It in Bulk

This is where it gets really practical. You can pre-mix a dry electrolyte powder that stores indefinitely and goes anywhere — your pack, your truck, your go-bag.

Dry Mix (makes ~30 servings):

  • 2 tablespoons fine sea salt
  • 1 tablespoon salt substitute (potassium chloride)
  • 1 teaspoon magnesium citrate powder
  • 3 tablespoons sugar or powdered drink mix (optional — for flavor and glucose transport)

Mix it all together, store in a small mason jar or ziplock bag. One level teaspoon per 32 oz of water. Done. Throw a few single-serving baggies in your kit and you’ve got electrolytes for a week-long trip that weighs almost nothing and cost you about two dollars total.

If you want to get fancy with flavor, mix in powdered lemon juice or unsweetened Kool-Aid powder. Or just squeeze citrus at camp — it’s better fresh anyway.

The Math: How Much Are You Really Saving?

Let’s be real about this because I think the numbers speak for themselves:

Option Cost/Serving Cost/Month (1/day)
LMNT $1.75 – $2.00 $52 – $60
Liquid IV $1.25 – $1.50 $37 – $45
Drip Drop $1.00 – $1.25 $30 – $37
DIY Mix $0.05 – $0.08 $1.50 – $2.40

That’s roughly $500 to $700 per year back in your pocket if you’re a daily electrolyte user. And a lot of active people are — especially in the summer, especially if you’re training, working outdoors, or just trying to stay sharp.

When Commercial Packets Make Sense

I’m not going to pretend there’s zero reason to buy pre-made electrolyte mixes. Convenience is real. If you’re traveling and don’t want to carry a jar of salt mix through TSA, grab some packets. If you genuinely can’t stand the taste of the DIY version and it means you won’t drink it, then a packet you actually use beats a homemade mix you leave in the cabinet.

But for daily use at home, at the gym, or out in the field? Making your own is a no-brainer. You control the ingredients, you know exactly what’s in it (no maltodextrin, no “natural flavors,” no stevia aftertaste), and you save a stupid amount of money.

A Quick Word on “But Is Salt Bad for You?”

If you’re active, almost certainly not. The fear of sodium is based on studies of sedentary people eating processed food. If you’re sweating regularly — training, working outside, rucking — you’re losing 1,000-2,000mg of sodium per hour through sweat. You need to replace it. Under-hydration with electrolyte imbalance is a far more common problem for active people than too much salt.

That said, if you have a specific medical condition (kidney disease, hypertension managed with medication), talk to your doctor before significantly increasing sodium intake. Common sense applies.

Your Challenge This Week

Make one batch. That’s it. Mix up the base recipe before your next workout or your next day working outside. See how you feel compared to plain water. Most people notice the difference immediately — less fatigue, fewer cramps, better focus in the heat.

Then make the bulk dry mix and stash some in your gym bag, your truck, and your pack. Once you see how easy and cheap it is, you’ll never look at a $2 electrolyte packet the same way again.

The bottom line: Electrolytes aren’t complicated, and they don’t need to be expensive. Four ingredients, 90 seconds, pennies a serving. Stop paying the marketing tax. Your body doesn’t care about the packaging — it cares about the sodium, potassium, and magnesium. Give it what it needs.