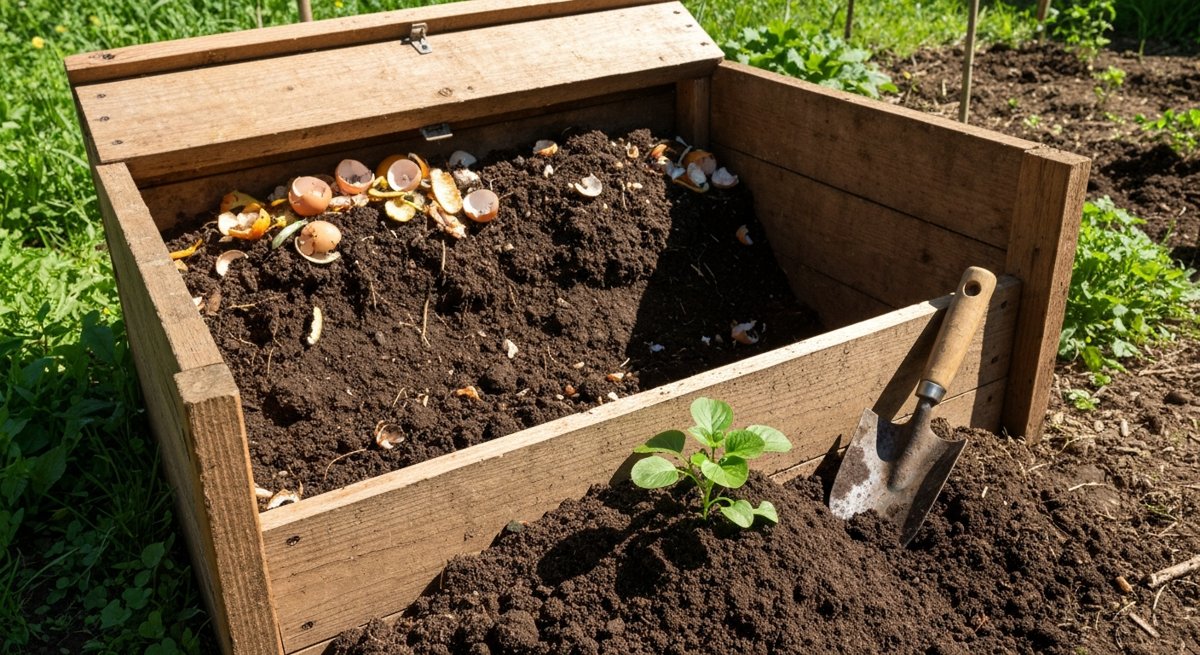
Composting 101: How to Turn Kitchen Waste Into Garden Gold in 90 Days

Here’s a stat that should annoy you: the average American household throws out roughly 500 pounds of food scraps a year. You pay to buy it. You pay to throw it away. Then in spring, you drive to the garden center and pay $8 a bag for compost that’s basically the same thing you just trashed.

Composting fixes this. And no, you don’t need a fancy tumbler, a degree in soil science, or a half-acre back forty. You need a corner of your yard, a pitchfork, and about 90 days. That’s it.

I’ve watched people overthink this for years. The slimy stink pile. The bone-dry stack of leaves that just sat there. The one forgotten for six months. Here’s what actually works, stripped of the gardening-blog fluff.

The 60-second version: Layer “browns” (carbon — dry leaves, cardboard) and “greens” (nitrogen — kitchen scraps, grass) at roughly 3:1 by volume. Keep it damp like a wrung-out sponge. Turn it once a week. In 90 days, you’ve got black gold. That’s the whole skill.

Why Bother? The Honest Pitch

Look, I’m not going to sell you on composting like it’s going to save the planet. The actual benefits are smaller and more practical:

  • Free soil amendment. Finished compost retails for $5-10 per cubic foot. A modest pile produces 10-20 cubic feet a year. That’s $100+ of garden soil you didn’t buy.
  • Half the trash. Food scraps and yard waste are 30-40% of household garbage by weight. Smaller bags, fewer trips, less stink in the can during summer.
  • Plants actually like it more than fertilizer. Compost adds microbes and slow-release nutrients. Synthetic fertilizer is just a salt blast — works fast, dead soil after.
  • It’s a closed loop on your property. Self-sufficiency isn’t a vibe, it’s a habit. Composting is one of the easiest habits to lock in.

If you grow anything — vegetables, fruit trees, a lawn, even houseplants — you should be composting. The math is too good to ignore.

The Only Rule That Matters: Browns and Greens

Forget everything you’ve read about C:N ratios of 30:1. You don’t need to weigh anything. Here’s the only mental model you need:

BROWNS (carbon) — 3 parts GREENS (nitrogen) — 1 part
Dry leaves Vegetable & fruit scraps
Shredded cardboard Coffee grounds (yes, they’re “green”)
Newspaper (no glossy) Grass clippings
Straw / hay Tea bags (staples out)
Sawdust (untreated wood) Eggshells (crushed)
Wood chips Garden trimmings, dead annuals
Pine needles (sparingly) Plant-based food prep scraps

Rough rule: three buckets of brown for every one bucket of green. If your pile is wet and stinky, add browns. If it’s dry and doing nothing, add greens (and water).

What NEVER Goes In

  • Meat, fish, bones. They’ll compost eventually, but they bring raccoons, rats, and a smell your neighbors will remember.
  • Dairy. Same reason. Cheese on the pile = wildlife party.
  • Greasy / oily food. Coats material, blocks airflow, smells.
  • Pet waste (dogs, cats). Carries pathogens that survive a normal backyard pile. Chickens and rabbits are fine.
  • Diseased plants. If a tomato plant got blight, burn it or bag it. Don’t reward the spores.
  • Walnut leaves/wood. Contain juglone, which kills tomatoes, peppers, and a lot of garden crops.
  • Glossy paper, “compostable” plastic. The first leaches chemicals; the second is a lie unless you have a 160°F industrial composter.

The Setup: Three Options, Cheapest to Best

Option 1: Open Pile (Free)

Pick a spot. Dump stuff. Done. Works fine if you have space and don’t care how it looks. Downside: spreads out, harder to turn, raccoons might dig.

Option 2: Pallet Bin ($0-30)

Four wood pallets, zip-tied or wired at the corners, makes a 4’x4′ bin. Hardware stores and warehouses give pallets away. This is what 90% of serious gardeners use. Add a second bin next to it for the “finishing” pile and you’re set for life.

Option 3: Tumbler ($120-250)

Enclosed plastic drum on a crank. Pros: keeps animals out, looks tidy, easy to turn. Cons: small capacity, plastic degrades in UV, you’ll outgrow it the first year you garden seriously. Buy a tumbler if you’re in a suburb and worried about appearances. Build a pallet bin if you actually want compost.

My take: Pallet bin every time. Tumblers look great on Instagram but produce a fraction of the volume. A double pallet bin setup (active + curing) costs under $30 and outlasts three tumblers.

The 90-Day Build

Day 1: Lay the Base

Drop 4-6 inches of coarse browns on the ground — twigs, corn stalks, rough mulch. This creates airflow underneath. Don’t skip this. A compacted pile is a dead pile.

Days 1-30: Build the Pile

Add material in alternating layers as you generate it. Bucket of kitchen scraps from the week? Cover it with two buckets of dry leaves or shredded cardboard. Always finish a fresh addition with browns on top — that’s what keeps the smell down and the flies out.

Your target size is a cube roughly 3 feet on each side. Smaller piles don’t generate enough internal heat. Bigger gets hard to turn. Three feet cubed is the sweet spot.

Days 30-60: Turn and Wait

Once the pile is built, stop adding to it. Start a second pile for new scraps. The first pile is now “finishing.”

Turn it once a week with a pitchfork or compost aerator. “Turning” means moving the outside material to the inside. The center cooks at 130-150°F when it’s working right. You’ll see steam rising on cool mornings — that’s the win.

Check moisture every turn. Squeeze a handful. Water should bead but not drip. Too dry? Hose it down. Too wet? Add browns and fluff it.

Days 60-90: Cure

By day 60 the pile has shrunk by half and most material is unrecognizable. Stop turning. Let it sit. The microbes do their last work and the pile cools down.

By day 90 you’ve got dark, crumbly, earthy-smelling compost. If it still smells like rotten anything, it’s not done. Give it another two weeks.

Reality check: 90 days is the fast version, assuming summer heat, good carbon/nitrogen balance, and weekly turning. In winter or with a neglected pile, it’s 6-12 months. Both work. The microbes don’t care about your timeline.

The Five Mistakes That Kill 90% of Backyard Piles

  1. Too much green, not enough brown. Result: slimy, stinky, attracts flies. Fix: dump in shredded cardboard or dry leaves and turn it.
  2. Pile too small. A 2-foot pile never gets hot enough. Build to 3x3x3 or bigger.
  3. Bone dry. Microbes need moisture. If it looks like a leaf pile, hose it down until it’s sponge-damp.
  4. Never turning it. A pile that doesn’t get turned still composts — in 18 months instead of 3. Turn weekly.
  5. Putting in stuff that doesn’t belong. Meat, dairy, dog poop. You’ll regret it within a week.

The Kitchen Side: Make It Effortless

If walking out to the pile every time you peel a carrot sounds annoying, that’s because it is. Here’s the system that actually sticks:

  • Counter caddy. A small lidded container (1 gallon) on the counter. Charcoal filter in the lid kills smell. Empty it every 3-5 days. Stainless or ceramic — plastic stains and holds odors.
  • Freezer trick (game changer). Keep a gallon zip bag in the freezer. Toss scraps in as you cook. Empty it weekly. Zero smell, zero fruit flies, zero excuses. This is the move.
  • Outdoor 5-gallon bucket with lid. If you generate a lot of yard waste, stage it next to the pile so you only have to walk out once a week.

What to Do With Finished Compost

Once it’s done, the use cases are endless:

  • Top-dress garden beds with 1-2 inches in spring and fall.
  • Mix into potting soil at a 1:3 ratio for container plants.
  • Side-dress tomatoes, peppers, squash mid-season for a nitrogen boost.
  • Compost tea. One shovelful in a 5-gallon bucket of water, steep 24 hours, water plants. Cheap liquid fertilizer.
  • Lawn topdressing. Quarter-inch layer in early fall. Best lawn treatment that exists, period.

The Honest Tradeoffs

Composting isn’t free time-wise. You’re looking at maybe 30 minutes a week — 5 minutes emptying the counter caddy, 10-15 minutes turning the pile, plus occasional sourcing of browns (free leaves in fall, cardboard from any delivery).

It’s also not magic. A bad pile won’t ruin anything, but it also won’t produce anything useful. The difference between people who get compost and people who get a wet pile of garbage is one thing: turning the pile. Everything else is forgivable.

Your 90-Day Challenge

This weekend: Build a pallet bin or designate a corner of the yard. Lay your coarse base layer. Put a counter caddy or freezer bag in your kitchen.

Next 30 days: Build the pile. Aim for 3’x3’x3′. Layer browns and greens 3:1. Always finish with browns on top.

Days 30-60: Stop adding. Start pile #2. Turn pile #1 every weekend.

Day 90: Sift out the finished compost. Top-dress one garden bed. Notice it’s the best soil you’ve ever had.

Report back. I want to know how your pile is doing.

Self-sufficiency isn’t about prepping for collapse or going off-grid. It’s about closing small loops on your property — turning waste into resource, reducing what you buy, getting your hands in the dirt. Compost is the most basic, most ancient version of this. It’s literally what soil has been doing since plants existed. You’re just helping it along.

Build the bin. Start the pile. Stop throwing money in the trash.

Composting closes one loop; there are dozens more. For the full playbook on the rest — water, food, soil, and power — The Self-Sufficient Backyard walks through the whole system.
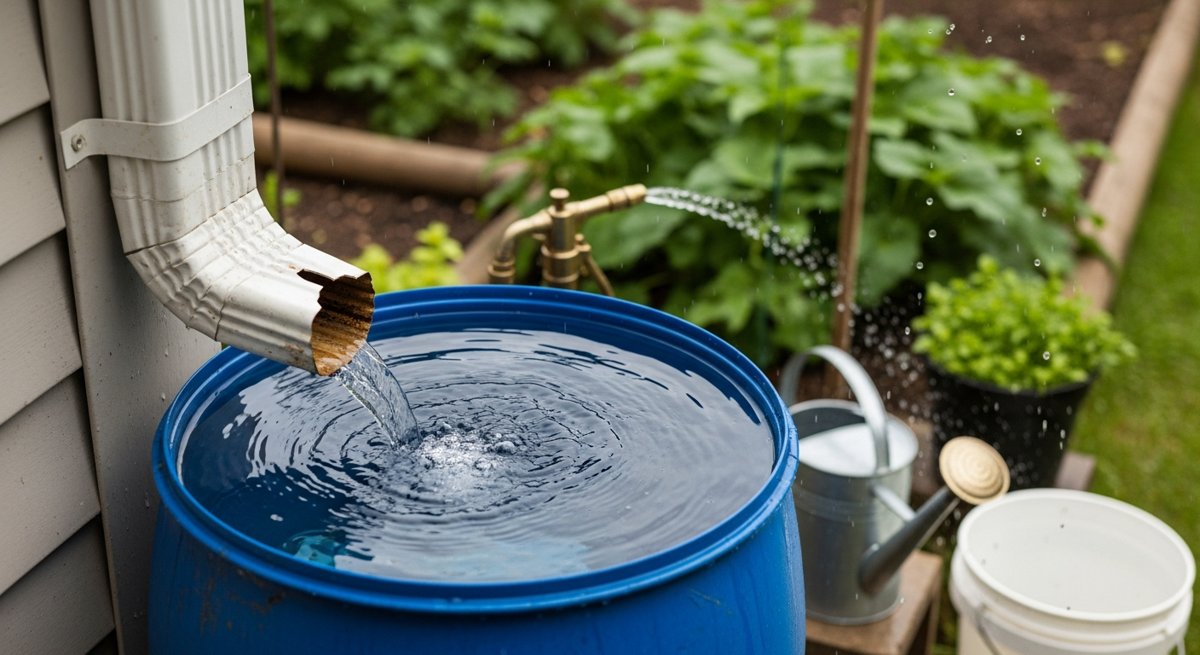
How to Build a Rainwater Collection System for Under $50 (Step-by-Step)

Most people look at their roof during a rainstorm and think nothing of it. Meanwhile, thousands of gallons of free, clean-enough water are pouring off the edges and disappearing into the ground. That’s water you could be using for your garden, your livestock, washing gear, or — with proper filtration — even drinking.

A basic rainwater collection system isn’t complicated. It isn’t expensive. And once it’s set up, it works every single time it rains without you lifting a finger. Here’s how to build one this weekend for under fifty bucks.

Why Bother Collecting Rainwater?

Let’s put some numbers on it. A 1,000-square-foot roof section in an area that gets 30 inches of rain per year will yield roughly 18,000 gallons annually. That’s not a typo. The formula is simple: 1 inch of rain on 1,000 sq ft of roof = about 600 gallons.

Even a modest setup with a single barrel captures 50+ gallons per decent rainstorm. That’s enough to keep a small garden watered for a week in the summer.

Beyond the free water, there are real practical reasons:

  • Rainwater is better for plants. No chlorine, no fluoride, no mineral buildup. Your garden will genuinely grow better with it.
  • It reduces your water bill. Outdoor watering can account for 30-50% of residential water use in summer months.
  • It’s a backup supply. Municipal water fails. Wells run dry. Having 200 gallons stored isn’t paranoia — it’s planning.
  • It reduces runoff. Less water flooding your yard, less erosion, less strain on storm drains.

What You Need (The Sub-$50 Shopping List)

You don’t need a fancy commercial rain barrel system. Here’s what actually works:

Item Approx Cost Where to Find
55-gallon food-grade barrel $15–25 Facebook Marketplace, car washes, food distributors
3/4″ brass spigot $6–8 Hardware store
3/4″ bulkhead fitting (or rubber washers + lock nut) $4–6 Hardware store
Window screen mesh (for inlet filter) $4 Hardware store
Downspout diverter OR flexible downspout adapter $8–12 Hardware store / Amazon
Overflow fitting + short hose $5 Hardware store
Teflon tape, silicone sealant $3 Already in your garage, hopefully
Total $35–50

Pro tip on the barrel: Food-grade is non-negotiable. You want barrels that held juice concentrate, soy sauce, vinegar — not chemicals. Most car washes sell their used soap barrels for $10-15 and those work great too. Avoid anything that held industrial chemicals, obviously.

The Build: Step by Step

Step 1: Pick Your Location

Find a downspout that drains from the largest roof section possible — more square footage means more water per storm. The ground needs to be level and firm. A full 55-gallon barrel weighs about 460 pounds, so don’t put it on soft dirt or a wobbly deck.

Ideally, you want it elevated. Even 12-18 inches of elevation (a couple of cinder blocks or a small wooden platform) gives you gravity-fed pressure through the spigot. This matters if you want to run a hose from it without a pump.

Step 2: Prep the Barrel

You need three holes:

  1. Inlet hole (top): Cut a hole in the lid large enough for your downspout adapter to fit through — typically 3-4 inches. If the barrel has a removable lid, even easier. Secure window screen mesh over this opening with a hose clamp or zip ties. This keeps mosquitoes, leaves, and debris out.
  2. Spigot hole (bottom): Drill a 7/8″ hole about 3-4 inches from the bottom of the barrel. Install the bulkhead fitting from inside, add the spigot on the outside. Teflon tape on all threads, silicone around the exterior seal. Let it cure 24 hours.
  3. Overflow hole (top): Drill another hole about 2 inches from the top on the opposite side from the inlet. Install a bulkhead fitting and attach a short garden hose to direct overflow away from your foundation. This is the hole people skip — and then wonder why water is pouring over the top and pooling next to their house.

Step 3: Connect to the Downspout

You have two options here:

Option A — Flexible adapter (easiest): Cut the downspout above barrel height. Attach a flexible corrugated adapter that runs from the cut downspout into the top of your barrel. Takes about 10 minutes.

Option B — Diverter (better): Install an inline diverter on the downspout. These redirect water to the barrel when it’s raining and automatically bypass when the barrel is full. Slightly more work to install, but much cleaner and you don’t lose your normal downspout function.

I’d go with Option B if you can. The extra 15 minutes of installation saves you from having to think about it ever again.

Step 4: Set It and Forget It

Place the barrel on your platform, connect everything, and wait for rain. After the first rain, check for leaks around the spigot and overflow fittings. Tighten as needed. That’s it. You’re collecting water.

Mistakes That’ll Bite You

  • Skipping the screen mesh. Congratulations, you just built a mosquito breeding facility. Always screen the inlet. No exceptions.
  • No overflow plan. Water WILL overflow. Direct it somewhere intentional — a garden bed, a rain garden, or at minimum away from your foundation.
  • Using a non-food-grade barrel. Those blue chemical drums are cheap for a reason. The residue leaches into the water. If you’re watering food crops, this matters a lot.
  • Forgetting about winter. In freeze zones, drain your barrel before the first hard freeze or the expanding ice will crack it. Disconnect the downspout adapter and store the barrel upside down.
  • Not checking local regulations. Most states allow residential rainwater collection, but a handful have restrictions (looking at you, Colorado — though even they relaxed their rules). Spend 5 minutes checking before you build.

Scaling Up (When You’re Hooked)

One barrel is a start. Most people who build one end up with three within a year. You can daisy-chain barrels by connecting the overflow of one to the inlet of the next. Same concept, just more capacity.

For serious storage, 275-gallon IBC totes (Intermediate Bulk Containers) show up on Marketplace for $50-75. They’re ugly, but one tote holds five times what a barrel does. Paint it dark or build a simple screen fence around it.

And if you’re thinking about drinking the water — you absolutely can, but you need proper filtration. A first-flush diverter (dumps the first gallon of dirty roof water), a sediment filter, and a quality activated carbon or ceramic filter will get you there. That’s a separate project, but the collection system is the same.

The Takeaway

Here’s my honest take: rainwater collection is one of the highest-return, lowest-effort self-sufficiency projects you can do. You spend a Saturday afternoon and $40, and from that point forward, the sky literally delivers free water to your property every time it rains. No ongoing cost. No maintenance beyond cleaning the screen once a season.

It won’t make you fully water-independent, but it changes how you think about resources on your property. And that shift in thinking — from consumer to collector — is where real self-sufficiency starts.

Your challenge: This weekend, go look at your downspouts during the next rain. Pick the one dumping the most water. That’s where your first barrel goes. Get the barrel this week, build it next Saturday. By the end of the month, you’ll be collecting water without thinking about it.

Rain catchment is the first step toward water independence. For the bigger picture — storage, filtration, gravity feed, and the rest of an off-grid water plan — The Self-Sufficient Backyard lays it out start to finish.

How to Build a Gravity-Fed Water System on Your Property (No Pump, No Power)

Water is the single most important resource on any property. You can go weeks without food. You’ll last about three days without water. And yet most people with land — even people who consider themselves “prepared” — are completely dependent on a municipal supply or an electric well pump to get it.

Here’s the thing: gravity doesn’t need electricity. It doesn’t break down. It doesn’t care about grid outages, fuel shortages, or supply chain problems. A gravity-fed water system is one of the simplest, most reliable pieces of infrastructure you can build on your property — and most people never even consider it.

Let’s fix that.

What Is a Gravity-Fed Water System?

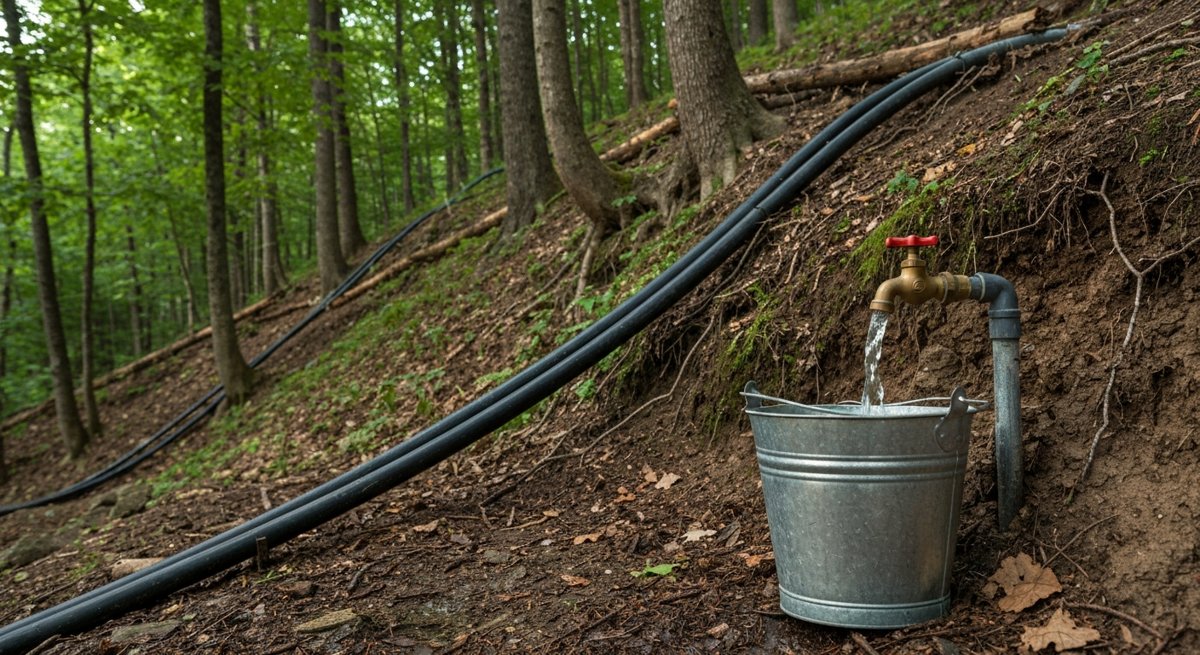
Dead simple concept: you put water storage above where you need the water, and gravity does the work of delivering it. No pump. No power. No moving parts. Water flows downhill through pipes to your garden, livestock troughs, outdoor sinks, or even an off-grid cabin.

For every 1 foot of elevation (called “head”), you get roughly 0.43 PSI of water pressure. So a tank sitting 10 feet above your delivery point gives you about 4.3 PSI. That’s not going to run a shower with great pressure, but it’s more than enough to fill troughs, drip-irrigate a garden, or provide a hand-wash station.

Put that tank 25 feet up? Now you’re at ~10.8 PSI — enough for a basic outdoor shower or a cabin sink with a low-flow faucet.

What You Need (The Short List)

This isn’t a $5,000 project. For a basic system, you’re looking at:

  • A water storage tank — 250 to 550 gallons is the sweet spot for most homesteads. IBC totes (those white cubes in metal cages) are cheap, widely available, and stack well. You can often find them for $50-$100 used.
  • An elevated platform — A hillside is ideal. No hill? Build a simple platform from treated lumber, concrete blocks, or even a repurposed trailer. You need at least 6-8 feet of elevation for usable pressure.
  • Polyethylene pipe — ¾” poly pipe is cheap, flexible, and easy to work with. For longer runs (over 100 feet), step up to 1″ to reduce friction loss.
  • A ball valve — At the tank outlet. Lets you shut off flow for maintenance.
  • A basic sediment filter — If your source is rainwater or surface water, a simple inline filter keeps debris out of your lines.
  • Hose barb fittings and clamps — To connect everything. That’s it.

Total cost for a basic system: $150-$400. Compare that to drilling a well ($5,000-$15,000) or installing a solar pump setup ($1,000+).

Step-by-Step: Building Your First System

Step 1: Find Your High Point

Walk your property. Look for natural elevation — a hillside, a berm, even the back of a sloped barn roof. The higher you can get your tank relative to where you need water, the more pressure you’ll have. If your land is flat, you’re building a stand. A simple 8-foot platform made from 4×4 posts and 2×6 joists will hold a 550-gallon IBC tote (about 4,600 lbs full). If you’re going this route, over-engineer the platform. Water is 8.34 lbs per gallon and it doesn’t forgive a wobbly structure.

Step 2: Set Up Your Tank

Place your tank on the platform or high ground. IBC totes come with a 2″ ball valve at the bottom — that’s your outlet. If you’re using a poly tank or barrel, you’ll need to install a bulkhead fitting near the bottom. Pro tip: Don’t put the outlet at the very bottom. Set it 2-3 inches above the floor of the tank. This lets sediment settle below the outlet instead of flowing into your lines.

Step 3: Run Your Lines

Connect ¾” or 1″ poly pipe from the tank outlet to where you need water. A few rules:

  • Avoid uphill runs. Every foot of uphill in your line eats into your pressure. If you have to go over a small rise, keep it as low as possible.
  • Minimize sharp bends. Use sweeping curves instead of 90-degree elbows. Each sharp bend adds friction loss.
  • Bury it if you can. Even 6 inches underground protects against UV degradation, freezing (in mild climates), and physical damage. In colder climates, bury below frost line or drain the system before winter.
  • Add a shutoff valve at each delivery point. A $4 ball valve means you can isolate sections without draining the whole system.

Step 4: Connect Your Source

How does the tank get filled? Several options:

  • Rainwater collection — Gutters from a roof into the tank. A 1,000 sq ft roof in an area that gets 30 inches of rain per year captures roughly 18,700 gallons annually. That’s real water.
  • Manual fill — Haul water from a well, creek, or municipal source and dump it in. Not glamorous, but it works.
  • Spring or creek diversion — If you have a natural water source uphill from your tank, pipe it in. Free water, forever. (Check local water rights laws before tapping natural sources.)
  • Well with solar pump — Pump water into the elevated tank when the sun shines, then gravity delivers it 24/7. The tank becomes your “battery.”

Step 5: Filter If Needed

For garden irrigation and livestock, you generally don’t need more than a basic sediment filter to keep debris out of your lines. For drinking water, you’ll need a proper multi-stage filter (sediment + carbon + UV or ceramic). Don’t cut corners on drinking water filtration. A good gravity-fed drinking filter like a Berkey-style system can sit at the end of your line and handle this.

Common Mistakes to Avoid

  • Undersizing the pipe. ½” pipe seems cheaper but the friction loss over distance kills your flow rate. ¾” minimum, 1″ for runs over 100 feet.
  • Not accounting for winter. Water expands when it freezes. If you’re in a freeze zone, install drain valves at low points and drain the system before hard frost. Or insulate and heat-tape exposed sections.
  • Using clear or translucent tanks. Sunlight + water = algae. Use opaque tanks (black or dark green) or paint/wrap translucent ones.
  • Forgetting the overflow. Your tank needs an overflow outlet near the top. Rain doesn’t stop because your tank is full. Direct overflow away from your platform’s foundation.
  • Ignoring the first flush. If you’re collecting rainwater off a roof, the first few gallons of every rain event carry bird droppings, dust, and debris. A simple first-flush diverter (a capped pipe that fills and diverts the first wash before water flows to your tank) makes a big difference in water quality.

Why This Matters More Than You Think

Here’s my honest take: a gravity-fed water system is one of the highest-return projects you can do on a homestead, and it’s almost criminally overlooked. People will spend thousands on solar panels, backup generators, and freeze-dried food — all good things — but ignore the one resource they literally cannot live without for more than 72 hours.

A gravity system gives you water independence from the grid. It works during power outages. It waters your garden without electricity. It keeps your animals alive when the pump goes down. And it does all of this passively, silently, and indefinitely — because gravity never quits.

Even if you’re on municipal water and have no plans to go off-grid, having 500 gallons of water stored in an elevated tank with a gravity delivery system is one of the smartest insurance policies you can build. The cost is trivial. The peace of mind is enormous.

Your Challenge This Weekend

Walk your property. Identify three things:

  1. The highest natural point on your land
  2. Where you actually need water delivered (garden, barn, outdoor kitchen, etc.)
  3. The rough vertical distance between those two points

That’s your system blueprint. Multiply the vertical distance by 0.43 — that’s your pressure in PSI. If it’s over 3 PSI, you’ve got a workable gravity system waiting to be built. If it’s under that, you’re building a platform. Either way, you’re closer to water independence than you were five minutes ago.

Stop depending on systems you don’t control. Start building ones you do.

A gravity-fed line is one piece of water independence. The Self-Sufficient Backyard covers how it fits with catchment, storage, and filtration into a system you fully control.