

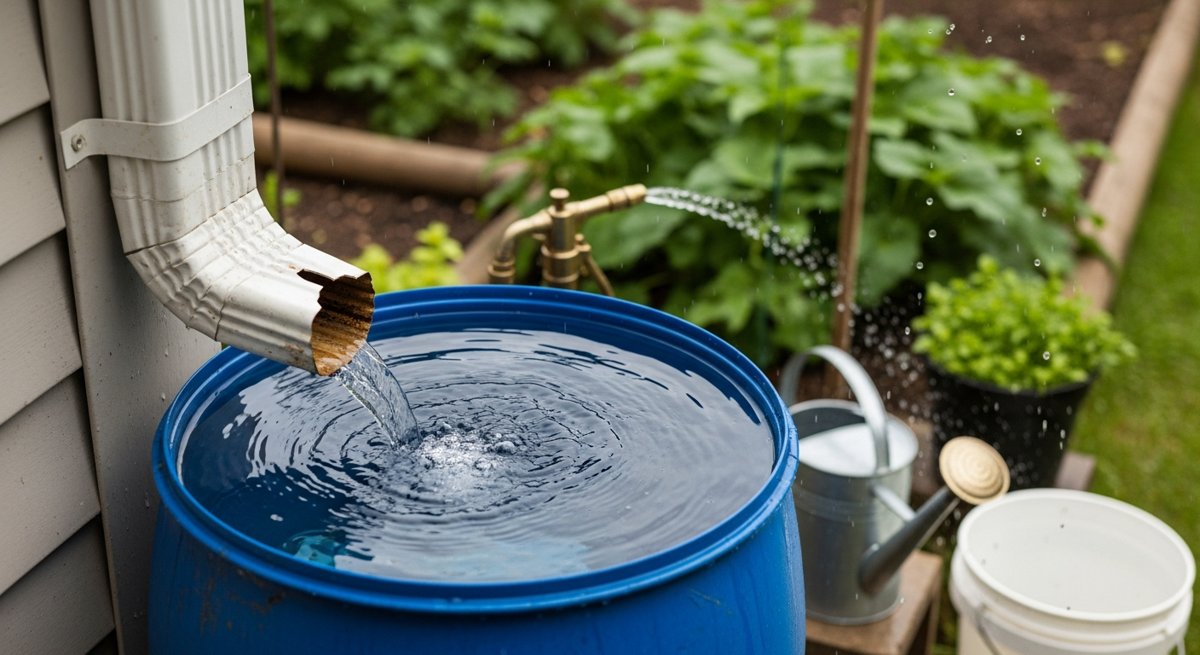
Most people look at their roof during a rainstorm and think nothing of it. Meanwhile, thousands of gallons of free, clean-enough water are pouring off the edges and disappearing into the ground. That’s water you could be using for your garden, your livestock, washing gear, or — with proper filtration — even drinking.
A basic rainwater collection system isn’t complicated. It isn’t expensive. And once it’s set up, it works every single time it rains without you lifting a finger. Here’s how to build one this weekend for under fifty bucks.
Why Bother Collecting Rainwater?
Let’s put some numbers on it. A 1,000-square-foot roof section in an area that gets 30 inches of rain per year will yield roughly 18,000 gallons annually. That’s not a typo. The formula is simple: 1 inch of rain on 1,000 sq ft of roof = about 600 gallons.
Even a modest setup with a single barrel captures 50+ gallons per decent rainstorm. That’s enough to keep a small garden watered for a week in the summer.
Beyond the free water, there are real practical reasons:
- Rainwater is better for plants. No chlorine, no fluoride, no mineral buildup. Your garden will genuinely grow better with it.
- It reduces your water bill. Outdoor watering can account for 30-50% of residential water use in summer months.
- It’s a backup supply. Municipal water fails. Wells run dry. Having 200 gallons stored isn’t paranoia — it’s planning.
- It reduces runoff. Less water flooding your yard, less erosion, less strain on storm drains.
What You Need (The Sub-$50 Shopping List)
You don’t need a fancy commercial rain barrel system. Here’s what actually works:
| Item | Approx Cost | Where to Find |
|---|---|---|
| 55-gallon food-grade barrel | $15–25 | Facebook Marketplace, car washes, food distributors |
| 3/4″ brass spigot | $6–8 | Hardware store |
| 3/4″ bulkhead fitting (or rubber washers + lock nut) | $4–6 | Hardware store |
| Window screen mesh (for inlet filter) | $4 | Hardware store |
| Downspout diverter OR flexible downspout adapter | $8–12 | Hardware store / Amazon |
| Overflow fitting + short hose | $5 | Hardware store |
| Teflon tape, silicone sealant | $3 | Already in your garage, hopefully |
| Total | $35–50 |
Pro tip on the barrel: Food-grade is non-negotiable. You want barrels that held juice concentrate, soy sauce, vinegar — not chemicals. Most car washes sell their used soap barrels for $10-15 and those work great too. Avoid anything that held industrial chemicals, obviously.
The Build: Step by Step
Step 1: Pick Your Location
Find a downspout that drains from the largest roof section possible — more square footage means more water per storm. The ground needs to be level and firm. A full 55-gallon barrel weighs about 460 pounds, so don’t put it on soft dirt or a wobbly deck.
Ideally, you want it elevated. Even 12-18 inches of elevation (a couple of cinder blocks or a small wooden platform) gives you gravity-fed pressure through the spigot. This matters if you want to run a hose from it without a pump.
Step 2: Prep the Barrel
You need three holes:
- Inlet hole (top): Cut a hole in the lid large enough for your downspout adapter to fit through — typically 3-4 inches. If the barrel has a removable lid, even easier. Secure window screen mesh over this opening with a hose clamp or zip ties. This keeps mosquitoes, leaves, and debris out.
- Spigot hole (bottom): Drill a 7/8″ hole about 3-4 inches from the bottom of the barrel. Install the bulkhead fitting from inside, add the spigot on the outside. Teflon tape on all threads, silicone around the exterior seal. Let it cure 24 hours.
- Overflow hole (top): Drill another hole about 2 inches from the top on the opposite side from the inlet. Install a bulkhead fitting and attach a short garden hose to direct overflow away from your foundation. This is the hole people skip — and then wonder why water is pouring over the top and pooling next to their house.
Step 3: Connect to the Downspout
You have two options here:
Option A — Flexible adapter (easiest): Cut the downspout above barrel height. Attach a flexible corrugated adapter that runs from the cut downspout into the top of your barrel. Takes about 10 minutes.
Option B — Diverter (better): Install an inline diverter on the downspout. These redirect water to the barrel when it’s raining and automatically bypass when the barrel is full. Slightly more work to install, but much cleaner and you don’t lose your normal downspout function.
I’d go with Option B if you can. The extra 15 minutes of installation saves you from having to think about it ever again.
Step 4: Set It and Forget It
Place the barrel on your platform, connect everything, and wait for rain. After the first rain, check for leaks around the spigot and overflow fittings. Tighten as needed. That’s it. You’re collecting water.
Mistakes That’ll Bite You
- Skipping the screen mesh. Congratulations, you just built a mosquito breeding facility. Always screen the inlet. No exceptions.
- No overflow plan. Water WILL overflow. Direct it somewhere intentional — a garden bed, a rain garden, or at minimum away from your foundation.
- Using a non-food-grade barrel. Those blue chemical drums are cheap for a reason. The residue leaches into the water. If you’re watering food crops, this matters a lot.
- Forgetting about winter. In freeze zones, drain your barrel before the first hard freeze or the expanding ice will crack it. Disconnect the downspout adapter and store the barrel upside down.
- Not checking local regulations. Most states allow residential rainwater collection, but a handful have restrictions (looking at you, Colorado — though even they relaxed their rules). Spend 5 minutes checking before you build.
Scaling Up (When You’re Hooked)
One barrel is a start. Most people who build one end up with three within a year. You can daisy-chain barrels by connecting the overflow of one to the inlet of the next. Same concept, just more capacity.
For serious storage, 275-gallon IBC totes (Intermediate Bulk Containers) show up on Marketplace for $50-75. They’re ugly, but one tote holds five times what a barrel does. Paint it dark or build a simple screen fence around it.
And if you’re thinking about drinking the water — you absolutely can, but you need proper filtration. A first-flush diverter (dumps the first gallon of dirty roof water), a sediment filter, and a quality activated carbon or ceramic filter will get you there. That’s a separate project, but the collection system is the same.
The Takeaway
Here’s my honest take: rainwater collection is one of the highest-return, lowest-effort self-sufficiency projects you can do. You spend a Saturday afternoon and $40, and from that point forward, the sky literally delivers free water to your property every time it rains. No ongoing cost. No maintenance beyond cleaning the screen once a season.
It won’t make you fully water-independent, but it changes how you think about resources on your property. And that shift in thinking — from consumer to collector — is where real self-sufficiency starts.
Your challenge: This weekend, go look at your downspouts during the next rain. Pick the one dumping the most water. That’s where your first barrel goes. Get the barrel this week, build it next Saturday. By the end of the month, you’ll be collecting water without thinking about it.
Rain catchment is the first step toward water independence. For the bigger picture — storage, filtration, gravity feed, and the rest of an off-grid water plan — The Self-Sufficient Backyard lays it out start to finish.