Digital Detox: I Spent 7 Days Without My Phone — Here Is the Exact Playbook

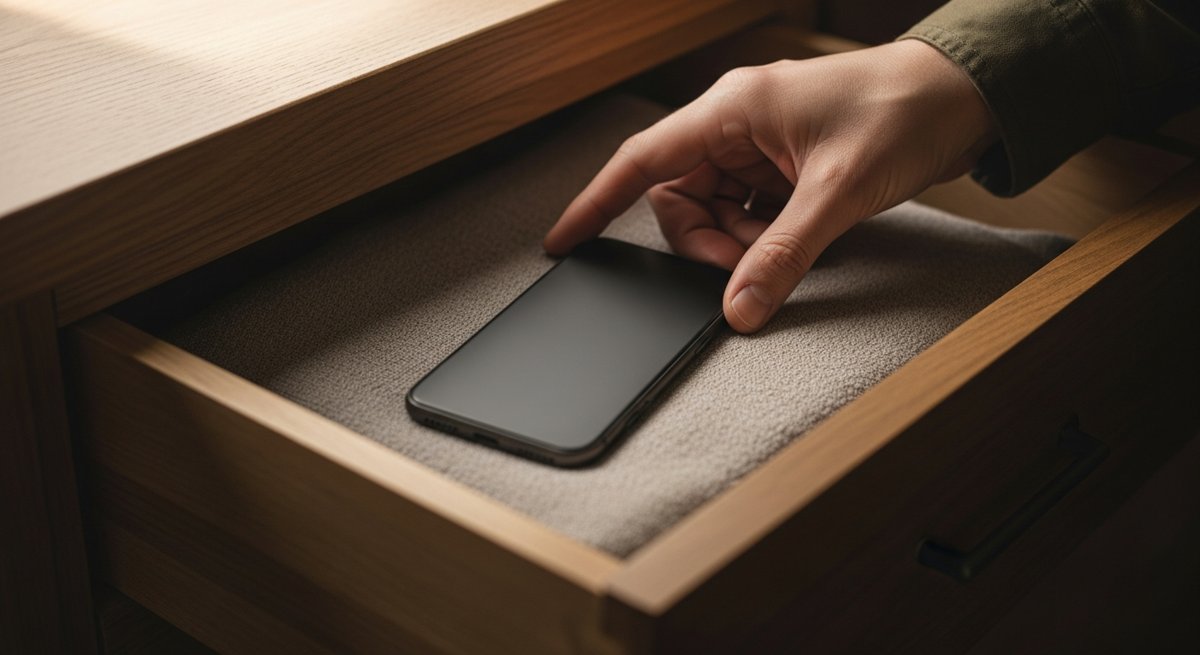
I put my phone in a drawer for seven days. Not airplane mode. Not “do not disturb.” In a drawer, across the house, on a shelf I had to drag a stool over to reach. Here’s what actually happened — and the exact playbook so you can do it without quitting your job or going off the grid.

Let’s get one thing straight up front: this isn’t a guilt trip about screen time. You already know you’re on your phone too much. The average American touches their phone 2,600 times a day and burns somewhere north of four hours on it. You don’t need another article waving that stat at you like a wagging finger. What you need is a way to actually do something about it that doesn’t blow up your real life. So that’s what this is.

Why a Full Week, Not “Just Cut Back”

“Cutting back” is the diet version of phone use — it sounds reasonable and it fails for the same reason crash diets fail: there’s no clear line, so every moment becomes a negotiation. “Just one quick check” is a battle you fight 200 times a day, and you lose most of them by lunch.

A hard boundary kills the negotiation. The phone is in the drawer. There’s nothing to decide. Your brain stops asking. And here’s the part nobody tells you — the craving curve is shorter than you think. The first two days are genuinely rough. By day four, the itch is mostly gone. By day seven you’ll catch yourself slightly annoyed that you have to pick the thing back up. That arc is the whole point. You can’t feel it if you only “cut back,” because you never let the withdrawal finish.

The Honest Setup (Do This the Night Before)

A detox that requires you to be a monk fails by Tuesday. The trick is to keep the two or three things your phone genuinely does for you, and amputate the other forty. Here’s the night-before checklist:

  • Buy a real alarm clock. This is the single most important purchase of the whole experiment. The phone-as-alarm is the Trojan horse — it’s the reason the phone is the first and last thing you touch every day. A $15 analog clock on the nightstand means the phone never needs to enter the bedroom. Do not skip this one.
  • Tell three people. Text your partner, your boss, and whoever’s most likely to panic if you go quiet: “Off my phone for a week. Call the landline / email me / here’s how to reach me in an emergency.” Two minutes of setup buys you a week of guilt-free silence.
  • Move the two “load-bearing” apps to your laptop. Banking, maps, whatever you genuinely need. You’re detoxing from the casino in your pocket, not from modern life. Doing your banking at a desk once a day is fine. Doing it in line at the grocery store 14 times is the problem.
  • Pick the drawer. Physical distance matters more than willpower. Across-the-house beats across-the-room beats face-down-on-the-desk. Make retrieval annoying on purpose.

The Day-by-Day Reality

Days 1–2: The phantom buzz. You’ll reach for a phone that isn’t there. Your hand will literally pat your pocket. You’ll feel a buzz that didn’t happen. This is real — it’s called phantom vibration syndrome and it’s your nervous system running a search for a hit it’s not getting. Annoying, harmless, gone in 48 hours. The hardest moments are the “dead time” gaps: waiting for coffee, the elevator, the bathroom (yeah, that one). Have a plan for the gaps or they’ll break you.

Days 3–4: The fog lifts. This is where it gets interesting. The compulsive reach starts to fade and something weird shows up in its place: you get bored, and then you get creative with the boredom. I reorganized a closet I’d been ignoring for a year. I called my brother for no reason. The mental real estate that scrolling was renting out goes back on the market.

Days 5–7: The recalibration. By here, your baseline has reset. You sleep harder. You finish thoughts. Conversations feel longer in a good way because you’re not half-checked-out waiting for a notification. The most telling sign: you stop missing it. That’s the proof the dependency was a habit loop, not a need.

Fill the Void or It Fills Itself

Here’s the mistake that sinks most attempts: people remove the phone and leave a vacuum. A vacuum gets filled by whatever’s nearest — the TV, the fridge, doomscrolling on a laptop instead. You have to pre-load the replacement. The cleanest swap I know is a physical book parked exactly where your phone used to live: on the nightstand, on the kitchen counter, in your bag.

If you want the detox to stick past day seven, read something about habits themselves while you’re in the clear-headed window — it lands harder when you’re actually living it. Atomic Habits by James Clear is the obvious pick — its whole engine is “make the bad habit invisible, make the good one obvious,” which is literally what putting the phone in a drawer does. If you want something with more grit and less framework, Can’t Hurt Me by David Goggins is the kick in the pants version. Either one beats a feed.

Other void-fillers that earned their spot during my week: a notebook for the random thoughts that used to become Google searches, a deck of cards, and a standing “go for a walk with no destination” rule for the witching hour around 8 p.m. when the pull is strongest.

What I Actually Learned (The Part That Surprised Me)

I expected to feel more relaxed. I did. What I didn’t expect was how much of my phone use had nothing to do with wanting anything — it was pure fidget. Ninety percent of the reaches were my hand looking for a job, not my brain looking for information. Once I clocked that, the phone got smaller. It went from “the device my life runs on” to “a useful tool I pick up on purpose.” That reframe is the real prize, and it outlasts the week.

The other surprise: nothing broke. No crisis happened because I was 30 minutes slower to reply. The world’s demand for your instant attention is almost entirely manufactured — by the apps, and by the version of you that trained everyone to expect an immediate response. Both of those can be retrained.

Don’t Want a Full Week? Do the 80% Version.

If seven phone-free days is a non-starter for your job or your kids, here’s the version that still delivers most of the benefit:

  • Phone sleeps in another room. Every night. Non-negotiable. This one rule fixes mornings and evenings, the two times that set the tone for everything else.
  • No phone for the first hour and last hour of the day. Bookend your day with your own thoughts instead of someone else’s algorithm.
  • One full day a week — pick Sunday. A weekly “screen sabbath” gives you the reset on repeat without the upfront pain of a whole week.

Do those three and you’ve captured the lion’s share of what the full detox teaches, on permanent repeat.

The Challenge

Tonight, before you go to bed, do exactly one thing: charge your phone in a different room. Not tomorrow, not “when things calm down” — tonight. Buy the cheap alarm clock this week so it sticks. That single move is the keystone the entire detox is built on, and it costs you nothing but a little discomfort.

Then, if you’re feeling bold, block out a Sunday and go the full distance. Worst case, you waste a week being a little bored and a lot more present. Best case, you get your attention back — and that’s the one thing nobody can sell back to you once it’s gone.

Put it in the drawer. Set the clock. See what’s on the other side of the boredom. I’ll bet it’s better than your feed.

How to Pressure Can Meat, Broth, and Vegetables Safely (Without Poisoning Your Family)

A full pantry of home-canned meat, broth, and vegetables is the single most underrated win in self-sufficiency. It’s shelf-stable for years, needs zero electricity, and costs a fraction of store-bought. But here’s the part nobody softens for you: pressure canning low-acid food the wrong way can kill you. Not “upset stomach” kill you — botulism, the real thing. So we’re going to do this right, the first time, every time.

The one rule that keeps you alive: Meat, broth, beans, and vegetables are low-acid foods. A boiling water bath only hits 212°F — not hot enough to kill Clostridium botulinum spores. You need 240°F, and the only way to get there is under pressure. Low-acid food = pressure canner. No exceptions. Ever.

Why Pressure, Not Just Heat

Botulism spores are tough little bastards. They shrug off boiling water all day. What kills them is sustained heat at 240°F or higher, and water simply can’t get that hot at sea level no matter how long you boil it. Lock that water under 10–15 pounds of steam pressure, though, and the boiling point climbs to 240°F+. That’s the whole game. Pickles, jams, and tomatoes with added acid can go in a water bath because acid does the safety work. Plain meat and green beans cannot. Memorize the line: if it’s not acidic, it gets pressurized.

The Gear You Actually Need

  • A real pressure canner. Not a pressure cooker — a canner, big enough to hold jars upright with a rack. The Presto 23-Quart and the All American 921 (no-gasket, metal-to-metal seal) are the two workhorses people pass down to their kids.
  • Canning jars — genuine Ball or Kerr Mason jars, pints and quarts. Never reuse mayo or pickle jars; they aren’t rated for the pressure and will shatter.
  • New lids every time. The flat lids are single-use. Bands are reusable; lids are not. This is non-negotiable for a good seal.
  • A jar lifter, canning funnel, and a bubble remover/headspace tool. Ten bucks of tools that save you scalded fingers and bad seals.

Dial Gauge vs. Weighted Gauge

Two kinds of canners. A weighted-gauge model rocks or jiggles a weight to hold a set pressure (5, 10, or 15 lbs) — dead simple, never needs calibration, you can hear it working from another room. A dial-gauge model shows exact pressure on a needle, which lets you fine-tune for altitude, but the gauge must be tested for accuracy once a year (your county extension office does this free). If you’re new and want one less thing to screw up, get weighted. If you’re at high altitude and want precision, dial-gauge earns its keep.

Step-by-Step: Raw-Pack Meat (The Easiest Win)

Beef, venison, pork, chicken — raw pack is the lazy genius method. No pre-cooking.

  1. Prep jars. Wash jars in hot soapy water, keep them warm. Cut meat into chunks, trim heavy fat (fat fights a good seal).
  2. Pack. Fill warm jars with raw meat, leaving a full 1 inch of headspace. Add 1/2 tsp salt per pint if you like — it’s for flavor, not safety. Do not add liquid; raw-packed meat makes its own.
  3. De-bubble and clean. Run your bubble tool around the inside, re-check headspace, then wipe every rim with a clean, damp cloth. A single grease smear ruins the seal.
  4. Lid up. Center a new flat lid, screw the band to fingertip tight — snug, not cranked.
  5. Load and vent. Set jars on the rack with 2–3 inches of water in the canner. Lock the lid, bring to a boil, and let steam vent steadily for a full 10 minutes before you add the weight. Skipping the vent traps air and gives you false pressure readings.
  6. Pressurize and process. Add the weight, bring to 10 lbs (weighted) or 11 lbs (dial) at sea level. Once you hit pressure, start the timer: pints process 75 minutes, quarts 90 minutes. Hold that pressure the entire time — if it dips, you restart the clock.
  7. Cool naturally. Kill the heat and walk away. Let the canner depressurize on its own — never run it under cold water or pry the weight off early, or you’ll force-boil liquid out of the jars and break seals.
  8. Rest and check. Lift jars out, set on a towel, don’t touch for 12–24 hours. You’ll hear the lids ping. The next day, press the center of each lid: no flex, no pop = sealed. Any that didn’t seal go straight in the fridge to eat this week.

Processing Times Cheat Sheet

At 10 lbs weighted / 11 lbs dial, sea level. These are starting points — always confirm against a tested recipe (USDA Complete Guide to Home Canning or the Ball Blue Book) before you process.

  • Meat (raw or hot pack): pints 75 min · quarts 90 min
  • Bone broth / stock: pints 20 min · quarts 25 min
  • Green beans: pints 20 min · quarts 25 min
  • Carrots: pints 25 min · quarts 30 min
  • Sweet corn (whole kernel): pints 55 min · quarts 85 min
  • Dry beans (soaked, hot pack): pints 75 min · quarts 90 min

Altitude matters — a lot. Every time you climb, water boils cooler, so you must add pressure. Above 1,000 ft, weighted canners go to 15 lbs. Dial canners step up gradually (12 lbs at 2,001–4,000 ft, 13 lbs at 4,001–6,000 ft, and so on). Look up your elevation before your first batch. This isn’t optional — it’s the difference between safe food and a gamble.

What You Should NOT Can

There are no tested-safe times for these, which means there’s no safe way to do them at home. Skip them, full stop:

  • Dairy — milk, butter, cheese, cream
  • Anything thickened with flour or cornstarch (it insulates the center from heat)
  • Pureed or mashed pumpkin/winter squash (can cubes instead)
  • Refried or mashed beans (can them whole, mash when you open the jar)
  • Rice, pasta, or other grains in the jar

My honest take: the people who get hurt aren’t the careful beginners — they’re the confident folks who “tweak” a recipe or trust a thirdhand method from a forum. Don’t freelance the science. Follow tested times, respect your altitude, and pressure canning is genuinely one of the safest, most satisfying skills you can own.

Want the whole self-reliant pantry blueprint?

Canning is one piece of a bigger system — food, water, power, and a backyard that feeds you. The Self-Sufficient Backyard walks you through building it on a normal lot, including a deeper food-preservation playbook than I can fit in one post. It’s the resource I point people to when they’re ready to go past “dabbling.”

Your Challenge This Week

Don’t try to can the whole garden on day one. Do one batch: seven pints of beef or a load of homemade broth. Get the rhythm — pack, vent, pressurize, cool, check seals. Once you’ve heard that first row of lids ping on the counter and you’re holding jars of food you’ll still be eating next winter, you’ll get it. That pantry shelf is independence you can see. Go fill it.

How to Navigate Without GPS: Map, Compass, and Natural Signs

Your phone is a liability the second the battery dies, the signal drops, or you drop it in a creek. And out where it actually matters — deep timber, a slot canyon, a snowed-in fire road — that happens more than you’d think. The good news: humans found their way across continents for thousands of years without a single satellite. You can learn the core of it in an afternoon. Here’s how to navigate with a map, a compass, and the sky when the blue dot disappears.

Why GPS Fails Exactly When You Need It

GPS is brilliant until it isn’t. Tree canopy and canyon walls block the signal. Cold murders lithium batteries — a phone that reads 60% at the trailhead can be dead in your pocket at 20°F. And a single fall onto granite ends the whole conversation. None of that touches a compass. It has no battery, no firmware update, no dead zone. It just works, which is exactly why every search-and-rescue team on earth still carries one.

My honest take: treat your phone as the primary tool and the map-and-compass as the system that never fails. Redundancy isn’t paranoia out here — it’s the difference between an inconvenience and a headline.

The Three Tools (and the One That Matters Most)

  • A baseplate compass. Not a button compass off a keychain — a real orienteering compass with a clear baseplate, a rotating bezel, and ideally a sighting mirror and adjustable declination. A Suunto MC-2 or a Silva Ranger 2.0 is the lifetime-buy here. Roughly $40–$70 and you’ll hand it to your kid someday.
  • A real topographic map. A USGS 7.5-minute quad or a National Geographic Trails Illustrated map of your area. Paper. Waterproof if you can get it. Free PDFs from the USGS National Map site if you’ve got a printer.
  • Your eyes and a little sky-reading. Free, always with you, and shockingly accurate once you practice.

If you buy one thing, buy the compass with adjustable declination. It removes the single most common source of “I did the math wrong” navigation errors. More on that in a second.

Step 1: Read the Map Like It’s Talking to You

A topo map is a 3D landscape flattened into lines. The brown squiggles are contour lines — each one connects points of equal elevation. Master three patterns and you can read terrain like text:

  • Lines close together = steep. Lines far apart = gentle. Stacked tight against each other = a cliff you do not want to walk off in the dark.
  • V’s pointing uphill = a drainage or creek. Water collects in those valleys. V’s pointing downhill = a ridge spur.
  • Concentric closed circles = a hilltop or peak. The innermost ring is the summit.

Before you ever take a step, find your position and your destination, then look at what’s between them. A blue creek line you’ll have to ford? A 40-foot cliff band the straight route walks you off? The map tells you the story if you slow down and read it.

Step 2: The Declination Trap (Don’t Skip This)

Here’s the thing that trips up almost everybody: your compass points to magnetic north, but your map is drawn to true north. The angle between them is called declination, and depending on where you stand in the US it can be 15–20 degrees off. Ignore it and a one-mile walk can land you a quarter-mile from where you meant to be.

Two fixes:

  • The easy way: buy a compass with adjustable declination, set it once for your region (the number is printed in the margin of your topo map, or look it up on NOAA’s declination calculator), and forget about it. The compass does the correction for you forever.
  • The math way: if you’ve got a fixed compass, you correct by hand every time. The western US has east declination and the eastern US has west declination, and you adjust your bearing accordingly — which is precisely the kind of mental math that’s easy to flip under stress, in the cold, at dusk. That’s exactly why I tell people to spend the extra ten bucks on adjustable declination and never think about it again.

Step 3: Shoot a Bearing and Walk It

This is the whole game. A bearing is just a direction expressed as a number from 0 to 360 degrees. Here’s how to get one and follow it:

  1. On the map: lay the edge of your compass baseplate so it connects where you are to where you want to go, with the direction-of-travel arrow pointing toward the destination.
  2. Rotate the bezel until the orienting lines inside the housing line up with the north–south grid lines on the map (north on the bezel pointing to map-north).
  3. Read the number at the index line. That’s your bearing. Say it’s 110 degrees.
  4. Now lift the compass off the map, hold it flat at your chest, and turn your whole body until the magnetic needle sits inside the orienting arrow — “red in the shed.” The direction-of-travel arrow is now pointing exactly where you need to walk.
  5. Pick a landmark on that line — a distinctive tree, a boulder, a notch in the ridge — walk to it, then shoot the bearing again and pick the next one. Never stare at the needle while you walk. Aim, hike, re-aim.

That leapfrog method keeps you honest over distance. It’s how you hold a straight line across terrain that’s trying to push you sideways.

Step 4: When You Have No Compass — Read the Sky

Lost the compass too? The natural world is full of directional clues if you know where to look.

  • The sun. It rises roughly east and sets roughly west — true everywhere. At local noon in the Northern Hemisphere, the sun sits due south, so your shadow points due north.
  • The shadow-stick method. Plant a straight stick in flat ground and mark the tip of its shadow with a rock. Wait 15–20 minutes and mark the new shadow tip. Draw a line between the two marks: it runs roughly west-to-east (first mark is west). Stand with the first mark on your left and the second on your right and you’re facing north.
  • The North Star. At night, find the Big Dipper. The two stars on the outer edge of its “cup” are the pointer stars — follow the line they make about five times that distance and you hit Polaris, the North Star. It sits almost directly over true north and barely moves all night. Face it and you’re facing north, full stop.
  • An analog watch (rough). Point the hour hand at the sun; halfway between the hour hand and 12 o’clock is roughly south. Crude, but it’ll keep you from walking circles.

Skip the folklore, by the way. Moss does not reliably grow on the north side of trees — it grows where it’s damp, which depends on your local terrain. Don’t bet your life on moss.

Step 5: Practice in Your Own Backyard

None of this sticks from reading. Go do it this week, somewhere safe and familiar:

  • Shoot a bearing to a tree across a park, walk to it, then shoot a bearing back to your start (that’s your original number plus or minus 180 degrees). If you land back where you began, your technique is solid.
  • Do the shadow-stick trick in your driveway at lunch and confirm north against a map of your street.
  • Find Polaris from your yard tonight. Once your eyes know the Big Dipper handoff, you’ll never lose it.

Twenty minutes of backyard reps now means it’s muscle memory when the stakes are real and the light is failing.

The Takeaway

A dead phone shouldn’t mean a dead end. Buy a baseplate compass with adjustable declination, print the topo quad for the place you actually hike, and spend one afternoon learning to shoot a bearing. Then learn to find Polaris so the sky becomes a backup to your backup. Do that and you’ve bought yourself a skill that doesn’t run out of charge, lose signal, or shatter on a rock.

Your challenge this week: grab any compass, walk a known 100-yard bearing out and the reverse bearing back, and see if you return to your exact starting point. Nail that and you’ve got the one skill that keeps working when everything electronic quits.

Carnivore vs Keto for Fat Loss: What Actually Works (and What’s Just Hype)

Walk into any gym parking lot and you’ll hear it: one guy swears he dropped 40 pounds eating nothing but ribeyes, the other guy hasn’t touched a carb since 2022 and won’t shut up about ketones. Carnivore and keto are the two loudest diets in the room right now, and people treat them like rival religions. They’re not. They’re two tools that work for the same reason — and understanding why is the thing that actually gets you lean.

Let me save you a year of confusion. Here’s what’s real, what’s marketing, and what to actually do.

The Quick Definitions

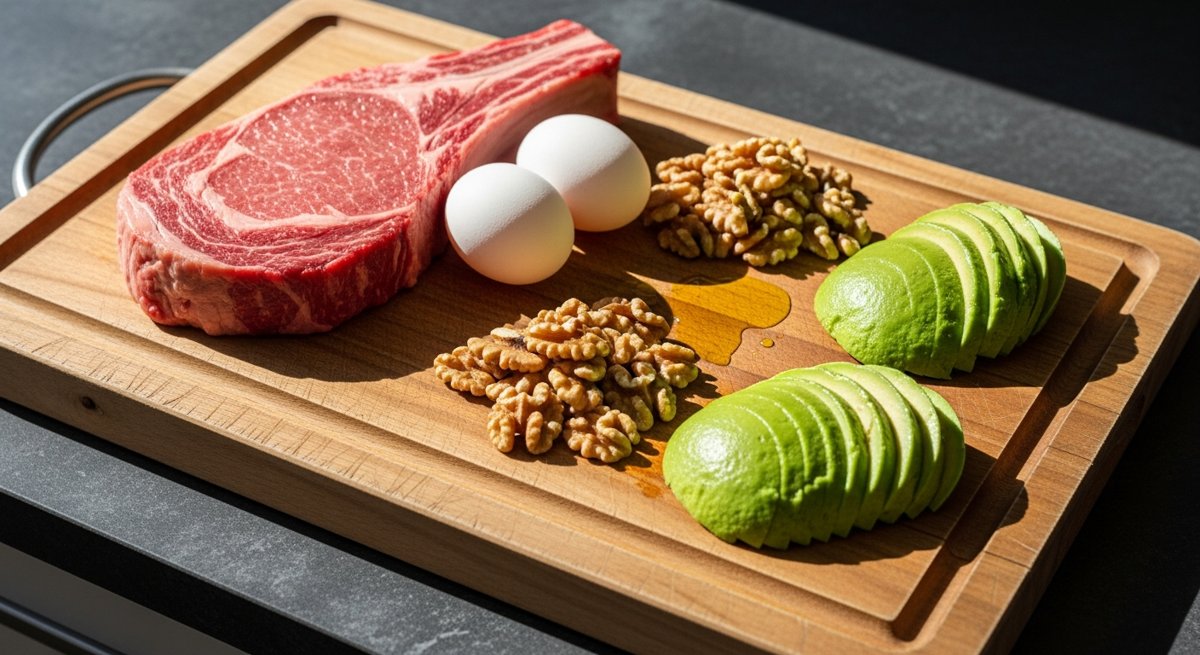
Keto (ketogenic diet): Very low carb — usually under 50g a day, often under 20g — with moderate protein and high fat. The point is to push your body into ketosis, where it burns fat for fuel instead of glucose. You can still eat plants: avocados, leafy greens, nuts, olive oil, cheese.

Carnivore: Animal products only. Meat, eggs, fish, some dairy. Zero plants. It’s keto’s stricter, more extreme cousin — carbs naturally fall to almost nothing because you’re not eating anything that contains them.

Both are low-carb. Both will put most people in ketosis. The real difference is just how many foods you’re allowed to eat.

Here’s the Part Nobody Wants to Hear

Neither diet has a magic metabolic advantage for fat loss. I know that’s not what the YouTube thumbnails promise. But when researchers actually control for calories and protein in a metabolic ward — meaning they lock people in and measure everything — low-carb and higher-carb diets produce nearly identical fat loss. The “ketosis burns more fat” claim falls apart fast once calories are matched.

So why do so many people lose weight on these diets? Three boring, undeniable reasons:

  • You cut out entire food categories. No bread, no chips, no soda, no ice cream. That’s a massive calorie reduction by default, before you ever count a single macro.
  • Protein and fat are filling. A ribeye keeps you full for hours. A bagel makes you hungry by 10am. When you’re less hungry, you eat less without trying.
  • Eating gets simple. Fewer choices means fewer impulse decisions. “Meat and eggs” is a lot harder to overeat than a pantry full of snack foods engineered to be irresistible.

That’s it. That’s the whole trick. Both diets work by creating a calorie deficit you can actually stick to. The deficit is the engine. The diet is just the car you drive it in.

Carnivore: The Honest Pros and Cons

What it’s genuinely good at: Simplicity and appetite control. There’s nothing to track, nothing to weigh, no decisions. A lot of people with autoimmune issues, gut problems, or food sensitivities report real relief on carnivore — probably because an elimination diet this aggressive removes whatever was triggering them. For some folks, that’s life-changing.

Where it bites you: It’s socially brutal (try explaining it at a backyard cookout), it can get expensive if you’re eating quality meat, and the long-term data simply doesn’t exist. We don’t have decades of research on people eating zero plants. You’re also waving goodbye to fiber and a wide range of micronutrients. Some people thrive; others get constipated, irritable, and bored within three weeks.

My honest take: Carnivore is a fantastic short-term reset or diagnostic tool. If you suspect food is wrecking your gut, eliminating everything and slowly adding foods back is legit. As a forever diet? I’m skeptical. Restriction that extreme is hard to sustain, and “hard to sustain” is how every diet eventually fails.

Keto: The Honest Pros and Cons

What it’s genuinely good at: Steady energy and crushing cravings once you’re adapted. It’s more flexible than carnivore — you still get vegetables, fiber, and a broader nutrient base. There’s solid evidence for keto helping with blood sugar control and certain medical conditions (it was literally developed to treat epilepsy). For people who are insulin resistant, the appetite suppression can feel like a superpower.

Where it bites you: The transition sucks. “Keto flu” — headaches, fatigue, brain fog — hits a lot of people in the first week, mostly from dropped electrolytes. It’s also easy to do badly: people drown everything in cheese and butter, blow past their calorie needs on fat alone, and wonder why the scale won’t move. Fat is calorie-dense. You can absolutely eat too much of it.

My honest take: Keto is the more practical of the two for most people. It’s sustainable enough to live on, flexible enough to stay social-ish, and the cravings control is real. The catch is you have to actually keep carbs low — “lazy keto” where you eat 80g of carbs isn’t keto, it’s just a vague low-carb diet with a cooler name.

So Which One Should You Pick?

Stop asking which diet is “better” and start asking which one you’ll actually do. That’s the only question that matters. Here’s my decision tree:

  • You want structure and hate counting? Keto. Hit your carb limit, eat real food, you’re golden.
  • You have gut issues or suspect a food sensitivity? Try carnivore for 30 days as an elimination test, then reintroduce foods one at a time.
  • You love variety and a social food life? Honestly, neither. A high-protein, moderate-carb diet with a calorie target will get you just as lean and you won’t have to bail on every dinner invite.
  • You’ve failed every diet before? Pick the one with fewer rules you’ll break. For most people that’s keto, but if decision fatigue is your enemy, carnivore’s brutal simplicity might be the unlock.

The Stuff That Actually Determines Your Results

Whichever you choose, these four things matter more than the carnivore-vs-keto label:

  1. Protein, always. Aim for roughly 0.7–1g per pound of goal bodyweight. Protein protects your muscle while you lose fat. Both diets make this easy — don’t skip it.
  2. Electrolytes. Low-carb dumps water and sodium fast. Salt your food, get potassium and magnesium, and 90% of “keto flu” disappears. This is the single most ignored fix.
  3. Real calorie awareness. You don’t have to count forever, but at least know roughly what you’re eating for a week. Fat bombs and “keto treats” are how people stall.
  4. Sleep and consistency. A perfect diet on 5 hours of sleep loses to a decent diet on 8. Boring, but true.

One more practical note: both diets live or die in the kitchen. Eating this much meat means you’ll be cooking a lot more of it yourself, and a good cast iron skillet plus a decent instant-read meat thermometer will do more for your adherence than any supplement. These are the two pieces of kit worth buying once and never replacing.

The Bottom Line

Carnivore and keto both work, and they both work for the exact same reason: they make it easy to eat less without feeling starved. There’s no secret fat-melting magic in either one. Pick the version you can run for six months without white-knuckling it, nail your protein and electrolytes, and stay consistent. That beats the “perfect” diet you quit in three weeks every single time.

Your challenge this week: Pick one — keto or a 30-day carnivore test — and commit to a single non-negotiable rule: hit your protein target every day and salt your food. Run it for seven days, no cheating, and write down how your hunger and energy feel by Sunday. You’ll learn more about your own body in one honest week than from a hundred hours of diet debates online.

How to Make Hard Decisions Faster: The 10-10-10 Framework

You ever sit in a truck in a parking lot for twenty minutes because you can’t decide whether to take the new job? Or stare at the same email draft for two days? That’s not careful thinking. That’s a decision rotting on the vine. And the cost of not deciding is almost always higher than picking wrong.

Here’s the thing nobody tells you: most hard decisions aren’t hard because the answer is unclear. They’re hard because the emotion in the moment drowns out everything else. The fear, the FOMO, the “what will people think.” So you freeze. Today I’m going to hand you a tool that cuts through all of it in about five minutes. It’s called 10-10-10, and once you use it a few times you’ll wonder how you ever decided anything without it.

What Is the 10-10-10 Framework?

It comes from journalist Suzy Welch, and the whole thing fits on a cocktail napkin. When you’re stuck on a decision, you ask yourself three questions:

  • How will I feel about this in 10 minutes?
  • How will I feel about this in 10 months?
  • How will I feel about this in 10 years?

That’s it. Three time horizons. The genius is that it forces you to separate the immediate emotional spike from the long-term consequence — which are almost always pulling in opposite directions. The 10-minute answer is your gut screaming. The 10-year answer is your future self tapping you on the shoulder. Most bad decisions happen because we let the 10-minute version win.

Why Your Brain Sabotages Hard Choices

Quick biology, because it matters. When you face a high-stakes choice, your brain runs it through the amygdala first — the threat-and-reward center. It is loud, fast, and short-sighted. It cares about right now: avoiding the awkward conversation, grabbing the dopamine hit, dodging the discomfort. The part of your brain that’s actually good at planning, the prefrontal cortex, is slower and quieter. It gets shouted down.

10-10-10 is basically a crowbar. It pries open space for the slow brain by literally forcing you to time-travel. You can’t answer “how will I feel in 10 years” with pure panic — the question demands you zoom out. That zoom is the whole point.

How to Actually Run It (Step by Step)

Step 1: Write the decision as a single sentence

Not a paragraph. One sentence, framed as a yes/no or A/B. “Do I take the contractor job in Dallas or stay where I am?” Vague decisions stay unsolved. The act of writing it down already does half the work, because most “hard decisions” are actually three tangled decisions wearing a trench coat. Separate them.

Step 2: Answer all three horizons out loud

Out loud, or on paper. Not in your head — your head will cheat. Say it: “In 10 minutes I’ll feel relieved I didn’t have to confront him. In 10 months I’ll be resentful that I let it slide again. In 10 years this will be a pattern that defined whether I respected myself.” Suddenly the 10-minute relief looks pretty cheap, doesn’t it?

Step 3: Notice which horizon you’re weighting

Here’s the move most people miss. After you answer, ask: which of these three matters most for THIS decision? Not all decisions deserve the 10-year lens. Whether to send back a cold steak at a restaurant? 10-minute horizon, decide in two seconds. Whether to marry someone, quit a career, move your family? That’s a 10-year call, and the 10-minute discomfort is noise. Matching the horizon to the stakes is where the speed comes from.

Step 4: Decide and close the loop

Once the horizons line up, you commit and you stop relitigating it. A decision you re-make every day isn’t a decision, it’s an open wound. Pick, act, move on.

Three Real Examples

The confrontation you keep dodging. 10 min: dread, you’d rather do anything else. 10 months: the unaddressed problem has festered into something twice as ugly. 10 years: you’re a person who avoids hard conversations, and your relationships are shallow because of it. Verdict: have the conversation. The 10-minute pain is the cheapest version of this you’ll ever get.

The big purchase you’re rationalizing. 10 min: that new truck would feel incredible. 10 months: the payment is squeezing you every single cycle. 10 years: the debt delayed every goal that actually mattered. Verdict: the 10-minute dopamine is lying to you. Sleep on it.

The opportunity that scares you. 10 min: terrified, want to say no and stay safe. 10 months: I’ll have grown more than the last three years combined. 10 years: this was the fork in the road. Verdict: the fear is the 10-minute brain trying to protect you from growth. Say yes.

My Honest Take

I love this framework because it’s fast, and speed is underrated in decision-making. Most people think slow deciding equals careful deciding. Wrong. Slow deciding usually equals anxious deciding — you’re not gathering information, you’re marinating in fear. 10-10-10 gives you permission to be done. You ran the horizons, the answer’s clear, go.

The one place it fails: decisions with genuinely missing information. If you literally don’t have the data — you don’t know the salary, you haven’t seen the inspection report — then 10-10-10 won’t save you, and you shouldn’t decide yet. Go get the data. But be honest about whether you’re actually missing information or just using “I need to think about it” as a hiding place. Nine times out of ten, it’s the hiding place.

The other thing: pair this with a notebook. I’m a broken record on this, but writing decisions down — the decision, the three horizons, and what you picked — turns you into a sharper decider over time. You start seeing your own patterns. “Oh, I always over-weight the 10-minute discomfort.” That self-knowledge compounds. A cheap field notebook or EDC journal in your back pocket is one of the highest-leverage tools you’ll ever carry, and it costs less than lunch.

The Takeaway

Hard decisions aren’t hard because they’re complicated. They’re hard because your 10-minute brain is loud and your 10-year brain is quiet. 10-10-10 turns up the volume on the voice that actually knows what you should do.

Your challenge: Pick the one decision you’ve been avoiding right now — you already know what it is. Write it as a single sentence. Run the three horizons out loud. Then decide before you finish your coffee. The decision’s been waiting on you, not the other way around.

How to Build a Debris Shelter That Actually Keeps You Warm (Not the Useless Lean-To You Saw on YouTube)

Quick truth: most of the “survival shelters” you see on YouTube would let you freeze to death by 3am. A flat lean-to with a thin layer of pine boughs is a wind break, not a shelter. If the temperature drops below 50°F and you don’t have a sleeping bag, that thing will kill you slowly through the night while you shiver, hallucinate, and lose the will to keep moving.

The debris shelter — done right — is different. It’s the closest thing to a sleeping bag you can build with nothing but your hands and what’s already on the forest floor. Built correctly, it’ll hold body heat down to about 20°F. I’ve slept in one in the high 30s with no bag, no fire, and a damp jacket. Woke up cold but alive. That’s the whole point.

Here’s how to actually build one. Not the version that looks pretty on Instagram — the version that works.

The Principle You Have to Understand First

A debris shelter is not about walls. It’s about trapped air. Your body is a 98.6°F heater pumping out roughly 100 watts continuously. The problem isn’t generating heat — it’s losing it. You lose heat four ways: conduction (cold ground sucking it out of you), convection (wind stripping it off your skin), radiation (your body glowing infrared into the dark), and evaporation (sweat, breath).

A debris shelter solves all four. The framework holds debris off your body. The debris itself — 2 to 3 feet of it — traps still air. Still air is the best insulator on Earth. It’s literally how down jackets work, how Thinsulate works, how every sleeping bag on the market works. You’re building a sleeping bag out of leaves.

Read that again: 2 to 3 feet of debris. Not 6 inches. Not “a good layer.” Knee-deep. If you can see daylight through the roof when you’re inside, you’re going to freeze.

Step 1: Pick the Right Spot (This Is Where Most People Screw Up)

You’re looking for four things, and you check them in this order:

  • Dry ground. Not a low spot. Not a drainage. Not the bottom of a valley where cold air pools. Look for a slight rise with leaves already piled up — nature already told you where it drains.
  • Debris within 30 feet. You’re going to make 20-40 armloads of leaves and pine needles. If your hauling distance is 100 yards, you’ll run out of daylight and energy before the shelter is done.
  • Two trees, a forked branch, or a deadfall roughly 7-8 feet apart to support the ridgepole. Don’t have that? A single sturdy tree + one strong stick jammed in the ground works too.
  • Not under widowmakers. Look up. Dead branches hung in living trees will kill you the one night you finally got warm.

Avoid: ridge tops (wind), valley bottoms (cold sink, water), anywhere near rotted trees, anywhere with a clear deer trail running through (you don’t want company at 2am).

Step 2: Build the Ridgepole and Frame

The ridgepole is the spine of the whole structure. Find a sturdy branch 1.5x your body length (so about 9-10 feet for most adults) and roughly wrist-thick. Not thumb-thick. Wrist-thick. It has to hold hundreds of pounds of wet leaves without bowing.

Prop one end up about 3 feet off the ground — in a tree fork, lashed to a tree, whatever works. The other end sits on the ground. You now have an angled spine, low end on the ground, high end at your hip when you sit. That low end is your foot end. The high end is your head end and entrance.

Critical sizing rule: the interior needs to be just barely big enough for you to fit. If you can sit up inside, it’s too big — your body can’t heat that much air. You should be able to roll over and that’s it. Coffin-sized. This feels wrong. Build it anyway.

Now lean ribbing sticks against the ridgepole on both sides, every 6-8 inches, angled at about 45°. These hold the debris off your body. Then weave smaller sticks horizontally across the ribs — basket-weave style — to create a lattice that leaves can’t fall through.

Step 3: Pile the Debris (Where Everyone Quits Too Early)

This is the work. Real work. Plan on 60-90 minutes of hauling leaves, pine needles, ferns, dry grass — anything fluffy and dry. Pile it on the frame until you have at least 2 feet of debris in every direction. Three feet is better. When you think you’re done, you’re halfway done.

Test it: push your arm into the pile from outside. If you can feel the frame, the debris is too thin. Keep piling. The shelter, when finished, should look like a giant pile of leaves with a small hole at one end. Not a tidy A-frame. Not a Boy Scout diorama. A messy, oversized leaf pile.

A common move: lay small branches over the pile after you’re done. Wind will strip the top layer otherwise, and one good gust at 1am will undo two hours of work.

Step 4: Stuff the Inside (The Step Almost Everyone Skips)

The ground will steal more heat from you than the air ever will. You need 6-12 inches of debris underneath you, packed into the interior of the shelter before you crawl in. Leaves, pine needles, dry grass — anything that compresses but still has loft.

Then, once you’re inside, you pull more debris in on top of yourself like a blanket. You’re going to crawl into a leaf pile and bury yourself. Your face stays exposed, everything else gets covered. This is where the magic happens — that’s the still-air sleeping bag I told you about. The shelter is the outer shell. The debris on top of you is the actual insulation.

Step 5: Plug the Door

Once you’re inside, you pull a “door plug” in behind you — basically a stuff sack of debris, or a small pre-made bundle of grass and leaves. Without it, the entrance is a chimney that vents all your warm air. With it, you’ve sealed the envelope. Build the plug before dark. You will not want to be making one at 11pm in the cold.

What This Costs You (Time and Calories)

A proper debris shelter takes 2-3 hours to build from scratch with no tools. It burns somewhere between 800-1500 calories. You need to start building no later than 3 hours before sunset, period. If you find yourself caught out at dusk and you haven’t started, you’re sleeping cold and you need to switch to plan B (fire and a wind break).

A small folding saw or even a sharp fixed-blade knife cuts the build time roughly in half. This is one of the cases where the right piece of gear matters — check out the survival gear in the BaseCampGoods shop if you don’t already have a real outdoor knife. A folding saw under 8 inches will save you more energy than any other tool in this scenario.

My Honest Opinion on When to Build One

Most people will never build a debris shelter for real. That’s fine. But you should build one once, in good weather, in your own woods or someone’s property where you have permission. Sleep in it for one night. Here’s why:

  • You will learn that “shelter” doesn’t mean what you think it means.
  • You will learn how much work it actually takes — and how badly you’d struggle to do it cold, wet, and tired.
  • You will never again leave the truck without a decent jacket and a knife.
  • You will respect a synthetic sleeping bag for the modern miracle it is.

Every serious outdoorsman I know has done this exercise at least once. It’s not because they expect to be lost in the woods. It’s because the experience recalibrates everything — how much gear matters, how much fitness matters, how thin the line really is.

The Five Most Common Mistakes

  1. Too big. Build it coffin-sized, not tent-sized. Your body can’t heat a room.
  2. Not enough debris. 2-3 feet on top. Not 6 inches. Not “a good layer.”
  3. No ground insulation. Cold ground will defeat you faster than cold air. 6-12 inches under you.
  4. Wet debris. Damp leaves are worse than no leaves. Brush off snow, shake out water, use dry stuff.
  5. No door plug. An open door is a chimney. Seal it.

Your Challenge This Weekend

Pick a Saturday in the next month. Go to your hunting lease, your buddy’s land, or a state forest that allows it. Spend three hours building a real debris shelter — coffin-sized, knee-deep debris, ground insulation, door plug. Then crawl in and stay in it for at least 30 minutes.

If you’re feeling froggy, sleep in it. Take a sleeping bag as a backup — you can leave it outside the shelter and only grab it if you genuinely need it. Most people who try this find they don’t.

The skill you can do on demand beats the gear you might forget. Build one shelter in good weather, and you’ll never panic about a cold night again.

Got questions about building your first one, or want to share how it went? Drop a comment below. We read every one.

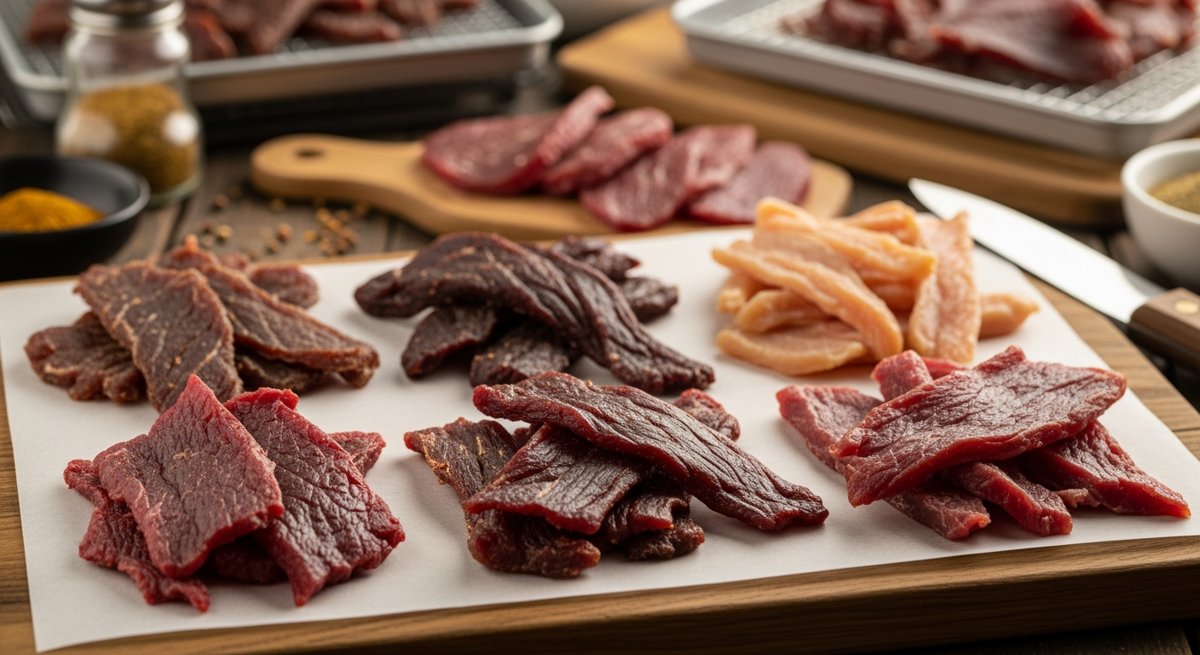
Jerky at Home: How to Dehydrate Beef, Venison, and Turkey (The Complete Guide)

A bag of decent grocery-store jerky runs $8 to $12 for what amounts to two real handfuls of meat. The good stuff — Chomps, Country Archer, anything labeled “grass-fed” — can hit $15 a bag. You can make better jerky at home for roughly $4 a pound, control every ingredient that goes into it, and stop pretending those tiny packets are a reasonable way to eat protein.

Here’s the whole playbook: beef, venison, and turkey. Three marinades, one machine, zero mystery.

Why Bother Making Your Own

Three reasons, in order of importance:

  1. Cost. A pound of eye of round runs $7–$9. You lose about half the weight to dehydration, so you end up with ~8 oz of finished jerky. That’s the equivalent of three or four store-bought bags ($25–$40 worth) for the price of one lean cut of beef.
  2. Ingredients. Read a jerky label sometime. Sodium nitrite, MSG, “natural flavors,” dextrose, maltodextrin, and enough sugar to qualify as candy. Yours has meat, salt, soy sauce, and whatever spices you actually like.
  3. Quality. Homemade jerky — properly dried, properly seasoned — is in a different league. It tastes like the animal, not a marinade injection.

My opinion: The cost argument matters, but the ingredient argument is the real win. If you’re trying to eat clean protein on the move, packaged jerky is one of the worst-value foods at the grocery store. You’re paying meat prices for sugar and preservatives.

What You Need

A dehydrator (or an oven, if you must)

A real dehydrator with a fan and an adjustable thermostat is the move. Look for one that hits at least 160°F — this is the FDA’s recommendation for safely killing pathogens in raw meat before drying. Stacked-tray dehydrators work; box-style with horizontal trays work better because airflow is more even.

If you don’t own one, an oven set to its lowest temperature (usually 170°F) with the door cracked open will work. It just ties up your oven for 4–8 hours and uses way more energy. Buy the dehydrator.

A sharp knife or a slicer

Even, thin slices are the whole game. If your slices are inconsistent, some pieces will be over-dried and some will still be soggy in the middle. A meat slicer is overkill unless you’re making jerky weekly. Otherwise, a sharp 8″ chef’s knife and 60 minutes of partial freezing (more on that below) is enough.

The meat — cut selection matters

  • Beef: Eye of round, top round, or bottom round. Lean cuts only. Fat doesn’t dry — it goes rancid. Trim every visible piece off before slicing.
  • Venison: Hindquarter muscles — top round, sirloin tip, eye of round. Same rule: trim hard, no silver skin, no fat.
  • Turkey: Breast only. Tenderloins work great because they’re already thin and uniform.

The Slicing Trick That Changes Everything

Put the meat in the freezer for 60–90 minutes before slicing. Not frozen solid — firm. You want it stiff enough that the knife glides through cleanly instead of squishing the muscle fibers.

Two slicing directions, two textures:

  • With the grain = chewy, traditional jerky texture. Better for backpacking because it holds up.
  • Against the grain = tender, breaks apart easily. Better for snacking at home, harder to tear when you’re walking.

Slice 1/8″ to 1/4″ thick. Thinner = faster drying and crispier finish. Thicker = chewier, takes longer. I default to about 3/16″ — call it the thickness of two stacked quarters.

Three Marinades That Actually Work

Mix marinade in a gallon zip-top bag, add sliced meat, squeeze the air out, and refrigerate 8–24 hours. Longer = saltier and more pronounced flavor. Don’t go past 24 hours or the texture starts to get mushy.

Each recipe is enough for about 2 pounds of sliced meat.

1. Classic Soy & Black Pepper (Beef)

  • 1/2 cup soy sauce
  • 1/4 cup Worcestershire
  • 2 tbsp brown sugar
  • 2 tsp coarse black pepper
  • 1 tsp garlic powder
  • 1 tsp onion powder
  • 1/2 tsp smoked paprika
  • 1/2 tsp red pepper flakes (optional)

2. Sweet Heat (Venison)

  • 1/3 cup soy sauce
  • 2 tbsp honey
  • 2 tbsp apple cider vinegar
  • 1 tbsp sriracha
  • 2 tsp garlic powder
  • 1 tsp ground ginger
  • 1 tsp coarse black pepper
  • 1/2 tsp cayenne

Venison takes spice well — it’s lean, gamey, and stands up to bigger flavors than beef. Don’t waste this marinade on store-bought beef.

3. Citrus Herb (Turkey)

  • 1/4 cup soy sauce
  • 2 tbsp olive oil
  • Juice and zest of 1 lemon
  • 2 tbsp Dijon mustard
  • 1 tbsp dried rosemary (or 2 tbsp fresh, chopped)
  • 2 tsp garlic powder
  • 1 tsp black pepper
  • 1 tsp salt

About curing salts: Most home jerky recipes don’t use Prague Powder #1 (sodium nitrite). The FDA recommends pre-heating meat to 160°F before dehydrating, which kills pathogens that nitrite would otherwise control. If you want maximum shelf life or you’re making something closer to commercial jerky, add 1/4 tsp Prague Powder #1 per pound of meat. Otherwise, skip it. I skip it.

The Drying Process, Start to Finish

  1. Pat the marinated slices dry with paper towels. Excess marinade on the surface = sticky, uneven drying. Don’t skip this.
  2. Pre-heat the meat to 160°F. Put the slices on a baking sheet in a 275°F oven for 10 minutes. This is the safety step. Don’t skip it just because you’re impatient.
  3. Arrange on dehydrator trays in a single layer, not touching. Airflow is everything.
  4. Dry at 160°F for 4–6 hours. Beef and venison usually finish around 5 hours. Turkey runs faster — check at 3 hours.
  5. Test doneness. Bend a cooled (not hot) piece. It should crack and show white fibers but not snap clean. If it’s bendy and shiny, keep going. If it shatters, you went too far — still edible, just brittle.

Storage — And the Step Almost Everyone Skips

After drying, let the jerky cool to room temperature, then put it in a paper bag (yes, a paper bag) for 24 hours. This step is called “conditioning.” It lets remaining moisture redistribute evenly so you don’t get a few wet pieces ruining the whole batch.

After 24 hours, check for any beads of moisture on the bag. If you see condensation, throw it back in the dehydrator for another hour.

Then store:

  • Vacuum-sealed at room temp: 1–2 months
  • Vacuum-sealed in the freezer: 6–12 months, no quality loss
  • Mason jar with an oxygen absorber: 3–4 months at room temp
  • Zip-top bag in the pantry: 1–2 weeks. Don’t kid yourself, it won’t last that long anyway.

The Cost Math, Spelled Out

Let’s run a 2-pound batch of beef jerky:

  • 2 lbs eye of round: ~$16
  • Marinade ingredients (pantry staples, prorated): ~$2
  • Electricity for 5 hours: ~$0.30
  • Total: ~$18.30 for about 16 oz of finished jerky

16 oz of grocery-store jerky at $10 per 2 oz bag = $80. You just saved $60 and got a better product. Do this twice a month and you’ve funded a decent dehydrator inside of six months.

Common Mistakes I See

  • Using fatty cuts. Chuck, ribeye, brisket trimmings — they all turn rancid in storage. Lean cuts only.
  • Skipping the 160°F pre-heat. Dehydrators alone don’t guarantee pathogen kill. It’s a 10-minute step. Just do it.
  • Inconsistent slicing. 1/8″ pieces next to 1/2″ pieces = some jerky, some shoe leather, some still raw in the middle.
  • Over-marinating. 24 hours max. Beyond that, the texture goes mushy and the salt overpowers everything.
  • Skipping the conditioning step. The paper bag move feels weird, but it’s the difference between jerky that lasts months and jerky that molds in a week.

Your Challenge This Week

Buy 2 pounds of eye of round on your next grocery run. About $16. That’s the entry fee.

Mix the classic soy & pepper marinade Saturday morning. Slice and bag the meat. Sunday morning, dry it. By Sunday afternoon, you have a week’s worth of high-protein snacks that cost you a third of what the gas station charges, taste better, and have ingredients you can pronounce.

Do this twice and you’ll never buy a $10 bag of jerky again.

If you hunt — venison jerky is the killer app for this. A backstrap and a hindquarter will keep you in protein snacks for months, and it’s the single best way I know to use up tough cuts that would otherwise sit in the freezer until next season.

One last thing: Once you start making your own, you’ll catch yourself reading every store-bought jerky label and getting mildly offended. That’s the goal. Keep building skills that make the convenient option look stupid.

Jerky is preservation 101. To go further — curing, canning, root cellars, and growing the food in the first place — The Self-Sufficient Backyard is the manual.

The Power of Boring Consistency: Why Motivation Is a Trap

Motivation is a liar. It shows up when you don’t need it and disappears the second things get hard. If you’ve been waiting to feel ready, feel inspired, feel like it — you’ve already lost the game.

The people you envy — the ones with the body, the business, the marriage, the bank account — they didn’t out-motivate you. They out-bored you. They did the same unsexy thing on Tuesday in February when nobody was watching and nothing felt good. That’s the whole secret. There isn’t a second one.

This post is about why boring consistency beats explosive effort every time, why motivation is actually working against you, and how to set up your life so showing up doesn’t require feeling like it.

The Lie You’ve Been Sold

Open Instagram. Open YouTube. Open TikTok. What do you see? Guys screaming about hustle. 4 AM cold plunges set to electronic music. Some life coach in a Lambo telling you that your mindset is the only thing holding you back.

It’s all selling the same lie: that you’re one hyped-up morning away from a different life. That if you just want it bad enough, the rest will fall into place.

It’s a lie because motivation is a feeling, and feelings are weather. They come, they go, you don’t control them. Building a life on top of motivation is like building a house on top of a cloud.

Here’s what nobody on your feed will tell you: the most successful people I know are kind of boring. They go to bed early. They eat the same breakfast. They train at the same time. They do the work whether they feel like it or not, and they’ve stopped having an opinion about whether they feel like it. The feeling is irrelevant. The reps still happen.

Why Boring Wins

Math. That’s the answer. It’s just math.

Run the numbers on a guy who works out 6 days a week for 3 weeks every January, then quits until next January. Over 5 years he’s done about 90 workouts. Now take a guy who trains 3 times a week, every week, no exceptions, no streak chasing, just three sessions. Over 5 years he’s done 780 workouts.

There is no level of motivation that closes that gap. The boring guy isn’t even working that hard. He’s just not stopping. And not stopping — that’s the entire skill.

The same math applies to everything: money saved, books read, miles rucked, sentences written, conversations with your kid, push-ups, prayers, sales calls. Volume over time crushes intensity in bursts. Always. It’s not close.

Motivation Is Actually the Enemy

Here’s the part that took me a while to accept: relying on motivation actively makes you weaker. Every time you only train when you feel like it, you teach your brain that the feeling is the prerequisite. No feeling, no action. You’re training the wrong nervous system.

The people who get strong — physically, financially, mentally — train the opposite reflex. They act first, the feeling follows. Or doesn’t. Doesn’t matter. The reps still happen.

Once you decouple action from feeling, you become genuinely dangerous. Bad day? Reps happen. Slept terribly? Reps happen. Marriage on fire, kid puked at 3 AM, work meeting got moved? Reps happen, maybe shorter, but they happen. That’s not discipline as a personality trait. That’s just an operating system you built once and now you don’t have to negotiate with yourself every morning.

How to Build the Boring Engine

Knowing motivation is a trap is step one. Step two is engineering your life so you don’t need it. Here’s the actual playbook.

1. Make the Bar Embarrassingly Low

If your daily target is “1 hour at the gym,” you will fail. Not because you’re weak — because life is chaos and an hour is a lot. Set the bar at 10 minutes. 5 pushups. One page. One sales call. Something so small that “I don’t have time” becomes obviously a lie you’re telling yourself.

Most days you’ll do way more. Some days you’ll only hit the minimum. That’s the whole point. The minimum is the protection against zero. Zero is what kills you. Zero compounds the wrong way.

2. Pick a Time and Defend It

Decision fatigue is real. Every morning you re-decide whether to train, whether to write, whether to eat well, you burn willpower you can’t get back. Pick a time, put it on the calendar, and stop thinking about it. 6 AM. 9 PM. Tuesday after work. Doesn’t matter — pick one and stop renegotiating.

Treat it like a meeting with someone who will fire you if you don’t show. Because eventually, you will. Your future self is the person paying the bill.

3. Track Something Stupid Simple

Get a wall calendar. The cheap kind. Every day you hit your minimum, put an X. That’s it. Don’t overthink it. Don’t use an app that gamifies your life into oblivion. An X on a calendar is one of the most powerful tools ever invented, and Jerry Seinfeld didn’t trademark it for a reason.

You’ll find yourself doing the work just to not break the chain. That’s not cheating. That’s leveraging human psychology against itself. Use whatever works.

4. Decouple From Outcome

If you started lifting last month and you’re still checking the mirror every morning waiting for abs, you’re going to quit. The outcome is too far away and too unreliable. You don’t control when results show up. You only control whether you showed up.

Switch your scoreboard. Don’t measure “did I lose 10 pounds this month.” Measure “did I hit 12 workouts this month.” One is in your control. One isn’t. Score yourself on the controllable one and the uncontrollable one starts taking care of itself.

5. Build Tolerance for Boredom

Most of consistency is just being okay with the fact that it’s not exciting. The first month is exciting. Month four through eighteen is just maintenance — the slog where most people quit. Real progress lives on the other side of that boredom.

Stop trying to optimize the boring out. The boring is the work. If you need it to be fun, you’ll keep program-hopping forever, chasing novelty like it’s a drug. It is a drug, by the way. Novelty hits the same dopamine receptors as a slot machine. The guy on his 800th boring squat day is just choosing a different vice.

What This Looks Like in Real Life

I’ll give you a real example. I know a guy who’s in better shape at 51 than most people are at 25. He doesn’t bio-hack. He doesn’t track macros. He doesn’t post about it. He walks his dog 45 minutes every morning, does 50 pushups before bed, lifts three times a week at the same gym at the same time, and eats roughly the same six meals on rotation.

He’s been doing this since his late twenties. That’s it. That’s the program. It would fit on a Post-it note. He would bore you to death if you tried to interview him about his “routine.” There’s no story there. Just twenty-three years of Tuesdays.

Meanwhile the rest of us are out here buying our seventh program, watching another podcast, trying to find the trick. The trick is there isn’t one. The trick is twenty-three years of Tuesdays.

The Mindset Shift That Changes Everything

Here’s the reframe that unlocks the rest of your life: stop trying to be motivated and start trying to be unstoppable.

Motivated is a state. Unstoppable is an identity. One depends on weather. The other depends on you deciding what kind of person you are and then refusing to negotiate. You don’t ask a brick wall if it feels like being a wall today. It’s a wall. That’s the whole job.

Become the wall. The motivation will visit sometimes — you’ll have great days, days where everything clicks, days where you feel ten feet tall. Enjoy them. But don’t depend on them. They are the bonus, not the foundation.

Your Challenge This Week

Pick one thing. Not three. Not a whole new lifestyle. One thing.

Set a minimum so small it’s almost insulting. 5 pushups. 10 minutes of reading. One glass of water before coffee. One walk after dinner.

Do it every day for the next 7 days. Hit the minimum even if you don’t feel like it. Especially if you don’t feel like it — those are the reps that count.

Put an X on a calendar each day. At the end of the week, look at the chain. That string of X’s is not a hack. It’s not a trick. It’s evidence. Evidence that you don’t need motivation to do hard things. Evidence that you’re the kind of person who shows up.

That evidence compounds. After 7 days you have a small thing. After 30 days you have a habit. After a year you have an identity. After 5 years you have a life that doesn’t look like everyone else’s, and you stopped noticing it changed because you were busy doing Tuesday.

Motivation got you to read this. Boring consistency is what gets you everything else.

Now close the tab and go do your 5 pushups.

Solar Power for Beginners: What a Starter System Actually Costs in 2026

Let me save you a weekend of YouTube rabbit holes and three hours on the phone with a sales rep who calls himself a “solar consultant.” Here’s what a real off-grid or backup solar setup actually costs in 2026 — broken down by what you’re trying to do, what gear you actually need, and where people waste money.

Spoiler: it’s cheaper than it was five years ago. It’s also more confusing, because the market is flooded with all-in-one units that range from genuinely good to garbage in a clever box. I’ll tell you which is which.

First: What Are You Actually Trying to Do?

99% of bad solar decisions happen because someone bought the wrong category of system. There are really only four:

  1. Tier 1 — Phone/Light Backup ($150–$400). Keep phones charged, run a fan, power a couple LED lights during a short outage. A small power station + one folding panel.
  2. Tier 2 — Fridge + Essentials Backup ($800–$2,500). Run a fridge, a CPAP, internet router, charge tools, lights for a few days. Mid-size power station (1,500–3,000Wh) plus 200–400W of panels.
  3. Tier 3 — Whole-Home Backup ($6,000–$15,000). Tied to your panel via transfer switch. Runs most of the house through outages. Larger battery bank, inverter, maybe rooftop solar.
  4. Tier 4 — True Off-Grid ($20,000+). No utility connection. Roof or ground array, battery bank, generator backup, the works.

If you don’t know which tier you need, you’re Tier 2. Almost everyone reading this is Tier 2. That’s where the real value lives — meaningful backup power, no electrician required, portable enough to take camping. Let’s break that down.

The Tier 2 Starter System (What Most People Should Build)

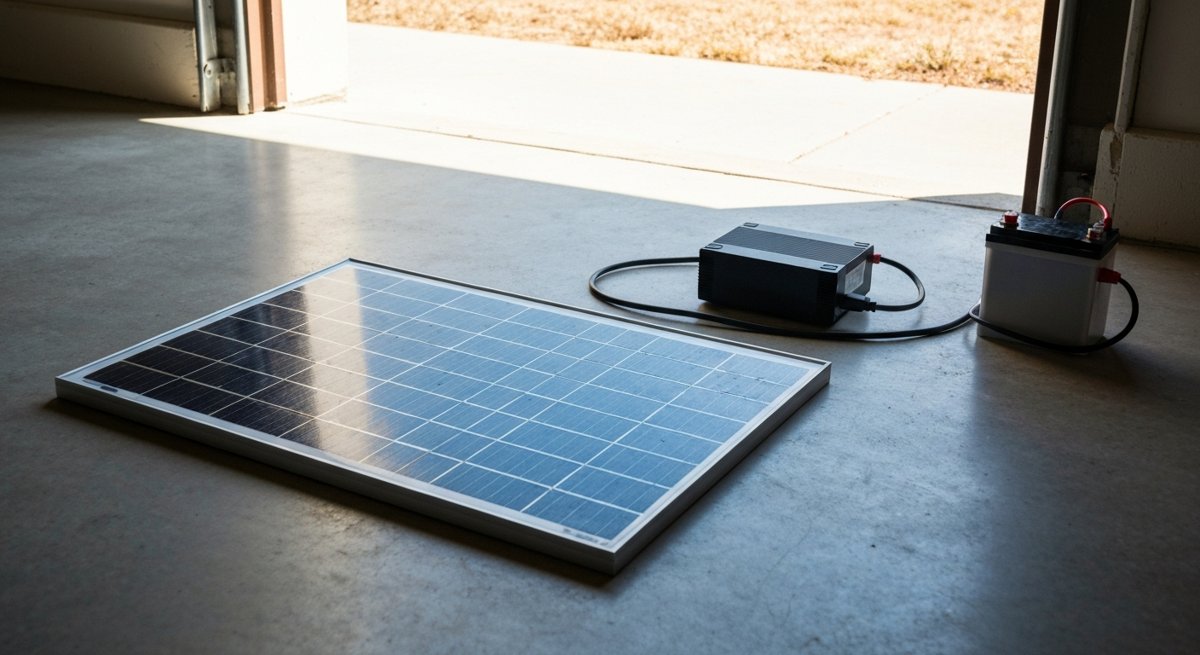
Here’s a real-world setup that handles a multi-day outage, runs a fridge, keeps phones and laptops alive, and powers a few lights and a fan. Total cost: about $1,400–$1,800 in 2026.

Component 1: A Power Station with LiFePO4 Batteries — $900–$1,200

This is the brain. It’s the battery, the inverter, the charge controller, and the outlets all in one box. Non-negotiable: it must be LiFePO4 (lithium iron phosphate), not standard lithium-ion. LiFePO4 lasts 3,000–6,000 cycles vs 500–1,000 for regular Li-ion, doesn’t catch fire if punctured, and handles temperature extremes way better. Brands I’d actually buy: EcoFlow Delta 2, Bluetti AC180, Anker Solix C1000, Jackery Explorer 1000 v2. Aim for at least 1,000Wh of capacity and 1,500W of continuous output. That’ll run a typical fridge plus a few small loads.

Component 2: Solar Panels — $300–$500

200–400W of foldable or rigid panels. Foldable is more versatile (you can chase the sun, pack them away), but rigid panels are cheaper per watt if you have a permanent spot. Two 200W foldable panels in parallel will give you a real-world 800–1,200Wh of charging per sunny day — enough to keep that 1,000Wh station topped off if you’re running modest loads.

Component 3: A Good Extension Cord and Heavy-Duty Outlet Strip — $50

Sounds boring, matters a lot. You need at least a 12-gauge outdoor extension cord to run from your power station (probably in the garage or by a window) to your fridge. Cheap 16-gauge cords will sag voltage and trip your inverter on startup surges.

Component 4: A Kill-A-Watt Meter — $30

Buy this before you buy a power station. Plug your fridge into it for 24 hours and read the actual daily watt-hours. Same for any other appliance you want to back up. Now you know exactly what size system you need. This $30 tool will save you from buying double the system you actually need — or half.

The Math Nobody Shows You

Here’s the formula that demystifies the whole thing:

Daily Wh you need = (watts of device) × (hours per day it runs)

Modern fridge: ~100W average, runs ~8 hrs/day cycling = 800 Wh/day
CPAP: 40W × 8 hrs = 320 Wh/night
Router + modem: 15W × 24 hrs = 360 Wh/day
Phones/laptop charging: ~150 Wh/day
3 LED lights: 10W × 5 hrs each = 150 Wh/day

Total essentials: ~1,800 Wh/day

So a 1,000Wh battery alone won’t last a full day of essentials. But pair it with 400W of solar in decent sun, and you’re generating 1,500–2,000 Wh/day of recharge. Now you’re sustainable. That’s why both halves of the system matter — battery alone is just a backup. Battery + panels is power independence.

Where People Waste Money

  • Buying gas-generator-sized systems for fridge-sized needs. You don’t need a 5,000Wh monster to ride out a 36-hour storm.
  • Cheap lead-acid setups. The math used to favor lead-acid on price. It doesn’t anymore. LiFePO4 is now cheaper over its lifetime, weighs a third as much, and doesn’t need to be vented.
  • Permanent rooftop installs for backup-only use. If you just want emergency power, don’t drill into your roof. A portable system is more flexible, moves with you, and works during a grid-down event without a special transfer switch.
  • Generic Amazon “1500W” panels. If a 200W panel costs $80, it’s not a 200W panel. Real-world output from no-name panels is often 40–60% of the sticker number.
  • Ignoring the inverter rating. A 1,000W inverter cannot start a fridge. Compressors have a startup surge 3–5x running watts. You need at least 1,500W continuous, with 3,000W surge.

My Honest Opinion on All-in-One Power Stations

I used to be a “build your own with separate components” snob. I’m not anymore. The modern all-in-one units are genuinely good — they pack a proper LiFePO4 battery, a pure sine wave inverter, an MPPT charge controller, and a battery management system into one box for less than you could build it for in 2026. Unless you’re going Tier 3 or Tier 4, just buy the all-in-one. Skip the 3 weekends of wiring, fuse-sizing, and second-guessing.

The only reason to DIY is if (a) you want a 5,000+ Wh bank, or (b) you genuinely enjoy this stuff. Both are fine. Just be honest with yourself.

A Word on Tax Credits

The federal Residential Clean Energy Credit currently covers 30% of the cost of solar systems — but only if they’re permanently installed on your home. Portable power stations don’t qualify. If you’re going Tier 3 (whole-home with rooftop), the 30% credit changes the math substantially. A $12,000 system effectively costs $8,400. Talk to a CPA before pulling the trigger, and don’t trust the installer’s word on what qualifies.

The Honest Truth About Payback Periods

Solar salespeople love to talk about “payback in 7 years.” For a backup-only Tier 2 system, the payback isn’t in dollars saved on your power bill — it’s in not losing $400 of fridge contents during an outage, being able to work during a multi-day storm, and not paying $1,500 for a generator + fuel + maintenance over 10 years. Frame it that way and a $1,500 system pays for itself the first time the grid goes down for more than 24 hours.

A Tier 3 whole-home install with grid sell-back? Real payback in some states is 8–12 years. In states with cheap power and no net metering, more like 18–25 years. Run the numbers for your zip code before anyone tries to sell you anything.

Your Challenge This Weekend

Do these three things before you buy anything:

  1. Buy a $30 Kill-A-Watt meter. Measure your fridge for 24 hours. Write down the kWh.
  2. Add up the daily Wh of every appliance you’d actually want during an outage. Be honest — you don’t need to run a hair dryer.
  3. Multiply that total by 1.5 to size your battery (gives margin for cloudy days and aging cells). That’s your target Wh.

Now you know what to buy. Not what a YouTube affiliate is pushing. Not what a salesperson commissioned on margin recommends. What you actually need.

Solar isn’t magic. It’s just math and decent equipment. Do the math, buy decent equipment, and you’ll never panic during a thunderstorm again.

Looking for gear that actually holds up? Check the BaseCampGoods shop for tested EDC and preparedness gear we’d put in our own kits.

Solar is one system; a self-reliant property runs on several. For the complete DIY blueprint — power, water, food, and storage, with no one upselling you — The Self-Sufficient Backyard is worth the read.

Water Purification Methods Ranked: Filters, Tablets, UV, and Boiling (Which Actually Works)

You can survive about three days without water. But here’s the part most people miss: drinking the wrong water can kill you faster than dehydration. Giardia. Cryptosporidium. E. coli. Norovirus. Heavy metals from old mining runoff. A clear mountain stream looks like Evian and tastes like betrayal.

So you boil it, right? Sometimes. Sometimes you can’t. Sometimes you’re moving fast, your fuel is wet, and you’ve got 800 mL of unknown creek water and 20 minutes before you need to be five miles down the trail. That’s why you need to actually understand your options — not just own a Sawyer because some YouTuber said so.

Here’s the honest ranking of the four main field methods, what each one actually kills, and when I’d reach for each one.

The Four Methods, Ranked Overall

  1. Boiling — most reliable, requires fuel + time
  2. Filtration (hollow fiber) — fastest in the field, no waiting
  3. Chemical tablets — lightest, slowest, tastes awful
  4. UV light — fast and clean, but fragile and battery-dependent

That’s the headline. Now let’s get into the why — because the right answer depends entirely on what you’re worried about.

#1. Boiling — The Gold Standard

Kills: Bacteria. Viruses. Protozoa (giardia, crypto). All of it. Anything biological dies in a rolling boil.

Does NOT remove: Chemicals, heavy metals, salt, sediment, or the taste of dead leaves.

How long: CDC says one minute at a rolling boil at sea level. Three minutes above 6,500 ft. That’s it. The “boil it for ten minutes” thing is folklore — by the time water hits 160°F, you’ve already killed everything that matters.

Why it wins: No moving parts. Nothing to break. Nothing to replace. If you have a pot and a heat source, you have safe water. Forever.

Why it loses sometimes: Fuel is heavy. Time is expensive. You can’t boil while you’re hiking. And in a true emergency — say, urban evac, no power — you might not have a stove at all.

My take: If I’m in a basecamp with a fire going, boiling is always the answer. It’s the most foolproof method humans have ever come up with. The only reason it’s not #1 in your pack is that it’s slow and fuel-dependent.

#2. Hollow-Fiber Filters — The Field Workhorse

The standouts: Sawyer Squeeze, Sawyer Mini, Katadyn BeFree, MSR Trail Shot.

Kills/removes: Bacteria and protozoa — 99.9999% of the bad stuff at the 0.1-micron level. The Sawyer Squeeze is rated to 100,000 gallons. That’s a lifetime of water from one filter the size of your thumb.

Does NOT remove: Viruses. This matters. In North America? Almost never an issue — viral contamination of backcountry water is extremely rare. In a sewage-contaminated urban flood, or anywhere overseas? You need more than a filter.

Why it wins: Drink immediately. No waiting, no taste, no fuel. Lightweight. Cheap (Sawyer Squeeze is around $40). Works in dirty water as long as you backflush it.

Why it loses sometimes: Freezing kills hollow-fiber filters. One night below 32°F with water still in the fibers and the filter is silently destroyed — no warning, just contaminated water next time. You also can’t filter saltwater or chemical contamination.

My take: This is what lives in my pack. Every hike, every overnight, every truck kit. The Sawyer Squeeze is the most cost-effective survival item I own. Just don’t let it freeze.

#3. Chemical Tablets — The Ultralight Backup

The standouts: Aquatabs (chlorine dioxide), Potable Aqua (iodine), Katadyn Micropur.

Kills: Chlorine dioxide tablets kill bacteria, viruses, AND crypto — which is rare for a single method. Iodine kills most things but is weak against crypto.

How long: 30 minutes for bacteria/viruses. Four hours for crypto in cold water. That’s the catch.

Why it wins: Weighs nothing. Lasts years on the shelf. Zero moving parts. Doesn’t care if it freezes. Throws into any kit and forgets about it until you need it. Pack of 30 tabs costs about $13.

Why it loses sometimes: Slow. Tastes like a pool. Doesn’t remove sediment. Iodine is contraindicated for pregnant women and people with thyroid issues. The wait time when you’re parched is brutal.

My take: Tablets are not your primary. They’re the redundancy. They live in the lid pocket of my pack and in my truck kit because they weigh nothing and they don’t break. If your filter freezes or clogs at the worst moment, the tablets save you.

#4. UV Light — Cool Tech, Wrong Tool

The standouts: SteriPEN Ultra, SteriPEN Adventurer Opti.

Kills: Everything biological — bacteria, viruses, protozoa. UV-C light scrambles their DNA and they can’t reproduce.

Why it wins on paper: 90 seconds, no chemicals, no flavor, no fuel.

Why it loses in reality: It’s a glass UV bulb in a battery-powered electronic device that you’re going to dip into cold water and toss around in a pack. The failure modes are not theoretical. Bulb breaks. Batteries die. Electronics get wet. Water must be clear — turbid water blocks the UV from reaching the pathogens, and you have no way to know if it worked.

My take: Cool gadget. Stays home. If I want belt-and-suspenders, I’d rather carry tablets AND a filter than rely on something with a battery and a glass bulb when I’m 30 miles from a road.

The Decision Matrix: What to Actually Use

Day hike in North America: Sawyer Squeeze. Done. That’s it.

Backcountry overnight: Sawyer + tablets as backup. Two methods, almost zero weight penalty.

Winter trip (below freezing): Tablets primary. Boiling at camp. Skip the filter — it’ll crack.

International travel / questionable city water: Filter + tablets. The combo kills viruses the filter misses.

Home emergency / urban evac: Boiling if power’s available. Bleach (2 drops per liter, wait 30 min) if not. Tablets if you have them.

Vehicle EDC / get-home bag: Tablets. They live in the bag for a decade and never complain.

The Sediment Problem Nobody Talks About

All four methods assume your water is reasonably clear. Murky water from a stock pond or a flood? You need to pre-filter first — through a bandana, a coffee filter, or by letting it settle for an hour in a separate container. Then purify. Skip this step and you’ll clog your filter, undertreat with tablets, or scatter the UV light. It’s the boring step everyone forgets.

The Layered Setup (What I Actually Run)

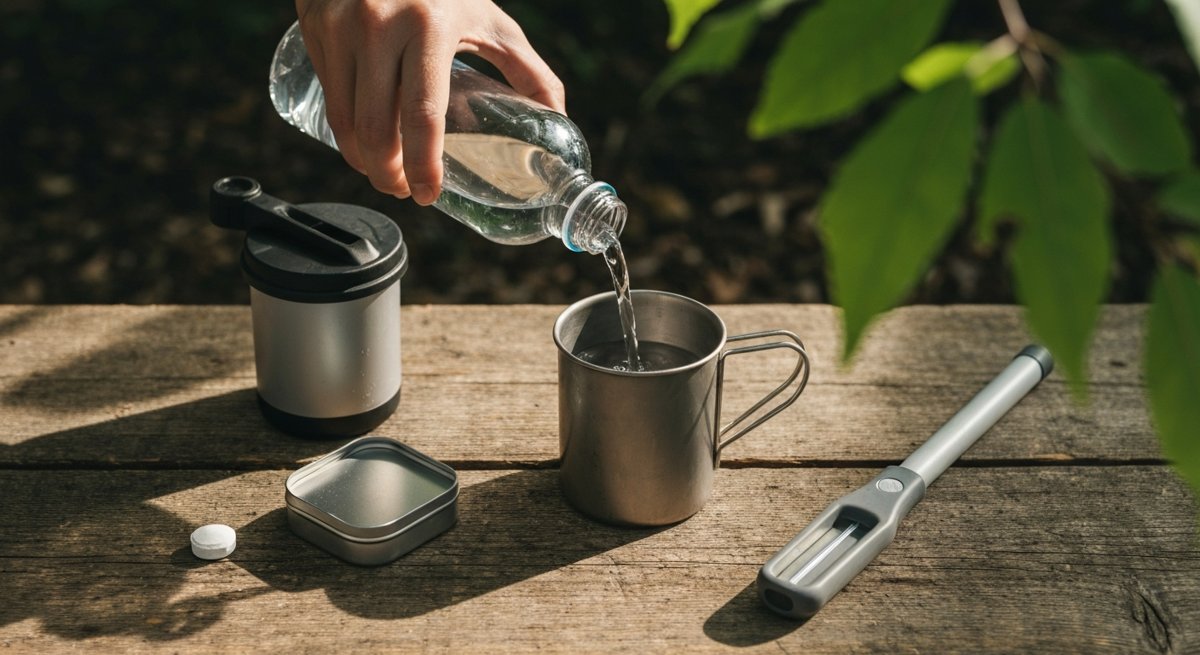
Redundancy isn’t paranoia — it’s how you don’t end up with giardia 12 miles from the trailhead. Here’s my actual three-tier setup, total weight under 5 ounces:

  • Primary: Sawyer Squeeze with a smartwater bottle as the dirty reservoir
  • Backup: 10-pack of Aquatabs in a tiny ziplock in the lid pocket
  • Camp: Titanium pot for boiling whenever I have a stove going

Three independent methods. Each covers what the others miss. If the filter freezes — tablets. If I’m out of tablets — boil. If I’m out of fuel — filter. The system never has a single point of failure.

The Takeaway

Pick two methods that fail in different ways. A filter and tablets. A pot and a filter. Whatever combination you can carry. The single-method survivalist is one freeze, one clog, or one dead battery away from drinking raw creek water and gambling with a parasite that ruins the next three weeks of their life.

Water is the one resource you can’t compromise on. Get this right and almost everything else gets easier.

Your Challenge This Week

Go look at your get-home bag, your truck, and your day pack. How many ways can you make water safe to drink with what’s in there right now? If the answer is “one” — or worse, “none” — fix that this weekend. A Sawyer Squeeze and a sleeve of Aquatabs is under $55 total and covers 90% of real-world scenarios you’ll ever face.

Want more practical survival gear breakdowns? Check out the BaseCamp Goods shop for vetted EDC, survival, and emergency kit essentials.

Knowing how to make water safe is field skill #1. For the long game — building catchment and storage you control, not just treating what you scavenge — The Self-Sufficient Backyard is the deeper resource.