The Shoe Transition Guide: How to Go Minimal Without Getting Injured

So you read about how modern shoes are wrecking your feet. Or a friend won’t shut up about their Vibrams. Or your knees hurt and the internet told you to go barefoot. Either way — you’re thinking about switching to minimalist shoes, and you want to know how to do it without ending up on crutches.

Good. Because the dirty secret of the minimalist shoe world is that most people who try them get hurt. Not because the shoes are bad. Because they rush.

Your feet have been in supportive, cushioned, heel-elevated shoes since you were a toddler. The muscles, tendons, and connective tissue that should be doing the work have been on vacation for 30-40 years. Then you buy a pair of Xero shoes, go for a 5-mile run on Saturday, and wake up Sunday with a screaming Achilles or a stress fracture in your metatarsal.

This is the guide I wish someone had handed me. It’s a 16-week plan. Yes, sixteen weeks. If that sounds long, you’re exactly the person who needs to read it.

Why You Can’t Just Switch

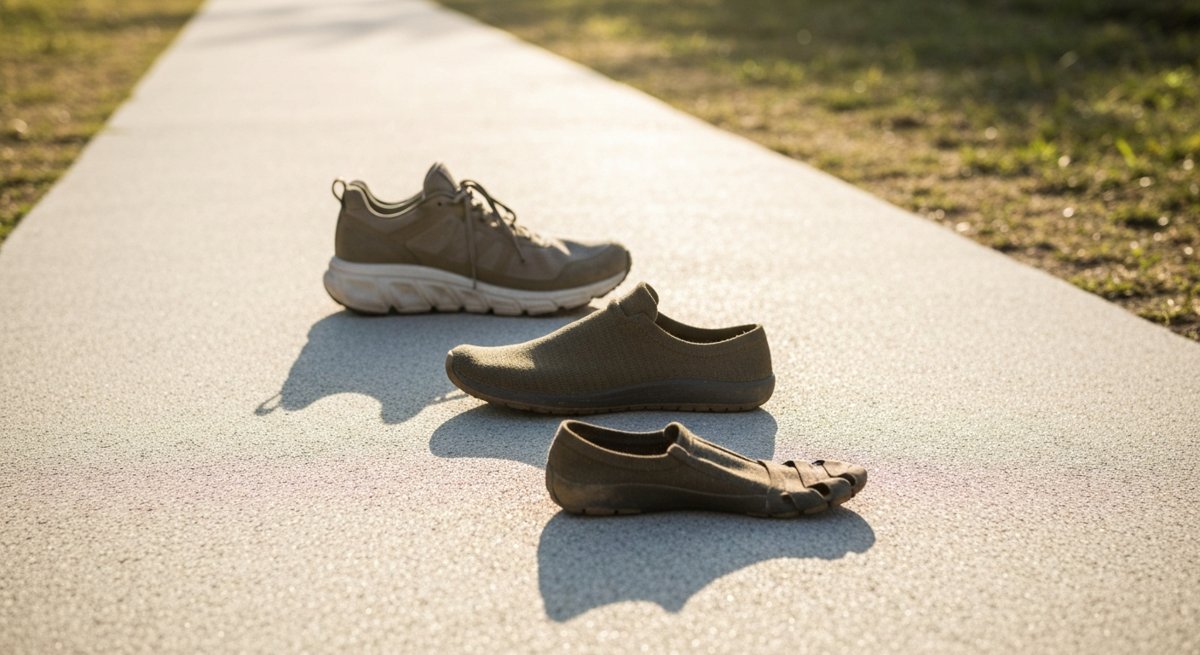
Three things are happening when you go from a traditional running shoe (10-12mm heel drop, heavy cushioning, motion control) to a minimalist shoe (0mm drop, thin sole, wide toe box):

  1. Your calves and Achilles take over. A heel-elevated shoe shortens your calf chain. Drop to zero, and suddenly those tissues are stretched longer than they’ve been in decades. They will revolt.
  2. Your foot muscles wake up. The arch isn’t supposed to be propped up by a shoe — it’s a spring made of 33 joints and 26 bones. Activating that system is like asking a sleeping muscle to do a max effort lift.
  3. Your gait changes whether you want it to or not. Most heel strikers naturally shift to a midfoot landing in minimalist shoes. That’s a different load pattern on different tissues that aren’t conditioned for it.

The fix isn’t toughness. It’s tissue adaptation time. Bone, tendon, and fascia adapt slowly. Muscle adapts in weeks. Connective tissue takes months. Push muscle past tissue, and tissue tears.

The 16-Week Transition Plan

This assumes you’re a reasonably active adult — you walk, maybe you run a couple times a week, no current injuries. If you’re dealing with plantar fasciitis or an Achilles issue right now, fix that first before starting this.

Weeks 1-4: Wear Them Around the House

That’s it. That’s the whole thing. Put on your new minimalist shoes (or just go barefoot) for an hour or two a day around the house. Cook dinner in them. Watch TV in them. Walk to the mailbox.

What you’re doing: letting the intrinsic foot muscles — the small ones inside your foot that control the arch — start firing again. You’ll notice some foot soreness, especially in the arch and the side of your big toe. That’s normal. That’s the muscles waking up.

Daily homework: 2 minutes of toe spreads (lift all toes, spread them, press them down individually), 2 minutes of calf raises off a step (slow eccentric on the way down).

Weeks 5-8: Short Walks Outside

Now take them outside. Start with 10-15 minute walks. Flat ground. Then build to 30 minutes. Then 45.

By the end of week 8, you should be able to walk a couple miles in minimalist shoes without your calves screaming the next morning. If you can’t — slow down. Repeat week 5 or 6 until you can.

Add to homework: single-leg balance work, 30 seconds per leg, twice a day. Eyes closed if you want to make it harder. Your foot is a sensory organ — it needs to relearn how to read the ground.

Weeks 9-12: Introduce Light Running (If You Run)

If you’re not a runner, skip this and just keep extending your walks, adding hills, and maybe some hiking. You’re done — you can wear minimalist shoes for daily life now.

If you do want to run, the first session is 500 meters. Not 500 yards. Half a kilometer. About 3-5 minutes of running. That’s the whole workout. Cool down by walking another mile.

Build by no more than 10% per week. Run every other day, not back-to-back. Run on grass, dirt, or track for the first month — pavement is the most punishing surface for minimalist running.

Watch your cadence. Most heel strikers run at 160-165 steps per minute. In minimalist shoes you want 170-180. Shorter steps. Land under your hips, not in front of you.

Weeks 13-16: Full Integration

By week 16 you should be doing 80-90% of your daily walking and easy running in minimalist shoes. Keep one pair of traditional shoes around for very long days on hard surfaces, race days, or when you need the cushion. There’s no prize for being a purist.

Warning Signs to Stop

Some discomfort is normal. These aren’t:

  • Sharp, localized pain in a bone (top of foot, shin). Could be a stress reaction. Back off for a week. If it persists, get imaging.
  • Achilles pain that worsens day-to-day instead of getting better. You’re loading faster than the tendon is adapting.
  • Knee pain you didn’t have before. Usually a cadence/form issue. Shorten your stride, increase your steps per minute.
  • Plantar fascia pain in the morning. The classic “first steps hurt” sign. Reduce volume by 50% for a week.

Soreness is fine. Stiffness is fine. Sharp pain, asymmetric pain, or pain that’s getting worse over weeks instead of better — that’s a stop sign.

A Few Honest Opinions

You probably don’t need to go fully zero-drop. Going from 12mm to 4mm captures most of the benefit with way less injury risk. Altras, some Topo models, and Lems all live in that 0-4mm range with a wide toe box and moderate cushion. For most people, that’s the sweet spot, not Vibrams.

The wide toe box matters more than the drop. If I could only change one thing about your shoes, it would be the toe box. Modern dress shoes and most running shoes squeeze your forefoot into a shape that doesn’t exist in nature. A wide toe box lets your foot splay on impact — that’s where most of the stability comes from. You can get most of the foot health benefit by just buying shoes that don’t taper.

Not everyone needs to do this. If you’re 55, you’ve been running comfortably in Hokas for a decade, and nothing hurts — you do not have a problem that needs solving. The pain-free system is the right system. This guide is for people whose current setup isn’t working, or who want to build resilience from the ground up.

The Daily Foot Maintenance That Actually Works

Whatever shoe you end up in, these three habits are worth more than any product:

  1. Walk barefoot at home. The cheapest, most effective foot strength program ever invented. Free. Do it.
  2. Roll a lacrosse ball or frozen water bottle under your arch for 60 seconds per foot every evening. Especially if you spent the day on hard floors.
  3. Calf raises off a step — 3 sets of 15, twice a week. Eccentric (slow down) is the key. This is bulletproof Achilles insurance.

The Challenge

For the next 7 days, every minute you’re at home, be barefoot. No house slippers, no flip-flops. Just feet on the floor.

Pay attention. Notice the floor temperature. Notice when you’re walking on the outside of your foot vs. the inside. Notice the tension in your toes when you go up stairs. Most people have spent so long with their feet padded and propped that they don’t realize how much information their feet are designed to give them.

If you can do that one week and your feet feel better — not worse — you’re ready to start week 1 of the transition. If your arches are screaming after two days, that’s your answer: your feet need more rebuilding before any new shoe is going to help.

Either way, you’ll have learned something real about your own body. Which is the point of all of this anyway.

This is Part 4 of the BaseCampGoods Foot Mechanics series. Previous: Your Feet Are Weak (And Your Shoes Did It) and How to Start Running Again Without Destroying Your Knees.
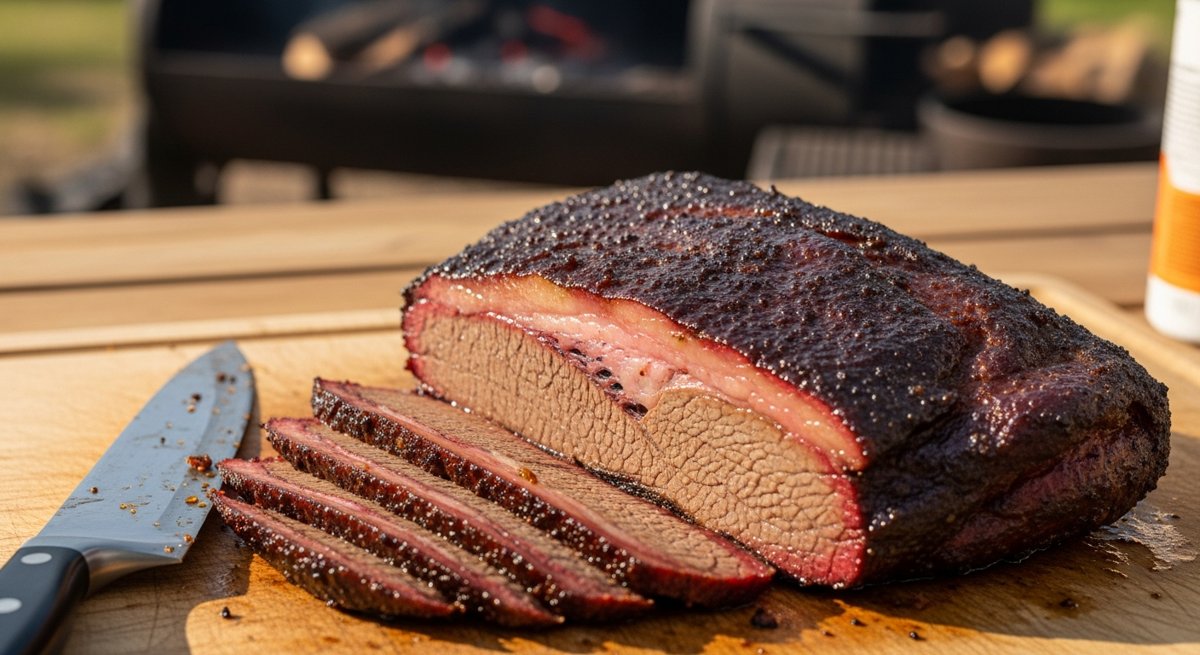

How to Smoke a Brisket: The Complete 14-Hour Guide (From Trim to Slice)

A great brisket isn’t a recipe. It’s a relationship. You spend fourteen hours with a piece of meat, and somewhere in hour eight you start having opinions about bark.

Here’s the truth nobody at the BBQ contest will tell you: smoking a brisket is one of the easiest things you’ll ever cook. The technique is simple. The variables are few. What people screw up is patience and panic — they peek too much, they crank the heat when it stalls, they slice it the wrong direction, and then they blame the smoker.

This is the guide I wish someone had given me before my first brisket (which was, for the record, a hockey puck of regret). Follow it and you’ll pull a 12-pound packer off the smoker that makes your neighbors find an excuse to come over.

What You Actually Need (And What You Don’t)

A smoker. That’s it. Offset, pellet, electric, kamado — doesn’t matter. Pitmasters will argue about this for hours and they’re all wrong, because brisket has been cooked over every kind of fire for 200 years and it still tastes great.

Other gear that actually matters:

  • An instant-read thermometer. Not optional. Brisket is done by feel and temperature, not time. If you’re cooking by the clock, you’re going to lose.
  • A leave-in probe thermometer. So you stop opening the lid every 20 minutes. Every peek costs you 15 minutes of cook time.
  • Pink butcher paper (unwaxed). Foil works, but paper gives you better bark. Buy a roll — it’s eight bucks and lasts forever.
  • A sharp boning knife. For trimming. A dull knife will turn a $90 brisket into ribbons of frustration.
  • A cooler. For resting. Yes, a regular Yeti-style cooler. You’ll see.

What you don’t need: injectors, marinades, fancy rubs with 17 ingredients, spritz bottles full of apple juice, or the “Texas crutch” foil boat that’s having a moment on YouTube. Salt, pepper, smoke, time. That’s the assignment.

Step 1: Buy the Right Cut (This Is Where Most People Lose)

You want a whole packer brisket. 12 to 14 pounds, untrimmed, with both the flat and the point still attached. Costco sells these for around $4/lb in a Cryovac bag. Don’t buy just the flat — the point is where the magic lives, and the fat between them is what bastes the meat for 14 hours.

When you pick it up, do the floppy test: hold it horizontally by one end. A good brisket flops like a wet towel. A stiff one means more connective tissue you’ll have to render. Choose grade Choice or Prime if you can. Wagyu is a flex; you don’t need it.

Step 2: Trim (The Night Before, ~30 Minutes)

Take the brisket out cold — cold fat trims clean, warm fat smears. Lay it fat-cap up.

  • Trim the fat cap down to about ¼ inch. Anything thicker won’t render and you’ll end up cutting flabby fat off slices later.
  • Flip it over. Remove the hard chunk of fat between the flat and the point (the “deckle”). Get rid of any silverskin you see.
  • Square off the corners and the thin edge of the flat. Those thin bits will dry out into jerky in hour 10. Save them for chili or trim tallow.
  • Round the corners so they don’t burn.

You should lose 1.5 to 2.5 pounds in trim. That’s normal. Save the fat — we’ll render it into tallow later (more on that).

Step 3: Season (5 Minutes)

Central Texas dry rub. Equal parts by volume of coarse kosher salt and 16-mesh black pepper. That’s it. If you want to get fancy, add a tablespoon of garlic powder. If you want to get stupid, add anything else.

Slather lightly with yellow mustard or hot sauce first — it’s a binder, you won’t taste it. Season heavily. Both sides. Edges too. Refrigerate uncovered overnight if you can — it dry-brines the meat and gives you better bark.

Step 4: The Cook (Hour 0 to ~8)

Fire up the smoker to 225°F. Use post oak if you can find it. Hickory, pecan, or a 50/50 with oak also works. Avoid mesquite unless you like a kick to the teeth.

Brisket goes on fat-side up if your heat source is below (most pellet grills, kamados). Fat-side down if heat comes from above or the side. The point of this rule: protect the meat from direct radiant heat with the fat cap.

Now do the hardest thing in barbecue: leave it alone. No spritzing, no peeking, no “just checking.” Set your leave-in probe in the thickest part of the flat and walk away. Drink coffee. Mow the lawn. Stop opening the lid.

Around hour 6 to 8, your internal temp will hit roughly 165°F and stall. This is the famous “stall.” The meat is sweating and evaporative cooling is keeping the temperature flat. Do not panic. Do not crank the heat. This is when bark forms.

Step 5: The Wrap (Hour 8-ish)

When the bark is dark mahogany and feels set when you poke it — not tacky — it’s wrap time. Internal temp will be 165-175°F.

Lay out two big sheets of pink butcher paper, overlapped. Drizzle a few tablespoons of beef tallow on the paper (this is where the trim from Step 2 pays off — render it down on the stovetop while the brisket cooks). Place brisket fat-side down. Wrap tight, like a burrito. Put it back on the smoker.

Wrapping speeds up the cook and protects against drying out. Paper lets some moisture escape so the bark stays bark instead of turning to mush. Foil traps everything and you’ll get pot-roast brisket. Don’t do it.

Step 6: Cook to Probe-Tender (Hour 10-13)

Now you cook by feel, not temperature. Slide a probe or skewer into the thickest part of the flat. It should slide in like room-temperature butter. Total resistance: zero. Internal temp will usually be 200-205°F — but a brisket done at 198 is done, and one that’s tough at 207 isn’t done.

Probe in three spots. If all three glide, pull it. If any one feels tight, give it another 30 minutes.

Step 7: Rest (Minimum 2 Hours. I’m Serious.)

This is where 80% of home cooks blow it. They pull a perfect brisket, get excited, slice it 20 minutes later, and watch all the juice run onto the cutting board.

Leave it wrapped. Vent the paper for 15 minutes (crack it open to release steam — otherwise it’ll keep cooking and turn mushy). Then close it back up, wrap in an old towel, and put it in an empty cooler. Close the lid.

Rest for at least 2 hours. 4 is better. You can hold it like this for up to 6 hours and it’ll still be over 140°F. The resting time is non-negotiable — it’s when the muscle fibers relax and reabsorb the juices. Skip it and you’ve wasted 14 hours of cooking.

Step 8: Slice (Don’t Mess This Up)

Unwrap on a big cutting board. Separate the point from the flat — you’ll see the fat seam between them. The grain runs different directions in each piece, which is why slicing a whole brisket as one log is amateur hour.

  • Flat: slice against the grain, pencil-thick (about ¼ inch).
  • Point: rotate 90° (the grain runs perpendicular to the flat). Slice thicker, or cube it for burnt ends.

A perfectly cooked slice should hold its shape when you pick it up, then pull apart with the gentlest tug. You want a quarter-inch pink smoke ring just under the bark. Don’t add sauce. If someone asks for sauce, you may judge them silently.

The 5 Mistakes That Ruin 90% of Briskets

  1. Cooking by time instead of temp/feel. “1.5 hours per pound” is a lie. Cook to probe-tender.
  2. Cranking the heat during the stall. Trust the stall. It’s working.
  3. Not resting long enough. 2 hours minimum. Yes, even though it smells incredible.
  4. Slicing with the grain. Look at the meat fibers before you cook. Mark the grain direction with a knife notch.
  5. Trimming too little fat. Quarter-inch cap. No exceptions.

Your Challenge

This weekend, buy a packer brisket. Trim it Friday night. Put it on at 4 AM Saturday. Cook to probe-tender, rest in a cooler until dinner, and feed eight people for less than $50 worth of meat.

The first one might be a 7/10. The second one will be an 8. By your fifth, you’ll be the friend people text on Tuesday asking what you’re doing Saturday.

Salt. Pepper. Smoke. Time. That’s the whole game. Stop overthinking it.

Stoicism for Regular People: 3 Ancient Ideas That Still Work in 2026

You don’t need a toga. You don’t need to read Marcus Aurelius in the original Greek. And you definitely don’t need to follow some bro on Twitter selling a $497 “Stoic Masculinity” course.

Stoicism is having a moment, and like most things having a moment on the internet, 90% of what people are saying about it is wrong. It’s been rebranded as cold plunges, suppressing emotions, and grinding through life like a charmless robot. That’s not what the Stoics taught. That’s just being a jerk who pretends suffering is a personality trait.

Real Stoicism is older than Christianity, was practiced by emperors and slaves alike, and survives because it actually works. It’s a practical operating system for handling the parts of life you didn’t sign up for — job loss, sick parents, traffic, the slow grind of being an adult with responsibilities.

Here are three Stoic ideas you can use this week. No philosophy degree required. No cold plunge necessary.

1. The Dichotomy of Control: Stop Wasting Energy on Things You Can’t Touch

Epictetus was born a slave. He had less control over his life than almost anyone you’ll ever meet. And he’s the guy who wrote the clearest sentence in all of Stoicism:

“Some things are up to us, and some things are not up to us.”

That’s the whole game. Every time you feel anxious, frustrated, or stuck — stop and ask one question: Is this in my control?

In your control: Your actions. Your effort. Your response. How prepared you are. What you say. What you do next.

Not in your control: Other people’s opinions. The economy. Traffic. Whether your boss is a jerk. Whether it rains on your camping trip. Whether the promotion comes through. The past. Most of the future.

Sounds obvious. It isn’t. Look at where your stress goes today and you’ll find that 80% of it is parked on things you literally cannot influence. You’re chewing on a problem like a dog with a bone, except the bone is plastic and you’re breaking your own teeth.

How to actually use it: When something bothers you, get a pen. Draw two columns. Write the situation. On the left, list everything that’s in your control. On the right, everything that isn’t. Then ignore the right column for the rest of the day. You’ll feel ridiculous for about ten minutes, and then you’ll feel free.

I do this when I’m catastrophizing about something at 11 PM. Works almost every time. The list of things I can actually do is usually three items long. The list of things I’m anxious about is twenty.

2. Negative Visualization: Pre-Game the Worst Case

The Stoics called it premeditatio malorum — the premeditation of evils. The modern self-help industry hates this because it sounds depressing. “Why would you imagine bad things happening? Manifest abundance, brother!”

Because manifesting abundance doesn’t work, and pretending bad things won’t happen is how people get steamrolled when they inevitably do.

Here’s how it actually goes: Spend two minutes a day imagining something you fear. Losing your job. Your car breaking down on a back road. Your kid getting hurt. Your spouse leaving. Not in a doom-scroll way — in a calm, detailed, problem-solving way. If this happened, what would I do? Who would I call? Do I have the savings? Do I have the skills?

Two things happen:

  • You stop being afraid of it. Most fears shrink in size the moment you stare at them and ask “what would I actually do?” The shapeless dread becomes a checklist.
  • You prepare. You realize you don’t have a flat tire kit in your truck. You don’t have three months of expenses saved. You don’t know first aid. So you fix it. Quietly. Before the day comes.

This is why I’m a big believer in real-world preparation — not the bunker-and-bullets kind, but the boring kind. Know how to start a fire without matches. Have a flashlight in your truck. Keep a basic first aid kit and a multi-tool in your everyday carry. The point isn’t paranoia. The point is that when something does go sideways — and it will, eventually — you’ve already mentally walked through it. You don’t panic. You execute.

There’s a bonus effect the Stoics talked about constantly: when you regularly imagine losing what you have, you start to actually appreciate it. Your kid’s annoying laugh. Your wife’s terrible playlist. Your beat-up old truck. You stop taking it for granted because you’ve already, in your head, lost it once today.

3. Memento Mori: Remember You’re Going to Die

I know. Heavy. Stay with me.

The Stoics had a phrase — memento mori, “remember that you must die.” Roman generals coming home from victory parades reportedly had a slave whisper it in their ear so they wouldn’t get too high on themselves. Marcus Aurelius wrote about it constantly in his private journal. You could leave life right now. Let that determine what you do and say and think.

It sounds morbid for about thirty seconds. Then it becomes the clearest filter for decision-making you’ll ever own.

Try this: Right now, do the math. If you live to 80, how many weekends do you have left? (Hint: take 80 minus your age, multiply by 52.) Write that number on a sticky note. Put it on your bathroom mirror.

If you’re 40, that’s about 2,000 weekends. That’s it. That’s the budget. Doesn’t feel infinite anymore, does it?

What this does — and this is the part the bros selling discipline courses miss entirely — is it makes you less serious about the small stuff and more serious about the big stuff. The petty fight with your brother-in-law? Who cares. The promotion you didn’t get? Will not matter in five years. The fact that you’ve been saying you’ll learn to weld / take that trip / call your dad more / start lifting again for the last three years? That matters. The clock is running.

Stoicism isn’t about not caring. It’s about caring about the right things. Memento mori is the tool that tells you which is which.

What Stoicism Isn’t

Before you go quote-tweeting Marcus Aurelius at your enemies, a quick reality check on what real Stoicism is NOT:

  • Not suppressing emotions. The Stoics were big on feeling things fully — they just didn’t want feelings to drive the car. Feel sad. Feel angry. Then choose what to do about it.
  • Not being cold or detached. Marcus Aurelius wrote love letters to his wife. Epictetus had close friends. The “stone-faced Stoic” thing is a meme, not the philosophy.
  • Not grinding 16 hours a day. The Stoics talked constantly about rest, friendship, food, conversation, walks. They weren’t trying to optimize their dopamine. They were trying to live well.
  • Not a personality. “I’m a Stoic” said out loud is almost always a red flag. It’s a practice, not a Twitter bio.

Your Challenge This Week

Pick one. Just one. Don’t try to become a Stoic monk by Friday.

  1. For the next 7 days, every time you feel stress rising, ask: Is this in my control? If no, drop it. If yes, do something about it.
  2. Once a day, spend 2 minutes imagining a worst-case scenario in detail. Plan your response. Then go on with your day.
  3. Do the weekend math. Write the number down. Put it where you’ll see it every morning.

Don’t journal about it. Don’t tell anyone you’re doing it. Just run the experiment for a week and notice if anything shifts.

My take: of the three, the dichotomy of control is the one that’s changed my life the most. It’s the simplest tool, and it’s the one I forget most often. Every time I remember it, I get an hour of my brain back.

Stoicism survived 2,400 years because it works on regular humans with regular problems. Not because it’s deep or impressive. Because some ideas are just true, and pretending they’re complicated is how people sell courses.

— Shelle

How to Start a Fire 5 Different Ways (When Matches Aren’t an Option)

Matches are a single point of failure. They get wet. They run out. The cardboard strike pad turns to mush after one rainstorm. If your entire fire-starting plan is "I have a Bic in my pocket," you don’t have a plan — you have a hope.

Fire is non-negotiable in a survival situation. It’s heat, water purification, signaling, cooking, and morale. Hypothermia kills more people in the backcountry than bears, snakes, and lightning combined. So you need redundancy — multiple ways to make fire, ideally using gear you already carry or stuff you can find on the ground.

Here are five methods that actually work, ranked by how practical they are when your hands are shaking and the sun is going down.

1. Ferro Rod (The One You Should Already Carry)

A ferrocerium rod is a small metal alloy stick that throws sparks at around 3,000°F when you scrape it with a sharp edge. It’s the single best non-match fire starter ever invented. Works wet. Works frozen. Works one-handed. Lasts for 10,000+ strikes. A decent one costs $15.

How to use it:

  1. Build your tinder bundle FIRST. Dry grass, birch bark, fatwood shavings, or — my favorite — a cotton ball smeared with petroleum jelly.
  2. Hold the ferro rod against the tinder. Don’t pull the rod up — scrape the striker DOWN the rod toward the tinder. This puts sparks where you want them.
  3. Use the spine of your knife (90° angle) or the dedicated striker. Never the sharp edge — you’ll dull your blade.
  4. Press hard, scrape fast. Sparks should rain into the tinder.

My take: If you spend any time outdoors and don’t carry a ferro rod, you’re cosplaying. They weigh nothing, fit in any pocket, and will outlive you. Get one. Practice with it before you need it.

2. Battery + Steel Wool (The Junk Drawer Special)

This one feels like cheating. A 9V battery and a wad of fine steel wool (grade 0000 works best) gives you instant fire. Touch the wool to both terminals — the current heats the fibers until they ignite. Glowing red, orange, then flame.

What works:

  • 9V battery is ideal because both terminals are on the same side
  • AA/AAA work too — bridge them with a foil gum wrapper (cut into a narrow hourglass shape, foil side down)
  • Phone batteries can be punctured with a knife — DO NOT do this unless you actually need fire and don’t mind a small lithium fire show

Why I like it: Most of us carry batteries everywhere — flashlights, smoke detectors, kid’s toys. Steel wool packs into a tiny ziplock and weighs nothing. Toss both in your truck kit and you’ve got a backup that doesn’t depend on dexterity, weather, or skill.

3. Solar / Lens Method (Free Fire, If the Sun Cooperates)

A magnifying glass, a Fresnel lens (the credit-card-sized kind that lives in a wallet), eyeglasses with strong prescription lenses, the bottom of a clear soda bottle filled with water, even a polished soda can bottom buffed with chocolate or toothpaste — all of these can focus sunlight into a pinpoint hot enough to ignite tinder.

How to do it right:

  1. Use the blackest, driest tinder you can find. Char cloth is gold. Punky wood, dry mushroom, or dark fungus also works.
  2. Tilt the lens until the dot of focused light becomes the smallest, brightest pinpoint possible.
  3. Hold steady. Within 10–30 seconds you’ll see smoke. Don’t move until you do.
  4. Once it smolders, transfer to your tinder bundle and gently blow.

The catch: Needs direct sun. Useless at night, in shade, or under cloud cover — which is when you usually need fire most. But it costs zero fuel and lasts forever, so it belongs in your kit as a backup-to-the-backup. A Fresnel lens weighs less than a postage stamp.

4. Flint and Steel With Char Cloth (The 1700s Method That Still Works)

Before matches existed, this is how everyone made fire for about 300 years. A piece of high-carbon steel struck against a hard, sharp-edged stone (flint, quartz, chert, even the bottom of a broken porcelain mug) throws small sparks. Catch those sparks on char cloth — partially burned cotton — and you have an ember.

To make char cloth at home:

  1. Cut 100% cotton fabric (old t-shirt, denim, canvas) into 2-inch squares.
  2. Pack into an Altoids tin. Punch one small hole in the lid.
  3. Put the tin on coals or a campfire for 5–10 minutes. Smoke will pour out the hole, then stop.
  4. Let it cool sealed. Inside: black, fragile cloth that catches a spark instantly.

Why bother: Steel and flint never wear out. The whole kit lives in a tin smaller than your palm. It’s also the most satisfying way to make fire — you’ll feel like Daniel Boone the first time it works. And once you can do it, you understand fire in a way matches don’t teach you.

5. Bow Drill (The Last Resort That Will Humble You)

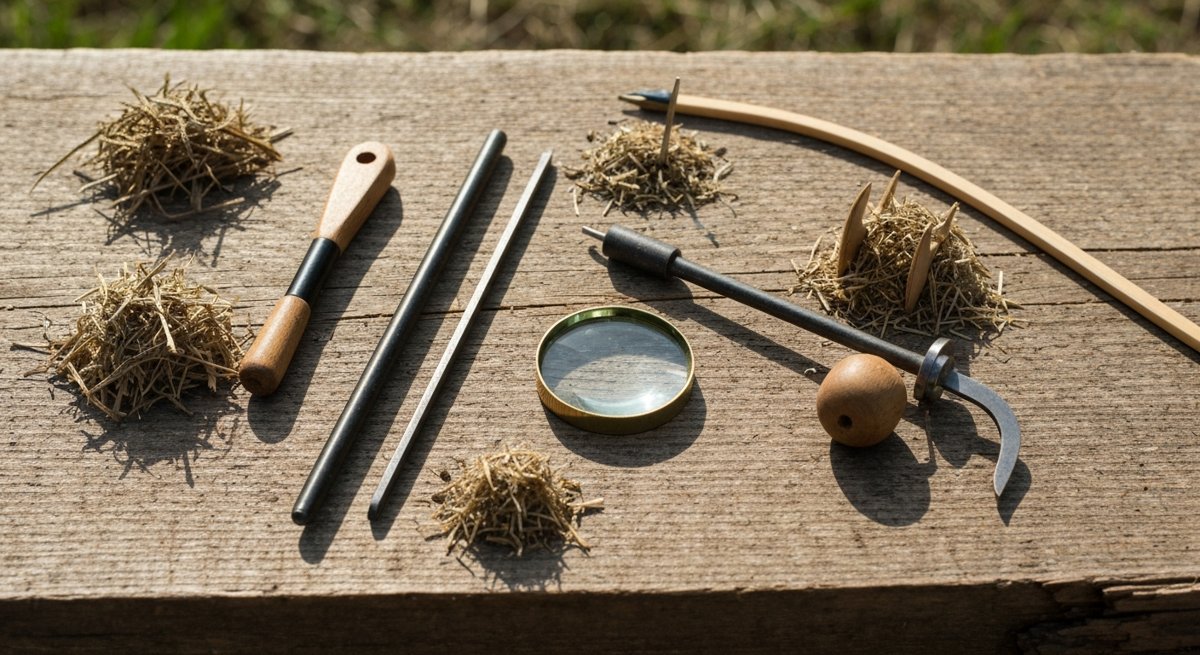
Pure friction fire. No metal, no chemistry, no sun. Just sticks, cordage, and lung-burning effort. This is the method everyone romanticizes and almost no one can actually do under pressure. I include it because if you have nothing else, you have your hands and the woods.

You need four pieces:

  • Spindle: Straight, dry, soft wood — cottonwood, willow, cedar — about 8 inches long, thumb-thick
  • Fireboard: Same wood, flat, with a small divot near one edge and a V-notch cut into the side
  • Bow: A flexible stick with cordage (paracord, shoelace, or improvised from inner bark) tied loosely
  • Bearing block: A hard piece of wood, stone, or bone with a divot to press the spindle from above

The technique: Loop the cord once around the spindle. Press the spindle into the fireboard with the bearing block. Saw the bow back and forth — long, smooth strokes — applying steady downward pressure. Black dust collects in the V-notch. Speed up. When you see smoke pouring out, keep going for another 20 seconds. Then carefully tip the smoldering dust ball into your tinder bundle and blow.

Honest opinion: Don’t trust your life to this method unless you’ve successfully done it ten times in good weather. It’s a humbling skill — humidity, wrong wood, bad form, or a tired arm will all kill the attempt. Learn it as a hedge, not a primary plan.

The Real Lesson: Tinder Matters More Than Spark

All five of these methods give you a spark or an ember. None of them give you fire. The bridge between spark and flame is tinder — and 90% of failed fires fail at tinder, not at ignition.

Always carry pre-made tinder:

  • Cotton balls + petroleum jelly (cheapest, lightest, burns 4+ minutes)
  • Dryer lint (free, takes a spark instantly)
  • Fatwood shavings (resin-soaked pine, almost waterproof)
  • Char cloth (catches a spark like nothing else)

Stuff a small Altoids tin with two or three of these and tape it shut. That tin is more useful than any single fire-starting tool.

Your Challenge This Weekend

Pick ONE method from this list — not the one that sounds coolest, the one you actually have gear for. Go to your backyard, your driveway, a parking lot. Make a fire. Time yourself.

If you can’t do it in good weather with no pressure, you can’t do it in the rain at night with hypothermia setting in. Skill in the field is built in the backyard.

Start with the ferro rod. It’s the highest leverage tool in your survival kit, and it’s the one you’ll actually use 99% of the time. The other four are insurance against the day your insurance fails.

Stay sharp. Stay warm.

How to Break a Bad Habit in 30 Days: The Replacement Method That Actually Works

You don’t break a bad habit. You replace it. That single sentence is the difference between people who quit smoking, drinking, doomscrolling, or whatever it is they’re trying to drop — and people who white-knuckle it for two weeks, fail, and decide they’re just "not the disciplined type."

You’re disciplined. You’re running the wrong playbook. Here’s the one that works.

Why Willpower Alone Loses Every Time

Habits aren’t moral failures. They’re loops. Neurologists have been mapping this for thirty years and it always shakes out the same way: cue, routine, reward. Something triggers you (stress, boredom, 3 PM, a notification), you run the routine (cigarette, beer, phone, snack), you get a reward (relief, dopamine, distraction).

Trying to "just stop" the routine leaves the cue and the reward orphaned. Your brain knows something is supposed to happen there. It will hunt for it. That’s not weakness — that’s a feature of the hardware you’re running on.

The replacement method works because it respects the wiring. You keep the cue. You keep the reward. You swap the middle.

The 30-Day Replacement Protocol

Pick one habit. Not three. Not five. One. People who try to overhaul their whole life on a Monday are back to baseline by Friday. This protocol works because it’s narrow.

Day 1–3: Stalk the Habit

Before you change anything, watch it happen. For three days, every time you do the thing, write down four things on your phone:

  • Time — when did it hit?
  • Location — where were you?
  • Emotion — what were you feeling 60 seconds before?
  • Who — alone or with someone?

By day three, you’ll see the pattern. Almost everyone is shocked. The cigarettes weren’t random — they were 10 AM after the morning meeting and 9 PM after the kids went down. The beer wasn’t "every night" — it was specifically the moment you walked in the door from work. The phone wasn’t constant — it was every time you sat down on the couch.

You can’t replace what you can’t see. This step is non-negotiable.

Day 4: Engineer the Swap

Now you design the replacement. The new routine has to satisfy three rules:

  1. It triggers on the same cue. If the cue is "sat down on couch," your replacement happens when you sit down on the couch.
  2. It delivers a similar reward. Stress relief gets replaced with something that relieves stress. Distraction gets replaced with something that distracts. Don’t swap a depressant for a productivity app — that’s not a replacement, that’s a punishment.
  3. It’s easier to start than the old habit. If the new habit requires more friction to begin, you’ll lose. The old groove is paved. Yours is gravel. Make it short gravel.

Some real swaps that work:

  • Evening drink → flavored sparkling water in the same glass, at the same time, in the same chair. The ritual is the point.
  • Phone-on-couch → a paperback book left on the cushion. Physical object in the cue location.
  • Cigarette after meals → 4-7-8 breathing for 90 seconds, then a piece of gum.
  • Stress-snacking → 20 pushups or a walk around the block. You’re discharging the same nervous-system spike.
  • Doom-scrolling at 11 PM → reading a single chapter of something fiction. Not self-help. Not the news. Fiction.

Day 5–14: The Ugly Phase

This is where most people quit, so let me be straight with you: it’s going to feel stupid for about a week. The new routine will feel hollow. The reward will feel cheap. You’ll be convinced the replacement isn’t working.

It is working. You’re just measuring it against a neural pathway that’s been carved over years. The new groove takes about ten days to feel like anything at all. Don’t quit before it does.

Two things help here:

  • Stack accountability. Tell one person what you’re doing. Not Instagram. One person who’s going to ask you about it on day 8.
  • Track only the replacement, not the old habit. Don’t count days clean. Count days you executed the swap. The frame matters — you’re not abstaining, you’re building.

Day 15–21: The Real Test

Around day 15, you’re going to have a bad day. Real bad. Work blew up, kid had a meltdown, you slept four hours. The old habit will whisper. This is the moment.

Have a pre-decided response. Not "I’ll figure it out." A specific sentence you’ve written down: "When today goes sideways, I will [specific action] before I do anything else."

Decisions made in calm beat decisions made in stress every single time. Pre-commit. It’s not weakness — it’s strategy.

Day 22–30: Reinforce, Don’t Celebrate

By day 22 the replacement starts feeling default. Here’s where people sabotage themselves: they "test" the old habit. Just one. To prove they can.

Don’t. The neural pathway you’ve been letting fade is one rep away from full bandwidth. The point of 30 days isn’t to "earn" the old thing back. It’s to make the new thing automatic enough that you don’t think about it.

Day 30 isn’t a finish line. It’s a checkpoint where you ask: do I want to keep building this, or pick a new one?

The Part Nobody Tells You

You will fail at this at some point. Probably more than once. The question isn’t whether you slip — the question is whether you slip and quit, or slip and restart on the same day.

The research on habit change is brutally clear on this: a single missed day has almost zero impact on long-term success. Two missed days in a row drops your odds by roughly 30%. The streak isn’t sacred. The return is sacred.

If you blow it on day 12, day 13 starts at 7 AM. Not next Monday. Not "after the wedding." Tomorrow morning, you run the swap. That’s the whole game.

The shortcut nobody talks about: Most relapses don’t happen because the habit was too strong. They happen because the cue was still loaded and the replacement was too far away. Put the running shoes by the door. Put the book on the couch. Pre-stage the swap so it’s the path of least resistance.

My Opinion, For What It’s Worth

Most habit advice is about identity. "Become the kind of person who doesn’t smoke." That works for some people. For most of us, it’s too abstract. Identity is a result, not a lever.

The replacement method is mechanical. Cue, swap, reward. You’re not trying to become a new person — you’re rewiring one specific loop. The identity stuff shows up on its own about six months later. You just look up one day and realize you haven’t thought about the old habit in weeks.

That’s how it actually goes. Not a thunderclap moment of transformation. Just a slow, boring, mechanical swap that compounds.

Common Mistakes That Sink People

  • Replacing one bad habit with another bad habit. Quitting smoking by eating two pints of ice cream a night isn’t progress, it’s reshuffling.
  • Picking too many habits at once. The brain has a limited budget for behavior change. Spend it in one place.
  • Making the new habit too ambitious. "Replace beer with a 5-mile run" isn’t a swap, it’s a fantasy. Match the energy of the old habit, not the energy of the person you wish you were.
  • Hiding the cue instead of replacing the routine. Throwing out all your beer works for a week. The cue (5 PM, work stress) is still there. You need a new routine, not just an absent one.
  • Quitting because you slipped once. See above. Day 13 starts at 7 AM.

Why This Matters

You’re not trying to be a saint. You’re trying to be someone who can trust their own word. The habit isn’t the point — the habit is the rep. Every time you run the swap when the cue hits, you’re depositing a small amount of evidence that you do what you say you’ll do.

That stack compounds. After 30 days of one habit, you’ve got data. After 90 days of three, you’ve got a different relationship with yourself. After a year, you barely recognize the version of you that quit on Tuesday because the new routine "wasn’t working."

Your Challenge

Today: Pick one habit. Just one. Write it down on paper, not your phone. Paper is heavier.

This week: Run the three-day stalking exercise. Cue, time, emotion, who. No changes yet — just watch.

Day 4: Design your swap. Same cue, similar reward, lower friction. Pre-stage it.

Day 30: Report back to yourself. Pick the next one or run it again.

Discipline isn’t a personality trait. It’s a protocol. Run the protocol.

The 10 Knots Every Adult Should Know (and When to Actually Use Each)

There are roughly 4,000 knots in the world. You need ten. Maybe twelve if you’re feeling fancy. The rest are variations, edge cases, or someone showing off at a sailing convention.

Here’s the truth: most adults can’t tie a single knot beyond the one in their shoes — and even that one is usually wrong (more on that later). That’s a problem. Knots aren’t a hobby. They’re a quiet, useful skill that pays you back the first time you need to tow a stuck truck, secure a load that won’t shift, or rig a tarp in the rain when the wind decides to be a jerk.

I’m going to give you ten knots. Each one with a clear purpose, when to grab it, and when to walk past it. Learn them in order. Practice each one until you can tie it in the dark, in the cold, with one hand pinned. Because that’s when you’ll actually need it.

Before You Tie Anything: Three Rules

  1. Dress your knots. A knot pulled tight without first arranging the strands neatly is half its strength. Pull it snug, look at it, then load it.
  2. Leave a tail. At least four times the rope’s diameter. A short tail is how knots come undone at the worst possible moment.
  3. The right knot beats the strong knot. A bowline tied wrong is worse than a square knot tied right. Match the knot to the job.

1. The Bowline — The King of Knots

When to use it: Anytime you need a fixed loop at the end of a rope that won’t slip, won’t tighten under load, and unties easily after.

If you only learn one knot from this list, learn the bowline. Mountaineers use it. Sailors use it. Rescue workers use it. It’s the knot you tie around your waist if someone’s pulling you out of a hole.

The classic memory trick: the rabbit comes out of the hole, around the tree, and back down the hole. Sounds dumb, works perfectly. Practice it 50 times. Then practice it 50 more times with your eyes closed.

2. The Figure 8 (and Figure 8 on a Bight)

When to use it: A stopper at the end of a line, or a fixed loop you trust your life to.

Climbers use the figure 8 follow-through to tie into their harness because it’s nearly impossible to tie wrong in a way that fails — you can see the mistake. The figure 8 on a bight (tied in a loop in the middle of the rope) is the go-to for anchor points and clipping in.

This is the "I’d rather be alive than fancy" knot. Use it.

3. The Two Half Hitches

When to use it: Tying a rope to a post, ring, tree, or bumper. Quickly. Reliably. With minimal thinking.

Two half hitches is the workhorse of tying-things-to-other-things. It cinches down on the object, holds under steady load, and is fast. Add a third hitch for slippery rope or critical loads.

This is the knot you use when you’re tarping a load in the truck bed and it’s about to rain.

4. The Taut-Line Hitch

When to use it: Tarp ridgelines, tent guy lines, anything you need to adjust after tying.

The genius of this knot: it slides freely when you push it with your hand, but grips like a vise under load. Set up a tarp, tie taut-line hitches at the corners, and you can tighten the whole rig by sliding the hitches up the line.

If you camp, hike, or rig shelters, this knot replaces the dumb plastic tensioners that come with cheap tents.

5. The Trucker’s Hitch

When to use it: Cinching down a load on a truck, trailer, roof rack, or canoe. Anywhere you need real mechanical advantage with rope.

This is the closest thing to a ratchet strap you can build with rope alone. It gives you roughly 3:1 mechanical advantage. Tie it once and you’ll never again wonder if your kayak is about to pull a yard sale on the highway.

Real-world test: If you can’t trucker’s-hitch a load down well enough that you can’t move it by hand from any direction, you’re not done tying.

6. The Clove Hitch

When to use it: Quick attachment to a post or pole when the load is steady and pulling perpendicular.

Fast to tie, fast to untie, perfect for temporary tasks like lashing a pole or hanging a lantern. Don’t trust it as your only knot for critical loads — it can roll loose when the load shifts. But for a hundred small jobs, it’s perfect.

7. The Square Knot (Reef Knot)

When to use it: Joining two ropes of the same diameter, under light, steady load. Bandages. Stuff sacks. Bundling firewood.

And here’s the truth most people don’t want to hear: the square knot is dangerous when used to join ropes for anything that matters. It can capsize and slip under uneven load. It’s a binding knot, not a bend. Use it for tying a bundle, not for tying your safety line.

Bonus: your shoelaces are square knots. If yours come untied constantly, you’re tying a granny knot — the slipped, weaker version. Reverse the direction of your second loop and you’ll never tie your shoes wrong again.

8. The Sheet Bend

When to use it: Joining two ropes of different diameters, or a rope to a loop.

This is what you should reach for instead of a square knot when you need to join two ropes. It works with mismatched ropes, holds under load, and unties cleanly. Double it (the double sheet bend) for slippery synthetic rope.

9. The Prusik Hitch

When to use it: Climbing a fixed rope. Backing up a rappel. Hauling. Self-rescue.

The prusik is a friction hitch tied with a small loop of cord around a larger rope. Slide it freely, weight it, it locks. This is how rescuers and climbers ascend ropes. It’s also how you build a 3:1 haul system to drag a stuck truck or a fallen tree.

You probably won’t use it weekly. You’ll be glad you know it the day you need it.

10. The Constrictor Knot

When to use it: Permanently binding something tight. Hose clamps. Sausage ties. Closing the end of a rope to keep it from fraying. Temporary "weld" on a torn item.

The constrictor is the world’s most aggressive binding knot. Once you cinch it down, it’s basically there forever — you’ll cut it off rather than untie it. That’s the point. When you need something to stay bound, this is the knot.

The Bonus Two (If You’re Hungry for More)

  • The Alpine Butterfly: A loop in the middle of a rope, tied without access to either end. Perfect for isolating a damaged section of rope or building an anchor point mid-line.
  • The Bowline on a Bight: A double-loop bowline tied in the middle of a rope. Useful for improvised harnesses and equalized anchors.

How to Actually Learn These

Here’s what I’ve learned from teaching knots to grown adults: watching a YouTube video doesn’t count as learning. Your hands need to do it. Cold, wet, half-asleep, with the rope slipping — that’s the only way the knowledge gets locked in.

  1. Buy 10 feet of cheap 1/4" nylon utility rope. Cut it into two 5-foot pieces. Keep them on your desk.
  2. Pick one knot per week. Tie it 20 times in the morning. 20 times before bed.
  3. By the end of week 10, you’ll know all of these in your fingers, not just your head.
My honest opinion: Modern adults are over-equipped and under-skilled. We’ve got $400 jackets and $200 multitools, but we can’t tie a tarp ridgeline that won’t sag overnight. A spool of paracord and ten knots will out-perform a $300 gadget every single time. Spend the rope money. Skip the gadget.

Why This Matters

You don’t need to be a survivalist to need knots. You need to tow a friend’s car. Lash a Christmas tree to your roof. Set up a hammock on a trip. Bind a torn pack strap until you can fix it. Build a clothesline. Tie down a tarp before a storm. Hang a deer to age. Build a gate that closes properly. Rescue a dog out of a creek.

The world is held together by string. The people who know how to tie it are the people who fix problems instead of waiting for someone else to.

Your Challenge

Get a length of rope by the end of this week. By Sunday night, learn one knot from this list cold — tied 20 times, eyes closed by the last 5. Start with the bowline. Send the next person who asks "can you tie this?" into mild shock.

Then tie the next knot next week. By July, you’ll be the one people call when something needs tying. That’s a useful kind of person to be.

The 5 AM Club Is Overrated: How to Find YOUR Most Productive Hours

Let me say the quiet part loud: the 5 AM club is a marketing scheme dressed up as discipline. Wake up before the sun, drink lemon water, journal, meditate, work out, conquer the world before breakfast — sold to you in book form by a guy who has never had to drive a forklift third shift.

Here is the thing nobody on LinkedIn wants to admit. Some of us are wired for early mornings. Some of us are wired to do our best thinking at 11 PM with a strong cup of coffee and one lamp on. Forcing yourself into someone else’s schedule is not discipline. It is cosplay.

This post is about finding YOUR productive hours — the real ones, not the aspirational ones — and then defending them like they pay your mortgage. Because they do.

What Science Actually Says About Chronotypes

Your body runs on a circadian rhythm controlled by a tiny cluster of cells in your brain called the suprachiasmatic nucleus. Yours is genetically calibrated, mostly through a gene called PER3. About 40% of people are morning-leaning. About 30% are evening-leaning. The other 30% are somewhere in the middle.

This is not a willpower thing. Researchers like Till Roenneberg at Ludwig-Maximilian University have spent decades documenting “social jetlag” — the gap between when your body wants to sleep and when society demands you be awake. Force a night owl into a 5 AM schedule and you do not get a Navy SEAL. You get a tired person making worse decisions.

The 5 AM club is not discipline. It is one chronotype’s preference being marketed as universal virtue.

The Four Chronotypes (Which One Are You?)

Sleep researcher Michael Breus broke chronotypes into four animals. It is reductive but useful. Read these and be honest about which one you are — not which one you wish you were.

The Lion (about 15% of people)

Wakes up early naturally, peak energy from 6 AM to noon, fades by 9 PM. These are the people who actually thrive at 5 AM. They are not better than you. They are just on a different schedule. Famous lions include most farmers and a lot of CEOs over 60.

The Bear (about 50% of people)

The default human. Wakes with the sun, peaks late morning to mid-afternoon, ready for bed by 11 PM. If you have no idea what you are, you are probably a bear. The 9-to-5 was built for bears.

The Wolf (about 15% of people)

Hates mornings, comes alive after 4 PM, does best creative work between 8 PM and midnight. Wolves get told they are lazy their entire lives. They are not lazy. They are nocturnal. A lot of writers, programmers, and surgeons (yes, surgeons) are wolves.

The Dolphin (about 10% of people)

Light sleepers, often anxious, fragmented sleep, but laser-focused in the late morning. Dolphins frequently get diagnosed with insomnia when they are really just dolphins.

How to Actually Figure Out Your Productive Hours

Stop guessing. Run a two-week experiment. This is the only way.

For 14 days, every morning, write down two things in a notebook (paper, not phone — phones lie):

  1. What time you woke up naturally — without an alarm. If you cannot do this on weekdays, do it on weekends and project from there.
  2. Three energy ratings per day: 9 AM, 1 PM, 8 PM. Rate yourself 1-10 on mental sharpness. Not how you feel. How well you can think.

After two weeks, look at the pattern. You will see your peak window with brutal clarity. For me it is 9 AM to noon and then again 8 PM to 10 PM — classic bear with a wolf streak. The 2-4 PM slot? Garbage. I would not solve a math problem in that window if you paid me.

The trap: most productivity advice tells you to schedule your hardest work first thing in the morning. If you are a wolf, that is the worst possible advice. You will spend your peak hours (8 PM) watching Netflix because someone told you “winners do their hard work in the morning.”

The Productive Hours Audit

Once you know your peak window, audit your current week. How much of your peak window are you spending on:

  • Email and Slack (the productivity equivalent of fast food)
  • Meetings that should have been emails
  • Other people’s priorities
  • Mindless scrolling
  • Errands that could be done at 3 PM when your brain is mush anyway

Most people spend their peak two hours answering emails and their worst hours trying to do real work. Then they wonder why they feel like frauds. You are not a fraud. You are using a Ferrari to deliver pizzas.

Defending Your Peak Window

Once you know when you are sharp, you have to defend that time like a junkyard dog. This is the actual discipline part. Forget waking up at 5 AM. The real discipline is saying no to things that steal your peak hours.

If your peak is… Defend by…
5 AM – 9 AM (Lion) No phone until 7 AM. Hard tasks first. Meetings after 10.
10 AM – 1 PM (Bear) Block calendar 10-12. No meetings. Email at 1 PM only.
4 PM – 8 PM (Wolf) Light work in AM. Cut non-essential evening plans. Protect dinner-to-bed.
11 AM – 2 PM (Dolphin) Slow morning. Coffee. No early meetings. Hard work at 11.

The Things That Actually Move the Needle (Regardless of Chronotype)

I have studied this for myself for years and tried every variation. Here is what works no matter when your peak hits:

1. Get sunlight in your eyes within 30 minutes of waking.

This is the single highest-leverage habit for setting your circadian rhythm. Not bright kitchen lights. Outside. Even if it is cloudy. Five minutes minimum. This anchors your peak window so it shows up consistently.

2. Stop drinking caffeine within 8 hours of bed.

Caffeine has a half-life of 5-7 hours. Your 4 PM coffee is still 25% active at midnight. You will fall asleep but the sleep will be cheap.

3. Eat your biggest meal away from your peak window.

Digestion steals blood from your brain. If your peak is 10 AM, do not eat a giant breakfast at 9. Coffee, protein, and carbs after the work is done. If your peak is 8 PM, do not eat a big dinner at 6.

4. One hard thing per peak window. That is it.

Your brain can do approximately one cognitively demanding task per peak window. Not three. One. Pick the one that matters most and treat the rest of the day as logistics.

The discipline is not when you wake up. The discipline is using your sharpest hours on the work that actually matters.

What About Shift Workers and Parents?

I hear you. If you work nights, or you have a 2-year-old who treats sleep like a rumor, you are not running a clean experiment. Here is what to do:

  • Shift workers: Find your peak relative to your wake time, not the clock. If you wake at 4 PM, your peak is probably 6-9 PM and 11 PM-1 AM. Same biology, different clock.
  • Parents of small children: You are in survival mode. Run the audit when your kid is in school or daycare. Once they sleep through the night, your real chronotype will reassert itself within 6 weeks.
  • Recovering from years of bad sleep: Give yourself a full month of consistent sleep before trusting the data. Sleep debt distorts everything.

My Honest Take

I tried the 5 AM thing for a year. Got up, journaled, worked out, drank the lemon water. Made me miserable, made my work worse, made me a worse husband. I am a bear who fakes lion energy until about 11 AM, then I am dialed in until 1 PM, then I work in 90-minute focused blocks with breaks until 5. Evening is for family, reading, and second-shift creative work if the day demanded it.

That schedule is not impressive. It is not Instagram-worthy. There is no #grindset hashtag for “wakes up at 6:45 like a normal adult.” But it is sustainable, and it has produced more output than any 5 AM phase ever did. Sustainable beats heroic, every time.

Your Challenge This Week

Run the 14-day chronotype audit. Notebook by your bed. Three energy ratings a day. No alarm on weekends. At the end of two weeks, identify your real peak window — and then look at your calendar and see how much of that window you are wasting on things that do not matter.

Then book one hour, in your peak window, this week, and protect it like your life depends on it. Phone in another room. No email. No meetings. One important thing.

That hour will outperform a month of 5 AM mornings. I promise you.

Stop trying to be someone else’s morning person. Be your own version of dialed-in. That is the actual discipline. The clock on the wall does not care when you do your best work — only the work cares.

Door Reinforcement 101: The $30 Fix That Stops Most Home Break-Ins

Here’s a stat that should make you uncomfortable: the FBI estimates that 34% of burglars enter through the front door. Not a window. Not a side entrance. The front door — the one you lock every night and assume is doing its job.

The problem isn’t your lock. It’s the frame. Most residential door frames are held together by 3/4-inch screws driven into soft pine trim. One solid kick — sometimes less — and the whole thing splits like firewood. Your deadbolt is still locked. It’s just lying on the floor with a chunk of wood attached to it.

The good news? Fixing this is absurdly cheap, takes about an hour, and requires nothing more than a drill and a screwdriver. This is hands-down the highest-impact home security upgrade you can make this weekend.

Why Your Door Frame Is the Weak Link

Builders don’t frame doors for security. They frame them for cost and speed. The typical interior and exterior door frame setup uses:

  • Short screws (3/4″ to 1″) that only bite into the soft door jamb trim — not the structural framing behind it
  • A tiny strike plate held by two small screws — the little metal rectangle where your deadbolt tongue goes
  • No reinforcement around the hinge side, which is just as vulnerable to forced entry

When someone kicks a door, the force concentrates on the strike plate area. Those short screws rip out of the trim instantly. It doesn’t matter if you have a $200 smart lock — the frame gives up before the lock does.

The Fix: A Door Reinforcement Kit (Under $30)

What you need is a door jamb reinforcement kit. Several companies make them — Door Armor, StrikeMaster, EverJamb — and they all work on the same principle: replace the weak points with heavy-gauge steel plates secured by 3.5-inch screws that anchor into the wall studs.

A typical kit includes three components:

  1. A full-length strike plate — Instead of that little 1×3-inch plate, you get a steel plate that runs 36-48 inches along the door jamb. It distributes kick force across a much larger area and is held by multiple 3.5″ screws sunk into the stud.
  2. Hinge reinforcement plates — Steel plates that sit behind your existing hinges, again anchored with long screws into the stud. This prevents the door from being pried from the hinge side.
  3. A door edge shield — Some kits include a steel wrap for the door edge itself around the deadbolt area, preventing the door from splitting at the bolt.

Total cost: $25-$45 depending on the kit. Total install time: 45 minutes to an hour if you take your time.

Step-by-Step Install

Tools you need: drill/driver, a #2 Phillips or square bit (usually included), a pencil, and maybe a chisel if you’re fitting a recessed plate.

Step 1: Replace the Strike Plate

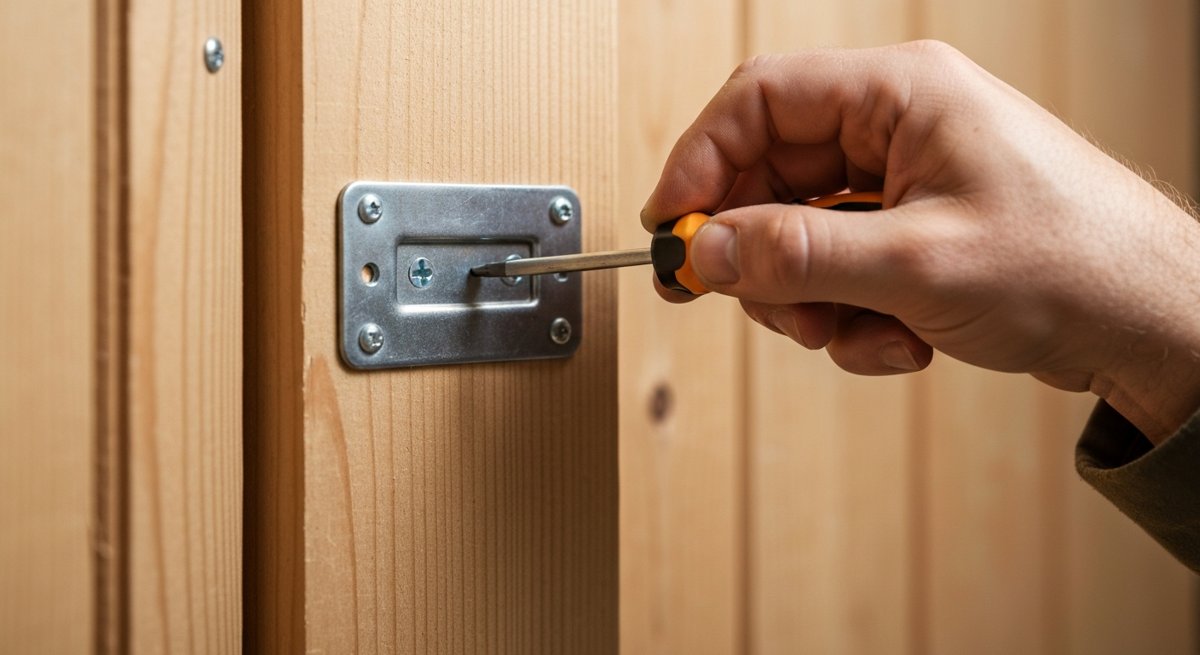
Remove your existing strike plate (the two screws next to the deadbolt hole in the frame). Hold the new reinforcement plate in position — it should center over the deadbolt and knob holes. Mark your screw holes with a pencil. Pre-drill pilot holes using a 1/8″ bit, going at least 3 inches deep. Drive the 3.5″ screws in until snug. Don’t overtighten — you want firm contact, not crushed wood.

Step 2: Reinforce the Hinges

Remove one hinge at a time (don’t take them all off — your door will fall). Pull the short screws and replace them with the 3.5″ screws from the kit. If your kit includes hinge shield plates, slide them behind the hinge before re-securing. Do this for all three hinges (or however many you have).

Step 3: Install the Door Edge Shield (If Included)

This is a U-shaped steel channel that wraps around the edge of the door where the deadbolt passes through. It prevents the wood from splitting if someone tries to spread the frame apart. Slide it over the edge, mark, drill, and screw it in place.

Step 4: Test Everything

Close the door. Lock and unlock the deadbolt. Make sure nothing binds or rubs. If the deadbolt is tight, you may need to slightly adjust the plate position or enlarge the bolt pocket with a chisel. Close, lock, and shoulder-check the door gently — it should feel noticeably more solid.

Don’t Forget Your Other Entry Points

Once the front door is hardened, walk your property and think about these:

  • Back door and side doors: Same reinforcement kit treatment. Every exterior door gets one.
  • Garage entry door: This is the one people forget. The door from your garage into your house is often a hollow-core interior door with a basic knob lock. If someone gets into your garage (opener cloned, side door forced), they’re walking through this door without even trying. Replace it with a solid-core door and deadbolt, then reinforce the frame.
  • Sliding glass doors: A reinforcement kit won’t help here, but a simple security bar (the rod that sits in the track) is cheap insurance. You can also install a secondary lock that pins the door to the frame.

The Layered Thinking

Door reinforcement isn’t a silver bullet. Nothing is. But it fits into what security professionals call defense in depth — layers that each buy you time and deter a different threat level.

  • Layer 1 — Deterrence: Lighting, visible cameras, signs, maintained property (signals someone is home and paying attention)
  • Layer 2 — Delay: Reinforced doors, quality locks, window security film, thorny landscaping under windows
  • Layer 3 — Detection: Alarm system, motion sensors, dogs, alert neighbors
  • Layer 4 — Response: Your plan for what happens when layers 1-3 fail

Door reinforcement lives in Layer 2. Its job is to make forced entry take longer and make more noise — long enough for detection systems to trigger and for you to respond. A reinforced door doesn’t have to be impenetrable. It just has to be harder than the next house.

My Honest Take

I think most people drastically overspend on cameras and smart home gadgets while ignoring the physical basics. A $300 Ring setup watching your front door doesn’t stop anyone from kicking it in — it just gives you a nice video of it happening. Meanwhile, $30 of steel and long screws would have actually prevented the entry.

Cameras are great for Layer 1 (deterrence) and Layer 3 (detection). But if you haven’t addressed Layer 2 first, you’ve built a very expensive notification system for a problem you could have physically prevented.

Start with the physical. Reinforce your doors. Then add the tech on top.

Your Weekend Challenge

Do this before Sunday night:

  1. Walk to your front door. Look at the strike plate. Count the screws and estimate their length.
  2. Open the door and look at the hinge screws. Are they short brass/gold screws? Those are the builder-grade ones.
  3. Go to your hardware store or order a door reinforcement kit online. Budget: $25-$45.
  4. Install it. One hour. One drill. Done.
  5. Then do the same for every exterior door in your house, including the one from the garage.

Bottom line: Your front door is probably held together by hope and half-inch screws. For less than the cost of a pizza, you can make it genuinely resistant to forced entry. That’s not prepper fantasy — that’s just smart homeownership.

How to Build a Rainwater Collection System for Under $50 (Step-by-Step)

Most people look at their roof during a rainstorm and think nothing of it. Meanwhile, thousands of gallons of free, clean-enough water are pouring off the edges and disappearing into the ground. That’s water you could be using for your garden, your livestock, washing gear, or — with proper filtration — even drinking.

A basic rainwater collection system isn’t complicated. It isn’t expensive. And once it’s set up, it works every single time it rains without you lifting a finger. Here’s how to build one this weekend for under fifty bucks.

Why Bother Collecting Rainwater?

Let’s put some numbers on it. A 1,000-square-foot roof section in an area that gets 30 inches of rain per year will yield roughly 18,000 gallons annually. That’s not a typo. The formula is simple: 1 inch of rain on 1,000 sq ft of roof = about 600 gallons.

Even a modest setup with a single barrel captures 50+ gallons per decent rainstorm. That’s enough to keep a small garden watered for a week in the summer.

Beyond the free water, there are real practical reasons:

  • Rainwater is better for plants. No chlorine, no fluoride, no mineral buildup. Your garden will genuinely grow better with it.
  • It reduces your water bill. Outdoor watering can account for 30-50% of residential water use in summer months.
  • It’s a backup supply. Municipal water fails. Wells run dry. Having 200 gallons stored isn’t paranoia — it’s planning.
  • It reduces runoff. Less water flooding your yard, less erosion, less strain on storm drains.

What You Need (The Sub-$50 Shopping List)

You don’t need a fancy commercial rain barrel system. Here’s what actually works:

Item Approx Cost Where to Find
55-gallon food-grade barrel $15–25 Facebook Marketplace, car washes, food distributors
3/4″ brass spigot $6–8 Hardware store
3/4″ bulkhead fitting (or rubber washers + lock nut) $4–6 Hardware store
Window screen mesh (for inlet filter) $4 Hardware store
Downspout diverter OR flexible downspout adapter $8–12 Hardware store / Amazon
Overflow fitting + short hose $5 Hardware store
Teflon tape, silicone sealant $3 Already in your garage, hopefully
Total $35–50

Pro tip on the barrel: Food-grade is non-negotiable. You want barrels that held juice concentrate, soy sauce, vinegar — not chemicals. Most car washes sell their used soap barrels for $10-15 and those work great too. Avoid anything that held industrial chemicals, obviously.

The Build: Step by Step

Step 1: Pick Your Location

Find a downspout that drains from the largest roof section possible — more square footage means more water per storm. The ground needs to be level and firm. A full 55-gallon barrel weighs about 460 pounds, so don’t put it on soft dirt or a wobbly deck.

Ideally, you want it elevated. Even 12-18 inches of elevation (a couple of cinder blocks or a small wooden platform) gives you gravity-fed pressure through the spigot. This matters if you want to run a hose from it without a pump.

Step 2: Prep the Barrel

You need three holes:

  1. Inlet hole (top): Cut a hole in the lid large enough for your downspout adapter to fit through — typically 3-4 inches. If the barrel has a removable lid, even easier. Secure window screen mesh over this opening with a hose clamp or zip ties. This keeps mosquitoes, leaves, and debris out.
  2. Spigot hole (bottom): Drill a 7/8″ hole about 3-4 inches from the bottom of the barrel. Install the bulkhead fitting from inside, add the spigot on the outside. Teflon tape on all threads, silicone around the exterior seal. Let it cure 24 hours.
  3. Overflow hole (top): Drill another hole about 2 inches from the top on the opposite side from the inlet. Install a bulkhead fitting and attach a short garden hose to direct overflow away from your foundation. This is the hole people skip — and then wonder why water is pouring over the top and pooling next to their house.

Step 3: Connect to the Downspout

You have two options here:

Option A — Flexible adapter (easiest): Cut the downspout above barrel height. Attach a flexible corrugated adapter that runs from the cut downspout into the top of your barrel. Takes about 10 minutes.

Option B — Diverter (better): Install an inline diverter on the downspout. These redirect water to the barrel when it’s raining and automatically bypass when the barrel is full. Slightly more work to install, but much cleaner and you don’t lose your normal downspout function.

I’d go with Option B if you can. The extra 15 minutes of installation saves you from having to think about it ever again.

Step 4: Set It and Forget It

Place the barrel on your platform, connect everything, and wait for rain. After the first rain, check for leaks around the spigot and overflow fittings. Tighten as needed. That’s it. You’re collecting water.

Mistakes That’ll Bite You

  • Skipping the screen mesh. Congratulations, you just built a mosquito breeding facility. Always screen the inlet. No exceptions.
  • No overflow plan. Water WILL overflow. Direct it somewhere intentional — a garden bed, a rain garden, or at minimum away from your foundation.
  • Using a non-food-grade barrel. Those blue chemical drums are cheap for a reason. The residue leaches into the water. If you’re watering food crops, this matters a lot.
  • Forgetting about winter. In freeze zones, drain your barrel before the first hard freeze or the expanding ice will crack it. Disconnect the downspout adapter and store the barrel upside down.
  • Not checking local regulations. Most states allow residential rainwater collection, but a handful have restrictions (looking at you, Colorado — though even they relaxed their rules). Spend 5 minutes checking before you build.

Scaling Up (When You’re Hooked)

One barrel is a start. Most people who build one end up with three within a year. You can daisy-chain barrels by connecting the overflow of one to the inlet of the next. Same concept, just more capacity.

For serious storage, 275-gallon IBC totes (Intermediate Bulk Containers) show up on Marketplace for $50-75. They’re ugly, but one tote holds five times what a barrel does. Paint it dark or build a simple screen fence around it.

And if you’re thinking about drinking the water — you absolutely can, but you need proper filtration. A first-flush diverter (dumps the first gallon of dirty roof water), a sediment filter, and a quality activated carbon or ceramic filter will get you there. That’s a separate project, but the collection system is the same.

The Takeaway

Here’s my honest take: rainwater collection is one of the highest-return, lowest-effort self-sufficiency projects you can do. You spend a Saturday afternoon and $40, and from that point forward, the sky literally delivers free water to your property every time it rains. No ongoing cost. No maintenance beyond cleaning the screen once a season.

It won’t make you fully water-independent, but it changes how you think about resources on your property. And that shift in thinking — from consumer to collector — is where real self-sufficiency starts.

Your challenge: This weekend, go look at your downspouts during the next rain. Pick the one dumping the most water. That’s where your first barrel goes. Get the barrel this week, build it next Saturday. By the end of the month, you’ll be collecting water without thinking about it.

Rain catchment is the first step toward water independence. For the bigger picture — storage, filtration, gravity feed, and the rest of an off-grid water plan — The Self-Sufficient Backyard lays it out start to finish.

How to Set Up a Low-Tech Perimeter Alert System Around Your Property

You don’t need cameras. You don’t need WiFi. You don’t need a monthly subscription to some security company that’ll call the cops 20 minutes after someone’s already inside your house.

What you do need is awareness. Specifically, you need to know when something crosses your perimeter — whether that’s a person, a vehicle, or a 200-pound hog tearing up your garden at 3 AM.

Today I’m going to walk you through how to build a layered, low-tech perimeter alert system that works without electricity, without internet, and without any monthly fees. Most of this you can set up in a single afternoon with stuff you already have or can grab for under $50.

Why Low-Tech?

Here’s the thing nobody in the security industry wants you to think about: high-tech systems fail at the worst possible times. Power goes out during a storm — cameras go dark. Internet drops — your app-based alerts are useless. Someone who actually knows what they’re doing can jam wireless signals with a $30 device off the internet.

Low-tech doesn’t fail because there’s nothing to fail. A tripwire doesn’t need firmware updates. A gravel path doesn’t lose WiFi signal. A dog doesn’t need to reboot.

I’m not saying ditch your Ring doorbell. I’m saying: build the foundation first. Then add tech on top if you want.

Layer 1: The Noise Barrier

Your first line of defense isn’t a wall. It’s sound. You want to make it physically impossible for someone to approach your home without making noise.

Gravel Paths and Beds

This is the single most underrated security measure for any property. A 3-4 inch layer of pea gravel or crushed stone around your home’s perimeter — especially under windows and along walkways — is loud enough to wake a light sleeper from inside.

  • Width: At least 3 feet out from the foundation. Wider is better.
  • Depth: 3-4 inches minimum. Too shallow and it’s easy to step quietly.
  • Best material: Crushed angular stone (not smooth river rock). The irregular edges grind against each other and create more noise.
  • Bonus: It also improves drainage around your foundation and looks good. Your HOA can’t complain about a landscaping feature.

Dry Leaf Zones

If you’re in a wooded area or on acreage, let the leaves accumulate in strategic areas — especially along tree lines and natural approach routes. Dry leaves are nature’s alarm system. A 150-pound human cannot walk through dry oak leaves quietly. Period.

Layer 2: Tripwire Alerts

Now we’re getting into actual alert devices. These are simple mechanical systems that tell you when a line has been crossed.

The Fishing Line + Can Method

Old-school, dead simple, and it works:

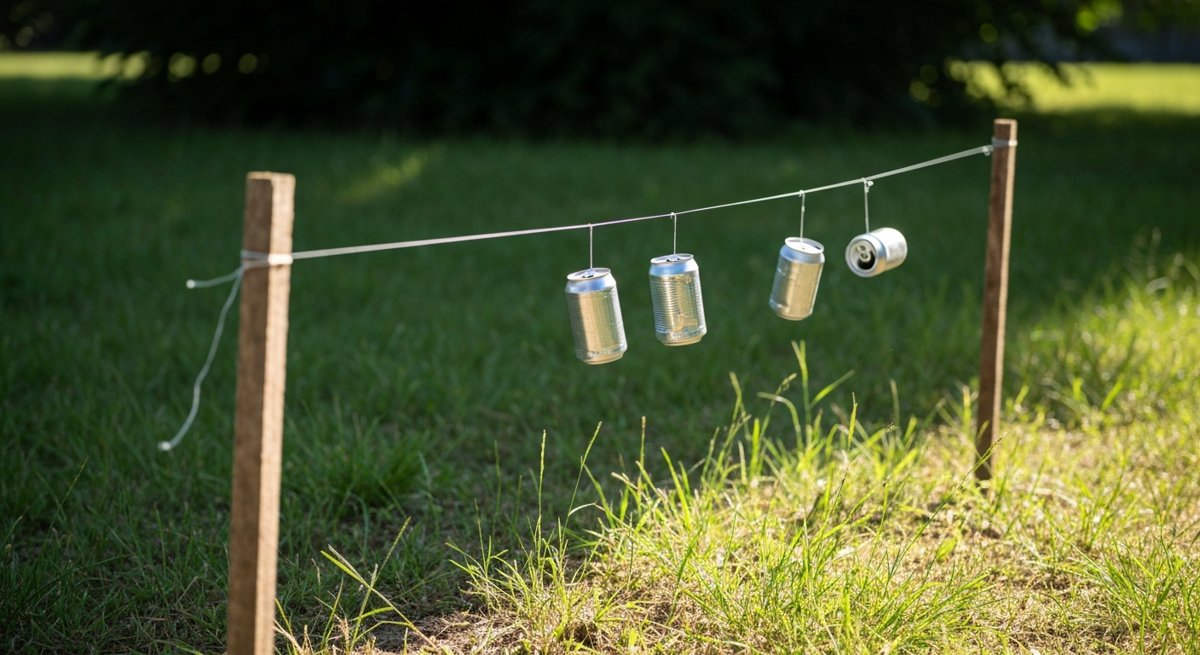
  1. Tie 20-pound monofilament fishing line between two stakes or trees at about 8-10 inches off the ground.
  2. Attach a few empty aluminum cans with pebbles inside to the line.
  3. When something hits the line, the cans rattle and drop.

Pro tip: Use clear mono line, not paracord. You want this to be invisible. Run it across natural approach paths — game trails, gaps in fence lines, the space between your shed and the tree line.

Perimeter Trip Alarms (12-Gauge Blanks)

These are commercially available trip alarm devices that fire a 12-gauge blank shotgun shell when a tripwire is pulled. They’re loud — we’re talking 100+ decibels. You’ll hear it from inside your house, and whoever tripped it will absolutely not stick around to find out what happened.

They run about $10-15 each. Set them at choke points — gates, gaps in fencing, the back side of outbuildings. Replace the blanks every 6 months since moisture degrades them.

Important: Check your local ordinances. These are legal almost everywhere for property protection, but some municipalities have noise rules. Know your area.

Layer 3: Visual Deterrents and Deception

Most intruders — human ones, at least — are looking for the easiest target. Your job isn’t to build Fort Knox. It’s to make your property look like more trouble than it’s worth.

  • Security signs and stickers — even if you don’t have the system. Sounds cheap, but studies consistently show these reduce break-in attempts. A “Protected by ADT” sign costs $5 and creates doubt.
  • Motion-activated solar lights — technically “tech,” but they’re self-contained, no wiring, no WiFi. A 4-pack runs about $25 and lasts years. Place them at corners, gates, and driveways.
  • Thorny landscaping under windows — holly bushes, barberry, roses, or hawthorn planted under first-floor windows. Nobody is climbing through a holly bush voluntarily. This is centuries-old security design and it works as well now as it did in medieval England.
  • Dummy cameras — a $8 fake camera with a blinking red LED mounted at your front gate. Is it real? They don’t know. And that uncertainty is the whole point.

Layer 4: The Human Element

No system replaces situational awareness. Here’s how to build it into your routine:

  • The nightly walkthrough. Every night before bed, take 5 minutes to walk your perimeter. Check gates, check locks, check your alert devices. This isn’t paranoia — it’s maintenance. You check your oil and tire pressure, right? Same idea.
  • Know your baseline. What does your property sound like at 2 AM on a Tuesday? What animals are normally moving around? You can’t detect “abnormal” if you don’t know what “normal” is. Spend a few nights actually listening.
  • Talk to your neighbors. The best perimeter alert system is a neighbor who calls you when they see something weird. Build those relationships. Bring over some eggs or a six-pack. Community is the oldest security system in human history.

Putting It All Together: A Sample Layout

Here’s how I’d set up a basic property — say a quarter-acre suburban lot with a house, detached garage, and backyard:

  1. Gravel bed — 4 feet wide around the entire house perimeter, especially under windows.
  2. Holly bushes under the two most vulnerable windows (usually side-yard windows that aren’t visible from the street).
  3. Solar motion lights at all four corners of the house and one at the garage.
  4. Fishing line tripwire across the side gate and along the back fence line.
  5. One 12-gauge trip alarm at the back gate (the one nobody uses but everyone forgets to lock).
  6. Security signs at the front and side of the property.
  7. Dummy camera at the front, pointed at the driveway.

Total cost: maybe $60-80 if you’re buying the gravel. Half that if you already have landscaping stone.

What About Rural and Large Properties?

Scale the same principles. You can’t gravel 40 acres, obviously. But you can:

  • Identify the 2-3 most likely approach routes (driveways, trails, road frontage gaps) and focus your tripwires there.
  • Use natural barriers — brush piles, fallen trees, thorny hedgerows — to funnel movement toward your monitored points.
  • Consider a driveway alarm (a battery-powered IR sensor that sends a wireless alert to a receiver in your house). These are semi-tech but run on batteries and don’t need WiFi. The Dakota Alert DCPA-4000 is the gold standard — about $100 and it’ll cover a quarter-mile.

The Takeaway

Security isn’t a product you buy. It’s a system you build. And the best systems start with the simplest, most reliable layers — noise, physical barriers, and human awareness — before you ever plug anything in.

Your challenge this weekend: Walk your property with fresh eyes. Pretend you’re trying to approach your own house without being noticed. Where would you come from? What would you avoid? Now make those easy routes harder. Start with gravel and a pair of solar lights. You’ll be ahead of 90% of homeowners by Sunday night.

Security is about layers, not gadgets. Build the foundation first. Everything else is optional.