

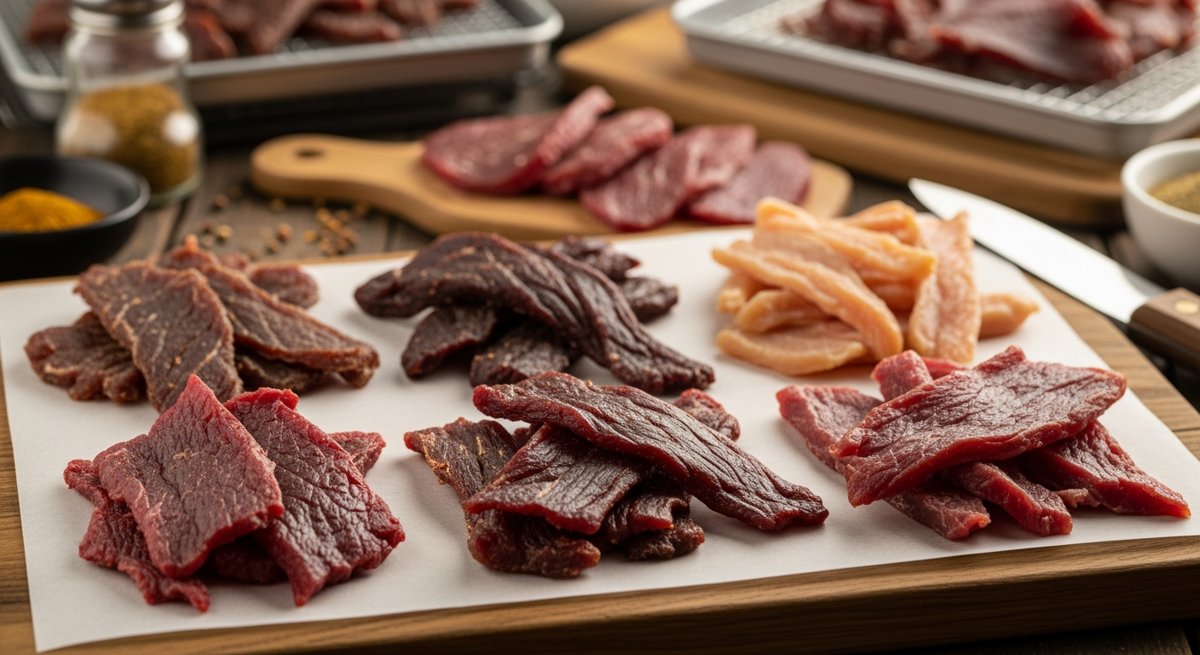
A bag of decent grocery-store jerky runs $8 to $12 for what amounts to two real handfuls of meat. The good stuff — Chomps, Country Archer, anything labeled “grass-fed” — can hit $15 a bag. You can make better jerky at home for roughly $4 a pound, control every ingredient that goes into it, and stop pretending those tiny packets are a reasonable way to eat protein.
Here’s the whole playbook: beef, venison, and turkey. Three marinades, one machine, zero mystery.
Why Bother Making Your Own
Three reasons, in order of importance:
- Cost. A pound of eye of round runs $7–$9. You lose about half the weight to dehydration, so you end up with ~8 oz of finished jerky. That’s the equivalent of three or four store-bought bags ($25–$40 worth) for the price of one lean cut of beef.
- Ingredients. Read a jerky label sometime. Sodium nitrite, MSG, “natural flavors,” dextrose, maltodextrin, and enough sugar to qualify as candy. Yours has meat, salt, soy sauce, and whatever spices you actually like.
- Quality. Homemade jerky — properly dried, properly seasoned — is in a different league. It tastes like the animal, not a marinade injection.
My opinion: The cost argument matters, but the ingredient argument is the real win. If you’re trying to eat clean protein on the move, packaged jerky is one of the worst-value foods at the grocery store. You’re paying meat prices for sugar and preservatives.
What You Need
A dehydrator (or an oven, if you must)
A real dehydrator with a fan and an adjustable thermostat is the move. Look for one that hits at least 160°F — this is the FDA’s recommendation for safely killing pathogens in raw meat before drying. Stacked-tray dehydrators work; box-style with horizontal trays work better because airflow is more even.
If you don’t own one, an oven set to its lowest temperature (usually 170°F) with the door cracked open will work. It just ties up your oven for 4–8 hours and uses way more energy. Buy the dehydrator.
A sharp knife or a slicer
Even, thin slices are the whole game. If your slices are inconsistent, some pieces will be over-dried and some will still be soggy in the middle. A meat slicer is overkill unless you’re making jerky weekly. Otherwise, a sharp 8″ chef’s knife and 60 minutes of partial freezing (more on that below) is enough.
The meat — cut selection matters
- Beef: Eye of round, top round, or bottom round. Lean cuts only. Fat doesn’t dry — it goes rancid. Trim every visible piece off before slicing.
- Venison: Hindquarter muscles — top round, sirloin tip, eye of round. Same rule: trim hard, no silver skin, no fat.
- Turkey: Breast only. Tenderloins work great because they’re already thin and uniform.
The Slicing Trick That Changes Everything
Put the meat in the freezer for 60–90 minutes before slicing. Not frozen solid — firm. You want it stiff enough that the knife glides through cleanly instead of squishing the muscle fibers.
Two slicing directions, two textures:
- With the grain = chewy, traditional jerky texture. Better for backpacking because it holds up.
- Against the grain = tender, breaks apart easily. Better for snacking at home, harder to tear when you’re walking.
Slice 1/8″ to 1/4″ thick. Thinner = faster drying and crispier finish. Thicker = chewier, takes longer. I default to about 3/16″ — call it the thickness of two stacked quarters.
Three Marinades That Actually Work
Mix marinade in a gallon zip-top bag, add sliced meat, squeeze the air out, and refrigerate 8–24 hours. Longer = saltier and more pronounced flavor. Don’t go past 24 hours or the texture starts to get mushy.
Each recipe is enough for about 2 pounds of sliced meat.
1. Classic Soy & Black Pepper (Beef)
- 1/2 cup soy sauce
- 1/4 cup Worcestershire
- 2 tbsp brown sugar
- 2 tsp coarse black pepper
- 1 tsp garlic powder
- 1 tsp onion powder
- 1/2 tsp smoked paprika
- 1/2 tsp red pepper flakes (optional)
2. Sweet Heat (Venison)
- 1/3 cup soy sauce
- 2 tbsp honey
- 2 tbsp apple cider vinegar
- 1 tbsp sriracha
- 2 tsp garlic powder
- 1 tsp ground ginger
- 1 tsp coarse black pepper
- 1/2 tsp cayenne
Venison takes spice well — it’s lean, gamey, and stands up to bigger flavors than beef. Don’t waste this marinade on store-bought beef.
3. Citrus Herb (Turkey)
- 1/4 cup soy sauce
- 2 tbsp olive oil
- Juice and zest of 1 lemon
- 2 tbsp Dijon mustard
- 1 tbsp dried rosemary (or 2 tbsp fresh, chopped)
- 2 tsp garlic powder
- 1 tsp black pepper
- 1 tsp salt
About curing salts: Most home jerky recipes don’t use Prague Powder #1 (sodium nitrite). The FDA recommends pre-heating meat to 160°F before dehydrating, which kills pathogens that nitrite would otherwise control. If you want maximum shelf life or you’re making something closer to commercial jerky, add 1/4 tsp Prague Powder #1 per pound of meat. Otherwise, skip it. I skip it.
The Drying Process, Start to Finish
- Pat the marinated slices dry with paper towels. Excess marinade on the surface = sticky, uneven drying. Don’t skip this.
- Pre-heat the meat to 160°F. Put the slices on a baking sheet in a 275°F oven for 10 minutes. This is the safety step. Don’t skip it just because you’re impatient.
- Arrange on dehydrator trays in a single layer, not touching. Airflow is everything.
- Dry at 160°F for 4–6 hours. Beef and venison usually finish around 5 hours. Turkey runs faster — check at 3 hours.
- Test doneness. Bend a cooled (not hot) piece. It should crack and show white fibers but not snap clean. If it’s bendy and shiny, keep going. If it shatters, you went too far — still edible, just brittle.
Storage — And the Step Almost Everyone Skips
After drying, let the jerky cool to room temperature, then put it in a paper bag (yes, a paper bag) for 24 hours. This step is called “conditioning.” It lets remaining moisture redistribute evenly so you don’t get a few wet pieces ruining the whole batch.
After 24 hours, check for any beads of moisture on the bag. If you see condensation, throw it back in the dehydrator for another hour.
Then store:
- Vacuum-sealed at room temp: 1–2 months
- Vacuum-sealed in the freezer: 6–12 months, no quality loss
- Mason jar with an oxygen absorber: 3–4 months at room temp
- Zip-top bag in the pantry: 1–2 weeks. Don’t kid yourself, it won’t last that long anyway.
The Cost Math, Spelled Out
Let’s run a 2-pound batch of beef jerky:
- 2 lbs eye of round: ~$16
- Marinade ingredients (pantry staples, prorated): ~$2
- Electricity for 5 hours: ~$0.30
- Total: ~$18.30 for about 16 oz of finished jerky
16 oz of grocery-store jerky at $10 per 2 oz bag = $80. You just saved $60 and got a better product. Do this twice a month and you’ve funded a decent dehydrator inside of six months.
Common Mistakes I See
- Using fatty cuts. Chuck, ribeye, brisket trimmings — they all turn rancid in storage. Lean cuts only.
- Skipping the 160°F pre-heat. Dehydrators alone don’t guarantee pathogen kill. It’s a 10-minute step. Just do it.
- Inconsistent slicing. 1/8″ pieces next to 1/2″ pieces = some jerky, some shoe leather, some still raw in the middle.
- Over-marinating. 24 hours max. Beyond that, the texture goes mushy and the salt overpowers everything.
- Skipping the conditioning step. The paper bag move feels weird, but it’s the difference between jerky that lasts months and jerky that molds in a week.
Your Challenge This Week
Buy 2 pounds of eye of round on your next grocery run. About $16. That’s the entry fee.
Mix the classic soy & pepper marinade Saturday morning. Slice and bag the meat. Sunday morning, dry it. By Sunday afternoon, you have a week’s worth of high-protein snacks that cost you a third of what the gas station charges, taste better, and have ingredients you can pronounce.
Do this twice and you’ll never buy a $10 bag of jerky again.
If you hunt — venison jerky is the killer app for this. A backstrap and a hindquarter will keep you in protein snacks for months, and it’s the single best way I know to use up tough cuts that would otherwise sit in the freezer until next season.
One last thing: Once you start making your own, you’ll catch yourself reading every store-bought jerky label and getting mildly offended. That’s the goal. Keep building skills that make the convenient option look stupid.
Jerky is preservation 101. To go further — curing, canning, root cellars, and growing the food in the first place — The Self-Sufficient Backyard is the manual.