Meal Prep Recipes: High-Protein, High-Volume, Low-Calorie Meals That Actually Fill You Up

Simple, high-protein, volume-friendly recipes built for meal prep. New recipes added regularly.

Looking for the science behind these choices? Read How Fat Cells Work to understand why volume eating is the most sustainable approach to body composition.

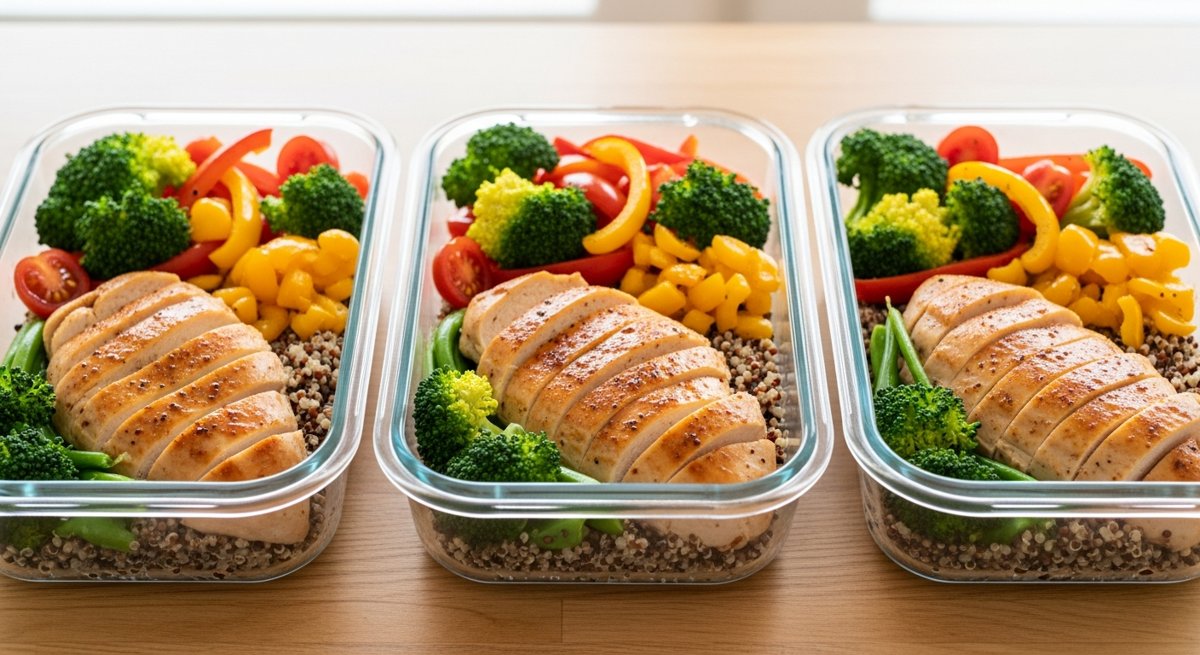
Chicken & Vegetable Power Bowl

Prep time: 15 min | Cook time: 25 min | Serves: 5 (meal prep)

Per serving: ~380 calories, 42g protein, 28g carbs, 9g fat

Ingredients

  • 2 lbs chicken breast, cubed
  • 1 lb broccoli florets
  • 2 bell peppers, diced
  • 1 large sweet potato, cubed
  • 2 cups cooked brown rice or quinoa
  • 2 tbsp olive oil
  • Salt, pepper, garlic powder, smoked paprika

Instructions

  1. Preheat oven to 425F. Toss sweet potato and broccoli with 1 tbsp olive oil, salt, pepper, and garlic powder. Spread on a sheet pan. Roast 25 minutes.
  2. While veggies roast, heat 1 tbsp olive oil in a large skillet over medium-high. Season chicken with smoked paprika, salt, pepper. Cook 6-7 minutes until golden and cooked through.
  3. Divide rice, chicken, and roasted vegetables into 5 meal prep containers.
  4. Store in fridge up to 5 days. Reheat 2-3 minutes in microwave.

Variations:

  • Tex-Mex: Swap paprika for cumin and chili powder. Add black beans. Top with salsa.
  • Asian: Use soy sauce + ginger on the chicken. Add edamame. Drizzle with sriracha.
  • Mediterranean: Use oregano and lemon. Add cherry tomatoes and cucumber. Top with feta.

Turkey Chili — Big Batch

Prep time: 10 min | Cook time: 35 min | Serves: 8

Per serving: ~290 calories, 32g protein, 24g carbs, 7g fat

Ingredients

  • 2 lbs ground turkey (93% lean)
  • 2 cans (15 oz) kidney beans, drained
  • 1 can (28 oz) crushed tomatoes
  • 1 can (15 oz) diced tomatoes
  • 2 bell peppers, diced
  • 1 large onion, diced
  • 4 cloves garlic, minced
  • 2 tbsp chili powder, 1 tbsp cumin, 1 tsp smoked paprika
  • Salt, pepper to taste

Instructions

  1. Brown turkey in a large pot over medium-high heat, breaking into crumbles. Drain any excess fat.
  2. Add onion, peppers, garlic. Cook 3-4 minutes until softened.
  3. Add all spices, stir 30 seconds until fragrant.
  4. Add all tomatoes and beans. Bring to a boil, then reduce to simmer for 25 minutes.
  5. Portion into containers. Keeps 5 days in fridge, 3 months in freezer.

Top with: Greek yogurt (instead of sour cream), diced avocado, hot sauce, fresh cilantro.


More recipes coming soon. Bookmark this page or check back regularly.

— BaseCampGoods
Recipes · basecampgoods.com

How Muscle Actually Grows: The Science of Strength, Satellite Cells, and Muscle Memory

Fat cells multiply and never leave. Muscle fibers have a different trick — and understanding it changes how you train, recover, and think about getting stronger.

Muscle Fibers Don’t Multiply — They Grow

Unlike fat cells, your muscle fibers are mostly set by the time you finish puberty. The average adult has roughly the same number of muscle fibers at 25 as they do at 65. When you lift weights and “build muscle,” you’re not creating new fibers — you’re making existing ones thicker.

This process is called myofibrillar hypertrophy, and it’s the primary driver of strength and size gains in trained adults.

How Muscle Actually Grows

Here’s the sequence, step by step:

Step 1: Mechanical Damage

When you lift heavy or push your muscles beyond what they’re accustomed to, you create micro-tears in the muscle fibers. This isn’t injury — it’s the signal. The mechanical tension stretches and damages the sarcomeres (the contractile units inside each fiber), which triggers an inflammatory response.

This is why progressive overload matters more than anything else in the gym. If you lift the same weight for the same reps every week, there’s no new damage, and therefore no new growth signal.

Step 2: Satellite Cell Activation

Here’s where it gets interesting. When muscle fibers are damaged, satellite cells — stem cells that live between the fiber and its outer membrane — wake up and get to work. They proliferate, then donate their nuclei to the damaged muscle fiber.

This is critical because each nucleus can only manage a limited volume of cellular territory (called the myonuclear domain). To get bigger, a muscle fiber needs more nuclei to manage the additional protein synthesis. Satellite cells are the supply line.

Step 3: Protein Synthesis

With fresh nuclei in place, the muscle fiber ramps up muscle protein synthesis (MPS) — manufacturing new contractile proteins (actin and myosin) and structural proteins. These new proteins are woven into the existing sarcomere structure, making the fiber thicker and stronger.

MPS stays elevated for 24-48 hours after a hard training session in trained individuals (up to 72 hours in beginners). This is your growth window. What you eat and how you recover during this window determines whether the damage gets rebuilt bigger or just repaired to baseline.

Muscle Memory Is Real — And It’s Nuclear

Here’s the best news in exercise science: muscle memory isn’t just neurological — it’s structural.

When satellite cells donate nuclei to a muscle fiber, those nuclei stick around even after you stop training. The fiber shrinks (atrophy), but the extra nuclei remain for years — possibly decades. Research by Gundersen et al. (2010) confirmed this with the term “myonuclear permanence.”

This means if you were strong once, getting strong again is significantly faster. Your fibers already have the nuclei they need — they just need the protein synthesis signal (training + nutrition) to rebuild. This is why former athletes can regain muscle in weeks that took them months to build originally.

It also means your 20s and 30s training isn’t just for now — it’s an investment. Every hard training block permanently increases your myonuclear count, making future gains easier for the rest of your life.

What Limits Growth?

Satellite Cell Depletion

Satellite cells are finite. As you age, the satellite cell pool shrinks and the remaining cells become less responsive to damage signals. This is a major reason why muscle building gets harder after 40. You can offset this with consistent training (which keeps satellite cells active and responsive) and adequate protein intake.

Hormonal Environment

Testosterone, growth hormone, and IGF-1 all amplify the muscle growth response. Natural testosterone peaks in your mid-20s and declines roughly 1% per year after 30. This doesn’t mean you can’t build muscle at 45 — it means the rate of gain slows. Sleep, stress management, and nutrition become more important, not less.

The Genetic Ceiling

Your fiber type distribution (fast-twitch vs. slow-twitch) is largely genetic. Fast-twitch fibers have much greater hypertrophy potential. If you’re naturally fast-twitch dominant, you’ll build visible muscle faster. Slow-twitch dominant individuals excel at endurance but have a lower ceiling for raw mass.

Most people never come close to their genetic ceiling. If you haven’t been training consistently with progressive overload for at least 5 years, genetics aren’t your limiting factor — consistency is.

The Practical Takeaways

Training

  • Progressive overload is everything. Add weight, add reps, or add sets over time. If the stimulus doesn’t increase, the adaptation stops.
  • Mechanical tension > metabolic stress > muscle damage. Heavy compound lifts (squat, deadlift, press, row, pull-up) provide the most efficient growth stimulus per minute in the gym.
  • Train each muscle group 2x per week. MPS returns to baseline within 48-72 hours. Once-a-week bro splits leave growth on the table. Upper/lower, push/pull/legs, or full-body 3x are all superior.
  • Don’t chase soreness. DOMS (delayed onset muscle soreness) is a sign of novelty, not effectiveness. A muscle can grow without being sore, and being extremely sore doesn’t mean better growth.

Nutrition

  • Protein: 0.7-1.0g per pound of body weight per day. This is the range supported by virtually every meta-analysis. A 200 lb man needs 140-200g daily. More than this has no additional benefit for muscle growth.
  • Distribute protein across 3-5 meals. MPS is maximally stimulated by roughly 30-50g of protein per meal. One 150g protein shake is less effective than three 50g servings spread throughout the day.
  • You need a caloric surplus to build muscle efficiently. A surplus of 200-300 calories above maintenance is enough. Bigger surpluses just add fat. If you’re over 20% body fat, you can build muscle at maintenance or even in a slight deficit — your body fat provides the energy surplus.
  • Creatine works. 5g daily, every day, forever. It’s the single most studied and effective legal supplement for muscle growth and strength. It increases your muscles’ phosphocreatine stores, allowing more work per set.

Recovery

  • Sleep is when you grow. Growth hormone release peaks during deep sleep. 7-9 hours minimum. Chronic sleep deprivation directly impairs MPS and increases cortisol (which is catabolic — it breaks muscle down).
  • Stress management matters. Cortisol competes with testosterone at the receptor level. Chronically elevated stress hormones shift your body toward catabolism. Training hard while chronically stressed can be counterproductive.
  • Rest days aren’t optional. The muscle doesn’t grow in the gym — it grows during recovery. Training is the damage; rest is the repair. If you’re not recovering between sessions, you’re just accumulating damage without adaptation.

Fat Loss vs. Muscle Gain: Can You Do Both?

Yes, but with caveats:

  • Beginners (first 6-12 months): You can absolutely build muscle and lose fat simultaneously. Your body is so far from its adapted state that almost any training stimulus plus adequate protein will produce results even in a caloric deficit.
  • Intermediate/advanced: Much harder. The signals for muscle growth (caloric surplus, anabolic hormones) directly conflict with the signals for fat loss (caloric deficit, catabolic hormones). The solution is to cycle phases — 8-12 weeks of slight surplus (building), then 4-6 weeks of slight deficit (cutting). Back and forth.
  • Overweight beginners: The sweet spot. If you’re carrying significant body fat AND you’re untrained, your body will happily use stored fat to fuel muscle protein synthesis. This is the one scenario where dramatic body recomposition happens fast.

Your muscle fibers are permanent employees — you can’t hire more, but you can make each one bigger, stronger, and better equipped. Train hard, eat enough protein, sleep like it matters, and the biology does the rest.

— BaseCampGoods
Fitness & Training · basecampgoods.com

How Fat Cells Work: The Science of Fat Growth, Storage, and Why Volume Eating Wins

Understanding how your body stores fat changes how you fight it. This isn’t a diet plan — it’s the operating manual your body didn’t come with.

Your Fat Cells Are Balloons, Not Boxes

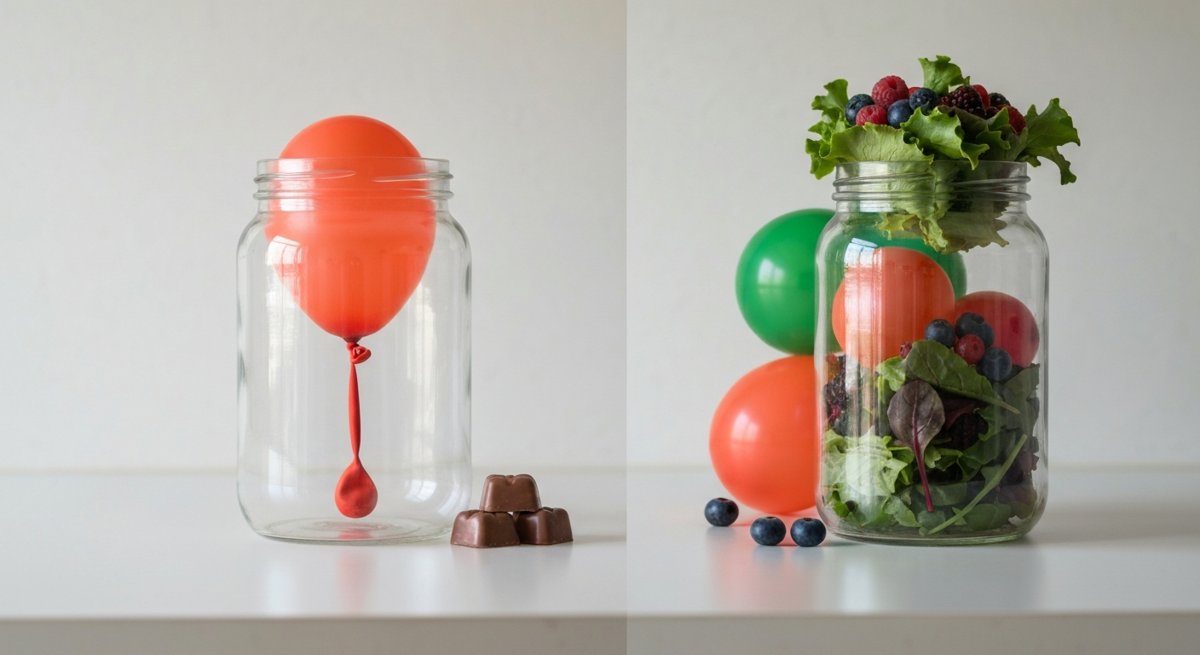
Most people think of fat as a substance you “burn off.” It’s more accurate to think of fat cells as billions of tiny balloons. When you eat more than you use, each balloon inflates with triglycerides. When you eat less than you use, each balloon deflates. The balloons themselves don’t go away — they just change size.

An average adult has roughly 30 billion fat cells. Someone who has been significantly overweight can have 100 billion or more. That difference matters, and we’ll get to why.

Phase 1: Hypertrophy — Cells Get Bigger

When you start gaining weight, your existing fat cells absorb more triglycerides and expand. A single fat cell can swell to roughly 4-6 times its lean volume. This is the primary mechanism behind most weight gain.

The good news: this is fully reversible. Eat less than you burn, and these cells shrink right back down. No permanent damage done.

Phase 2: Hyperplasia — New Cells Are Born

Here’s where it gets serious. When your existing fat cells hit their storage limit — roughly 0.7-0.8 micrograms of lipid per cell — they send out chemical distress signals. These signals trigger stem cells (pre-adipocytes) to differentiate into brand new fat cells.

This typically kicks in when men exceed roughly 25-30% body fat, though genetics, fat distribution, and how long you’ve been at that weight all play a role.

The critical part: once new fat cells are created, you cannot lose them through diet or exercise. You can only shrink them. They sit there, empty and waiting, sending “fill me” signals that make weight regain easier. This is a major reason why people who were once significantly overweight have a harder time maintaining weight loss than people who were never heavy.

The Numbers — Where Are You?

Here’s a rough framework for men (women carry ~8-10% more body fat at equivalent fitness levels):

  • 15-20% body fat: Healthy range. Your existing cells are comfortably filled, no hyperplasia risk. Weight loss from here is straightforward — you’re just deflating balloons.
  • 20-25% body fat: Overfilled but manageable. Still mostly hypertrophy. Cells are stretched but not maxed out. This is the most responsive range for diet changes.
  • 25-30% body fat: Approaching the threshold. Cells are near capacity. The longer you stay here, the higher the risk of triggering new cell creation. This is the “act now” zone.
  • 30%+ body fat: Hyperplasia is likely active, especially if you’ve been here for months or years. Weight loss is still absolutely possible, but your body is building infrastructure that will fight you on the way back down.

Quick estimate: if you know your lean target weight (what you’d weigh at 15% body fat), subtract that from your current weight, divide by current weight, and multiply by 100. That’s your approximate body fat percentage. It’s rough, but it gets you in the right zone.

What This Means for Your Diet

The science points to one clear strategy: don’t stay overfilled for long periods. Brief spikes in weight (holidays, vacations, stressful months) are fine — your cells inflate and deflate without creating new ones. It’s the sustained, months-long surplus that triggers hyperplasia.

But “eat less” is useless advice if you’re hungry all the time. The real answer is volume eating — foods that fill your stomach and keep you satisfied while delivering fewer calories per bite.

Volume Eating: Big Plates, Small Calories

Your stomach doesn’t count calories. It measures volume and weight. Stretch receptors in your stomach wall tell your brain “I’m full” based on how much physical space the food takes up — not how many calories it contains. This is the cheat code.

The High-Volume Playbook

  • Cruciferous vegetables: Broccoli, cauliflower, Brussels sprouts, cabbage. A full pound of broccoli is only 150 calories but fills an entire plate. Roast with garlic and olive oil for flavor without going overboard.
  • Leafy greens: Spinach, kale, arugula. An enormous salad bowl is 30-50 calories before dressing. Use vinaigrette instead of ranch and you stay under 150 for a meal-sized salad.
  • Lean proteins: Chicken breast, turkey, white fish, shrimp, egg whites. High satiety, moderate calories. 8 oz of chicken breast is ~280 calories and keeps you full for hours.
  • Potatoes (yes, potatoes): The most satiating food ever measured on the Satiety Index. A large baked potato is ~280 calories and will keep you fuller than almost anything else you can eat. Skip the butter and sour cream — use Greek yogurt and hot sauce instead.
  • Soups and stews: Water adds volume without calories. A giant bowl of chicken vegetable soup can be 200-300 calories and feel like a feast. This is the ultimate meal-prep food.
  • Berries: Strawberries, blueberries, raspberries. A full cup of strawberries is 50 calories. Compare that to a banana at 100+ or grapes at 100+.
  • Greek yogurt: High protein, thick texture, very satiating. 200g of non-fat Greek yogurt is ~130 calories with 20g of protein.
  • Popcorn (air-popped): 3 cups of air-popped popcorn is 90 calories. That’s a large bowl for the calorie cost of a single handful of chips.

The Calorie Density Trick

Think in terms of calories per pound:

  • Vegetables: 60-200 cal/lb
  • Fruits: 200-350 cal/lb
  • Potatoes, rice, beans: 400-600 cal/lb
  • Lean meat, fish: 500-700 cal/lb
  • Bread, pasta: 1,200-1,500 cal/lb
  • Cheese: 1,600-1,800 cal/lb
  • Nuts: 2,500-3,000 cal/lb
  • Oils, butter: 4,000 cal/lb

Build your plates from the top of this list. The lower you go, the smaller your portions need to be.

Meal Prep That Actually Works

Volume eating is perfect for meal prep because the base ingredients are cheap, keep well, and cook in bulk.

  • Sunday protein cook: Grill or bake 3-4 lbs of chicken breast, portion into containers. Season differently (lemon herb, cajun, teriyaki) to avoid monotony.
  • Big-batch soups: Make a pot of chicken vegetable, turkey chili, or lentil soup. Portions into 5 containers. Reheats perfectly all week.
  • Roasted vegetable trays: Sheet-pan roast a mix of broccoli, bell peppers, zucchini, and sweet potato. 400°F, 25 minutes. Makes 4-5 side portions.
  • Overnight oats: Rolled oats, Greek yogurt, berries, splash of almond milk. Prep 5 jars Sunday night. Grab and go all week. ~300 calories per jar with 20g+ protein.
  • Egg muffins: Whisk eggs with spinach, peppers, turkey sausage. Pour into muffin tins, bake at 375°F for 20 minutes. 12 muffins = 3-4 days of grab-and-go breakfasts at ~70 calories each.

The key to sustainable meal prep: cook the protein and base vegetables in bulk, vary the sauces and seasonings daily. Same chicken breast tastes completely different with salsa verde vs. mustard vs. soy-ginger glaze.

For more meal prep ideas, recipes, and detailed macros, check out our growing recipe collection — we’ll be adding new volume-friendly recipes regularly.


The science is clear: your fat cells are permanent residents, but their size is negotiable. Fill your plates with volume, keep your cells from maxing out, and the biology works in your favor.

— BaseCampGoods
Nutrition & Meal Prep · basecampgoods.com

Loaded Carries: The One Exercise That Builds Every Kind of Strength You Actually Need

You can bench press 300 pounds and still struggle to carry a 50-pound bag of feed from the truck to the barn. You can run a 5K and still be gassed after hauling a generator uphill. The disconnect isn’t your fitness level — it’s how you train.

If I could only recommend one exercise to someone who works with their hands, spends time outdoors, or just wants to be genuinely useful in a crisis, it would be loaded carries. Not squats. Not deadlifts. Not burpees. Carries.

Here’s why — and exactly how to start doing them today with whatever you have lying around.

What Makes Loaded Carries Different

Most gym exercises isolate muscles. Curls work your biceps. Leg press works your quads. Even compound lifts like squats and deadlifts have a defined start, middle, and end — you lift the weight, then you put it down.

Loaded carries are different because they train your body the way you actually use it: pick something heavy up, hold onto it, and move. That’s it. And in that simplicity is everything.

A single loaded carry session works:

  • Grip strength — your hands, forearms, and fingers under sustained load
  • Core stability — not crunching, but bracing, which is how your core actually functions in real life
  • Shoulder integrity — the rotator cuff and traps working together to keep your shoulders packed and stable
  • Hip and ankle stability — maintaining balance under load while walking on uneven ground
  • Cardiovascular conditioning — your heart rate will climb fast and stay there
  • Mental toughness — there’s no rep count to hide behind; you carry until you can’t

Name another exercise that does all of that. I’ll wait.

The 5 Loaded Carry Variations You Should Know

You don’t need a gym. You don’t even need dumbbells. Here are five variations ranked from easiest to most demanding, with ideas for improvised equipment.

1. The Farmer’s Carry

The classic. Pick up something heavy in each hand and walk. Keep your chest up, shoulders back, and core braced. Don’t let the weight pull you into a lean.

Improvised equipment: 5-gallon buckets filled with sand or gravel (about 50 lbs each), heavy duffel bags, jerry cans filled with water, cinder blocks.

2. The Suitcase Carry

Same as the farmer’s carry, but you only hold weight in one hand. This turns it into an aggressive anti-lateral-flexion exercise — your obliques and deep core muscles have to fire hard to keep you from tilting sideways. This is what actually builds the kind of core strength that prevents back injuries.

Improvised equipment: A single heavy bucket, a loaded backpack held at your side, a sandbag, a propane tank.

3. The Bear Hug Carry

Wrap your arms around something heavy and walk. This murders your upper back, biceps, and core. It also trains the exact movement pattern you use carrying feed bags, hay bales, or an injured person.

Improvised equipment: A heavy sandbag, a large rock, a bag of concrete mix (don’t open it — those 80-lb bags are perfect), a keg.

4. The Overhead Carry

Press something overhead and walk with it locked out. This is shoulder stability on hard mode. Start light — seriously. Even 25 pounds overhead for 100 yards will expose weaknesses you didn’t know you had.

Improvised equipment: A sandbag, a log, a heavy toolbox, a water jug. One hand or two — both work.

5. The Ruck

Load up a backpack and walk. This is the endurance version of loaded carries. Less peak intensity, more sustained demand. Military units have used this for centuries because it works. A 45-minute ruck with 30-40 pounds will humble anyone who thinks walking isn’t exercise.

Improvised equipment: Any backpack loaded with books, bricks, sand bags, or water bottles. A purpose-built ruck plate is nice but not necessary.

The Starter Program: 3 Weeks to a Stronger Everything

Here’s a dead-simple program. Three sessions per week. Each session takes 20-30 minutes. No gym required.

Week 1 — Build the Base

  • Farmer’s carry: 4 x 40 yards (rest 60-90 seconds between sets)
  • Suitcase carry: 3 x 30 yards per side
  • Use a weight that’s challenging but lets you keep good posture

Week 2 — Add Variety

  • Farmer’s carry: 4 x 50 yards
  • Bear hug carry: 3 x 30 yards
  • Overhead carry: 3 x 25 yards per arm (go light)

Week 3 — Test Yourself

  • Farmer’s carry medley: carry 60 yards, set down, bear hug carry back 60 yards. Rest 2 min. Repeat 3 times.
  • Saturday: Load a pack with 30 lbs and ruck for 30-45 minutes. Walk your neighborhood, walk a trail — just walk.

Common Mistakes That Kill Your Progress

Going too heavy too fast. Your grip will be the first thing to fail, and that’s fine — that’s what you’re training. But if you can’t walk with your shoulders back and your core braced, the weight is too heavy. Drop it down. Form matters here as much as anywhere.

Short-arming the distance. A 15-yard farmer’s carry is basically just a heavy hold. You need at least 30-40 yards to get the training effect of walking under load. If space is tight, do laps.

Holding your breath. Breathe. Short, rhythmic breaths through your nose. Your core should stay braced while you breathe — that’s the whole skill you’re developing.

Only training one variation. Each carry variation loads your body differently. The farmer’s carry builds grip and traps. The suitcase carry builds obliques and anti-rotation. The bear hug builds upper back endurance. Rotate through them.

Why This Matters Beyond the Gym

I’ll be honest — I think the fitness industry has overcomplicated everything. People are doing cable crossovers and Smith machine quarter-squats while they can’t carry their groceries in one trip without their forearms cramping.

Loaded carries build the kind of strength that makes you capable. Capable of hauling a downed tree off a trail. Capable of carrying your kid and a 40-pound pack at the same time. Capable of moving supplies in an emergency without breaking down after the second trip. That’s not gym strength — that’s useful strength.

And here’s the thing nobody talks about: carries build mental resilience in a way that sets and reps don’t. There’s something about holding heavy weight while your grip screams and your lungs burn and your only job is to keep walking that rewires your relationship with discomfort. You learn to exist in the suck. That skill transfers to everything.

The Challenge

Here’s what I want you to do this week: find two heavy things in your garage, your barn, or your yard. Fill two 5-gallon buckets with gravel if you have to. Then walk with them for as far as you can without setting them down.

Measure that distance. Write it down.

Next week, beat it.

That’s it. No app. No program. No subscription. Just you and something heavy and a direction to walk. Do that three times a week for a month and tell me your life hasn’t changed.

Loaded carries are the foundation of real-world fitness. Start simple, stay consistent, and stop overcomplicating it.

How to Build a Workout Habit When You Hate the Gym

Let’s get the uncomfortable part out of the way: you don’t need to love the gym to be in shape. You don’t even need to like it. What you need is a system that doesn’t depend on how you feel about the gym on any given Tuesday.

Most fitness advice assumes you’re already motivated. “Find your why!” “Get a gym buddy!” “Make a killer playlist!” That’s nice for people who already go. For the rest of us — the ones who’ve bought three gym memberships and used each one for six weeks — the problem isn’t motivation. It’s identity.

The Real Problem: You’re Trying to Be a “Gym Person”

Here’s what nobody tells you: you don’t have to become a gym person. You need to become a person who moves consistently. That’s a different thing.

“Gym person” comes with baggage — the right clothes, the right form, knowing how to use machines without looking lost, tolerating the environment. That’s a lot of identity friction for someone who just wants to not feel like garbage.

The reframe: you are building a movement practice. The gym is one venue. Your garage is another. A park, a hotel room, your living room floor — all of these count. The habit is movement. The location is a detail.

The Minimum Viable Workout (MVW)

This is the concept that changes everything: the Minimum Viable Workout is the smallest session that still counts as showing up. It’s your floor — the thing you do on the days when everything in your body says “not today.”

Your MVW might be:

  • 10 push-ups, 10 squats, 30-second plank
  • A 15-minute walk — no pace requirement
  • One set of each: push, pull, squat, hinge
  • 5 minutes of kettlebell swings

That’s it. Three to fifteen minutes. No commute, no changing clothes, no shower required. You can do your MVW in work boots in your garage.

The rule is binary: did you do the MVW today? Yes or no. There’s no partial credit, but there’s also no minimum beyond the MVW. An amazing workout and a bare-minimum MVW get the same checkmark. That’s the point. The checkmark is the habit. The intensity is a bonus.

Anchor It to Something That Already Happens

Habits that survive are attached to existing behaviors. This is James Clear’s “habit stacking” concept, and it works because you’re not relying on memory or motivation — you’re piggybacking on autopilot.

Examples:

  • After I pour my morning coffee, I do my MVW before the first sip.
  • When I get home from work and change clothes, I put on workout clothes instead of loungewear.
  • After I drop the kids off at school, I drive to the park instead of home.
  • When my lunch break starts, I walk for 15 minutes before eating.

Notice what these all have in common: the anchor is something you already do every day. The habit rides on its back. You’re not adding a new decision to your day — you’re modifying an existing one.

Remove Every Possible Barrier

The number one reason people skip workouts isn’t laziness. It’s friction. Every barrier between “I should work out” and actually moving is a chance for your brain to talk you out of it.

Eliminate the barriers:

  • Lay out your clothes the night before. Decision removed.
  • Keep a set of resistance bands at home. A $25 set of bands eliminates the “I can’t get to the gym” excuse permanently. You can do a full-body workout with bands in your living room.
  • Shorten the commute. If the gym is 20 minutes away, you’re fighting 40 minutes of driving plus 40 minutes of working out. That’s 80 minutes of commitment for a habit you’re trying to build. Find something closer, or work out at home.
  • Stop planning elaborate workouts. For now, your plan is: show up and move. That’s the whole plan. Programming and optimization come later, after the habit is locked in.

A Starter Program That Doesn’t Require a Gym

For the first 30 days, all you need is your body and a floor. This isn’t a training program — it’s a habit-locking protocol. Do what you can, skip what you can’t, but show up every day.

The 4-Move Foundation (15 min, 3x/week minimum):

Push: Push-ups (on knees if needed) — 3 sets to near-failure

Pull: Inverted rows under a table, or band pull-aparts — 3 sets of 10-15

Squat: Bodyweight squats or goblet squats (hold anything heavy) — 3 sets of 12-15

Hinge: Romanian deadlifts with a backpack full of books, or kettlebell swings — 3 sets of 10-12

Rest 60-90 seconds between sets. Total time: 12-18 minutes. That’s it.

On off days, walk. That’s your MVW — a walk. It counts. Don’t let anyone tell you walking isn’t exercise. It’s the single most underrated physical activity for overall health, metabolic function, and mental clarity.

Track It — But Keep It Simple

Habit tracking works because it turns an abstract behavior into a visible streak. But don’t overcomplicate it. You’re not logging sets, reps, and RPE. You’re tracking one thing: did I move today?

Options that work:

  • A calendar on the wall with X marks
  • A single row in a bullet journal
  • A habit tracking app (if you’ll actually open it)

The visual record does something powerful: it creates identity evidence. After 14 consecutive X marks, you start thinking “I’m the kind of person who works out every day.” That identity shift is the real goal. Once you believe it, the habit becomes self-sustaining.

When You Miss a Day (Not If)

You will miss a day. You’ll get sick, travel, have a family emergency, or just plain forget. This is where most people blow up their progress — they see the broken streak and quit.

The rule: never miss twice. One missed day is a rest day. Two missed days is the start of a new pattern. Three is a rut. Do whatever it takes to show up the day after you miss. Even if it’s just the MVW. Especially if it’s just the MVW.

The person who does 10 push-ups on the day after they missed is more disciplined than the person who does an hour-long workout when they feel like it. Consistency under resistance is the whole game.

The 30-Day Challenge

Here’s your commitment, starting today:

  1. Define your MVW. Write it down. Make it embarrassingly easy.
  2. Pick your anchor. What existing daily behavior will trigger your movement?
  3. Remove one barrier. Lay out clothes, buy a $25 band set, or clear a 6×6 space in your garage.
  4. Track it. One mark per day. Binary. Did you move or didn’t you?
  5. Protect the streak. Never miss twice.

In 30 days, you won’t be ripped. You won’t have PRs. But you’ll be someone who works out every day — and that person can build anything from there. The habit is the foundation. Everything else is just programming.

You don’t need to love the gym. You just need to stop negotiating with yourself about whether today counts.

BaseCampGoods is about building the kind of man who’s ready — physically, mentally, and practically. No guru theater. Just systems that work.

The Evening Shutdown Ritual: How to Actually Decompress After Work

You spend the whole day trying to be productive, then you get home and scroll your phone for three hours while telling yourself you’re “decompressing.” That’s not decompression. That’s avoidance wearing a comfortable mask.

A real evening shutdown ritual does two things: it closes out the day’s open loops so your brain stops running background processes, and it sets up tomorrow so you wake up with a plan instead of anxiety. Here’s how to build one that actually works.

Why Your Brain Won’t Shut Off

There’s a reason you’re still mentally replaying that meeting at 11pm. Psychologists call it the Zeigarnik Effect — your brain fixates on incomplete tasks. Every open email, unfinished conversation, and half-baked plan becomes a mental thread your subconscious keeps pulling.

The fix isn’t “relax more.” The fix is closing the loops. When you write down what’s unfinished and what you’ll do about it tomorrow, your brain releases the thread. It trusts the system. That’s when real rest happens.

Cal Newport calls this a “shutdown complete” ritual. I call it the bare minimum for not being a wreck by Friday.

The 20-Minute Evening Shutdown

This isn’t an hour-long production. It’s 20 minutes between “done with work” and “actually off the clock.” Here’s the sequence:

1. The Brain Dump (5 minutes)

Grab a notebook — not your phone, not a laptop. Write down everything that’s still in your head:

  • Tasks that didn’t get done today
  • Things someone said that you’re still chewing on
  • Ideas that popped up during the day
  • Tomorrow’s non-negotiables (the 1-3 things that actually matter)

The goal isn’t organization. It’s extraction. Get it out of your skull and onto paper. You can organize tomorrow morning. Right now you’re just emptying the buffer.

2. The Work Shutdown (3 minutes)

Close every work-related tab, app, and notification. All of them. If you work from home, this is especially critical — you need a hard boundary between “work brain” and “rest brain.”

  • Close Slack, email, and project management tools
  • Put your work phone on Do Not Disturb (or leave it in another room)
  • If you share a workspace, physically leave the room

Say it out loud if you need to: “Shutdown complete.” It sounds ridiculous. It works. Your brain needs a signal that the work day is over.

3. The Physical Reset (7 minutes)

Your body has been in fight-or-flight mode all day. It needs a physical signal to switch gears. Pick one:

  • Walk. Even 10 minutes around the block. No podcast, no phone call. Just walk.
  • Stretch. 5-7 minutes of basic mobility work. Hips, shoulders, thoracic spine. Your desk posture is punishing you and you’re ignoring it.
  • Cold exposure. A 2-minute cold shower. Not because it’s trendy — because the parasympathetic nervous system response is real and immediate.

The point is movement. Not exercise, not a workout. Just enough physical engagement to tell your nervous system that the threat is over.

4. The Analog Wind-Down (5 minutes)

This is the part most people skip. They go from “shutdown” straight to Netflix or their phone. That’s not decompression — you’re just switching from one stream of stimulation to another.

The wind-down is analog on purpose:

  • Read a physical book (fiction is ideal — it gives your brain a different world to occupy)
  • Write in a journal — even three sentences about the day
  • Have an actual conversation with someone in your household. Not about logistics. About anything else.
  • Make something with your hands — cook, sketch, build something small

The screen will still be there in 30 minutes. Give your brain five minutes of genuine quiet first.

The Sleep Setup (Do This Before 9pm)

Your evening ritual isn’t just about mental health — it’s infrastructure for tomorrow’s performance. The last hour before bed sets your sleep quality, and sleep quality sets everything else.

  • Temperature: Set your bedroom to 65-68°F. Your body needs to drop core temperature to initiate sleep. A warm room fights this.
  • Light: Dim the overhead lights after 8pm. Blue light from screens suppresses melatonin production for up to 90 minutes after exposure. If you must use a screen, use night mode.
  • Caffeine cutoff: Caffeine has a half-life of 5-6 hours. That 3pm coffee is still 50% active in your bloodstream at 9pm. Move your cutoff to noon and watch what happens.
  • Lay out tomorrow’s gear: Clothes, gym bag, work bag. Removing decisions from the morning removes anxiety from the evening. You sleep better when tomorrow isn’t a mystery.

What This Looks Like in Practice

Sample evening timeline:

6:00pm — Walk in the door. Brain dump + work shutdown (8 min)

6:10pm — Change clothes, 5-min stretch or walk

6:20pm — Dinner / family time (screens away)

7:30pm — Free time (screen OK here — you’ve earned it)

8:30pm — Dim lights, prep tomorrow’s gear

9:00pm — Analog wind-down: read, journal, talk

9:30pm — Lights out

Will you follow this exactly? Probably not. That’s fine. The point isn’t perfection — it’s having a structure to fall back on. On your worst days, the structure carries you. On your best days, you don’t even notice it.

The Challenge

Tonight — not tomorrow, tonight — do the brain dump. That’s it. Five minutes with a pen and paper before you pick up your phone. Write down what’s unfinished and what matters tomorrow. Then close the notebook and see how different the next two hours feel.

If it works (and it will), add the work shutdown tomorrow. Build it one piece at a time. In a week, you’ll have the full ritual. In a month, you won’t remember how you lived without it.

You don’t need more willpower at the end of the day. You need a system that works because you’re out of willpower.

BaseCampGoods is about building the kind of man who’s ready — physically, mentally, and practically. No guru theater. Just systems that work.

Stop Buying Electrolyte Packets — Make Your Own for Pennies a Serving

You’re standing in the supplement aisle staring at a wall of brightly colored electrolyte packets — Liquid IV, LMNT, Drip Drop — each one promising to “optimize your hydration” for the low price of two bucks a serving. Maybe more.

Here’s the thing: you’re paying for marketing. The ingredients in those packets cost almost nothing. And once you understand what electrolytes actually are and what your body needs, you can mix your own at home in about 90 seconds for roughly 5 to 8 cents a serving.

This isn’t some weird biohacker trick. It’s basic chemistry that athletes, hikers, and field medics have used for decades. Let me show you exactly how to do it.

Why Electrolytes Matter (The 30-Second Version)

Your muscles, nerves, and heart run on electrical signals. Those signals depend on four key minerals dissolved in your blood and cells:

  • Sodium — the big one. You lose the most of this in sweat. Without enough, you cramp, get dizzy, and your performance tanks.
  • Potassium — works alongside sodium for muscle contraction and fluid balance.
  • Magnesium — involved in 300+ enzymatic reactions. Low magnesium means poor recovery, bad sleep, and muscle twitches.
  • Calcium — you get plenty from food. Not usually the one you need to supplement in a drink.

That’s it. That’s the formula those $2 packets are built around. Sodium, potassium, maybe some magnesium, and a sweetener to make it drinkable. You already have most of this in your kitchen.

The Base Recipe: Everyday Electrolyte Drink

This is your daily driver. Good for workouts, hot days, yard work, hiking — any time you’re sweating.

Per 32 oz (1 quart) of water:

  • ¼ teaspoon sea salt (about 575mg sodium)
  • ⅛ teaspoon salt substitute like Nu-Salt or Morton Lite Salt (about 350mg potassium)
  • 1 tablespoon honey or maple syrup (just enough glucose to aid absorption)
  • Juice of ½ lemon or lime (flavor + a little extra potassium)

Stir it up. That’s it. Total cost per serving: somewhere between a nickel and a dime, depending on what you already have on hand.

My honest take: Does it taste as good as a watermelon LMNT packet? No. It tastes like slightly salty lemonade. But you know what? It works exactly the same — arguably better, because you can dial in the ratios to YOUR sweat rate and YOUR activity level instead of trusting a one-size-fits-all packet designed for the average person who doesn’t exist.

Level Up: The Heavy Sweat Formula

If you’re training hard, working outside in Texas summer heat, or rucking under load, you need more. Here’s the stepped-up version:

Per 32 oz of water:

  • ½ teaspoon sea salt (~1,150mg sodium)
  • ¼ teaspoon salt substitute (~700mg potassium)
  • 1 tablespoon honey
  • Juice of 1 full lemon
  • Pinch of food-grade magnesium citrate powder (optional but recommended — about 200mg)

The magnesium is the one upgrade worth spending a few bucks on. A bag of magnesium citrate powder runs about $12-15 and will last you months. If you’ve ever had leg cramps at night after a hard day, low magnesium is almost always the culprit.

The Shelf-Stable Trail Mix: Make It in Bulk

This is where it gets really practical. You can pre-mix a dry electrolyte powder that stores indefinitely and goes anywhere — your pack, your truck, your go-bag.

Dry Mix (makes ~30 servings):

  • 2 tablespoons fine sea salt
  • 1 tablespoon salt substitute (potassium chloride)
  • 1 teaspoon magnesium citrate powder
  • 3 tablespoons sugar or powdered drink mix (optional — for flavor and glucose transport)

Mix it all together, store in a small mason jar or ziplock bag. One level teaspoon per 32 oz of water. Done. Throw a few single-serving baggies in your kit and you’ve got electrolytes for a week-long trip that weighs almost nothing and cost you about two dollars total.

If you want to get fancy with flavor, mix in powdered lemon juice or unsweetened Kool-Aid powder. Or just squeeze citrus at camp — it’s better fresh anyway.

The Math: How Much Are You Really Saving?

Let’s be real about this because I think the numbers speak for themselves:

Option Cost/Serving Cost/Month (1/day)
LMNT $1.75 – $2.00 $52 – $60
Liquid IV $1.25 – $1.50 $37 – $45
Drip Drop $1.00 – $1.25 $30 – $37
DIY Mix $0.05 – $0.08 $1.50 – $2.40

That’s roughly $500 to $700 per year back in your pocket if you’re a daily electrolyte user. And a lot of active people are — especially in the summer, especially if you’re training, working outdoors, or just trying to stay sharp.

When Commercial Packets Make Sense

I’m not going to pretend there’s zero reason to buy pre-made electrolyte mixes. Convenience is real. If you’re traveling and don’t want to carry a jar of salt mix through TSA, grab some packets. If you genuinely can’t stand the taste of the DIY version and it means you won’t drink it, then a packet you actually use beats a homemade mix you leave in the cabinet.

But for daily use at home, at the gym, or out in the field? Making your own is a no-brainer. You control the ingredients, you know exactly what’s in it (no maltodextrin, no “natural flavors,” no stevia aftertaste), and you save a stupid amount of money.

A Quick Word on “But Is Salt Bad for You?”

If you’re active, almost certainly not. The fear of sodium is based on studies of sedentary people eating processed food. If you’re sweating regularly — training, working outside, rucking — you’re losing 1,000-2,000mg of sodium per hour through sweat. You need to replace it. Under-hydration with electrolyte imbalance is a far more common problem for active people than too much salt.

That said, if you have a specific medical condition (kidney disease, hypertension managed with medication), talk to your doctor before significantly increasing sodium intake. Common sense applies.

Your Challenge This Week

Make one batch. That’s it. Mix up the base recipe before your next workout or your next day working outside. See how you feel compared to plain water. Most people notice the difference immediately — less fatigue, fewer cramps, better focus in the heat.

Then make the bulk dry mix and stash some in your gym bag, your truck, and your pack. Once you see how easy and cheap it is, you’ll never look at a $2 electrolyte packet the same way again.

The bottom line: Electrolytes aren’t complicated, and they don’t need to be expensive. Four ingredients, 90 seconds, pennies a serving. Stop paying the marketing tax. Your body doesn’t care about the packaging — it cares about the sodium, potassium, and magnesium. Give it what it needs.

Stop Waiting for Motivation: The 10-Minute Rule That Builds Real Discipline

Here’s the uncomfortable truth nobody in the fitness or preparedness space wants to say out loud: motivation is not coming to save you.

Not tomorrow. Not after you get the right gear. Not after you finish that book on mental toughness. Not after the new year, new month, or new moon.

Motivation is a guest that shows up uninvited, stays for twenty minutes, and leaves without cleaning up. If your training, your prep work, or your personal development depends on motivation, you’re building on sand.

But here’s what actually works. It’s stupid simple, and that’s exactly why most people ignore it.

The 10-Minute Rule

On any day you don’t feel like doing the work — training, rucking, meal prep, range time, whatever your thing is — you commit to doing exactly 10 minutes. That’s it. Not an hour. Not your full program. Ten minutes.

After 10 minutes, you have full permission to stop. Walk away. No guilt. No self-flagellation. You showed up, and that counts.

Here’s what actually happens about 80% of the time: you keep going.

The hardest part of any session isn’t the work itself. It’s the transition from “not doing it” to “doing it.” The 10-minute rule eliminates the mental negotiation that kills most people’s consistency. You’re not deciding whether to do the whole workout. You’re deciding whether you can handle 10 minutes. And you can always handle 10 minutes.

Why This Works (and Why “Just Push Through” Doesn’t)

The “just push through” crowd means well, but they’re giving advice that only works when you already have momentum. When you’re deep in a rut — overtired, stressed from work, dealing with life — white-knuckling through a full training session creates a negative association. Your brain starts filing “training” under “painful obligation” instead of “thing I do.”

The 10-minute rule works because it does three things simultaneously:

  1. It lowers the activation energy. Ten minutes is nothing. Your brain can’t manufacture a convincing excuse against ten minutes. “I’m too tired for ten minutes” sounds ridiculous even to your laziest self.
  2. It protects the streak. Consistency isn’t about intensity — it’s about frequency. A 10-minute session on a bad day protects the habit loop far more than a monster session followed by three days off.
  3. It builds identity, not just fitness. Every time you show up on a day you didn’t want to, you’re casting a vote for the person you’re becoming. Miss enough days and you start telling yourself “I’m the kind of person who skips.” Show up for 10 minutes and you’re still the kind of person who trains.

How to Actually Implement This

This isn’t theoretical. Here’s exactly how to set this up so it works on autopilot:

Step 1: Define Your Minimum Effective Sessions

Write down your 10-minute versions for each type of training or work you do. Be specific. “Work out” is not specific. Here are examples:

  • Strength: 3 sets of push-ups, 3 sets of squats, 2 sets of pull-ups. Done in 8–10 minutes.
  • Cardio/Rucking: Throw on your pack and walk for 10 minutes out, then turn around. That’s 20 minutes of rucking because you have to get back.
  • Mobility: 10 minutes of hip openers, shoulder dislocates, and thoracic spine work. Set a timer.
  • Skill work: 10 minutes of dry fire practice. 10 minutes of knot tying. 10 minutes reviewing your comms plan.
  • Prep work: Rotate one shelf of stored food. Inventory one first aid kit. Sharpen three knives.

The key: each of these is a complete, useful session on its own. You’re not doing a warm-up and then stopping. You’re doing a compressed version of the real work.

Step 2: Remove the Decision Point

The 10-minute rule only works if you’ve already decided when and where it happens. This is called an implementation intention, and the research on it is rock solid.

Don’t say: “I’ll work out sometime today.”
Say: “At 6 AM, I put on my shoes and start my minimum session. If I feel like doing more after 10 minutes, I do more. If not, I stop.”

The “putting on shoes” part matters. Attach the commitment to a physical action that’s brainlessly easy. Shoes on → timer starts → you’re in it.

Step 3: Track the Streaks, Not the Volume

Get a calendar. Paper. On the wall. Every day you do your minimum, you mark an X. That’s it.

Don’t track weight lifted. Don’t track miles run. Don’t track calories. Just track: did you show up?

After about two weeks, that chain of X’s becomes its own motivation. You won’t want to break it. This is the one time peer pressure works in your favor — except the peer is yesterday’s version of you.

The Days That Matter Most

I want to be real with you about something: the 10-minute days are more important than the great days.

Anyone can train hard when they’re fired up, well-rested, and the playlist is hitting right. That’s not discipline. That’s enthusiasm with a gym membership.

Discipline is the Tuesday when you slept four hours because the kid was sick, you’ve got a deadline at work, and your shoulder is tweaky. Discipline is doing your 10 minutes of mobility work on that Tuesday instead of nothing.

Those days are where the gap opens between people who are ready and people who talk about getting ready. Between people who are fit and people who used to be fit. Between people who have skills and people who bought a book about skills.

The 10-minute days are where you build the identity. The big days just add volume to it.

Common Objections (and Why They’re Wrong)

“10 minutes isn’t enough to make progress.”
Wrong. 10 minutes of bodyweight work, 5 days a week, is 50 minutes of training that wouldn’t have happened otherwise. Over a year, that’s 43+ hours. You will absolutely make progress in 43 hours. But more importantly, most of your 10-minute sessions will turn into 30- or 45-minute sessions once you get moving. The 10 minutes is the entry point, not the ceiling.

“This sounds like I’m going easy on myself.”
No. Going easy on yourself is skipping entirely and telling yourself you’ll make up for it tomorrow. The 10-minute rule is showing up every single day regardless of how you feel. There’s nothing easy about that.

“I need a real program, not this minimum viable stuff.”
You should absolutely have a real program. The 10-minute rule isn’t your program — it’s your floor. It’s what you do on the days your program feels impossible. The best program in the world is worthless if you only follow it when conditions are perfect.

Your Challenge This Week

Here’s what I want you to do — starting today, not Monday, not next week:

  1. Write down your 10-minute minimum sessions for the 2–3 things that matter most to you right now.
  2. Pick your trigger time and action (e.g., “6 AM, shoes on”).
  3. Put a calendar on the wall and commit to 7 straight days of X’s.
  4. After 10 minutes, check in with yourself. Want to keep going? Go. Want to stop? Stop — and feel zero guilt about it.

Seven days. That’s it. If this doesn’t shift something in how you approach your training and prep work, I’ll be genuinely surprised.

The Bottom Line: Discipline isn’t about doing hard things when you’re motivated. It’s about doing the minimum when you’re not. The 10-minute rule gives you a framework to show up every single day — and most of those days, you’ll end up doing a lot more than 10 minutes. Stop waiting to feel ready. Set a timer and start.

Stop Overpacking Your Truck: How to Build a Vehicle EDC Kit That Actually Gets Used

Here’s the pattern I see constantly: someone gets into preparedness, buys a massive tactical backpack, stuffs it with 40 pounds of gear, throws it behind the driver’s seat, and never touches it again. Six months later, the water’s expired, the batteries are dead, and they can’t find the one thing they actually need — a decent flashlight — because it’s buried under three MREs and a folding saw.

The problem isn’t the gear. It’s the approach. A vehicle EDC kit shouldn’t be a bug-out bag. It should be a curated, organized set of tools you actually reach for — on a regular Tuesday when you need to cut zip ties, charge a dead phone, or fix a flat in the dark.

Let me show you how to build one that works.

The Two-Tier System: Daily Reach vs. Emergency Backup

The key to a vehicle kit that actually gets used is splitting it into two layers:

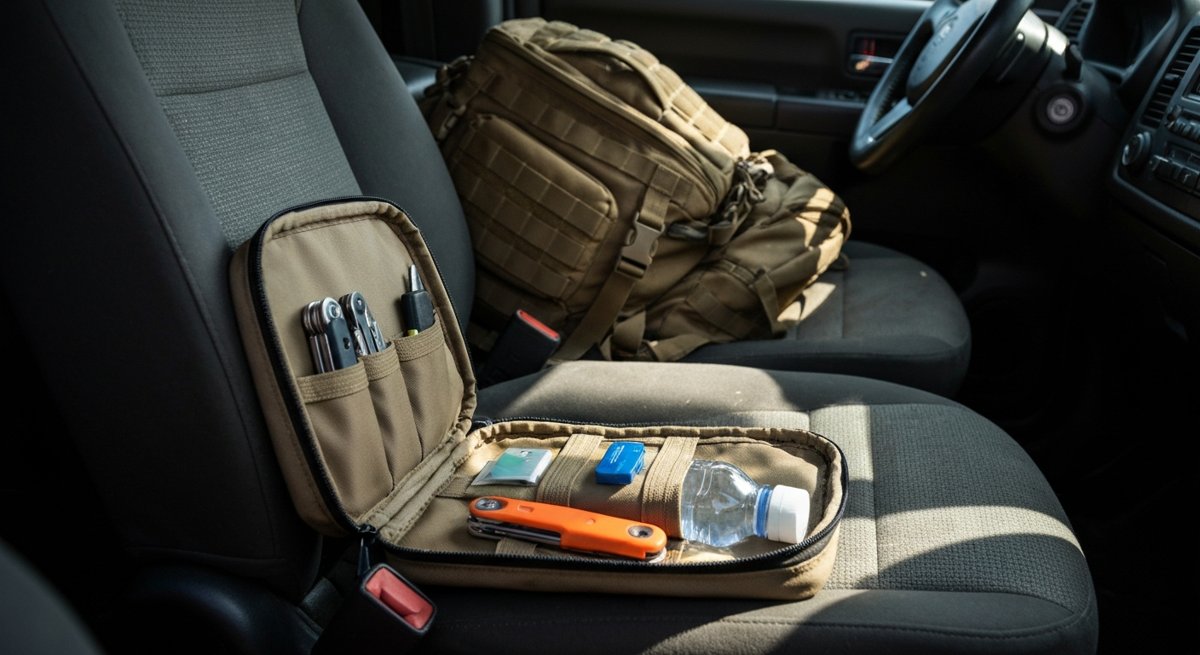
Tier 1 — The Daily Reach Pouch. This is small. Think organizer pouch or glove-box insert. These are the items you grab weekly or even daily. They live within arm’s reach — center console, door pocket, or glove box.

Tier 2 — The Trunk Kit. This is your emergency layer. It stays packed and organized in a rigid container in your trunk or truck bed. You touch it monthly to rotate water and check batteries, but when you need it, you know exactly where everything is.

This separation is everything. When your daily-use items are mixed in with emergency gear, you stop reaching for any of it.

Tier 1: Your Daily Reach Kit (6 Items Max)

Constraint is the point here. If it doesn’t fit in an organizer the size of a large paperback, you’re overpacking this tier. Here’s what earns a spot:

1. A quality folding knife. Not a $200 collector piece you’re afraid to use. A solid, mid-range folder with a 3–3.5 inch blade that you’ll actually pull out to cut cordage, open packages, or strip wire. I like the Civivi Elementum or Ontario RAT II for this role — under $50, great steel, zero guilt using them hard.

2. A compact flashlight (600+ lumens). Not the 3,000-lumen tactical cannon. A single-cell 18650 or even AA light that fits in your hand, throws enough light to check under the hood or illuminate a trail at night. The sweet spot is 600–1,000 lumens with a low moonlight mode. Charge it when you charge your phone — make it a habit.

3. A USB charging cable and small power bank. Boring? Sure. But when your phone dies at 4% and you need maps, this is worth more than your fixed-blade collection. A 10,000mAh bank is plenty — charges most phones twice. Keep it topped off.

4. A pen and waterproof notepad. You’ll use these more than you think. Jotting down license plates, notes, measurements, phone numbers when your hands are too dirty for a touchscreen. Fisher Space Pen is the gold standard, but any metal-body pen works.

5. A lighter. Even if you don’t smoke. A simple Bic lighter is the most reliable fire source ever made and costs a dollar. Toss one in the pouch and forget about it until you need it.

6. Cash. $40–60 in small bills. Folded flat in the pouch. When the card reader’s down, the power’s out, or you need to tip someone for a jump start, cash is king. Don’t overthink this — just put it in there.

Tier 2: The Trunk Emergency Kit

This lives in a rigid container — a small plastic tote or ammo can, not a soft bag. Why? Because in your trunk, soft bags get crushed, shift around, and lose their shape. A rigid box stays organized and stackable.

Here’s what goes in it:

  • Jumper cables or a lithium jump starter. The jump starter is better — it’s compact, works solo, and most double as a power bank. Worth the $60–80.
  • Basic first aid kit. Not a field surgery kit. Band-aids, gauze, medical tape, ibuprofen, antihistamines, and a tourniquet if you’ve trained with one. If you haven’t trained with a tourniquet, skip it — gear you can’t use is dead weight.
  • Two bottles of water. Rotate quarterly. Mark the date on the cap with a Sharpie.
  • A rain poncho. One of those $3 emergency ponchos, still in the wrapper. Takes up zero space and turns a miserable roadside tire change into a merely annoying one.
  • Work gloves. Mechanix or similar. Changing a tire, moving debris, handling broken glass — bare hands are a liability.
  • A multi-tool. This is where your Leatherman or Gerber lives. Pliers, screwdrivers, a blade — the multi-tool is for problems that need more than a folding knife.
  • Duct tape. Wrap 10 feet around an old gift card. Takes up almost no space, fixes almost anything temporarily.
  • Reflective triangle or road flares. If you’re stopped on the shoulder at night, visibility is survival. Non-negotiable.
  • A basic tow strap. 20-foot, 10,000lb rated. Not a bungee cord. Not a ratchet strap. An actual recovery strap. If you live anywhere with mud, snow, or ditches, this will save you a tow truck bill at least once.

The Part Everyone Skips: Maintenance

A kit you build and forget is a kit that fails when you need it. Set a quarterly reminder — first day of each season works great. Takes five minutes:

  1. Check water expiration. Replace if needed.
  2. Test the flashlight and jump starter. Charge both.
  3. Verify the power bank has charge.
  4. Check the first aid kit — anything used? Replace it.
  5. Cash still there? (Seriously. It walks.)

That’s it. Five checks, five minutes, four times a year.

What NOT to Put in Your Vehicle Kit

This is where I’ll get some pushback, but here’s my honest take on what doesn’t belong:

  • MREs or heavy food. They take up too much space, they’re affected by heat, and unless you’re driving through the Nevada desert for 12 hours, you don’t need them. A couple of granola bars in Tier 2 is fine. Anything more is cosplay.
  • Weapons beyond your folding knife. Your vehicle kit is for roadside problems and minor emergencies. If personal defense is a priority, that’s a separate, dedicated decision — not something to lump in with your jumper cables.
  • Survival blankets as your only warmth layer. Those crinkly mylar blankets are better than nothing, but only barely. If you live somewhere cold, keep an actual fleece blanket or jacket in the trunk. It doubles as a picnic blanket the other 11 months.
  • Anything you haven’t tested. That fire starter kit you bought? Have you used it? The water filter straw? Ever actually drunk through one? Don’t carry gear you can’t operate under stress. Period.

The Takeaway

The best vehicle EDC kit isn’t the biggest one. It’s the one you actually use, actually maintain, and can actually find things in when it’s dark, raining, and your hands are shaking.

Build it in two tiers. Keep the daily stuff within reach. Keep the emergency stuff organized in a rigid box. Review it quarterly. Done.

Your challenge this week: Pull everything out of your vehicle right now — glove box, center console, trunk, under the seats. Lay it all out. How much of it is actually useful? How much is junk drawer overflow? Rebuild it with intent. Two tiers. Six items max for Tier 1. One rigid box for Tier 2. Report back.

Door Security: 5 Cheap Upgrades That Stop 90% of Break-Ins

Here’s a stat that should bother you: according to FBI data, over 55% of residential burglaries happen through a door. Not a window. Not through some Mission Impossible ceiling vent. The front door. Sometimes the back door. Sometimes the garage entry door. But it’s almost always a door.

And here’s the kicker — most of those doors fail because of cheap hardware, bad installation, or things the homeowner could have fixed in an afternoon for under $100.

I’m not going to tell you to buy a $3,000 security system. I’m going to show you five upgrades you can do this weekend, most with a drill and a screwdriver, that will make your doors genuinely hard to kick in.

1. Replace Your Strike Plate Screws (Cost: $0–$5)

This is the single most important thing on this list, and it costs almost nothing.

Go look at your front door’s strike plate right now — that metal piece on the door frame where the deadbolt slides in. Pull it off. Look at the screws. I’ll bet you a six-pack they’re 3/4-inch screws that only grip the door jamb — a thin piece of pine that splits like kindling when someone puts a boot to it.

The fix: Replace those screws with 3-inch deck screws. That’s it. Three-inch screws pass through the jamb and bite into the structural framing (the jack stud) behind it. You’re going from a screw gripping half an inch of soft wood to one anchored in the actual structure of your house.

While you’re at it, do the same for your hinges. Most doors come with short hinge screws too. Replace at least one screw per hinge with a 3-inch screw. Now the entire door is anchored to the framing, not just hanging on the trim.

Time: 10 minutes. Difficulty: If you can use a drill, you can do this.

2. Install a Reinforced Strike Plate (Cost: $10–$25)

The stock strike plate that came with your door is a joke. It’s a small rectangle of thin metal held by those pathetic short screws we just talked about.

A reinforced strike plate is a heavy-gauge steel plate, usually 12 to 48 inches long, that distributes the force of a kick across a much larger area of the door frame. Brands like Door Armor, StrikeMaster II, and Prime-Line make versions you can find at any hardware store or online.

Why it matters: A standard deadbolt with a standard strike plate can be kicked in with about 100 pounds of force. With a reinforced plate and 3-inch screws, that number jumps to over 800 pounds. That’s the difference between one kick and “I’m going to find a different house.”

Time: 20 minutes. Difficulty: Easy — it’s just screws and a plate.

3. Add a Door Reinforcement Kit to Your Jamb (Cost: $50–$80)

If you want to go a step further — and I think you should, especially on your front and back doors — get a full door reinforcement kit. These typically include:

  • A full-length jamb reinforcement plate (covers the entire lock side of the frame)
  • Hinge reinforcement plates (wraps around each hinge)
  • A door edge shield (reinforces the area around the deadbolt on the door itself)

Brands like EverPlus, Defender Security, and Door Armor make kits that cover all three. They’re painted to match standard door colors, so they’re barely noticeable once installed.

My opinion: This is the best $60 you’ll spend on home security. Period. Better than cameras. Better than alarm stickers. A camera watches someone break in. A reinforced door stops them.

Time: 45 minutes per door. Difficulty: Moderate — you need to be comfortable with a drill and chisel.

4. Upgrade to a Grade 1 or Grade 2 Deadbolt (Cost: $30–$70)

Deadbolts are graded 1 through 3 by ANSI/BHMA standards. Most builder-grade deadbolts are Grade 3 — the lowest tier. They’re designed to meet building code minimums, not to actually resist forced entry.

What the grades mean:

  • Grade 3: Survives 2 strikes in cycle testing. The participation trophy of deadbolts.
  • Grade 2: Survives 4 strikes. Significantly stronger construction. Good for residential.
  • Grade 1: Survives 10 strikes. Commercial-grade. This is what you want if you’re serious.

Schlage B60N (Grade 1) runs about $40-50. That’s not a big investment for a lock that’s actually built to take a hit. Make sure the bolt throw is at least 1 inch — anything less and it’s not fully engaging the strike plate.

Time: 15 minutes if replacing an existing deadbolt. Difficulty: Easy swap.

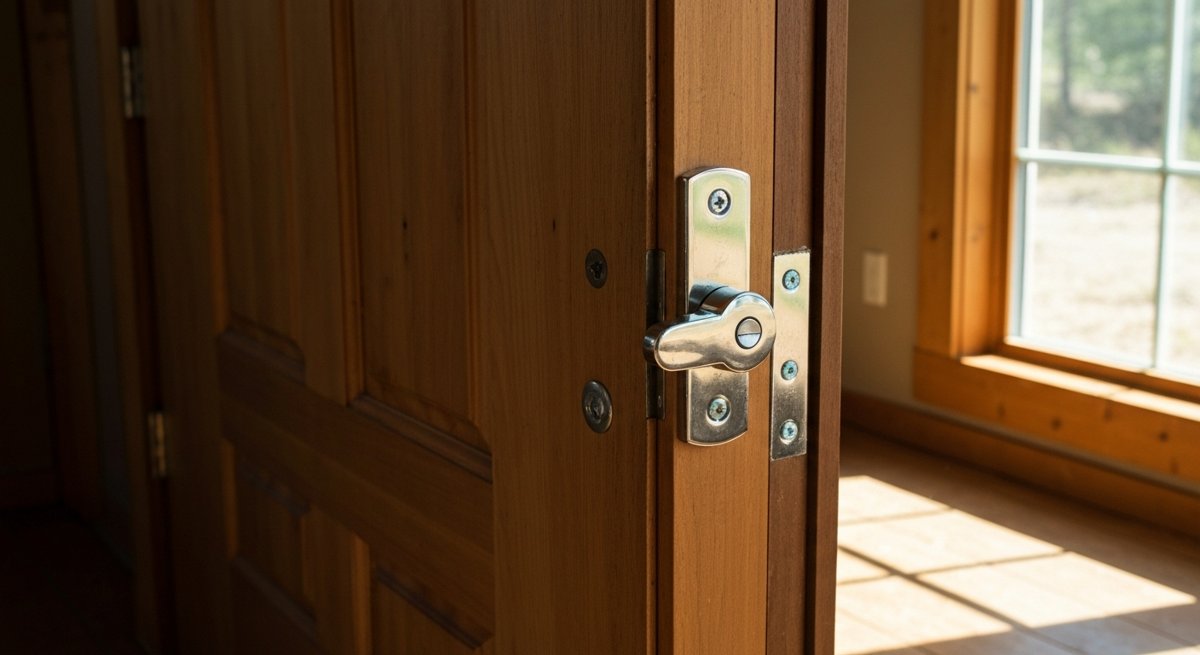
5. Don’t Forget the Sliding Door (Cost: $10–$30)

Sliding glass doors are a massive weak point that people consistently ignore. The factory latch on most sliders is basically decorative. Here’s what to do:

  • Drop a security bar in the track. A cut piece of broom handle works, but a purpose-built bar like the Master Lock 265D adjusts to fit and won’t roll out. $12.
  • Install anti-lift pins. Drill a small hole at a downward angle through the inside frame into the outside frame (when the door is closed). Drop a nail or pin in. This prevents someone from lifting the door off its track. $0.
  • Add a secondary foot lock. These screw into the bottom track and flip up to block the door from sliding. Cheap, effective, and adds a second point of resistance.

Time: 15 minutes. Difficulty: Dead simple.

The Uncomfortable Truth

Most burglaries are crimes of opportunity. The guy isn’t picking your lock. He’s not disabling your alarm. He’s kicking your door once, hard, and he’s in. The whole thing takes 10 seconds.

Every upgrade on this list makes that kick harder — or impossible. And the total cost for all five? Somewhere between $50 and $200 depending on how many doors you’re hardening. That’s less than one month of a monitored alarm service that does nothing to physically stop entry.

I’m not saying don’t get cameras or an alarm. I’m saying those are layer two. Layer one is making your doors actually hard to get through. Physical security first, electronic security second.

Your Weekend Challenge

Right now — today — go pull the strike plate off your front door and look at those screws. If they’re short, you know what to do. That one upgrade alone makes your door dramatically harder to force open, and it takes less time than scrolling through your phone.

Then work your way down this list. One door per weekend if you want to take it slow. By the end of the month, every entry point in your home will be genuinely hardened — not “security sticker” hardened, but actually hardened.

Stop decorating your doors with security theater. Reinforce them.