Safe Appetite Control: What Actually Works (Supplements, Strategies, and the Science)

Willpower is not your problem. If you’ve ever crushed a “clean” lunch and found yourself elbow-deep in a bag of chips 90 minutes later, you don’t have a character flaw — you have a biology problem. Hunger is driven by hormones, blood sugar, sleep, and what you ate last, not by how disciplined you feel. The good news: those are all levers you can pull. Here’s what actually moves the needle, and what’s just expensive urine.

First, Know What You’re Fighting

Two hormones run the show. Ghrelin is the “I’m hungry” signal — it spikes before meals and when you’re short on sleep. Leptin is the “I’m full, stop eating” signal. When you’re tired, stressed, or eating fast-digesting junk, ghrelin goes up and leptin gets ignored. That’s the whole game. Every real appetite strategy below works by turning ghrelin down or making leptin louder. Anything that doesn’t touch those levers is selling you a story.

The Three Things That Actually Work

1. Eat Protein First, and Eat Enough of It

Protein is the most filling macronutrient by a wide margin. It blunts ghrelin, slows digestion, and costs your body energy just to break down. The research is boringly consistent: front-load protein and you eat less for the rest of the day without trying. My rule of thumb — get 30–40 grams at breakfast. Not a granola bar. Eggs, Greek yogurt, cottage cheese, or a shake.

If mornings are chaos, a shake is the path of least resistance, and that’s the whole point — you want the easy choice to also be the right one. A scoop of Optimum Nutrition Gold Standard 100% Whey gets you ~24g in 30 seconds, and honestly it’s the whey I keep in my own cabinet because it actually mixes instead of clumping. Pair it with a BlenderBottle Classic V2 Shaker so there’s zero excuse on a busy morning. Opinion: protein powder is the single most useful “supplement” most people can buy, because it’s just food you were too busy to cook.

2. Add Volume With Fiber

Fiber fills your stomach, feeds your gut bacteria, and slows the sugar spike-and-crash that makes you hungry again an hour later. Most Americans get about half the fiber they should. Fix that with food first: beans, lentils, oats, berries, and a mountain of vegetables at every meal. Vegetables are the cheat code — they take up enormous stomach real estate for almost no calories.

If you want a supplement lever, psyllium husk or glucomannan (konjac fiber) both have real data behind them for appetite. Glucomannan absorbs water and expands in your stomach; taken with a big glass of water 20–30 minutes before a meal, it takes the edge off. It’s not magic — it’s a physics trick — but it’s a cheap, safe one. Just don’t expect a pill to outrun a bad diet.

3. Sleep, Because Tired People Eat More

This is the one nobody wants to hear. One bad night of sleep raises ghrelin, lowers leptin, and torpedoes your impulse control — studies consistently show sleep-deprived people eat 300–500 extra calories the next day and reach for junk, not broccoli. You cannot out-discipline a sleep deficit. If your appetite is out of control, audit your sleep before you buy a single supplement. Seven-plus hours does more for your waistline than any pill on this list.

The Free Habits That Punch Above Their Weight

  • Drink a glass of water first. Thirst masquerades as hunger constantly. Water before a meal also modestly reduces how much you eat. Cheapest tool you own.
  • Slow down. It takes ~20 minutes for fullness signals to reach your brain. Eat fast and you’ll blow past “full” before you feel it. Put the fork down between bites — sounds dumb, works.
  • Pause 10 minutes before a second helping. Most “I’m still hungry” moments evaporate if you just wait. If you’re still hungry after 10 minutes, eat — usually you won’t be.
  • Don’t drink your calories. Soda, juice, and sugary coffee drinks don’t trigger fullness at all. You’ll eat the same amount of food on top of them.

Supplements: What Has Data vs. What’s Snake Oil

Has real evidence: protein, soluble fiber (psyllium, glucomannan), and caffeine (a modest, short-term appetite suppressant — a black coffee before a meal is a legit tool). Berberine and blood-sugar-stabilizing approaches can help some people with cravings, but that’s a talk-to-your-doctor conversation, not a gas-station-pill one.

Save your money: garcinia cambogia, raspberry ketones, “fat burner” blends, and 90% of the stuff with a shirtless guy on the label. The research on them ranges from “underwhelming” to “flatly doesn’t work,” and some are just caffeine with a 400% markup. My honest take: if a product promises to “melt fat” or “crush cravings” with a proprietary blend, the only thing shrinking is your wallet.

And yes — the GLP-1 drugs (Ozempic, Wegovy, etc.) genuinely crush appetite by mimicking a fullness hormone. They work. But that’s a prescription and a doctor’s call, not a supplement, and they come with real trade-offs. Out of scope for a grocery-store fix.

Make the Right Choice the Default (Meal Prep)

Here’s the part that ties it all together: appetite control isn’t a moment of willpower, it’s a system you set up in advance. When there’s a protein-heavy meal ready to grab, you don’t negotiate with a vending machine. Prep hits your three levers at once — protein, fiber, and not-being-a-tired-hangry-mess at 6 p.m.

A dead-simple Sunday: cook a batch of chicken or ground beef, a pot of rice or beans, and roast two trays of vegetables. Portion it. Keep boiled eggs and Greek yogurt in the fridge for grab-and-go protein. Stash a shaker and a bag of whey at work. That’s it. You’ve now made the hungry-3-p.m. version of yourself choose between “good food that’s already here” and “nothing” — and that’s a fight future-you actually wins.

The Takeaway

Stop treating hunger like a willpower test you keep failing. It’s a system. Hit protein first, add fiber volume, protect your sleep, and set up your environment so the easy choice is the good one. Do that and “appetite control” stops being a daily battle and becomes background noise.

Your challenge this week: nail 30 grams of protein at breakfast, every single day, for seven days. Nothing else. Just that one lever. Then notice how much quieter your afternoon cravings get. If that’s the only thing you take from this post, it’ll still be the highest-leverage change most people can make.
How Much Protein Do You Actually Need? (It’s Less Than You Think)

Walk down any supplement aisle and you’d think protein is some rare, precious resource you have to chase with powders, bars, and “anabolic windows.” The industry has a vested interest in keeping you anxious about it. So let’s clear the smoke: most people need less protein than the internet screams about — but plenty of people still aren’t hitting that lower number either. Both things are true.

This is the no-BS breakdown of how much protein you actually need, where to get it, and which “rules” you can throw in the trash.

The Number, Stripped of Marketing

There are two numbers that matter, and they’re miles apart.

The survival minimum (RDA): 0.36 grams per pound of bodyweight. That’s the amount that keeps a sedentary adult from developing a deficiency. It is not the amount that builds muscle, keeps you full, or protects your strength as you age. Treating the RDA as a goal is like treating “not drowning” as a swimming workout.

The performance range: for anyone lifting, rucking, running, or trying to hold onto muscle past 40, the research lands at roughly 0.7 to 1.0 grams per pound of bodyweight per day. That’s the band where muscle protein synthesis is maxed out. Push past it and you’re not getting more muscle — you’re getting expensive pee.

Here’s the part nobody selling powder will tell you: a landmark meta-analysis found muscle gains plateau around 0.73 g/lb. Everything above that is insurance, not magic. The bodybuilder gospel of “1 gram per pound, minimum, no exceptions” is a safe over-estimate that became a religion.

Do the Math on Yourself (30 Seconds)

Take your bodyweight in pounds. Multiply by 0.7 for the floor and 1.0 for the ceiling. That’s your daily target range. A few real examples:

Bodyweight Floor (0.7g) Solid target (0.8g) Ceiling (1.0g)
140 lb 98 g 112 g 140 g
180 lb 126 g 144 g 180 g
220 lb 154 g 176 g 220 g

My honest take: aim for 0.8 g per pound and stop overthinking it. For a 180-pound guy that’s 144 grams. It’s enough to cover muscle-building with margin, but it’s not the punishing 180+ grams that has people choking down a fifth chicken breast at 9 p.m. wondering why they hate eating.

One asterisk: if you’re significantly overweight, run the math on your goal bodyweight or lean mass, not your scale weight — otherwise the number gets inflated for no reason.

Where It Should Come From: Food First

Whole food beats powder every time — it comes with iron, zinc, B12, and the satiety that keeps you from raiding the pantry at night. Here’s what real food actually delivers so you can stop guessing:

Food Serving Protein
Chicken breast 6 oz cooked ~52 g
Ground beef (90/10) 6 oz cooked ~46 g
Eggs 3 large ~18 g
Greek yogurt (plain) 1 cup ~23 g
Canned tuna 1 can ~27 g
Cottage cheese 1 cup ~24 g
Lentils (cooked) 1 cup ~18 g

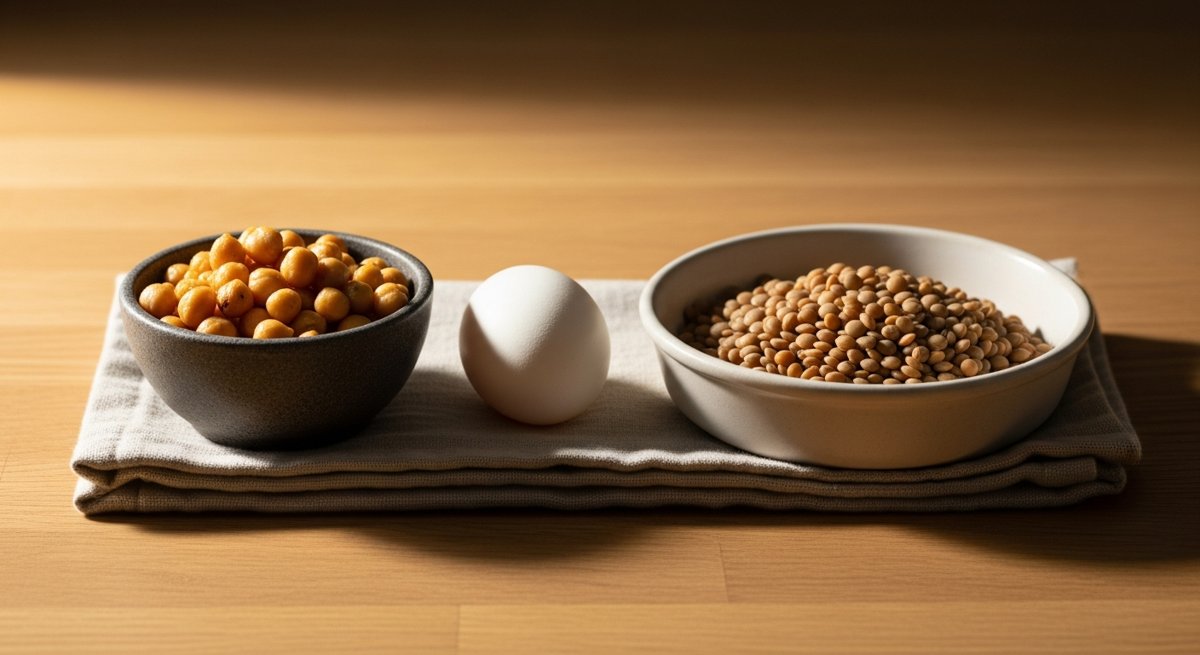
Look at that list and the target stops feeling intimidating. Three eggs at breakfast, a can of tuna at lunch, 6 oz of beef at dinner, and a cup of Greek yogurt for dessert is already ~115 grams — and that’s before counting the protein hiding in your bread, beans, and side dishes. Hitting your number is an assembly problem, not a heroic effort.

Myths Worth Killing

“Your body can only absorb 30g per meal.”

False, and it won’t die quietly. Your body absorbs essentially all the protein you eat; digestion just slows down to handle a bigger load. A 2023 study had people eat 100g of protein in one sitting and they used it just fine. Eat three big meals or six small ones — total daily intake is what moves the needle, not the per-meal accounting.

“You need protein within 30 minutes of training.”

The “anabolic window” is more like a garage door that’s open for hours. If you’ve eaten protein in the same general part of the day as your workout, you’re covered. Don’t sprint to your shaker bottle like the muscle is leaking out of you.

“More protein = more muscle.”

Only up to the ceiling. Past ~1g/lb, extra protein is just calories. If you want more muscle, the lever is training and total calories, not stacking another scoop.

When a Supplement Actually Earns Its Spot

I’m not anti-powder — I’m anti-relying on powder. Whey is a tool for one job: closing a gap you can’t close with food that day. Busy morning, no time to cook, 30 grams short before bed — that’s when a scoop makes sense. It’s convenient, cheap per gram, and digests fast.

If you want one that’s been the boring, reliable benchmark for two decades, Optimum Nutrition Gold Standard 100% Whey is the default for a reason — clean macros, mixes without clumping, and you’re not paying for a fancy label. Pair it with a BlenderBottle Classic V2 so “I didn’t have time” stops being an excuse. That’s the entire supplement conversation. You don’t need BCAAs, “test boosters,” or anything with a lightning bolt on the tub.

Worth the $12: a cheap digital kitchen scale will recalibrate your whole sense of portions. Most people think they’re eating 8 oz of chicken when it’s 4. Weigh your protein for one week and you’ll never need to weigh it again — your eyeballs get educated permanently.

A Day That Hits 144g Without Trying Hard

  • Breakfast: 3 eggs + 1 cup Greek yogurt → 41 g
  • Lunch: 1 can tuna + 1 cup cottage cheese → 51 g
  • Dinner: 6 oz ground beef + 1 cup lentils → 64 g

That’s 156 grams across three normal meals — no powder required, and you’ve got room to spare. Add a scoop of whey only on the days real food falls short.

The Takeaway

Stop chasing a number the supplement industry inflated to sell you more product, and stop ignoring protein entirely because it feels complicated. The truth sits in the boring middle: 0.8 grams per pound, mostly from whole food, total intake over timing. That’s it. That’s the whole game.

Your challenge this week: track your protein honestly for three days — weigh it if you can. Most people discover they’re 30 to 50 grams short and never knew it. Find your real number, then build a couple of go-to meals that get you there on autopilot. Do that and you’ve solved protein for good, no anxiety required.

The 20-Minute Kettlebell Complex That Replaces Your Entire Gym

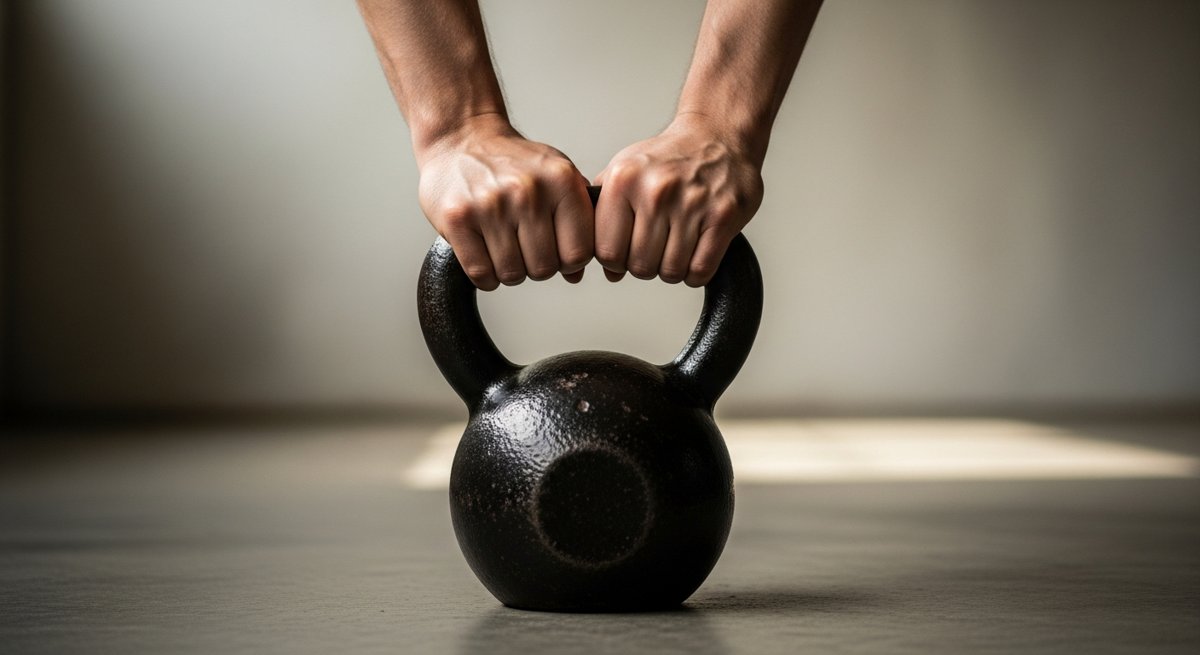
Here’s the pitch nobody in the fitness industry wants to make: you can build serious full-body strength and conditioning with one piece of equipment, in your garage, in 20 minutes. No squat rack. No membership. No drive. Just a hunk of cast iron with a handle.

The kettlebell complex is how you do it. And once it clicks, you’ll wonder why you ever paid $60 a month to wait for a bench.

What’s a “Complex,” and Why Should You Care?

A complex is a sequence of exercises you flow through back-to-back, without putting the bell down, for a set number of reps each. You do the whole chain, rest, repeat. Because you never set the weight down, your grip, core, and lungs get hammered while your muscles do the actual lifting. It’s strength and cardio in the same breath — which is exactly why it replaces about 80% of what most people do at a commercial gym.

I’ll be straight with you: this is harder than it looks on paper. The first time you string these together, a “light” bell will feel like it doubled in weight by round three. That’s the point. That’s the workout doing its job.

The One Piece of Gear You Need

You need exactly one kettlebell. Not a set. One. The trick is picking the right weight — heavy enough to challenge your strongest movement (the swing), light enough that you can still press it overhead without your form falling apart.

  • Most men: start at 16 kg (35 lb).
  • Most women: start at 8–12 kg (18–26 lb).
  • Already strong / lifting regularly: 20–24 kg.

Buy cast iron with a smooth, single-piece handle — no welds, no chrome that’ll chew up your hands during a swing. I’m partial to a solid cast-iron kettlebell from Power Systems; their gym-grade bells have the wide, comfortable handle that makes high-rep work bearable. If you want one bell to grow into, the Power Systems Elite Kettlebell is the kind of thing you buy once and hand down. Skip the adjustable plastic-shell ones — the balance is wrong and the handle’s too fat for cleans.

ShelleB’s honest take: Don’t overthink the brand. A 16 kg bell is a 16 kg bell. What matters is that you actually pick it up four times a week. The fanciest kettlebell in the world does nothing sitting in a closet.

The 20-Minute Complex

Here’s the whole workout. Five movements, done in order, without setting the bell down between them. This is one “ladder.” You’ll do it on each side.

The Sequence (per side)

  • 5× Clean — swing the bell up to the rack position (resting on your forearm at the shoulder).
  • 5× Front Squat — bell stays racked, you squat.
  • 5× Press — press the bell straight overhead.
  • 5× Reverse Lunge — bell still racked, step back into a lunge.
  • 5× Swing — finish by setting it down to two hands and swinging to chest height.

That’s 25 reps on the right, then immediately 25 on the left. Set the bell down. That’s one round. Rest 60–90 seconds. Repeat for as many rounds as you can hold good form inside 20 minutes — most people land between 4 and 7 rounds.

The non-negotiable: When your form breaks — back rounding on the swing, press turning into a heave — you stop. Quality over quantity, every single time. A sloppy round isn’t a bonus, it’s how you end up icing your shoulder for two weeks.

How to Actually Run It

Week 1–2: Learn the Moves

Forget the clock. Do the sequence slowly with a comfortable weight. Film yourself from the side on the swing and the press — those are where people get hurt. The swing is a hip hinge (think slamming a car door with your butt), not a squat or an arm raise. The bell floats up because your hips snap, not because your shoulders lift it.

Week 3–4: Add the Clock

Now set a 20-minute timer and count your rounds. Write the number down. That number is your benchmark — beating it is the entire game from here on out.

Week 5+: Progress

You progress one of three ways, in this order: more rounds in the 20 minutes, then shorter rest, then a heavier bell. When you can crank out 7+ clean rounds with short rest, it’s time to size up. This is why a single heavier bell eventually earns its place — but earn it first.

Why This Beats the Gym for Most People

  • Time. Door to done in 25 minutes including warm-up. No commute, no waiting on equipment.
  • Everything at once. Legs, back, shoulders, grip, core, and a brutal cardio effect — one tool, one session.
  • It travels. Throw the bell in the truck for a hunting camp or a job site. Try that with a leg-press machine.
  • It’s honest. You can’t half-ass a kettlebell complex. The bell tells you the truth about your conditioning real fast.

Is it a complete replacement for a powerlifter chasing a 500 lb deadlift? No. But for the 95% of us who want to be strong, lean, hard to kill, and useful — it’s more than enough. I’d argue it’s better, because the workout you do beats the perfect workout you skip.

Your Challenge This Week

Get one bell. Today if you can. Spend two sessions just learning the five moves — no clock, no ego. Then on session three, set the 20-minute timer and count your rounds. Write that number on the bell with a paint pen if you have to.

Four weeks from now, you’ll be doing more rounds, resting less, and looking at that commercial gym membership like the subscription you forgot you were paying for. Pick up the iron. Let’s go.

High-Protein Overnight Oats for People Who Think Overnight Oats Are Gross

Let me guess. Someone told you overnight oats were the answer to your rushed, sad weekday breakfasts. You dutifully mixed oats and milk in a jar, slept on it, and woke up to a cold, gray, gelatinous slurry that tasted like wet cardboard with a vague memory of cinnamon. You ate two bites, gagged, and went back to eating nothing until 11 a.m.

I get it. Most overnight oats are genuinely bad. They’re under-seasoned, under-protein’d, and the texture is an actual crime. But the concept is sound — a no-cook, grab-and-go breakfast you build five at a time on Sunday is exactly the kind of boring consistency that keeps your nutrition on the rails. The problem isn’t overnight oats. It’s that nobody told you how to make ones that don’t suck.

Why your overnight oats are gross (the four real problems)

Before recipes, you need to understand why the standard version fails. Fix these four things and everything downstream gets better:

  • Wrong oats. Quick oats turn to paste. Steel-cut stay raw and gritty (they don’t fully soften without heat). You want old-fashioned rolled oats — the big flat flakes. That’s the entire texture battle, right there.
  • No protein. A jar of oats and milk is maybe 10–12g of protein. That’s a snack, not a meal. You’ll be starving by 10. This is the single biggest reason people quit.
  • Too much liquid. A 1:1 oat-to-liquid ratio gives you soup. You want it thick enough to hold a spoon upright-ish.
  • No salt, no acid, no crunch. Every good dish has those. Oats made with just milk and sweetener are flat and one-note. A pinch of salt and a splash of something bright wakes the whole thing up.

The formula (memorize this, ditch the recipes)

Recipes make you dependent. A formula makes you free. Here’s the ratio that works every single time, scaled to one jar (use a wide-mouth pint mason jar — it’s the perfect size and you can eat straight out of it):

½ cup rolled oats + ½ cup milk + ¼ cup Greek yogurt + 1 scoop protein powder + 1 Tbsp chia seeds + a pinch of salt + flavor & toppings.

That’s it. Roughly 35–42g of protein, depending on your powder, and a texture that’s thick and creamy instead of gluey. Let’s break down why each piece is there, because once you understand the job each ingredient does, you can riff forever.

Greek yogurt + chia: the texture cheat code

This is the move nobody tells you. Plain milk-and-oats is loose and slimy. Add ¼ cup of plain Greek yogurt and the whole thing turns thick, tangy, and almost mousse-like. The chia seeds gel overnight and pull the texture together so it’s spoonable, not soupy. Skip these two and you’re back to slurry. Don’t skip them.

Protein powder: how to actually hit your numbers

One scoop of whey adds 24–25g of protein and does most of the flavoring work for you — a chocolate or vanilla whey basically turns the jar into dessert. I use Optimum Nutrition Gold Standard Whey because it mixes clean and a 5 lb tub lasts forever, which matters when you’re making five jars a week. Here’s the catch: whey thickens overnight and can go pasty if you dump it straight in. The fix is to mix the powder into the milk first — a BlenderBottle Classic V2 shaker bottle does this in ten seconds — then pour the milk over the oats. Smooth every time.

If you don’t tolerate whey, a casein or plant blend works and actually stays thicker. And if you’re already taking creatine monohydrate, the jar is a perfect place to stir in your daily 5g — it’s flavorless and you’ll never forget a dose.

Three jars that don’t taste like wallpaper paste

Build any of these on the formula above. Add the flavor ingredients with everything else, stir, lid, fridge. Toppings that should stay crunchy (nuts, granola) go on in the morning, not the night before.

1. Peanut Butter Cup

  • Chocolate protein powder + 1 Tbsp real peanut butter + pinch of salt
  • Morning topping: a few dark chocolate chips and chopped peanuts
  • Tastes like dessert, hits ~40g protein. This is the gateway jar — make this one first.

2. Apple Pie

  • Vanilla protein + ½ grated apple + ½ tsp cinnamon + tiny pinch of salt
  • Morning topping: chopped walnuts and a drizzle of maple
  • The grated apple melts in and sweetens it naturally. The acid from the apple is what keeps it from tasting flat.

3. PB&J / Berry Blast

  • Vanilla protein + ½ cup frozen mixed berries (they thaw and release juice overnight — built-in flavor) + pinch of salt
  • Morning topping: a spoon of yogurt and a few fresh berries
  • The berries do double duty: sweetener and that bright acid note. Easily my favorite for summer.

The Sunday workflow: five jars in ten minutes

This is where overnight oats actually earn their keep. Don’t make one jar at a time like a chump — batch the whole week:

  • Line up five wide-mouth pint jars. Dry stuff first, assembly-line style: oats, chia, salt, and protein powder into each.
  • Shake your milk + any extra protein in the shaker bottle, pour into each jar to the same line.
  • Spoon in the yogurt, add each jar’s flavor (berries, apple, PB), stir each one, lid, done.
  • They keep 4–5 days in the fridge, so Sunday covers you through Thursday. Make Friday’s fresh or just have eggs.
  • Keep crunchy toppings in a separate little container or just add them at your desk. Soggy granola is sad granola.

Total active time once you’ve got the rhythm: about ten minutes. That’s ten minutes on Sunday for five high-protein breakfasts you don’t have to think about. Compare that to the daily “what do I eat / screw it, nothing” spiral and it’s not close.

The honest caveats

I’m not going to pretend this is magic. Two things to know:

  • Cold breakfast isn’t for everyone. If you genuinely hate cold food in the morning, microwave the jar for 60–90 seconds — it becomes warm protein oatmeal and it’s great. Pull the fresh-fruit toppings off first.
  • Watch the calories if fat loss is the goal. Peanut butter, granola, and maple add up fast. The base jar is lean and high-protein; the toppings are where it can balloon to 600+ calories. Measure them, don’t eyeball.

Your challenge

This Sunday, make three jars — not five, just three, so the bar is stupidly low. Use the Peanut Butter Cup recipe because it’s the most forgiving and the hardest to dislike. Mix your protein into the milk first, use rolled oats, don’t forget the pinch of salt. Eat one Monday, one Tuesday, one Wednesday.

If you still think overnight oats are gross after that, fine — you gave it an honest shot with the texture and protein actually dialed in, and you can go back to skipping breakfast with my blessing. But I’d put money on you making five jars next week. Report back.

The Running Gear That’s Worth It (And the Stuff That’s Not)

This is the last stop in our Foot Mechanics series. We started by waking up your weak feet, sorted out what actually matters in a running shoe, got you back on the road without wrecking your knees, and covered recovery from the ground up. Now let’s talk money.

The running industry is a machine built to separate you from your paycheck. Walk into any specialty store and you’ll get sold $300 shoes, a $400 watch, compression sleeves for body parts you didn’t know could be compressed, and a “recovery system” that costs more than your monthly rent. Most of it is junk. Some of it is genuinely worth it. Here’s the honest breakdown — what I’d actually buy with my own money, and what I’d walk right past.

Worth Every Penny

1. Good Shoes (the right ones for YOUR feet)

If you spend money on one thing, spend it here. Not because expensive equals better — it doesn’t — but because the wrong shoe is the fastest path to an injury that sidelines you for months. We covered the zero-drop vs. cushioned debate and the transition plan already, so I won’t repeat it. The takeaway: get fitted, buy what feels right on your foot, and replace them around 400–500 miles. A worn-out shoe is worse than no shoe.

2. Real Running Socks

This is the most underrated $15 you’ll ever spend. Cotton socks hold moisture, bunch up, and shred your feet into a blister farm. A proper merino or synthetic running sock wicks sweat, doesn’t slide, and lasts for years. I run in Darn Tough (lifetime warranty, made in Vermont, basically indestructible) and Balega Hidden Comfort for longer stuff. Buy three pairs and you’ll never go back. Genuinely a bigger comfort upgrade than most people’s shoe purchase.

3. A Basic GPS Watch

Note the word basic. You do not need the $700 multisport flagship with topo maps and a titanium bezel. You need something that tracks pace, distance, and heart rate so you can actually follow a plan instead of guessing. A Garmin Forerunner 55 or a Coros Pace 3 does everything 95% of runners will ever need for around $150–230. The data keeps you honest: it stops you from going too hard on easy days, which is the #1 mistake new runners make. Your phone in an armband works too if you’re broke — no shame in that.

4. A Foam Roller

Recovery isn’t optional, and a foam roller is the cheapest, most effective recovery tool there is. Ten minutes after a hard run loosens up your calves, IT band, and quads so you’re not hobbling the next morning. I use the TriggerPoint GRID — it’s firm, it’s lasted me years, and the textured surface actually digs in. If you want a commercial-grade option or you’re kitting out a home gym, Power Systems carries a high-density foam roller and trigger-point tools that hold up to daily abuse. Either way, get one. Your future self thanks you.

5. A Way to Carry Water (for anything over an hour)

For short runs, drink before and after and don’t overthink it. But once you’re going over 60–75 minutes, especially in heat, you need water on you. A handheld bottle or a simple hydration belt does the job. Keep a wide-mouth bottle like the Nalgene 32 oz by the door to pre-hydrate and refill — boring, cheap, indestructible, and it’ll outlive your car.

Save Your Money

Compression Everything

Compression socks and sleeves have a tiny bit of evidence behind them for recovery and swelling on long-haul flights or for specific medical issues. As performance gear for the average runner? The benefit is mostly in your head. If wearing them makes you feel fast, fine — but don’t believe they’re shaving minutes off your time.

$1,000 Recovery Boots

Those pneumatic compression boots the influencers wear on the couch? Cool tech. Wildly overpriced for what they do. A foam roller and a good night’s sleep deliver 90% of the benefit for 3% of the cost. Unless you’re putting in elite mileage, this is pure status spending.

Carbon-Plated “Super Shoes” (for beginners)

The $250+ carbon-plated racers are real — they genuinely make fast people faster. But if you’re new, they’ll do nothing but drain your wallet and possibly mess with your form. Earn the fast shoes. Build your base first.

Smart Water Bottles & Gimmick Gadgets

A water bottle that reminds you to drink via Bluetooth is a solution to a problem that doesn’t exist. Same with most app-connected gadgets. If it needs charging to hold water, walk away.

Motion-Control / “Stability” Shoes You Don’t Need

Stores love to upsell heavily structured “stability” shoes to anyone whose arch looks slightly flat. For most people this is unnecessary and can actually keep your feet weak — the exact opposite of what part one of this series was about. Strengthen the foot, don’t cast it in a brace.

The “Depends on You” Pile

Headlamp: non-negotiable if you run before dawn or after dark, useless if you don’t. Anti-chafe balm (Body Glide and friends): a lifesaver on long runs and in summer, irrelevant for a quick 20 minutes. Running vest: great once you’re doing trail or ultra distances, overkill for the neighborhood loop. Buy these when the problem shows up, not before.

The Bottom Line

Here’s the whole series in one sentence: your body is the equipment, the gear just supports it. The runner in a $40 pair of shoes and good socks who shows up four days a week will smoke the gadget collector every single time. Spend on the few things that prevent injury and keep you consistent — shoes, socks, a roller, a basic watch — and ignore the rest until you’ve earned the right to care about it.

Your challenge: Audit your running drawer this week. Pull out everything you bought and never use, and be honest about why. Then put that money toward the two things that matter most — a sock upgrade and a foam roller — and go run. That’s the whole game.

Recovery From the Ground Up: What Your Feet Actually Need After Hard Days

You stretch your hamstrings. You foam roll your back. You ice your knees. And then you cram the two most abused structures in your body — your feet — back into shoes and forget about them until the next hard day. That’s backwards. Your feet take roughly the impact of your bodyweight a few thousand times every mile, and they’re the foundation everything else stands on. Recover them properly and your knees, hips, and lower back all thank you. Ignore them and you’re building recovery on a cracked slab.

This is Part 5 of the Foot Mechanics series. We’ve talked about why your feet got weak, how to transition to less shoe, and how to come back to running without wrecking your knees. Now let’s talk about the part everybody skips: what your feet actually need after the work is done.

Why Your Feet Need Active Recovery (Not Just Rest)

Here’s the thing nobody tells you: your feet have 26 bones, 33 joints, and over 100 muscles, tendons, and ligaments crammed into a space the size of a paperback. After a long ruck, a hard run, or eight hours on concrete, all that tissue is jammed up, the small intrinsic muscles are fatigued, and the plantar fascia — the thick band of connective tissue along the bottom of your foot — is tight and irritated.

Passive rest helps, but it’s slow. Active recovery — deliberately mobilizing, releasing, and stretching the tissue — flushes blood through the area, breaks up adhesions, and resets resting muscle tone so you wake up loose instead of stiff. My honest opinion after years of this: ten minutes of foot work beats an hour on the couch every single time. It’s the highest return-on-time recovery move there is, and almost nobody does it.

Step 1: Roll the Bottom of Your Foot

Start where the abuse lands hardest — the sole. Grab a firm ball (a lacrosse ball is the gold standard; a golf ball if you want it more aggressive), put it under your bare foot, and roll slowly from heel to the ball of the foot for 60-90 seconds per side. Stand for more pressure, sit for less. When you hit a knot, park on it and breathe for a few seconds until it releases.

This single move is the best thing you can do for tight, achy arches and early plantar fasciitis. A dedicated massage ball holds up better than a golf ball and won’t roll away on you — Power Systems’ foam roller and massage ball collection has lacrosse balls, textured myo-release balls, and trigger-point tools in the $4-15 range. Cheap insurance for your feet.

Pro move: keep a ball in the freezer. Rolling with a frozen ball after a brutal day gives you the massage and the ice in one shot, which is exactly what an inflamed plantar fascia wants.

Step 2: Work the Calves and Lower Legs

Your feet don’t operate alone. Tight calves pull on the heel and load the plantar fascia, so foot recovery that ignores the lower leg is half a job. Drop onto a foam roller and work the calf from the achilles up to behind the knee — 30-45 seconds each side, then turn the leg slightly in and out to hit the inner and outer heads. Add the shins (the front) if you’re a runner; tight tibialis muscles are a quiet cause of shin splints.

A firm grid-pattern roller digs in better than the soft cylinders. The TriggerPoint GRID Foam Roller, 13-Inch, Black is the one I keep recommending — it’s compact enough to throw in a gym bag and firm enough to actually do something. Follow the rolling with a wall calf stretch: hands on the wall, one leg back, heel down, lean in for 30 seconds, then bend the back knee to shift the stretch into the lower calf and achilles.

Step 3: Mobilize the Toes and Ankles

Shoes hold your toes in a coffin all day. Recovery is when you give them room to move again. Three drills, no equipment:

  • Toe spreads: sit barefoot and actively splay your toes apart, hold 2 seconds, release. 20 reps. If they won’t move independently, weave your fingers between them and stretch them manually first.
  • Ankle circles: 15 slow circles each direction, each foot. Boring, but it restores the rotation your stiff ankles lost.
  • Big-toe pulls: grab your big toe and gently pull it back toward your shin, then point it down. This restores the toe extension you need for a normal push-off and walking gait.

Step 4: Strengthen What You Just Loosened

Recovery isn’t only about releasing tissue — it’s the perfect window to fire up the small muscles that keep your arch from collapsing. Two of my favorites:

  • Towel scrunches: lay a towel flat on the floor, plant your heel, and use your toes to drag the towel toward you. 2-3 rounds. You’ll feel muscles in your arch you forgot you had.
  • Banded foot work: loop a resistance band around your forefoot and work ankle flexion, extension, and side-to-side. Cheap, packable, and brutal in the best way. A set like the Fit Simplify Resistance Loop Exercise Bands, Set of 5 covers feet, ankles, hips — the whole lower-body chain — for the price of a sandwich.

Don’t overthink the load. The intrinsic foot muscles respond to frequency, not heroics. A little, often, beats a once-a-week beatdown.

Step 5: What You Put on Your Feet After Counts Too

Two ways to win here. First, go barefoot around the house for 20-30 minutes post-workout — let the foot articulate, splay, and grip on the floor the way it was built to. That barefoot time is recovery.

The Big Guns: Contrast, Elevation, and Salt

For genuinely thrashed feet — marathon, all-day ruck, double shift — pull out the extras:

  • Contrast soak: alternate 1 minute hot, 1 minute cold, 3-4 rounds, end on cold. The vascular pumping flushes swelling better than ice alone.
  • Elevation: 10 minutes with your feet above your heart. Gravity does the de-swelling for free.
  • Epsom salt soak: the science on magnesium absorption is thin, but a warm soak relaxes the tissue and feels like a reward. That’s enough reason.

Your 8-Minute Daily Foot Recovery Protocol

Do this every night, barefoot, before bed:

  1. Roll each sole with a ball — 60 sec/side
  2. Foam roll calves — 45 sec/side
  3. Wall calf stretch — 30 sec/side (straight + bent knee)
  4. Toe spreads — 20 reps
  5. Towel scrunches — 2 rounds
  6. Ankle circles — 15 each direction

That’s it. Eight minutes. Do it for two weeks and your feet will feel like a different set of equipment.

The Takeaway

Your feet are the only part of your body in contact with the ground, and they’re almost always the most neglected link in your recovery chain. You don’t need a fancy boot or a $600 massage gun. You need a firm ball, a foam roller, a band, and eight honest minutes a night.

The challenge: run the 8-minute protocol every night for the next 14 days. No skipping. At the end, stand up first thing in the morning and notice how your first ten steps feel compared to today. That difference is the whole point — recovery built from the ground up.

Zero Drop, Minimalist, Maximalist — What Actually Matters in a Running Shoe

Walk into any running store and you’ll get hit with three religions: zero-drop minimalists who think cushioning is the devil, max-stack pillow lovers who can’t fathom feeling the ground, and the marketing folks in the middle selling you whatever’s on the wall. All three will tell you they have the answer. None of them are asking the right question.

The right question isn’t “what’s the best running shoe?” It’s “what do my feet actually need to do their job?” Because here’s the secret nobody selling shoes wants you to hear: the shoe is just a tool. Some tools fix problems. Some tools cause them. Most do both — depending on the foot inside.

This is Part 2 of our Foot Mechanics series. If you missed Part 1 on why your feet are weak, go read that first. This post is about the shoe itself: what the buzzwords mean, what actually matters, and how to pick something that helps you instead of hurting you.

The Three Camps (And What They Get Right and Wrong)

1. Minimalist / Zero-Drop

Heel and forefoot are the same height. Stack height (the foam under your foot) is low — usually 0-12mm. Wide toe box. Flexible sole. Think Altra, Vivobarefoot, Xero, and the original Vibram FiveFingers.

What they get right: Your foot has 26 bones, 33 joints, and over 100 muscles, tendons, and ligaments. It’s designed to move, splay, sense the ground, and absorb shock through that whole chain. Pile a 35mm slab of foam under it and you turn that sensory miracle into a numb stump. Zero-drop and wide toe boxes let the foot work like a foot.

Where they go wrong: Most people coming out of decades in cushioned shoes have weak feet, short calves, and tight Achilles tendons. If you jump straight from a 12mm-drop trainer into zero-drop, you will get hurt. The shoe didn’t break you — the mismatch between your tissues and the demand did. (We cover the transition plan in Part 4.)

2. Maximalist / High-Stack Cushion

Big foam stacks (30-50mm), often with a moderate to high heel-to-toe drop (8-12mm), and increasingly with a carbon plate in the midsole. Hoka built an empire on this. Nike Vaporfly turned it into a marathon-record-breaking weapon.

What they get right: For high-mileage road runners and people with cranky joints, that stack absorbs an absurd amount of impact. Carbon plates genuinely improve running economy — the science is real, not marketing. If your job is to grind out 50+ miles a week on concrete, maximalist shoes can keep you in the game.

Where they go wrong: All that foam between you and the ground kills proprioception — your foot’s ability to feel and react to the surface. Studies have shown that maximalist shoes can actually increase impact forces because you land harder when you can’t feel what you’re landing on. They also lock the foot in a rigid platform, so the intrinsic foot muscles atrophy. You become dependent on the shoe to do work your foot used to do.

3. Traditional Trainers

The middle of the road. Moderate stack (20-28mm), 8-10mm drop, some structure, some cushioning. Brooks Ghost, Asics Gel-Nimbus, Saucony Ride, the whole running-store wall.

What they get right: Nothing extreme. For a recreational runner doing 15-25 miles a week, they’re fine. They won’t fix your feet, but they probably won’t actively destroy them either.

Where they go wrong: They’re a compromise that doesn’t really commit to anything. Enough heel lift to keep your calves short. Enough cushioning to dampen your foot’s signal. Not enough to actually carry the load if you’re a heavy mileage runner. They’re the Toyota Camry of footwear — and that’s not always a compliment.

What Actually Matters (The Five Variables)

Forget the marketing categories. Here are the five things that actually change how a shoe interacts with your body.

Variable What It Means Why It Matters
Heel-to-toe drop The height difference between heel and forefoot (in mm) Higher drop = more pressure on the forefoot/knees, shortens calves over time. Lower drop = more demand on calves/Achilles but a more natural foot strike.
Stack height Total foam under your foot More stack = more impact absorption but less ground feel. Less stack = better proprioception but more honest about your form.
Toe box width How much room your toes have to splay Narrow boxes cause bunions, neuromas, and weak intrinsic muscles. Wide boxes let your foot work as a stable platform.
Flexibility Can you bend the shoe? Twist it? Stiff shoes lock the foot in place. Flexible shoes let the 33 joints in your foot actually move.
Weight Grams per shoe Heavier shoes = more energy cost per stride. For long days on feet, this compounds.

Notice “cushioning” isn’t on the list as a single variable. That’s because cushioning is the combination of stack height, foam density, and your weight. A 30mm stack of soft EVA foam feels nothing like a 30mm stack of dense PEBA. The number on the box doesn’t tell you what you’ll feel.

My Honest Opinion (Take It or Leave It)

Most adults benefit from a wide toe box and a moderately low drop (0-6mm). The maximum stack height should be set by what you’re doing and how much your tissues can currently handle — not by what’s trendy.

Here’s why: the toe box thing is non-negotiable. Squeezing your toes into a point for 8 hours a day in dress shoes and another 90 minutes in narrow running shoes is why half of America has hammertoes, bunions, and chronic plantar fasciitis. Wide toe boxes aren’t a preference. They’re an anatomical baseline.

Low drop matters because every millimeter of heel lift puts you in a slight forward lean, which shortens your calves and Achilles, loads your knees, and changes how your hips fire. You can get away with it for a while. You don’t get away with it forever.

But stack height? That depends on context. I run a hard surface long run in a moderately cushioned shoe. I do strength work and short runs barefoot or in something flat and flexible. I hike in something with grip and a wider platform but not a pillow. The shoe should match the demand.

How to Pick a Shoe Without Getting Conned

Walk into the store with this checklist. Ignore everything else.

  1. Try them on at the end of the day. Feet swell. A shoe that fits at 9 AM will be tight at 6 PM after a long run.
  2. Trace your foot on paper. Trace the shoe insole. Compare. The insole should be wider than your foot at the widest point — that’s your toe splay zone. If your foot is wider than the insole, the shoe is too narrow. Period.
  3. Flex test. Hold the heel, push the toe. The shoe should bend at the ball of the foot, where your foot bends — not in the middle of the arch.
  4. Twist test. Wring the shoe like a wet towel. Some give is good. A shoe that resists like a 2×4 will fight your foot’s natural motion.
  5. Check the drop on the spec sheet. Stores hide this. Look it up before you buy. Anything over 10mm should be a deliberate choice, not a default.
  6. Walk and jog around the store. If something feels weird in 2 minutes, it’ll feel terrible at mile 6.

The most expensive shoe in the store is not the best shoe for your foot. It’s the best shoe for the store’s margin. Don’t confuse the two.

What About the Carbon Plates Everyone’s Wearing?

Quick reality check. Carbon-plated super shoes (Vaporfly, Alphafly, Adios Pro, Endorphin Pro, etc.) are real. They make you 2-4% more efficient at race pace. For a sub-3-hour marathoner, that’s 5+ minutes. For a 4:30 marathoner, that’s also real time.

But: they’re race-day tools, not training tools. The plate locks your foot in a fixed-shape rocker. Train in them every day and you’ll get the same atrophy problem we talked about above — plus they break down fast (200-300 miles) and cost $250+. Use them for the workouts that matter. Train in something honest.

The Three-Shoe Rotation I Actually Recommend

If you’re a serious recreational runner — say, 20+ miles a week — here’s the setup that gives you the best of every camp without the downsides of any.

  1. A daily trainer with moderate cushion and a 4-8mm drop. This is your bread and butter. 60-70% of your miles. Brooks Glycerin, Saucony Ride, New Balance 880 territory.
  2. A minimalist or zero-drop shoe for short easy runs and strength work. Altra Escalante, Vivobarefoot Primus, Xero HFS. 20-30% of your miles. This keeps your feet strong.
  3. A “fast day” shoe — could be a super shoe or just a snappier, lighter trainer. Used for tempo runs, intervals, and races. 10-20% of your miles.

Rotating shoes isn’t just about variety — it’s about loading your tissues in different patterns so no single repetitive stress wears out one structure. Multiple studies have shown rotation reduces injury rate by 30-40%. It’s not a luxury. It’s a strategy.

The TL;DR

  • Wide toe box always. Non-negotiable. Your foot needs to splay.
  • Lower drop (0-8mm) for most people, most of the time. Long-term, your calves and knees will thank you.
  • Stack height depends on the job. Race day pillows, training day honesty.
  • Carbon plates are a tool, not a lifestyle. Use them for races, not for groceries.
  • Rotate. Two or three shoes for different jobs beats one shoe doing everything.
  • Don’t transition fast. Going from a 12mm-drop maximalist to a zero-drop minimalist in one week is how you get plantar fasciitis. Take 8-12 weeks. (Again: Part 4 walks you through this.)

This Week’s Challenge

Pull out every pair of shoes you own — dress shoes, running shoes, sneakers, boots. Trace your bare foot on a piece of paper. Now trace the insole of each shoe. How many of them are actually wider than your foot at the toes? If the answer is “none” or “one,” you just diagnosed a foot health problem you didn’t know you had. Fix that first. The right shoe matters more than the right training plan.

Next up in the series: Part 5 — Recovery From the Ground Up: What Your Feet Need After Hard Days. Because picking the right training shoe is half the battle. What you do with your feet after the run is the other half.

How to Start Running Again Without Destroying Your Knees: A 12-Week Comeback Plan

This is Part 3 of the Foot Mechanics series. Part 1 covered why your feet are weak. Today: how to actually start running again without wrecking yourself in the first month.

The Truth Nobody Tells You About “Just Going for a Run”

Here’s the thing nobody warns you about when you decide to “get back into running”: your cardiovascular system recovers faster than your tendons. Your lungs and heart will feel ready around week three. Your Achilles, your patellar tendon, your shins, and the connective tissue in your knees? Those things adapt on a timeline measured in months, not weeks.

This mismatch is exactly why so many comeback runners end up in a boot at week six. They feel good, so they push. The engine can handle it. The chassis can’t.

If you’ve been sedentary for a year or more, you don’t have a fitness problem. You have a tissue tolerance problem. And the fix isn’t more willpower — it’s a smarter ramp-up.

Before You Run a Single Step: The 2-Week Prep Phase

I know, I know. You want to lace up tomorrow morning and pound out three miles. Don’t. The two weeks before you start running are arguably more important than the first month of running itself.

Walk first. A lot. For two weeks, walk 30-45 minutes a day, four or five days a week. Brisk pace. This re-introduces your tissues to impact and load without the 2.5-3x bodyweight forces that running creates. Boring? Yes. Effective? Absolutely.

While you’re doing this, add three things to your routine:

  • Calf raises: 3 sets of 15, both straight-leg and bent-knee, every other day. Your Achilles and soleus are the #1 injury site for returning runners.
  • Single-leg balance work: 30 seconds per leg, three rounds, daily. Brush your teeth on one foot. It rebuilds the ankle stability you lost on the couch.
  • Glute bridges: 3 sets of 20. Weak glutes are the actual cause of most “knee pain” — your knees just take the hit when your hips can’t do their job.

Do this for 14 days. Now you’re ready to actually run.

The 12-Week Knee-Friendly Comeback Plan

This is a walk-run progression. It’s based on the same principle as Couch to 5K, but stretched longer because most C25K dropouts blow out a tendon around week 5. We’re going to be the tortoise. The tortoise finishes the race.

Three sessions per week. Never two days in a row. Tissue adaptation happens on the off days, not the on days.

Weeks 1-2: The “Are You Kidding Me” Phase

Walk 4 minutes, jog 1 minute. Repeat 5 times. That’s 25 minutes total. Yes, that’s it. If it feels insultingly easy, you’re doing it right. The point right now isn’t fitness — it’s loading your tendons in a controlled way.

Weeks 3-4: The Ramp Begins

Walk 3 minutes, jog 2 minutes. Repeat 5 times. By the end of week 4 you’ll have logged roughly 60 minutes of cumulative running. That’s the magic number where most people start to feel like a runner again.

Weeks 5-6: The Danger Zone

Walk 2 minutes, jog 3 minutes. Repeat 5 times. This is where overuse injuries historically peak. If anything starts hinting at pain — shin tightness, knee twinge, Achilles soreness that lingers more than 24 hours — repeat the previous week instead of progressing. No ego. The plan bends, you don’t break.

Weeks 7-8: The Tipping Point

Walk 1 minute, jog 4 minutes. Repeat 5 times. You’re now mostly running. This is also the week most people start adding distance instead of effort. Don’t. Keep it to 25 minutes. The clock matters more than the mileage.

Weeks 9-10: Continuous Running

25 minutes of continuous jogging, three times a week. Pace should be conversational — you can speak a full sentence without gasping. If you can’t, you’re going too fast. Slow down. Almost everyone is going too fast.

Weeks 11-12: Time to Build

Now you bump duration: 30 minutes, then 35, then 40. Keep two of your three weekly runs short (25-30 min) and make one a longer effort. Congratulations — you are a runner again.

The Five Things That Actually Save Your Knees

Knee pain in returning runners is almost never a knee problem. It’s a load problem, a cadence problem, or a hip problem masquerading as a knee problem. Here’s what actually helps:

1. Increase your cadence

Most beginner runners overstride — landing with their foot way out in front of their body. This creates a braking force that hammers your knees on every step. The fix is counterintuitive: take shorter, faster steps. Aim for 170-180 steps per minute. Use a metronome app or a playlist matched to 170-180 BPM. This single change has rescued more knees than any shoe ever has.

2. Run on softer surfaces — but not all the time

Grass, dirt, and rubberized tracks reduce impact. They’re great for two of your three weekly runs. But you also need some pavement, because trails build uneven, multi-directional stress that your knees actually need to adapt to. Don’t avoid pavement entirely — just don’t live on it.

3. Strength train. Seriously.

Two short sessions a week of squats, deadlifts, lunges, and single-leg work will protect your knees more than any brace, sleeve, or expensive shoe. Stronger hips and quads mean less rotational stress at the knee. This is non-negotiable for anyone over 35.

4. Sleep like it’s part of the program

Tendon repair is hormonally driven, and growth hormone spikes in deep sleep. Seven hours minimum. The runners who get injured most aren’t the ones who train hardest — they’re the ones who recover worst.

5. Listen to the 24-hour rule

Mild soreness the day after a run is normal. Pain that’s still there 24 hours later, or that gets worse during a run instead of better, is your tissue waving a red flag. Take a rest day. Two if needed. A skipped run costs you nothing. An MRI costs you six weeks.

A Word on Shoes

I’ll go deeper on this in Part 4 of the series, but for now: don’t switch to minimalist shoes mid-comeback. If you’ve been wearing cushioned trainers for years, your calves and Achilles are not ready for zero drop. Start with whatever you’ve been wearing. Get through this 12-week plan. Then, slowly, transition. We’ll cover that whole process next.

What you can do now: replace your running shoes every 300-500 miles. The foam degrades long before the upper looks worn. Old shoes don’t cause injury directly, but they remove the cushioning your tissues are still counting on.

My Honest Opinion

The single biggest mistake comeback runners make isn’t going too far. It’s going too fast on each individual run. Slow down. Slow way down. Run so slow that strangers give you concerned looks. Run so slow that your friends question whether you should call it running.

Easy mileage is the foundation. Speed is the dessert. People skip the dinner and wonder why they’re hungry.

You don’t need a Garmin to do this. You don’t need carbon-plated super shoes. You don’t need a coach. You need consistency, patience, and the willingness to let two weeks of walking happen before you take your first jogging step. That’s it.

Your Challenge This Week

Don’t start the plan tomorrow. Start the prep phase tomorrow. Walk 30 minutes. Do your calf raises. Do your glute bridges. Then again the day after. Build the tissue tolerance first. In two weeks, you’ll be ready to start the actual 12-week plan — and you’ll be the rare comeback runner who makes it to week 12 without a single injury setback.

Next in the Foot Mechanics series: The Shoe Transition Guide — how to safely move toward minimalist shoes once you’ve rebuilt your base.

Creatine: The One Supplement That Actually Works (and How to Take It)

Let me save you about $400 a year. Walk into any supplement store and you’ll see walls of powders promising you everything from “explosive pumps” to “alpha test boosting.” Ninety-five percent of it is hopium in a plastic tub. There is, however, one supplement that has been studied to death for forty years, costs about thirteen cents a day, and actually does what it says. That’s creatine.

I’ll cut to the chase: I take it. My wife takes it. My 60-year-old dad takes it. If you train, lift heavy things, ruck, or just want to age without turning to dust, creatine should already be in your kitchen. If it’s not, you’re being weird about the easiest win in fitness.

What Creatine Actually Is

Creatine isn’t some lab-made chemical from a Russian doping lab. Your body already makes about a gram of it per day in your liver and kidneys, and you pull another gram or two out of red meat and fish. It lives inside your muscle cells where it does one job: donate a phosphate group to ADP, recycling it back into ATP — the molecule that fuels short, hard efforts.

Translation: more creatine in your muscles = more juice in the tank for sets 3, 4, and 5. That’s it. That’s the magic. It’s not a stimulant. It’s not a hormone. It’s a battery that lets you do one or two more reps, which over weeks and months compounds into noticeably more muscle and noticeably more strength.

What the Research Actually Shows

Creatine monohydrate is the most studied sports supplement in human history. Not “most marketed” — most studied. Over 1,000 peer-reviewed trials. The consensus is boring and consistent:

  • 5–15% increase in strength over 4–12 weeks compared to placebo.
  • 1–2 kg of lean mass in the first month (some is water inside the muscle cell — that’s fine, that’s also performance).
  • Better high-intensity work capacity — more reps, more sets, faster recovery between them.
  • Cognitive benefits in sleep-deprived and aging populations — improved working memory and reaction time.
  • Potential neuroprotective effects — promising work in Parkinson’s, depression, and traumatic brain injury, though not conclusive yet.

It’s also one of the safest supplements ever tested. The “creatine destroys your kidneys” myth refuses to die, but if you actually look at the literature you’ll find decades of studies in healthy adults showing zero kidney impact at standard doses. If you have existing kidney disease, talk to your doctor. Everyone else: you’re fine.

Which Type to Buy (Hint: The Cheap One)

Supplement companies have invented at least a dozen “advanced” forms of creatine — HCL, ethyl ester, buffered (Kre-Alkalyn), nitrate, magnesium chelate. They charge two to four times more for them. And in head-to-head trials, every single one of them either performs the same as plain old creatine monohydrate, or worse.

Buy creatine monohydrate. That’s it. If you want to be extra picky, look for “Creapure” on the label — it’s a German-manufactured form with the highest purity certification. A 1 kg tub costs around $30 and lasts six to eight months. That’s roughly 13 cents per day.

Don’t pay $50 for “next-gen pH-optimized hydro-soluble” creatine. The molecule that gets absorbed into your muscle cell is the same either way. It’s literally just marketing with a metallic label.

How to Actually Take It

This is where people overcomplicate the simplest supplement on Earth. Here’s the entire protocol:

The dose: 5 grams per day. One rounded teaspoon. Every day. Forever.

The timing: Doesn’t matter. Morning coffee, post-workout shake, with dinner — muscle storage builds up over weeks. One missed day means nothing.

The liquid: Water, coffee, juice, protein shake. Doesn’t matter. The “creatine and caffeine cancel out” myth was based on one flawed 1996 study and has been debunked dozens of times since.

Do You Need to “Load”?

Old-school protocols had you slam 20 g/day for 5–7 days to saturate your muscles fast, then drop to 5 g maintenance. It works. It also gives some people stomach upset, and the only thing you gain is reaching full saturation in one week instead of three to four. Same destination, different on-ramp.

If you’re impatient, load. If you’re not, don’t. The end result is identical after a month.

Do You Need to Cycle Off?

No. Your body doesn’t “downregulate” creatine production in any way that comes back to bite you. Take it daily, year-round. Stop only if you stop training and don’t care about the cognitive benefits.

What to Expect (and What’s Hype)

Real, expected effects in weeks 2–8:

  • Your last few reps feel crisper. You’re getting an extra rep or two on heavy sets.
  • Muscles look slightly fuller — that’s intracellular water, which is exactly what you want.
  • Recovery between sets is noticeably better. Less gasping during a 4×8 squat session.
  • Scale might go up 1–3 lbs in the first two weeks. That’s water in muscle. Not fat.

Stuff creatine does NOT do:

  • Make you bloated or “puffy” in the face. It goes into muscle, not under your skin.
  • Cause hair loss. One small 2009 rugby study suggested a DHT bump and the internet ran with it. Never replicated.
  • Replace training. You still have to lift the bar.
  • Turn you into a different human. It’s a 5–15% edge, not a steroid.
The honest framing: Creatine doesn’t build the muscle. Your training does. Creatine just lets you train slightly harder, slightly more often, with slightly better recovery. Over a year, “slightly” turns into “significantly.”

Who Should Be Taking This

Honestly? Almost everyone over 30 who moves their body for a living or a hobby.

  • Lifters and athletes: Obvious. This is what it was made for.
  • Ruckers, hikers, manual laborers: Anything with repeated hard efforts benefits.
  • People over 50: Sarcopenia — age-related muscle loss — is brutal. Creatine plus resistance training is the best one-two punch we have for it.
  • Vegetarians and vegans: You make less endogenous creatine because you don’t eat meat. You’ll feel the difference more than anyone.
  • Anyone chronically sleep-deprived: Parents, shift workers, students. There’s solid evidence creatine helps cognitive performance under sleep deprivation.

The only “maybe skip it” case is a competitive endurance athlete worried about a small water-weight gain affecting power-to-weight ratio. For everyone else, the cost-benefit is absurd.

The Common Mistakes I See

  1. Stopping after two weeks because “it didn’t work.” Saturation takes 3–4 weeks without loading. Be patient.
  2. Buying flavored creatine blends. You’re paying 3x for sugar and dye. Buy plain monohydrate and mix it with whatever you already drink.
  3. Taking it only on workout days. Saturation is a steady-state thing. Daily, including rest days.
  4. Drinking 4 liters of water “to support kidney function.” Drink normal amounts of water. Your kidneys are not in danger.
  5. Doubling up after missing a day. Unnecessary. Just take your 5 g and move on.

My Honest Take

I’m cynical about the supplement industry. Most of it is overpriced placebo dressed up with sponsored athletes who’d look exactly the same without it. Creatine is the exception. It’s the one bottle on my counter that has earned its spot through forty years of replication, not marketing budget.

Five grams. Every day. About thirty dollars every six months. If you train and you’re not on it, you are leaving free strength, free recovery, and probably some free cognition on the table for no reason at all.

Your Challenge This Week

Buy a 1 kg tub of plain creatine monohydrate (Creapure if you can find it, any reputable brand if not). Put it next to your coffee maker. Take 5 grams every morning for the next 30 days alongside your training.

If you don’t notice a difference in the gym by week four, I’ll be genuinely surprised. And if you do — welcome to the boring, effective side of supplementation.

Not medical advice. If you have kidney disease, are pregnant, or are under 18, talk to your doctor first. Everyone else: it’s just creatine, relax.

Your Feet Are Weak (And Your Shoes Did It): The Honest Guide to Rebuilding Foot Strength

Look down at your feet. Right now. Those things at the end of your legs that hit the ground 7,000+ times a day, carry you through every workout, and absorb the entire weight of your existence — when was the last time you actually trained them?

Yeah. That is what I thought.

Here is the deal: your feet have 26 bones, 33 joints, and over 100 muscles, tendons, and ligaments — roughly a quarter of all the bones in your body. They are engineering marvels. And most of us have shoved them into padded coffins since we were toddlers, then wonder why our knees ache, our hips are tight, our balance is garbage, and plantar fasciitis hits us at 35 like a freight train.

This is not another “go barefoot and you will be enlightened” post. I am not telling you to throw out your boots and start running on gravel tomorrow. I am telling you something simpler and harder: your feet are weak, your shoes made them that way, and you can fix it. Here is how.

Why Your Shoes Are the Problem

Modern shoes are designed around three principles: cushion, support, and motion control. Sounds great, right? It is not. Here is what each one actually does:

  • Cushion dampens the feedback your feet send to your brain about how to land. So you land harder. So they add more cushion. So you land harder still.
  • Arch support does the work your foot intrinsic muscles are supposed to do — so those muscles atrophy, like any muscle a brace replaces.
  • Motion control stops your foot from doing what feet are designed to do: spread, pronate, and act as a shock-absorbing spring.

A 2017 study in Nature (Holowka and Lieberman) compared habitually barefoot populations to shod ones. The barefoot group had significantly stronger arches, better balance, and dramatically lower rates of common foot pathologies. Not because their feet are magic. Because they actually use their feet.

My take? The shoe industry has spent 50 years selling you a solution to a problem they created. Your feet are not broken. They are untrained.

The 5-Minute Test: How Weak Are Your Feet?

Before you fix anything, let us see what we are working with. These four tests take five minutes total. No equipment.

Test 1: Single-Leg Balance (Eyes Closed)

Stand on one foot, close your eyes, start a timer. Goal: 30 seconds without your foot grabbing wildly at the floor. If you cannot make 10 seconds, your intrinsic foot muscles and proprioception are toast.

Test 2: Toe Spread

Sit down, look at your feet. Try to spread your toes like a fan — actively, no help from your hands. Big toe out, pinky toe out, gaps between every toe. Most adults can barely move their toes independently. That is not normal — that is atrophy.

Test 3: Arch Doming (Short Foot)

Stand. Without curling your toes, try to “shorten” your foot by pulling the ball of your foot toward your heel. Your arch should rise. If nothing happens, your tibialis posterior and intrinsics are offline. This is the muscle that creates your arch — not your shoe.

Test 4: Heel Raise Hold

Single-leg calf raise, hold the top position. Goal: 25 reps with a 2-second hold per side. Most people gas out at 8-10. Strong calves and feet share most of the same plumbing.

If you bombed all four — congrats, you are normal. And you have got room to grow.

The Daily 10-Minute Foot Reset

You do not need a program. You need a habit. Do this every morning while your coffee brews. Barefoot. On a hard floor. Ten minutes total.

1. Toe Spreads and Lifts (2 min)

Sit or stand. Lift only your big toe, keeping the others down. Then reverse — keep the big toe down, lift the other four. Then spread all toes wide and hold 5 seconds. This will feel impossible the first week. Do it anyway. The pathways come back fast.

2. Short Foot Holds (2 min)

Standing, dome your arch (test 3 above) and hold 10 seconds. Repeat 10 times per foot. This rebuilds your arch the way nature intended — actively, not passively. If you have been told you have flat feet, this is the single most important exercise in this article.

3. Calf Raises, Slow Tempo (3 min)

3 sets of 15. 3 seconds up, 3 seconds down. Both legs at first; progress to single-leg when you can hit 25 doubles cleanly. Edge of a step for full range. Your Achilles will thank you. Your knees will thank you. Your future self will thank you.

4. Single-Leg Balance (2 min)

30 seconds per side, eyes open. Then 30 seconds per side, eyes closed. Brush your teeth on one foot. Make coffee on one foot. Make balance a default mode, not an exercise.

5. Towel Scrunches (1 min)

Throw a hand towel on the floor. Scrunch it toward you using only your toes. Then push it back out. Boring? Yes. Effective? Stupidly so. The fastest way to wake up dormant intrinsics I have ever seen.

Real Talk: Should You Switch to Minimalist Shoes?

Maybe. But not the way most people do it.

Here is what happens 90% of the time: someone reads an article like this one, buys a pair of Vibrams, runs five miles in them on Saturday, and limps for two weeks with a metatarsal stress fracture. Your feet have been in casts for 30 years. You do not take a cast off and run a marathon.

My honest opinion after a decade of swapping in and out of minimalist footwear: spend more time barefoot at home, not less time in shoes outside. Take your shoes off the second you walk in the door. Walk around the yard barefoot in the morning. Do your foot work barefoot. Get a pair of zero-drop, wide-toe-box shoes for casual wear (Altra, Lems, Xero — pick one) and use them as your “training wheels” while you transition.

Save the running and lifting in barefoot shoes for after you can pass the four tests above. We will cover the actual transition protocol in Part 3 of this series.

What Happens When You Actually Do This

A few things, in roughly this order:

  1. Week 1-2: Your calves will be sore. Not pulled, not injured — just awake for the first time in a decade.
  2. Week 3-4: Balance improves measurably. You stop wobbling on the single-leg test. Stairs feel different.
  3. Month 2: Knee pain (if you had any) often quietly disappears. Knees inherit problems from feet and hips. Fix the feet, the knees relax.
  4. Month 3+: Your gait changes. You land softer. You feel the ground. You realize you have been numb from the ankles down your whole life.

I am not promising miracles. I am telling you what tens of thousands of athletes, runners, and physical therapists already know: foot strength is the most under-trained, highest-leverage muscle group in the body. Ten minutes a day. That is the whole ask.

The Challenge

For the next 30 days, do the 10-Minute Foot Reset every morning. No exceptions. No “I will start Monday.” Tomorrow morning, before coffee, on the kitchen floor.

Re-take the four tests on day 30. I bet you will double your single-leg balance time and add 10+ reps to your heel raises. Drop me a line and tell me what changed.

This is Part 1 of our Foot Mechanics series. Up next: how to choose between zero-drop, minimalist, and maximalist shoes — and why the spec sheet matters more than the marketing.

Your feet carried you for free your entire life. Pay them back with ten minutes a day.