The Running Gear That’s Worth It (And the Stuff That’s Not)

This is the last stop in our Foot Mechanics series. We started by waking up your weak feet, sorted out what actually matters in a running shoe, got you back on the road without wrecking your knees, and covered recovery from the ground up. Now let’s talk money.

The running industry is a machine built to separate you from your paycheck. Walk into any specialty store and you’ll get sold $300 shoes, a $400 watch, compression sleeves for body parts you didn’t know could be compressed, and a “recovery system” that costs more than your monthly rent. Most of it is junk. Some of it is genuinely worth it. Here’s the honest breakdown — what I’d actually buy with my own money, and what I’d walk right past.

Worth Every Penny

1. Good Shoes (the right ones for YOUR feet)

If you spend money on one thing, spend it here. Not because expensive equals better — it doesn’t — but because the wrong shoe is the fastest path to an injury that sidelines you for months. We covered the zero-drop vs. cushioned debate and the transition plan already, so I won’t repeat it. The takeaway: get fitted, buy what feels right on your foot, and replace them around 400–500 miles. A worn-out shoe is worse than no shoe.

2. Real Running Socks

This is the most underrated $15 you’ll ever spend. Cotton socks hold moisture, bunch up, and shred your feet into a blister farm. A proper merino or synthetic running sock wicks sweat, doesn’t slide, and lasts for years. I run in Darn Tough (lifetime warranty, made in Vermont, basically indestructible) and Balega Hidden Comfort for longer stuff. Buy three pairs and you’ll never go back. Genuinely a bigger comfort upgrade than most people’s shoe purchase.

3. A Basic GPS Watch

Note the word basic. You do not need the $700 multisport flagship with topo maps and a titanium bezel. You need something that tracks pace, distance, and heart rate so you can actually follow a plan instead of guessing. A Garmin Forerunner 55 or a Coros Pace 3 does everything 95% of runners will ever need for around $150–230. The data keeps you honest: it stops you from going too hard on easy days, which is the #1 mistake new runners make. Your phone in an armband works too if you’re broke — no shame in that.

4. A Foam Roller

Recovery isn’t optional, and a foam roller is the cheapest, most effective recovery tool there is. Ten minutes after a hard run loosens up your calves, IT band, and quads so you’re not hobbling the next morning. I use the TriggerPoint GRID — it’s firm, it’s lasted me years, and the textured surface actually digs in. If you want a commercial-grade option or you’re kitting out a home gym, Power Systems carries a high-density foam roller and trigger-point tools that hold up to daily abuse. Either way, get one. Your future self thanks you.

5. A Way to Carry Water (for anything over an hour)

For short runs, drink before and after and don’t overthink it. But once you’re going over 60–75 minutes, especially in heat, you need water on you. A handheld bottle or a simple hydration belt does the job. Keep a wide-mouth bottle like the Nalgene 32 oz by the door to pre-hydrate and refill — boring, cheap, indestructible, and it’ll outlive your car.

Save Your Money

Compression Everything

Compression socks and sleeves have a tiny bit of evidence behind them for recovery and swelling on long-haul flights or for specific medical issues. As performance gear for the average runner? The benefit is mostly in your head. If wearing them makes you feel fast, fine — but don’t believe they’re shaving minutes off your time.

$1,000 Recovery Boots

Those pneumatic compression boots the influencers wear on the couch? Cool tech. Wildly overpriced for what they do. A foam roller and a good night’s sleep deliver 90% of the benefit for 3% of the cost. Unless you’re putting in elite mileage, this is pure status spending.

Carbon-Plated “Super Shoes” (for beginners)

The $250+ carbon-plated racers are real — they genuinely make fast people faster. But if you’re new, they’ll do nothing but drain your wallet and possibly mess with your form. Earn the fast shoes. Build your base first.

Smart Water Bottles & Gimmick Gadgets

A water bottle that reminds you to drink via Bluetooth is a solution to a problem that doesn’t exist. Same with most app-connected gadgets. If it needs charging to hold water, walk away.

Motion-Control / “Stability” Shoes You Don’t Need

Stores love to upsell heavily structured “stability” shoes to anyone whose arch looks slightly flat. For most people this is unnecessary and can actually keep your feet weak — the exact opposite of what part one of this series was about. Strengthen the foot, don’t cast it in a brace.

The “Depends on You” Pile

Headlamp: non-negotiable if you run before dawn or after dark, useless if you don’t. Anti-chafe balm (Body Glide and friends): a lifesaver on long runs and in summer, irrelevant for a quick 20 minutes. Running vest: great once you’re doing trail or ultra distances, overkill for the neighborhood loop. Buy these when the problem shows up, not before.

The Bottom Line

Here’s the whole series in one sentence: your body is the equipment, the gear just supports it. The runner in a $40 pair of shoes and good socks who shows up four days a week will smoke the gadget collector every single time. Spend on the few things that prevent injury and keep you consistent — shoes, socks, a roller, a basic watch — and ignore the rest until you’ve earned the right to care about it.

Your challenge: Audit your running drawer this week. Pull out everything you bought and never use, and be honest about why. Then put that money toward the two things that matter most — a sock upgrade and a foam roller — and go run. That’s the whole game.

Cast Iron Cooking: How to Season, Maintain, and Cook Like Your Grandpa

Somewhere in your family there was a pan that never got thrown out. It got handed down. It cooked ten thousand eggs, a few hundred cornbreads, and survived a couple of moves and at least one divorce. That pan was almost certainly cast iron — and the reason it outlived everything else in the kitchen is the same reason people get intimidated by it: it works differently than every other pan you own.

Here’s the good news. Cast iron isn’t fussy. It’s just misunderstood. Once you get the three fundamentals — seasoning, heat, and cleanup — you’ll have a pan that sears better than anything in a department store, costs less than a tank of gas, and quite literally outlives you. Let’s get you there.

Why Cast Iron Beats Your Nonstick

Three reasons, and they all matter:

  • It holds heat like a brick. Cast iron has serious thermal mass. When you drop a cold ribeye onto a thin nonstick pan, the temperature crashes and you end up steaming your meat. Cast iron barely flinches — that’s how you get a real, dark, restaurant-grade crust.
  • It’s genuinely nonstick once seasoned. A well-loved pan releases eggs as cleanly as Teflon, minus the chemical coating flaking into your food at high heat.
  • It’s basically immortal. No coating to scratch off, no warping, no “replace it every two years.” You can buy a rusted-shut pan at an estate sale, strip it, and bring it back from the dead. Try that with a $200 nonstick.

My honest take: if you own one good pan for the rest of your life, make it cast iron. A Lodge 10.25″ Cast Iron Skillet (L8SK3) runs under twenty bucks and will be in your grandkids’ kitchen. Nothing else in your house has that kind of ROI.

What “Seasoning” Actually Is (It’s Not Spices)

Seasoning confuses people because the word is misleading. It has nothing to do with salt and pepper. Seasoning is a layer of polymerized oil bonded to the iron. You heat oil past its smoke point, it breaks down and chemically bonds to the metal, and that hardened layer becomes your slick, rust-proof cooking surface. Think of it like a coat of varnish you build up over time.

Most new pans (Lodge included) come “pre-seasoned,” but it’s a thin factory coat. You’re going to make it better with use. Here’s how to lay down a solid base layer at home:

The 5-Step Home Seasoning Method

  • 1. Scrub it clean and dry it completely. Hot water and a little soap on a fresh pan is fine. Dry with a towel, then set it on a burner for a minute to drive off every trace of moisture.
  • 2. Oil it thin — thinner than you think. A teaspoon of a high-smoke-point oil (grapeseed, canola, or flaxseed). Rub it over the entire pan — inside, outside, handle — then wipe it back off with a clean cloth until it looks dry. A thick coat turns gummy and sticky. Thin is the whole game.
  • 3. Bake it upside down at 450–500°F for one hour. Upside down so excess oil drips off. Put foil on the rack below to catch the drips.
  • 4. Let it cool in the oven. Don’t rush it.
  • 5. Repeat 2–3 times for a strong base. Each round adds a layer. After that, cooking does the rest.
The shortcut that’s actually legit: Skip the marathon oven sessions and just cook fatty food in it. Bacon, burgers, fried chicken — anything in oil. Every cook lays down a micro-layer of seasoning. A pan used hard for a month beats one babied in the oven. Use the thing.

Heat Management: Where Everyone Screws Up

The single biggest cast iron mistake is treating it like nonstick — cranking it to high and going. Cast iron heats slowly and unevenly, but once it’s hot, it stays hot. So:

  • Preheat low and slow. Medium heat, five minutes minimum. A drop of water should dance and skitter across the surface, not just sit there.
  • Then back the heat down to cook. Because of that thermal mass, you need less burner than you think. People scorch food because they leave it on high after preheating.
  • Let proteins release on their own. A steak or chicken thigh will stick when you first lay it down, then naturally release once a crust forms. If you’re fighting it with a spatula, it’s not ready. Wait.

If you’re searing thick cuts, pull a ThermoPro TP19H Instant-Read Meat Thermometer and cook to temperature instead of guessing. Cast iron’s crust game is so good it’s easy to nail the outside while the inside lags — temp takes the gamble out.

Cleaning: Forget Everything You’ve Heard

The “never use soap” rule is a half-myth left over from the lye-soap era. A little modern dish soap won’t strip a properly polymerized seasoning. What actually kills cast iron is water sitting in it — that’s rust. Here’s the bulletproof routine:

  • Clean while it’s still warm. Hot water and a brush or a Lodge Chainmail Scrubber for Cast Iron Pans knocks off stuck-on bits in seconds. That chainmail scrubber is genuinely the best $10 cast iron upgrade — it scrubs gunk without touching your seasoning.
  • Stuck-on mess? Coarse salt as an abrasive scrub, or simmer a little water in the pan to loosen it. Never leave it to soak.
  • Dry it immediately and completely. Towel first, then 60 seconds on a hot burner to evaporate any hidden moisture.
  • Wipe a drop of oil over the surface while it’s warm. Buff it dry. That’s it — you just re-seasoned a hair every single time.
Rusty pan rescue: Found one in a barn? Scrub the rust with steel wool and a little vinegar-water (don’t soak it more than an hour — vinegar eats iron too). Rinse, dry hard, then run the full seasoning method 3–4 times. Pans people leave for dead come back perfect. It’s the most satisfying $5 you’ll spend at a flea market.

What to Cook First (Build Confidence Fast)

Start with foods that add seasoning and are hard to ruin:

  • Bacon. Renders fat, seasons the pan, builds confidence. The perfect first cook.
  • Smash burgers. The crust cast iron puts on ground beef is unreal. Nonstick can’t touch it.
  • Cornbread. Preheat the oiled pan in the oven, pour the batter into the hot pan, and you get a crackly golden bottom crust.
  • Seared-then-oven-finished steak. Sear on the stove, slide the whole pan into the oven. One pan, steakhouse result.

Once you’re hooked, the natural next buy is a Dutch oven. A Lodge Essential Enameled Cast Iron Dutch Oven, 6 Quart handles braises, no-knead bread, soups, and chili. The enameled version skips seasoning maintenance entirely, so it’s a nice complement to a bare skillet rather than a replacement: bare iron for searing, enamel for low-and-slow acidic stuff like tomato sauce (acid slowly eats bare seasoning, so enamel earns its keep there).

The Takeaway

Cast iron isn’t a precious heirloom you’re afraid to touch — it’s a tool that gets better the more you use it. Season it thin, preheat it slow, dry it fast, and cook in it constantly. That’s the entire skill.

Your challenge: if you’ve got a pan sitting in a cabinet because you’re “not sure how to use it,” this week you cook bacon in it three mornings in a row. Clean it the right way each time. By Sunday you’ll have a slicker pan and a habit — and you’ll wonder why you ever bought anything with a coating that wears out. Cook like your grandpa. The pan’s been waiting.

Digital Detox: I Spent 7 Days Without My Phone — Here Is the Exact Playbook

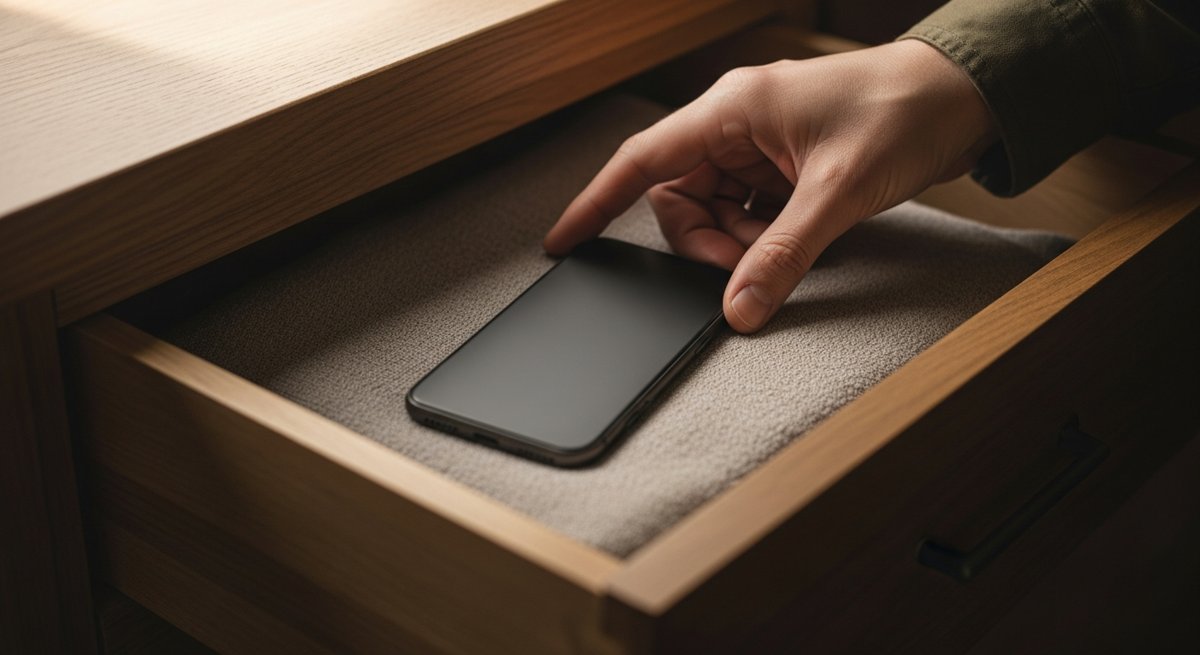
I put my phone in a drawer for seven days. Not airplane mode. Not “do not disturb.” In a drawer, across the house, on a shelf I had to drag a stool over to reach. Here’s what actually happened — and the exact playbook so you can do it without quitting your job or going off the grid.

Let’s get one thing straight up front: this isn’t a guilt trip about screen time. You already know you’re on your phone too much. The average American touches their phone 2,600 times a day and burns somewhere north of four hours on it. You don’t need another article waving that stat at you like a wagging finger. What you need is a way to actually do something about it that doesn’t blow up your real life. So that’s what this is.

Why a Full Week, Not “Just Cut Back”

“Cutting back” is the diet version of phone use — it sounds reasonable and it fails for the same reason crash diets fail: there’s no clear line, so every moment becomes a negotiation. “Just one quick check” is a battle you fight 200 times a day, and you lose most of them by lunch.

A hard boundary kills the negotiation. The phone is in the drawer. There’s nothing to decide. Your brain stops asking. And here’s the part nobody tells you — the craving curve is shorter than you think. The first two days are genuinely rough. By day four, the itch is mostly gone. By day seven you’ll catch yourself slightly annoyed that you have to pick the thing back up. That arc is the whole point. You can’t feel it if you only “cut back,” because you never let the withdrawal finish.

The Honest Setup (Do This the Night Before)

A detox that requires you to be a monk fails by Tuesday. The trick is to keep the two or three things your phone genuinely does for you, and amputate the other forty. Here’s the night-before checklist:

  • Buy a real alarm clock. This is the single most important purchase of the whole experiment. The phone-as-alarm is the Trojan horse — it’s the reason the phone is the first and last thing you touch every day. A $15 analog clock on the nightstand means the phone never needs to enter the bedroom. Do not skip this one.
  • Tell three people. Text your partner, your boss, and whoever’s most likely to panic if you go quiet: “Off my phone for a week. Call the landline / email me / here’s how to reach me in an emergency.” Two minutes of setup buys you a week of guilt-free silence.
  • Move the two “load-bearing” apps to your laptop. Banking, maps, whatever you genuinely need. You’re detoxing from the casino in your pocket, not from modern life. Doing your banking at a desk once a day is fine. Doing it in line at the grocery store 14 times is the problem.
  • Pick the drawer. Physical distance matters more than willpower. Across-the-house beats across-the-room beats face-down-on-the-desk. Make retrieval annoying on purpose.

The Day-by-Day Reality

Days 1–2: The phantom buzz. You’ll reach for a phone that isn’t there. Your hand will literally pat your pocket. You’ll feel a buzz that didn’t happen. This is real — it’s called phantom vibration syndrome and it’s your nervous system running a search for a hit it’s not getting. Annoying, harmless, gone in 48 hours. The hardest moments are the “dead time” gaps: waiting for coffee, the elevator, the bathroom (yeah, that one). Have a plan for the gaps or they’ll break you.

Days 3–4: The fog lifts. This is where it gets interesting. The compulsive reach starts to fade and something weird shows up in its place: you get bored, and then you get creative with the boredom. I reorganized a closet I’d been ignoring for a year. I called my brother for no reason. The mental real estate that scrolling was renting out goes back on the market.

Days 5–7: The recalibration. By here, your baseline has reset. You sleep harder. You finish thoughts. Conversations feel longer in a good way because you’re not half-checked-out waiting for a notification. The most telling sign: you stop missing it. That’s the proof the dependency was a habit loop, not a need.

Fill the Void or It Fills Itself

Here’s the mistake that sinks most attempts: people remove the phone and leave a vacuum. A vacuum gets filled by whatever’s nearest — the TV, the fridge, doomscrolling on a laptop instead. You have to pre-load the replacement. The cleanest swap I know is a physical book parked exactly where your phone used to live: on the nightstand, on the kitchen counter, in your bag.

If you want the detox to stick past day seven, read something about habits themselves while you’re in the clear-headed window — it lands harder when you’re actually living it. Atomic Habits by James Clear is the obvious pick — its whole engine is “make the bad habit invisible, make the good one obvious,” which is literally what putting the phone in a drawer does. If you want something with more grit and less framework, Can’t Hurt Me by David Goggins is the kick in the pants version. Either one beats a feed.

Other void-fillers that earned their spot during my week: a notebook for the random thoughts that used to become Google searches, a deck of cards, and a standing “go for a walk with no destination” rule for the witching hour around 8 p.m. when the pull is strongest.

What I Actually Learned (The Part That Surprised Me)

I expected to feel more relaxed. I did. What I didn’t expect was how much of my phone use had nothing to do with wanting anything — it was pure fidget. Ninety percent of the reaches were my hand looking for a job, not my brain looking for information. Once I clocked that, the phone got smaller. It went from “the device my life runs on” to “a useful tool I pick up on purpose.” That reframe is the real prize, and it outlasts the week.

The other surprise: nothing broke. No crisis happened because I was 30 minutes slower to reply. The world’s demand for your instant attention is almost entirely manufactured — by the apps, and by the version of you that trained everyone to expect an immediate response. Both of those can be retrained.

Don’t Want a Full Week? Do the 80% Version.

If seven phone-free days is a non-starter for your job or your kids, here’s the version that still delivers most of the benefit:

  • Phone sleeps in another room. Every night. Non-negotiable. This one rule fixes mornings and evenings, the two times that set the tone for everything else.
  • No phone for the first hour and last hour of the day. Bookend your day with your own thoughts instead of someone else’s algorithm.
  • One full day a week — pick Sunday. A weekly “screen sabbath” gives you the reset on repeat without the upfront pain of a whole week.

Do those three and you’ve captured the lion’s share of what the full detox teaches, on permanent repeat.

The Challenge

Tonight, before you go to bed, do exactly one thing: charge your phone in a different room. Not tomorrow, not “when things calm down” — tonight. Buy the cheap alarm clock this week so it sticks. That single move is the keystone the entire detox is built on, and it costs you nothing but a little discomfort.

Then, if you’re feeling bold, block out a Sunday and go the full distance. Worst case, you waste a week being a little bored and a lot more present. Best case, you get your attention back — and that’s the one thing nobody can sell back to you once it’s gone.

Put it in the drawer. Set the clock. See what’s on the other side of the boredom. I’ll bet it’s better than your feed.

How to Pressure Can Meat, Broth, and Vegetables Safely (Without Poisoning Your Family)

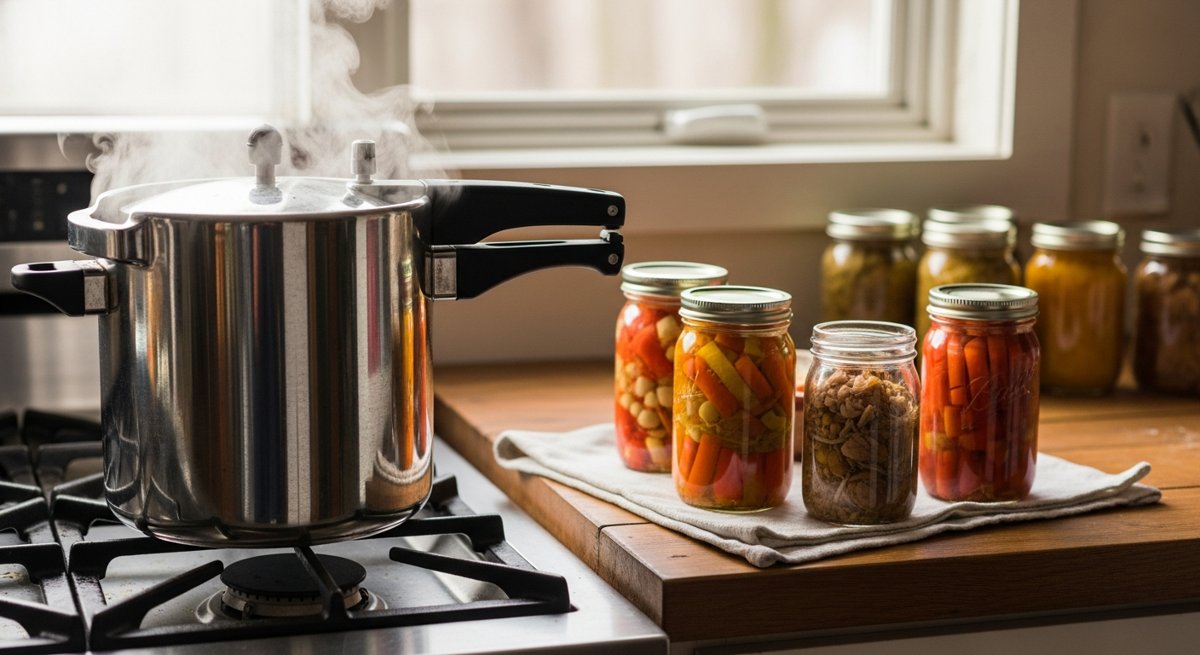
A full pantry of home-canned meat, broth, and vegetables is the single most underrated win in self-sufficiency. It’s shelf-stable for years, needs zero electricity, and costs a fraction of store-bought. But here’s the part nobody softens for you: pressure canning low-acid food the wrong way can kill you. Not “upset stomach” kill you — botulism, the real thing. So we’re going to do this right, the first time, every time.

The one rule that keeps you alive: Meat, broth, beans, and vegetables are low-acid foods. A boiling water bath only hits 212°F — not hot enough to kill Clostridium botulinum spores. You need 240°F, and the only way to get there is under pressure. Low-acid food = pressure canner. No exceptions. Ever.

Why Pressure, Not Just Heat

Botulism spores are tough little bastards. They shrug off boiling water all day. What kills them is sustained heat at 240°F or higher, and water simply can’t get that hot at sea level no matter how long you boil it. Lock that water under 10–15 pounds of steam pressure, though, and the boiling point climbs to 240°F+. That’s the whole game. Pickles, jams, and tomatoes with added acid can go in a water bath because acid does the safety work. Plain meat and green beans cannot. Memorize the line: if it’s not acidic, it gets pressurized.

The Gear You Actually Need

  • A real pressure canner. Not a pressure cooker — a canner, big enough to hold jars upright with a rack. The Presto 23-Quart and the All American 921 (no-gasket, metal-to-metal seal) are the two workhorses people pass down to their kids.
  • Canning jars — genuine Ball or Kerr Mason jars, pints and quarts. Never reuse mayo or pickle jars; they aren’t rated for the pressure and will shatter.
  • New lids every time. The flat lids are single-use. Bands are reusable; lids are not. This is non-negotiable for a good seal.
  • A jar lifter, canning funnel, and a bubble remover/headspace tool. Ten bucks of tools that save you scalded fingers and bad seals.

Dial Gauge vs. Weighted Gauge

Two kinds of canners. A weighted-gauge model rocks or jiggles a weight to hold a set pressure (5, 10, or 15 lbs) — dead simple, never needs calibration, you can hear it working from another room. A dial-gauge model shows exact pressure on a needle, which lets you fine-tune for altitude, but the gauge must be tested for accuracy once a year (your county extension office does this free). If you’re new and want one less thing to screw up, get weighted. If you’re at high altitude and want precision, dial-gauge earns its keep.

Step-by-Step: Raw-Pack Meat (The Easiest Win)

Beef, venison, pork, chicken — raw pack is the lazy genius method. No pre-cooking.

  1. Prep jars. Wash jars in hot soapy water, keep them warm. Cut meat into chunks, trim heavy fat (fat fights a good seal).
  2. Pack. Fill warm jars with raw meat, leaving a full 1 inch of headspace. Add 1/2 tsp salt per pint if you like — it’s for flavor, not safety. Do not add liquid; raw-packed meat makes its own.
  3. De-bubble and clean. Run your bubble tool around the inside, re-check headspace, then wipe every rim with a clean, damp cloth. A single grease smear ruins the seal.
  4. Lid up. Center a new flat lid, screw the band to fingertip tight — snug, not cranked.
  5. Load and vent. Set jars on the rack with 2–3 inches of water in the canner. Lock the lid, bring to a boil, and let steam vent steadily for a full 10 minutes before you add the weight. Skipping the vent traps air and gives you false pressure readings.
  6. Pressurize and process. Add the weight, bring to 10 lbs (weighted) or 11 lbs (dial) at sea level. Once you hit pressure, start the timer: pints process 75 minutes, quarts 90 minutes. Hold that pressure the entire time — if it dips, you restart the clock.
  7. Cool naturally. Kill the heat and walk away. Let the canner depressurize on its own — never run it under cold water or pry the weight off early, or you’ll force-boil liquid out of the jars and break seals.
  8. Rest and check. Lift jars out, set on a towel, don’t touch for 12–24 hours. You’ll hear the lids ping. The next day, press the center of each lid: no flex, no pop = sealed. Any that didn’t seal go straight in the fridge to eat this week.

Processing Times Cheat Sheet

At 10 lbs weighted / 11 lbs dial, sea level. These are starting points — always confirm against a tested recipe (USDA Complete Guide to Home Canning or the Ball Blue Book) before you process.

  • Meat (raw or hot pack): pints 75 min · quarts 90 min
  • Bone broth / stock: pints 20 min · quarts 25 min
  • Green beans: pints 20 min · quarts 25 min
  • Carrots: pints 25 min · quarts 30 min
  • Sweet corn (whole kernel): pints 55 min · quarts 85 min
  • Dry beans (soaked, hot pack): pints 75 min · quarts 90 min

Altitude matters — a lot. Every time you climb, water boils cooler, so you must add pressure. Above 1,000 ft, weighted canners go to 15 lbs. Dial canners step up gradually (12 lbs at 2,001–4,000 ft, 13 lbs at 4,001–6,000 ft, and so on). Look up your elevation before your first batch. This isn’t optional — it’s the difference between safe food and a gamble.

What You Should NOT Can

There are no tested-safe times for these, which means there’s no safe way to do them at home. Skip them, full stop:

  • Dairy — milk, butter, cheese, cream
  • Anything thickened with flour or cornstarch (it insulates the center from heat)
  • Pureed or mashed pumpkin/winter squash (can cubes instead)
  • Refried or mashed beans (can them whole, mash when you open the jar)
  • Rice, pasta, or other grains in the jar

My honest take: the people who get hurt aren’t the careful beginners — they’re the confident folks who “tweak” a recipe or trust a thirdhand method from a forum. Don’t freelance the science. Follow tested times, respect your altitude, and pressure canning is genuinely one of the safest, most satisfying skills you can own.

Want the whole self-reliant pantry blueprint?

Canning is one piece of a bigger system — food, water, power, and a backyard that feeds you. The Self-Sufficient Backyard walks you through building it on a normal lot, including a deeper food-preservation playbook than I can fit in one post. It’s the resource I point people to when they’re ready to go past “dabbling.”

Your Challenge This Week

Don’t try to can the whole garden on day one. Do one batch: seven pints of beef or a load of homemade broth. Get the rhythm — pack, vent, pressurize, cool, check seals. Once you’ve heard that first row of lids ping on the counter and you’re holding jars of food you’ll still be eating next winter, you’ll get it. That pantry shelf is independence you can see. Go fill it.

How to Navigate Without GPS: Map, Compass, and Natural Signs

Your phone is a liability the second the battery dies, the signal drops, or you drop it in a creek. And out where it actually matters — deep timber, a slot canyon, a snowed-in fire road — that happens more than you’d think. The good news: humans found their way across continents for thousands of years without a single satellite. You can learn the core of it in an afternoon. Here’s how to navigate with a map, a compass, and the sky when the blue dot disappears.

Why GPS Fails Exactly When You Need It

GPS is brilliant until it isn’t. Tree canopy and canyon walls block the signal. Cold murders lithium batteries — a phone that reads 60% at the trailhead can be dead in your pocket at 20°F. And a single fall onto granite ends the whole conversation. None of that touches a compass. It has no battery, no firmware update, no dead zone. It just works, which is exactly why every search-and-rescue team on earth still carries one.

My honest take: treat your phone as the primary tool and the map-and-compass as the system that never fails. Redundancy isn’t paranoia out here — it’s the difference between an inconvenience and a headline.

The Three Tools (and the One That Matters Most)

  • A baseplate compass. Not a button compass off a keychain — a real orienteering compass with a clear baseplate, a rotating bezel, and ideally a sighting mirror and adjustable declination. A Suunto MC-2 or a Silva Ranger 2.0 is the lifetime-buy here. Roughly $40–$70 and you’ll hand it to your kid someday.
  • A real topographic map. A USGS 7.5-minute quad or a National Geographic Trails Illustrated map of your area. Paper. Waterproof if you can get it. Free PDFs from the USGS National Map site if you’ve got a printer.
  • Your eyes and a little sky-reading. Free, always with you, and shockingly accurate once you practice.

If you buy one thing, buy the compass with adjustable declination. It removes the single most common source of “I did the math wrong” navigation errors. More on that in a second.

Step 1: Read the Map Like It’s Talking to You

A topo map is a 3D landscape flattened into lines. The brown squiggles are contour lines — each one connects points of equal elevation. Master three patterns and you can read terrain like text:

  • Lines close together = steep. Lines far apart = gentle. Stacked tight against each other = a cliff you do not want to walk off in the dark.
  • V’s pointing uphill = a drainage or creek. Water collects in those valleys. V’s pointing downhill = a ridge spur.
  • Concentric closed circles = a hilltop or peak. The innermost ring is the summit.

Before you ever take a step, find your position and your destination, then look at what’s between them. A blue creek line you’ll have to ford? A 40-foot cliff band the straight route walks you off? The map tells you the story if you slow down and read it.

Step 2: The Declination Trap (Don’t Skip This)

Here’s the thing that trips up almost everybody: your compass points to magnetic north, but your map is drawn to true north. The angle between them is called declination, and depending on where you stand in the US it can be 15–20 degrees off. Ignore it and a one-mile walk can land you a quarter-mile from where you meant to be.

Two fixes:

  • The easy way: buy a compass with adjustable declination, set it once for your region (the number is printed in the margin of your topo map, or look it up on NOAA’s declination calculator), and forget about it. The compass does the correction for you forever.
  • The math way: if you’ve got a fixed compass, you correct by hand every time. The western US has east declination and the eastern US has west declination, and you adjust your bearing accordingly — which is precisely the kind of mental math that’s easy to flip under stress, in the cold, at dusk. That’s exactly why I tell people to spend the extra ten bucks on adjustable declination and never think about it again.

Step 3: Shoot a Bearing and Walk It

This is the whole game. A bearing is just a direction expressed as a number from 0 to 360 degrees. Here’s how to get one and follow it:

  1. On the map: lay the edge of your compass baseplate so it connects where you are to where you want to go, with the direction-of-travel arrow pointing toward the destination.
  2. Rotate the bezel until the orienting lines inside the housing line up with the north–south grid lines on the map (north on the bezel pointing to map-north).
  3. Read the number at the index line. That’s your bearing. Say it’s 110 degrees.
  4. Now lift the compass off the map, hold it flat at your chest, and turn your whole body until the magnetic needle sits inside the orienting arrow — “red in the shed.” The direction-of-travel arrow is now pointing exactly where you need to walk.
  5. Pick a landmark on that line — a distinctive tree, a boulder, a notch in the ridge — walk to it, then shoot the bearing again and pick the next one. Never stare at the needle while you walk. Aim, hike, re-aim.

That leapfrog method keeps you honest over distance. It’s how you hold a straight line across terrain that’s trying to push you sideways.

Step 4: When You Have No Compass — Read the Sky

Lost the compass too? The natural world is full of directional clues if you know where to look.

  • The sun. It rises roughly east and sets roughly west — true everywhere. At local noon in the Northern Hemisphere, the sun sits due south, so your shadow points due north.
  • The shadow-stick method. Plant a straight stick in flat ground and mark the tip of its shadow with a rock. Wait 15–20 minutes and mark the new shadow tip. Draw a line between the two marks: it runs roughly west-to-east (first mark is west). Stand with the first mark on your left and the second on your right and you’re facing north.
  • The North Star. At night, find the Big Dipper. The two stars on the outer edge of its “cup” are the pointer stars — follow the line they make about five times that distance and you hit Polaris, the North Star. It sits almost directly over true north and barely moves all night. Face it and you’re facing north, full stop.
  • An analog watch (rough). Point the hour hand at the sun; halfway between the hour hand and 12 o’clock is roughly south. Crude, but it’ll keep you from walking circles.

Skip the folklore, by the way. Moss does not reliably grow on the north side of trees — it grows where it’s damp, which depends on your local terrain. Don’t bet your life on moss.

Step 5: Practice in Your Own Backyard

None of this sticks from reading. Go do it this week, somewhere safe and familiar:

  • Shoot a bearing to a tree across a park, walk to it, then shoot a bearing back to your start (that’s your original number plus or minus 180 degrees). If you land back where you began, your technique is solid.
  • Do the shadow-stick trick in your driveway at lunch and confirm north against a map of your street.
  • Find Polaris from your yard tonight. Once your eyes know the Big Dipper handoff, you’ll never lose it.

Twenty minutes of backyard reps now means it’s muscle memory when the stakes are real and the light is failing.

The Takeaway

A dead phone shouldn’t mean a dead end. Buy a baseplate compass with adjustable declination, print the topo quad for the place you actually hike, and spend one afternoon learning to shoot a bearing. Then learn to find Polaris so the sky becomes a backup to your backup. Do that and you’ve bought yourself a skill that doesn’t run out of charge, lose signal, or shatter on a rock.

Your challenge this week: grab any compass, walk a known 100-yard bearing out and the reverse bearing back, and see if you return to your exact starting point. Nail that and you’ve got the one skill that keeps working when everything electronic quits.

Recovery From the Ground Up: What Your Feet Actually Need After Hard Days

You stretch your hamstrings. You foam roll your back. You ice your knees. And then you cram the two most abused structures in your body — your feet — back into shoes and forget about them until the next hard day. That’s backwards. Your feet take roughly the impact of your bodyweight a few thousand times every mile, and they’re the foundation everything else stands on. Recover them properly and your knees, hips, and lower back all thank you. Ignore them and you’re building recovery on a cracked slab.

This is Part 5 of the Foot Mechanics series. We’ve talked about why your feet got weak, how to transition to less shoe, and how to come back to running without wrecking your knees. Now let’s talk about the part everybody skips: what your feet actually need after the work is done.

Why Your Feet Need Active Recovery (Not Just Rest)

Here’s the thing nobody tells you: your feet have 26 bones, 33 joints, and over 100 muscles, tendons, and ligaments crammed into a space the size of a paperback. After a long ruck, a hard run, or eight hours on concrete, all that tissue is jammed up, the small intrinsic muscles are fatigued, and the plantar fascia — the thick band of connective tissue along the bottom of your foot — is tight and irritated.

Passive rest helps, but it’s slow. Active recovery — deliberately mobilizing, releasing, and stretching the tissue — flushes blood through the area, breaks up adhesions, and resets resting muscle tone so you wake up loose instead of stiff. My honest opinion after years of this: ten minutes of foot work beats an hour on the couch every single time. It’s the highest return-on-time recovery move there is, and almost nobody does it.

Step 1: Roll the Bottom of Your Foot

Start where the abuse lands hardest — the sole. Grab a firm ball (a lacrosse ball is the gold standard; a golf ball if you want it more aggressive), put it under your bare foot, and roll slowly from heel to the ball of the foot for 60-90 seconds per side. Stand for more pressure, sit for less. When you hit a knot, park on it and breathe for a few seconds until it releases.

This single move is the best thing you can do for tight, achy arches and early plantar fasciitis. A dedicated massage ball holds up better than a golf ball and won’t roll away on you — Power Systems’ foam roller and massage ball collection has lacrosse balls, textured myo-release balls, and trigger-point tools in the $4-15 range. Cheap insurance for your feet.

Pro move: keep a ball in the freezer. Rolling with a frozen ball after a brutal day gives you the massage and the ice in one shot, which is exactly what an inflamed plantar fascia wants.

Step 2: Work the Calves and Lower Legs

Your feet don’t operate alone. Tight calves pull on the heel and load the plantar fascia, so foot recovery that ignores the lower leg is half a job. Drop onto a foam roller and work the calf from the achilles up to behind the knee — 30-45 seconds each side, then turn the leg slightly in and out to hit the inner and outer heads. Add the shins (the front) if you’re a runner; tight tibialis muscles are a quiet cause of shin splints.

A firm grid-pattern roller digs in better than the soft cylinders. The TriggerPoint GRID Foam Roller, 13-Inch, Black is the one I keep recommending — it’s compact enough to throw in a gym bag and firm enough to actually do something. Follow the rolling with a wall calf stretch: hands on the wall, one leg back, heel down, lean in for 30 seconds, then bend the back knee to shift the stretch into the lower calf and achilles.

Step 3: Mobilize the Toes and Ankles

Shoes hold your toes in a coffin all day. Recovery is when you give them room to move again. Three drills, no equipment:

  • Toe spreads: sit barefoot and actively splay your toes apart, hold 2 seconds, release. 20 reps. If they won’t move independently, weave your fingers between them and stretch them manually first.
  • Ankle circles: 15 slow circles each direction, each foot. Boring, but it restores the rotation your stiff ankles lost.
  • Big-toe pulls: grab your big toe and gently pull it back toward your shin, then point it down. This restores the toe extension you need for a normal push-off and walking gait.

Step 4: Strengthen What You Just Loosened

Recovery isn’t only about releasing tissue — it’s the perfect window to fire up the small muscles that keep your arch from collapsing. Two of my favorites:

  • Towel scrunches: lay a towel flat on the floor, plant your heel, and use your toes to drag the towel toward you. 2-3 rounds. You’ll feel muscles in your arch you forgot you had.
  • Banded foot work: loop a resistance band around your forefoot and work ankle flexion, extension, and side-to-side. Cheap, packable, and brutal in the best way. A set like the Fit Simplify Resistance Loop Exercise Bands, Set of 5 covers feet, ankles, hips — the whole lower-body chain — for the price of a sandwich.

Don’t overthink the load. The intrinsic foot muscles respond to frequency, not heroics. A little, often, beats a once-a-week beatdown.

Step 5: What You Put on Your Feet After Counts Too

Two ways to win here. First, go barefoot around the house for 20-30 minutes post-workout — let the foot articulate, splay, and grip on the floor the way it was built to. That barefoot time is recovery.

The Big Guns: Contrast, Elevation, and Salt

For genuinely thrashed feet — marathon, all-day ruck, double shift — pull out the extras:

  • Contrast soak: alternate 1 minute hot, 1 minute cold, 3-4 rounds, end on cold. The vascular pumping flushes swelling better than ice alone.
  • Elevation: 10 minutes with your feet above your heart. Gravity does the de-swelling for free.
  • Epsom salt soak: the science on magnesium absorption is thin, but a warm soak relaxes the tissue and feels like a reward. That’s enough reason.

Your 8-Minute Daily Foot Recovery Protocol

Do this every night, barefoot, before bed:

  1. Roll each sole with a ball — 60 sec/side
  2. Foam roll calves — 45 sec/side
  3. Wall calf stretch — 30 sec/side (straight + bent knee)
  4. Toe spreads — 20 reps
  5. Towel scrunches — 2 rounds
  6. Ankle circles — 15 each direction

That’s it. Eight minutes. Do it for two weeks and your feet will feel like a different set of equipment.

The Takeaway

Your feet are the only part of your body in contact with the ground, and they’re almost always the most neglected link in your recovery chain. You don’t need a fancy boot or a $600 massage gun. You need a firm ball, a foam roller, a band, and eight honest minutes a night.

The challenge: run the 8-minute protocol every night for the next 14 days. No skipping. At the end, stand up first thing in the morning and notice how your first ten steps feel compared to today. That difference is the whole point — recovery built from the ground up.

Carnivore vs Keto for Fat Loss: What Actually Works (and What’s Just Hype)

Walk into any gym parking lot and you’ll hear it: one guy swears he dropped 40 pounds eating nothing but ribeyes, the other guy hasn’t touched a carb since 2022 and won’t shut up about ketones. Carnivore and keto are the two loudest diets in the room right now, and people treat them like rival religions. They’re not. They’re two tools that work for the same reason — and understanding why is the thing that actually gets you lean.

Let me save you a year of confusion. Here’s what’s real, what’s marketing, and what to actually do.

The Quick Definitions

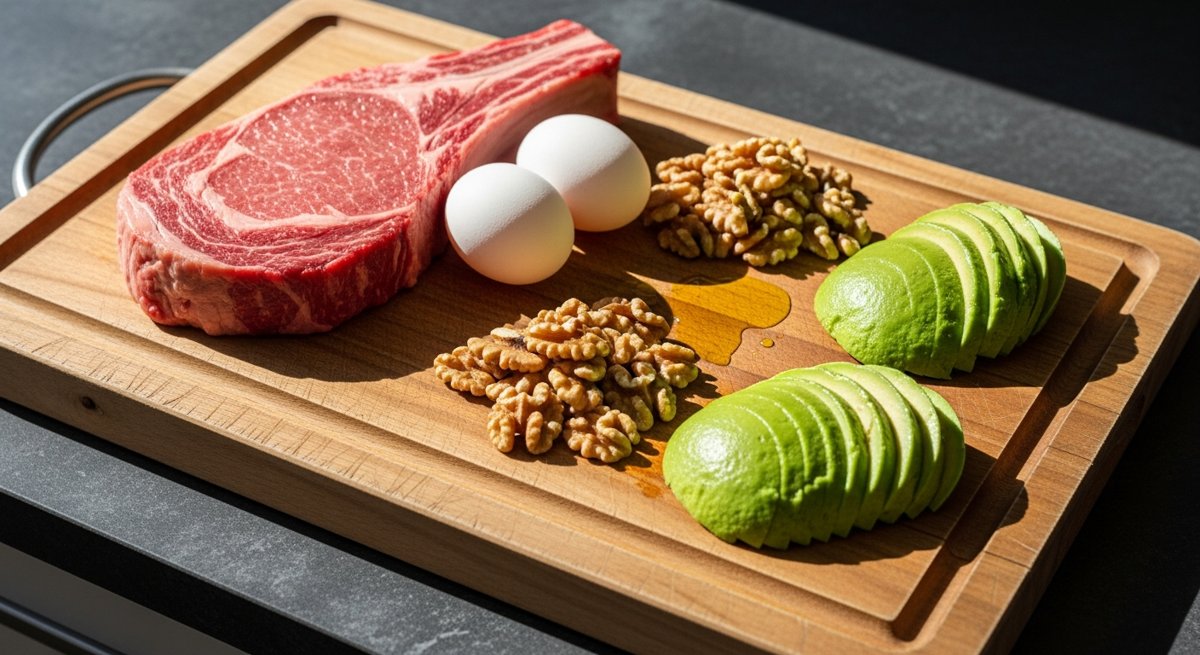
Keto (ketogenic diet): Very low carb — usually under 50g a day, often under 20g — with moderate protein and high fat. The point is to push your body into ketosis, where it burns fat for fuel instead of glucose. You can still eat plants: avocados, leafy greens, nuts, olive oil, cheese.

Carnivore: Animal products only. Meat, eggs, fish, some dairy. Zero plants. It’s keto’s stricter, more extreme cousin — carbs naturally fall to almost nothing because you’re not eating anything that contains them.

Both are low-carb. Both will put most people in ketosis. The real difference is just how many foods you’re allowed to eat.

Here’s the Part Nobody Wants to Hear

Neither diet has a magic metabolic advantage for fat loss. I know that’s not what the YouTube thumbnails promise. But when researchers actually control for calories and protein in a metabolic ward — meaning they lock people in and measure everything — low-carb and higher-carb diets produce nearly identical fat loss. The “ketosis burns more fat” claim falls apart fast once calories are matched.

So why do so many people lose weight on these diets? Three boring, undeniable reasons:

  • You cut out entire food categories. No bread, no chips, no soda, no ice cream. That’s a massive calorie reduction by default, before you ever count a single macro.
  • Protein and fat are filling. A ribeye keeps you full for hours. A bagel makes you hungry by 10am. When you’re less hungry, you eat less without trying.
  • Eating gets simple. Fewer choices means fewer impulse decisions. “Meat and eggs” is a lot harder to overeat than a pantry full of snack foods engineered to be irresistible.

That’s it. That’s the whole trick. Both diets work by creating a calorie deficit you can actually stick to. The deficit is the engine. The diet is just the car you drive it in.

Carnivore: The Honest Pros and Cons

What it’s genuinely good at: Simplicity and appetite control. There’s nothing to track, nothing to weigh, no decisions. A lot of people with autoimmune issues, gut problems, or food sensitivities report real relief on carnivore — probably because an elimination diet this aggressive removes whatever was triggering them. For some folks, that’s life-changing.

Where it bites you: It’s socially brutal (try explaining it at a backyard cookout), it can get expensive if you’re eating quality meat, and the long-term data simply doesn’t exist. We don’t have decades of research on people eating zero plants. You’re also waving goodbye to fiber and a wide range of micronutrients. Some people thrive; others get constipated, irritable, and bored within three weeks.

My honest take: Carnivore is a fantastic short-term reset or diagnostic tool. If you suspect food is wrecking your gut, eliminating everything and slowly adding foods back is legit. As a forever diet? I’m skeptical. Restriction that extreme is hard to sustain, and “hard to sustain” is how every diet eventually fails.

Keto: The Honest Pros and Cons

What it’s genuinely good at: Steady energy and crushing cravings once you’re adapted. It’s more flexible than carnivore — you still get vegetables, fiber, and a broader nutrient base. There’s solid evidence for keto helping with blood sugar control and certain medical conditions (it was literally developed to treat epilepsy). For people who are insulin resistant, the appetite suppression can feel like a superpower.

Where it bites you: The transition sucks. “Keto flu” — headaches, fatigue, brain fog — hits a lot of people in the first week, mostly from dropped electrolytes. It’s also easy to do badly: people drown everything in cheese and butter, blow past their calorie needs on fat alone, and wonder why the scale won’t move. Fat is calorie-dense. You can absolutely eat too much of it.

My honest take: Keto is the more practical of the two for most people. It’s sustainable enough to live on, flexible enough to stay social-ish, and the cravings control is real. The catch is you have to actually keep carbs low — “lazy keto” where you eat 80g of carbs isn’t keto, it’s just a vague low-carb diet with a cooler name.

So Which One Should You Pick?

Stop asking which diet is “better” and start asking which one you’ll actually do. That’s the only question that matters. Here’s my decision tree:

  • You want structure and hate counting? Keto. Hit your carb limit, eat real food, you’re golden.
  • You have gut issues or suspect a food sensitivity? Try carnivore for 30 days as an elimination test, then reintroduce foods one at a time.
  • You love variety and a social food life? Honestly, neither. A high-protein, moderate-carb diet with a calorie target will get you just as lean and you won’t have to bail on every dinner invite.
  • You’ve failed every diet before? Pick the one with fewer rules you’ll break. For most people that’s keto, but if decision fatigue is your enemy, carnivore’s brutal simplicity might be the unlock.

The Stuff That Actually Determines Your Results

Whichever you choose, these four things matter more than the carnivore-vs-keto label:

  1. Protein, always. Aim for roughly 0.7–1g per pound of goal bodyweight. Protein protects your muscle while you lose fat. Both diets make this easy — don’t skip it.
  2. Electrolytes. Low-carb dumps water and sodium fast. Salt your food, get potassium and magnesium, and 90% of “keto flu” disappears. This is the single most ignored fix.
  3. Real calorie awareness. You don’t have to count forever, but at least know roughly what you’re eating for a week. Fat bombs and “keto treats” are how people stall.
  4. Sleep and consistency. A perfect diet on 5 hours of sleep loses to a decent diet on 8. Boring, but true.

One more practical note: both diets live or die in the kitchen. Eating this much meat means you’ll be cooking a lot more of it yourself, and a good cast iron skillet plus a decent instant-read meat thermometer will do more for your adherence than any supplement. These are the two pieces of kit worth buying once and never replacing.

The Bottom Line

Carnivore and keto both work, and they both work for the exact same reason: they make it easy to eat less without feeling starved. There’s no secret fat-melting magic in either one. Pick the version you can run for six months without white-knuckling it, nail your protein and electrolytes, and stay consistent. That beats the “perfect” diet you quit in three weeks every single time.

Your challenge this week: Pick one — keto or a 30-day carnivore test — and commit to a single non-negotiable rule: hit your protein target every day and salt your food. Run it for seven days, no cheating, and write down how your hunger and energy feel by Sunday. You’ll learn more about your own body in one honest week than from a hundred hours of diet debates online.

How to Make Hard Decisions Faster: The 10-10-10 Framework

You ever sit in a truck in a parking lot for twenty minutes because you can’t decide whether to take the new job? Or stare at the same email draft for two days? That’s not careful thinking. That’s a decision rotting on the vine. And the cost of not deciding is almost always higher than picking wrong.

Here’s the thing nobody tells you: most hard decisions aren’t hard because the answer is unclear. They’re hard because the emotion in the moment drowns out everything else. The fear, the FOMO, the “what will people think.” So you freeze. Today I’m going to hand you a tool that cuts through all of it in about five minutes. It’s called 10-10-10, and once you use it a few times you’ll wonder how you ever decided anything without it.

What Is the 10-10-10 Framework?

It comes from journalist Suzy Welch, and the whole thing fits on a cocktail napkin. When you’re stuck on a decision, you ask yourself three questions:

  • How will I feel about this in 10 minutes?
  • How will I feel about this in 10 months?
  • How will I feel about this in 10 years?

That’s it. Three time horizons. The genius is that it forces you to separate the immediate emotional spike from the long-term consequence — which are almost always pulling in opposite directions. The 10-minute answer is your gut screaming. The 10-year answer is your future self tapping you on the shoulder. Most bad decisions happen because we let the 10-minute version win.

Why Your Brain Sabotages Hard Choices

Quick biology, because it matters. When you face a high-stakes choice, your brain runs it through the amygdala first — the threat-and-reward center. It is loud, fast, and short-sighted. It cares about right now: avoiding the awkward conversation, grabbing the dopamine hit, dodging the discomfort. The part of your brain that’s actually good at planning, the prefrontal cortex, is slower and quieter. It gets shouted down.

10-10-10 is basically a crowbar. It pries open space for the slow brain by literally forcing you to time-travel. You can’t answer “how will I feel in 10 years” with pure panic — the question demands you zoom out. That zoom is the whole point.

How to Actually Run It (Step by Step)

Step 1: Write the decision as a single sentence

Not a paragraph. One sentence, framed as a yes/no or A/B. “Do I take the contractor job in Dallas or stay where I am?” Vague decisions stay unsolved. The act of writing it down already does half the work, because most “hard decisions” are actually three tangled decisions wearing a trench coat. Separate them.

Step 2: Answer all three horizons out loud

Out loud, or on paper. Not in your head — your head will cheat. Say it: “In 10 minutes I’ll feel relieved I didn’t have to confront him. In 10 months I’ll be resentful that I let it slide again. In 10 years this will be a pattern that defined whether I respected myself.” Suddenly the 10-minute relief looks pretty cheap, doesn’t it?

Step 3: Notice which horizon you’re weighting

Here’s the move most people miss. After you answer, ask: which of these three matters most for THIS decision? Not all decisions deserve the 10-year lens. Whether to send back a cold steak at a restaurant? 10-minute horizon, decide in two seconds. Whether to marry someone, quit a career, move your family? That’s a 10-year call, and the 10-minute discomfort is noise. Matching the horizon to the stakes is where the speed comes from.

Step 4: Decide and close the loop

Once the horizons line up, you commit and you stop relitigating it. A decision you re-make every day isn’t a decision, it’s an open wound. Pick, act, move on.

Three Real Examples

The confrontation you keep dodging. 10 min: dread, you’d rather do anything else. 10 months: the unaddressed problem has festered into something twice as ugly. 10 years: you’re a person who avoids hard conversations, and your relationships are shallow because of it. Verdict: have the conversation. The 10-minute pain is the cheapest version of this you’ll ever get.

The big purchase you’re rationalizing. 10 min: that new truck would feel incredible. 10 months: the payment is squeezing you every single cycle. 10 years: the debt delayed every goal that actually mattered. Verdict: the 10-minute dopamine is lying to you. Sleep on it.

The opportunity that scares you. 10 min: terrified, want to say no and stay safe. 10 months: I’ll have grown more than the last three years combined. 10 years: this was the fork in the road. Verdict: the fear is the 10-minute brain trying to protect you from growth. Say yes.

My Honest Take

I love this framework because it’s fast, and speed is underrated in decision-making. Most people think slow deciding equals careful deciding. Wrong. Slow deciding usually equals anxious deciding — you’re not gathering information, you’re marinating in fear. 10-10-10 gives you permission to be done. You ran the horizons, the answer’s clear, go.

The one place it fails: decisions with genuinely missing information. If you literally don’t have the data — you don’t know the salary, you haven’t seen the inspection report — then 10-10-10 won’t save you, and you shouldn’t decide yet. Go get the data. But be honest about whether you’re actually missing information or just using “I need to think about it” as a hiding place. Nine times out of ten, it’s the hiding place.

The other thing: pair this with a notebook. I’m a broken record on this, but writing decisions down — the decision, the three horizons, and what you picked — turns you into a sharper decider over time. You start seeing your own patterns. “Oh, I always over-weight the 10-minute discomfort.” That self-knowledge compounds. A cheap field notebook or EDC journal in your back pocket is one of the highest-leverage tools you’ll ever carry, and it costs less than lunch.

The Takeaway

Hard decisions aren’t hard because they’re complicated. They’re hard because your 10-minute brain is loud and your 10-year brain is quiet. 10-10-10 turns up the volume on the voice that actually knows what you should do.

Your challenge: Pick the one decision you’ve been avoiding right now — you already know what it is. Write it as a single sentence. Run the three horizons out loud. Then decide before you finish your coffee. The decision’s been waiting on you, not the other way around.

Composting 101: How to Turn Kitchen Waste Into Garden Gold in 90 Days

Here’s a stat that should annoy you: the average American household throws out roughly 500 pounds of food scraps a year. You pay to buy it. You pay to throw it away. Then in spring, you drive to the garden center and pay $8 a bag for compost that’s basically the same thing you just trashed.

Composting fixes this. And no, you don’t need a fancy tumbler, a degree in soil science, or a half-acre back forty. You need a corner of your yard, a pitchfork, and about 90 days. That’s it.

I’ve watched people overthink this for years. The slimy stink pile. The bone-dry stack of leaves that just sat there. The one forgotten for six months. Here’s what actually works, stripped of the gardening-blog fluff.

The 60-second version: Layer “browns” (carbon — dry leaves, cardboard) and “greens” (nitrogen — kitchen scraps, grass) at roughly 3:1 by volume. Keep it damp like a wrung-out sponge. Turn it once a week. In 90 days, you’ve got black gold. That’s the whole skill.

Why Bother? The Honest Pitch

Look, I’m not going to sell you on composting like it’s going to save the planet. The actual benefits are smaller and more practical:

  • Free soil amendment. Finished compost retails for $5-10 per cubic foot. A modest pile produces 10-20 cubic feet a year. That’s $100+ of garden soil you didn’t buy.
  • Half the trash. Food scraps and yard waste are 30-40% of household garbage by weight. Smaller bags, fewer trips, less stink in the can during summer.
  • Plants actually like it more than fertilizer. Compost adds microbes and slow-release nutrients. Synthetic fertilizer is just a salt blast — works fast, dead soil after.
  • It’s a closed loop on your property. Self-sufficiency isn’t a vibe, it’s a habit. Composting is one of the easiest habits to lock in.

If you grow anything — vegetables, fruit trees, a lawn, even houseplants — you should be composting. The math is too good to ignore.

The Only Rule That Matters: Browns and Greens

Forget everything you’ve read about C:N ratios of 30:1. You don’t need to weigh anything. Here’s the only mental model you need:

BROWNS (carbon) — 3 parts GREENS (nitrogen) — 1 part
Dry leaves Vegetable & fruit scraps
Shredded cardboard Coffee grounds (yes, they’re “green”)
Newspaper (no glossy) Grass clippings
Straw / hay Tea bags (staples out)
Sawdust (untreated wood) Eggshells (crushed)
Wood chips Garden trimmings, dead annuals
Pine needles (sparingly) Plant-based food prep scraps

Rough rule: three buckets of brown for every one bucket of green. If your pile is wet and stinky, add browns. If it’s dry and doing nothing, add greens (and water).

What NEVER Goes In

  • Meat, fish, bones. They’ll compost eventually, but they bring raccoons, rats, and a smell your neighbors will remember.
  • Dairy. Same reason. Cheese on the pile = wildlife party.
  • Greasy / oily food. Coats material, blocks airflow, smells.
  • Pet waste (dogs, cats). Carries pathogens that survive a normal backyard pile. Chickens and rabbits are fine.
  • Diseased plants. If a tomato plant got blight, burn it or bag it. Don’t reward the spores.
  • Walnut leaves/wood. Contain juglone, which kills tomatoes, peppers, and a lot of garden crops.
  • Glossy paper, “compostable” plastic. The first leaches chemicals; the second is a lie unless you have a 160°F industrial composter.

The Setup: Three Options, Cheapest to Best

Option 1: Open Pile (Free)

Pick a spot. Dump stuff. Done. Works fine if you have space and don’t care how it looks. Downside: spreads out, harder to turn, raccoons might dig.

Option 2: Pallet Bin ($0-30)

Four wood pallets, zip-tied or wired at the corners, makes a 4’x4′ bin. Hardware stores and warehouses give pallets away. This is what 90% of serious gardeners use. Add a second bin next to it for the “finishing” pile and you’re set for life.

Option 3: Tumbler ($120-250)

Enclosed plastic drum on a crank. Pros: keeps animals out, looks tidy, easy to turn. Cons: small capacity, plastic degrades in UV, you’ll outgrow it the first year you garden seriously. Buy a tumbler if you’re in a suburb and worried about appearances. Build a pallet bin if you actually want compost.

My take: Pallet bin every time. Tumblers look great on Instagram but produce a fraction of the volume. A double pallet bin setup (active + curing) costs under $30 and outlasts three tumblers.

The 90-Day Build

Day 1: Lay the Base

Drop 4-6 inches of coarse browns on the ground — twigs, corn stalks, rough mulch. This creates airflow underneath. Don’t skip this. A compacted pile is a dead pile.

Days 1-30: Build the Pile

Add material in alternating layers as you generate it. Bucket of kitchen scraps from the week? Cover it with two buckets of dry leaves or shredded cardboard. Always finish a fresh addition with browns on top — that’s what keeps the smell down and the flies out.

Your target size is a cube roughly 3 feet on each side. Smaller piles don’t generate enough internal heat. Bigger gets hard to turn. Three feet cubed is the sweet spot.

Days 30-60: Turn and Wait

Once the pile is built, stop adding to it. Start a second pile for new scraps. The first pile is now “finishing.”

Turn it once a week with a pitchfork or compost aerator. “Turning” means moving the outside material to the inside. The center cooks at 130-150°F when it’s working right. You’ll see steam rising on cool mornings — that’s the win.

Check moisture every turn. Squeeze a handful. Water should bead but not drip. Too dry? Hose it down. Too wet? Add browns and fluff it.

Days 60-90: Cure

By day 60 the pile has shrunk by half and most material is unrecognizable. Stop turning. Let it sit. The microbes do their last work and the pile cools down.

By day 90 you’ve got dark, crumbly, earthy-smelling compost. If it still smells like rotten anything, it’s not done. Give it another two weeks.

Reality check: 90 days is the fast version, assuming summer heat, good carbon/nitrogen balance, and weekly turning. In winter or with a neglected pile, it’s 6-12 months. Both work. The microbes don’t care about your timeline.

The Five Mistakes That Kill 90% of Backyard Piles

  1. Too much green, not enough brown. Result: slimy, stinky, attracts flies. Fix: dump in shredded cardboard or dry leaves and turn it.
  2. Pile too small. A 2-foot pile never gets hot enough. Build to 3x3x3 or bigger.
  3. Bone dry. Microbes need moisture. If it looks like a leaf pile, hose it down until it’s sponge-damp.
  4. Never turning it. A pile that doesn’t get turned still composts — in 18 months instead of 3. Turn weekly.
  5. Putting in stuff that doesn’t belong. Meat, dairy, dog poop. You’ll regret it within a week.

The Kitchen Side: Make It Effortless

If walking out to the pile every time you peel a carrot sounds annoying, that’s because it is. Here’s the system that actually sticks:

  • Counter caddy. A small lidded container (1 gallon) on the counter. Charcoal filter in the lid kills smell. Empty it every 3-5 days. Stainless or ceramic — plastic stains and holds odors.
  • Freezer trick (game changer). Keep a gallon zip bag in the freezer. Toss scraps in as you cook. Empty it weekly. Zero smell, zero fruit flies, zero excuses. This is the move.
  • Outdoor 5-gallon bucket with lid. If you generate a lot of yard waste, stage it next to the pile so you only have to walk out once a week.

What to Do With Finished Compost

Once it’s done, the use cases are endless:

  • Top-dress garden beds with 1-2 inches in spring and fall.
  • Mix into potting soil at a 1:3 ratio for container plants.
  • Side-dress tomatoes, peppers, squash mid-season for a nitrogen boost.
  • Compost tea. One shovelful in a 5-gallon bucket of water, steep 24 hours, water plants. Cheap liquid fertilizer.
  • Lawn topdressing. Quarter-inch layer in early fall. Best lawn treatment that exists, period.

The Honest Tradeoffs

Composting isn’t free time-wise. You’re looking at maybe 30 minutes a week — 5 minutes emptying the counter caddy, 10-15 minutes turning the pile, plus occasional sourcing of browns (free leaves in fall, cardboard from any delivery).

It’s also not magic. A bad pile won’t ruin anything, but it also won’t produce anything useful. The difference between people who get compost and people who get a wet pile of garbage is one thing: turning the pile. Everything else is forgivable.

Your 90-Day Challenge

This weekend: Build a pallet bin or designate a corner of the yard. Lay your coarse base layer. Put a counter caddy or freezer bag in your kitchen.

Next 30 days: Build the pile. Aim for 3’x3’x3′. Layer browns and greens 3:1. Always finish with browns on top.

Days 30-60: Stop adding. Start pile #2. Turn pile #1 every weekend.

Day 90: Sift out the finished compost. Top-dress one garden bed. Notice it’s the best soil you’ve ever had.

Report back. I want to know how your pile is doing.

Self-sufficiency isn’t about prepping for collapse or going off-grid. It’s about closing small loops on your property — turning waste into resource, reducing what you buy, getting your hands in the dirt. Compost is the most basic, most ancient version of this. It’s literally what soil has been doing since plants existed. You’re just helping it along.

Build the bin. Start the pile. Stop throwing money in the trash.

Composting closes one loop; there are dozens more. For the full playbook on the rest — water, food, soil, and power — The Self-Sufficient Backyard walks through the whole system.

How to Build a Debris Shelter That Actually Keeps You Warm (Not the Useless Lean-To You Saw on YouTube)

Quick truth: most of the “survival shelters” you see on YouTube would let you freeze to death by 3am. A flat lean-to with a thin layer of pine boughs is a wind break, not a shelter. If the temperature drops below 50°F and you don’t have a sleeping bag, that thing will kill you slowly through the night while you shiver, hallucinate, and lose the will to keep moving.

The debris shelter — done right — is different. It’s the closest thing to a sleeping bag you can build with nothing but your hands and what’s already on the forest floor. Built correctly, it’ll hold body heat down to about 20°F. I’ve slept in one in the high 30s with no bag, no fire, and a damp jacket. Woke up cold but alive. That’s the whole point.

Here’s how to actually build one. Not the version that looks pretty on Instagram — the version that works.

The Principle You Have to Understand First

A debris shelter is not about walls. It’s about trapped air. Your body is a 98.6°F heater pumping out roughly 100 watts continuously. The problem isn’t generating heat — it’s losing it. You lose heat four ways: conduction (cold ground sucking it out of you), convection (wind stripping it off your skin), radiation (your body glowing infrared into the dark), and evaporation (sweat, breath).

A debris shelter solves all four. The framework holds debris off your body. The debris itself — 2 to 3 feet of it — traps still air. Still air is the best insulator on Earth. It’s literally how down jackets work, how Thinsulate works, how every sleeping bag on the market works. You’re building a sleeping bag out of leaves.

Read that again: 2 to 3 feet of debris. Not 6 inches. Not “a good layer.” Knee-deep. If you can see daylight through the roof when you’re inside, you’re going to freeze.

Step 1: Pick the Right Spot (This Is Where Most People Screw Up)

You’re looking for four things, and you check them in this order:

  • Dry ground. Not a low spot. Not a drainage. Not the bottom of a valley where cold air pools. Look for a slight rise with leaves already piled up — nature already told you where it drains.
  • Debris within 30 feet. You’re going to make 20-40 armloads of leaves and pine needles. If your hauling distance is 100 yards, you’ll run out of daylight and energy before the shelter is done.
  • Two trees, a forked branch, or a deadfall roughly 7-8 feet apart to support the ridgepole. Don’t have that? A single sturdy tree + one strong stick jammed in the ground works too.
  • Not under widowmakers. Look up. Dead branches hung in living trees will kill you the one night you finally got warm.

Avoid: ridge tops (wind), valley bottoms (cold sink, water), anywhere near rotted trees, anywhere with a clear deer trail running through (you don’t want company at 2am).

Step 2: Build the Ridgepole and Frame

The ridgepole is the spine of the whole structure. Find a sturdy branch 1.5x your body length (so about 9-10 feet for most adults) and roughly wrist-thick. Not thumb-thick. Wrist-thick. It has to hold hundreds of pounds of wet leaves without bowing.

Prop one end up about 3 feet off the ground — in a tree fork, lashed to a tree, whatever works. The other end sits on the ground. You now have an angled spine, low end on the ground, high end at your hip when you sit. That low end is your foot end. The high end is your head end and entrance.

Critical sizing rule: the interior needs to be just barely big enough for you to fit. If you can sit up inside, it’s too big — your body can’t heat that much air. You should be able to roll over and that’s it. Coffin-sized. This feels wrong. Build it anyway.

Now lean ribbing sticks against the ridgepole on both sides, every 6-8 inches, angled at about 45°. These hold the debris off your body. Then weave smaller sticks horizontally across the ribs — basket-weave style — to create a lattice that leaves can’t fall through.

Step 3: Pile the Debris (Where Everyone Quits Too Early)

This is the work. Real work. Plan on 60-90 minutes of hauling leaves, pine needles, ferns, dry grass — anything fluffy and dry. Pile it on the frame until you have at least 2 feet of debris in every direction. Three feet is better. When you think you’re done, you’re halfway done.

Test it: push your arm into the pile from outside. If you can feel the frame, the debris is too thin. Keep piling. The shelter, when finished, should look like a giant pile of leaves with a small hole at one end. Not a tidy A-frame. Not a Boy Scout diorama. A messy, oversized leaf pile.

A common move: lay small branches over the pile after you’re done. Wind will strip the top layer otherwise, and one good gust at 1am will undo two hours of work.

Step 4: Stuff the Inside (The Step Almost Everyone Skips)

The ground will steal more heat from you than the air ever will. You need 6-12 inches of debris underneath you, packed into the interior of the shelter before you crawl in. Leaves, pine needles, dry grass — anything that compresses but still has loft.

Then, once you’re inside, you pull more debris in on top of yourself like a blanket. You’re going to crawl into a leaf pile and bury yourself. Your face stays exposed, everything else gets covered. This is where the magic happens — that’s the still-air sleeping bag I told you about. The shelter is the outer shell. The debris on top of you is the actual insulation.

Step 5: Plug the Door

Once you’re inside, you pull a “door plug” in behind you — basically a stuff sack of debris, or a small pre-made bundle of grass and leaves. Without it, the entrance is a chimney that vents all your warm air. With it, you’ve sealed the envelope. Build the plug before dark. You will not want to be making one at 11pm in the cold.

What This Costs You (Time and Calories)

A proper debris shelter takes 2-3 hours to build from scratch with no tools. It burns somewhere between 800-1500 calories. You need to start building no later than 3 hours before sunset, period. If you find yourself caught out at dusk and you haven’t started, you’re sleeping cold and you need to switch to plan B (fire and a wind break).

A small folding saw or even a sharp fixed-blade knife cuts the build time roughly in half. This is one of the cases where the right piece of gear matters — check out the survival gear in the BaseCampGoods shop if you don’t already have a real outdoor knife. A folding saw under 8 inches will save you more energy than any other tool in this scenario.

My Honest Opinion on When to Build One

Most people will never build a debris shelter for real. That’s fine. But you should build one once, in good weather, in your own woods or someone’s property where you have permission. Sleep in it for one night. Here’s why:

  • You will learn that “shelter” doesn’t mean what you think it means.
  • You will learn how much work it actually takes — and how badly you’d struggle to do it cold, wet, and tired.
  • You will never again leave the truck without a decent jacket and a knife.
  • You will respect a synthetic sleeping bag for the modern miracle it is.

Every serious outdoorsman I know has done this exercise at least once. It’s not because they expect to be lost in the woods. It’s because the experience recalibrates everything — how much gear matters, how much fitness matters, how thin the line really is.

The Five Most Common Mistakes

  1. Too big. Build it coffin-sized, not tent-sized. Your body can’t heat a room.
  2. Not enough debris. 2-3 feet on top. Not 6 inches. Not “a good layer.”
  3. No ground insulation. Cold ground will defeat you faster than cold air. 6-12 inches under you.
  4. Wet debris. Damp leaves are worse than no leaves. Brush off snow, shake out water, use dry stuff.
  5. No door plug. An open door is a chimney. Seal it.

Your Challenge This Weekend

Pick a Saturday in the next month. Go to your hunting lease, your buddy’s land, or a state forest that allows it. Spend three hours building a real debris shelter — coffin-sized, knee-deep debris, ground insulation, door plug. Then crawl in and stay in it for at least 30 minutes.

If you’re feeling froggy, sleep in it. Take a sleeping bag as a backup — you can leave it outside the shelter and only grab it if you genuinely need it. Most people who try this find they don’t.

The skill you can do on demand beats the gear you might forget. Build one shelter in good weather, and you’ll never panic about a cold night again.

Got questions about building your first one, or want to share how it went? Drop a comment below. We read every one.