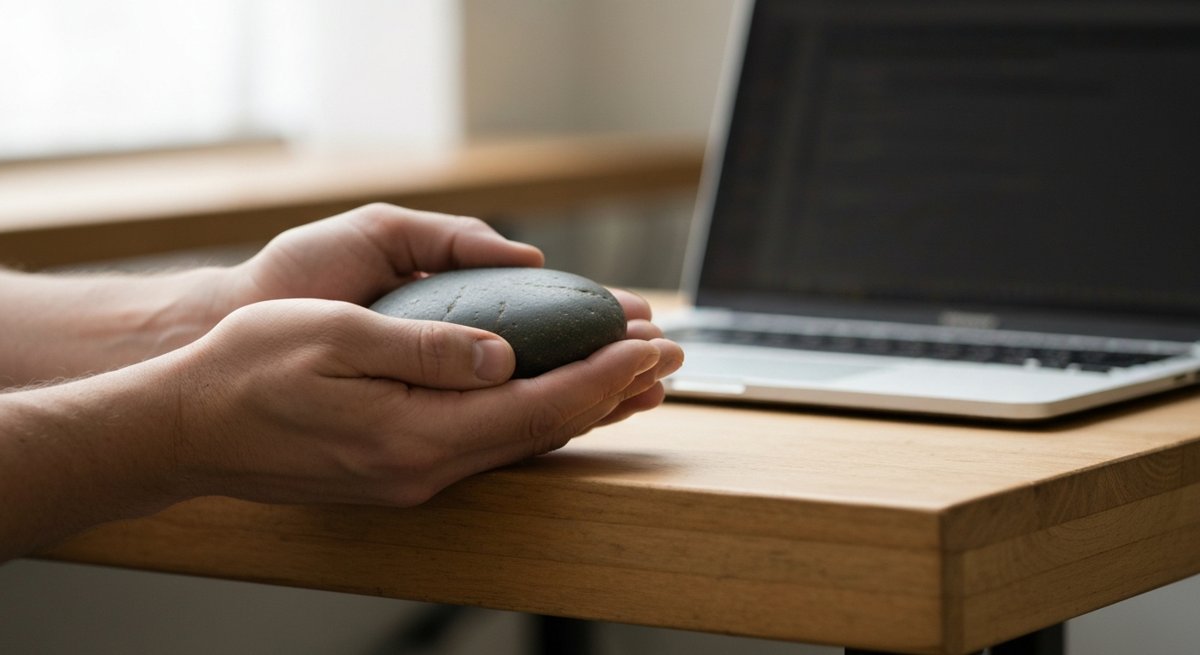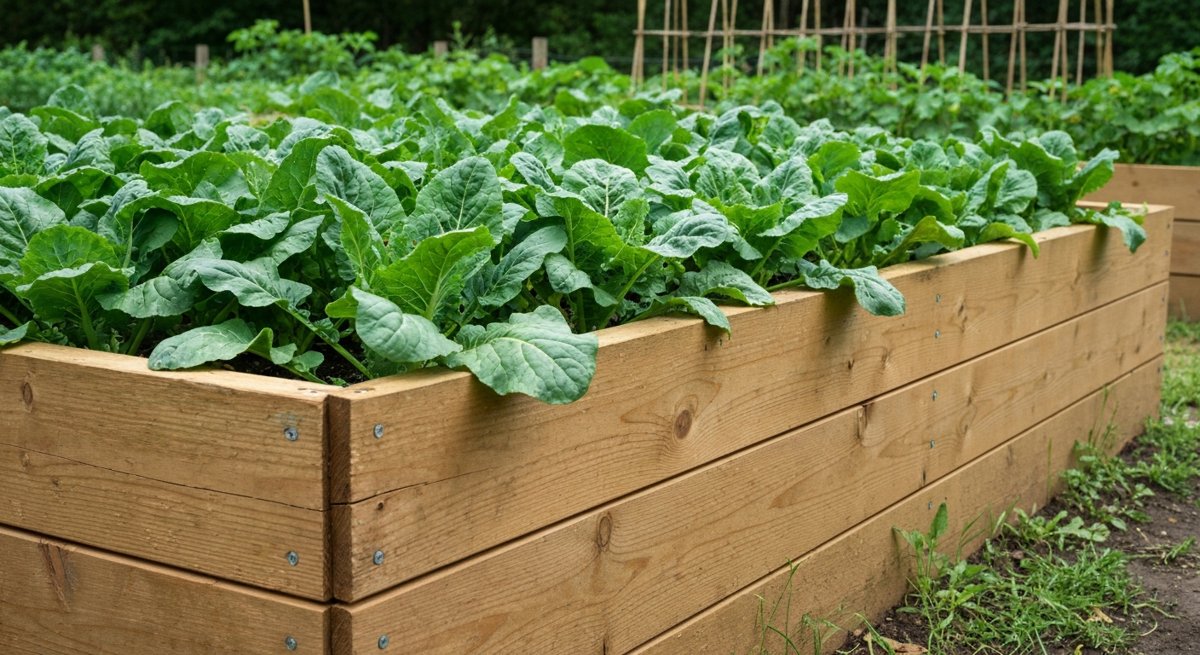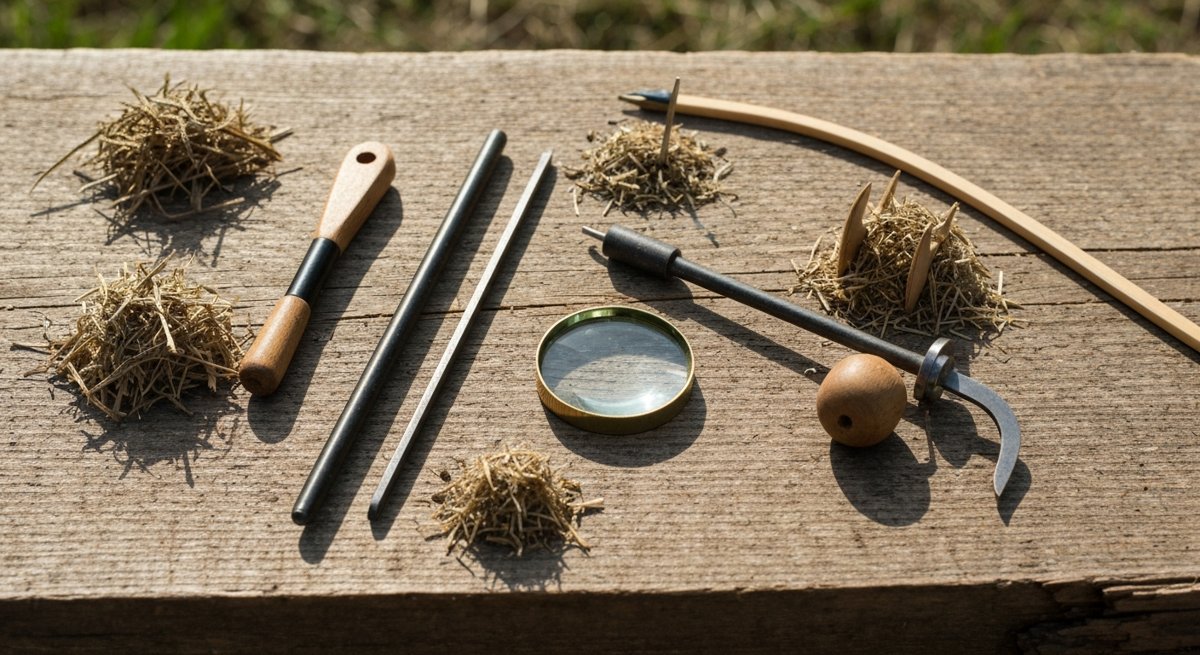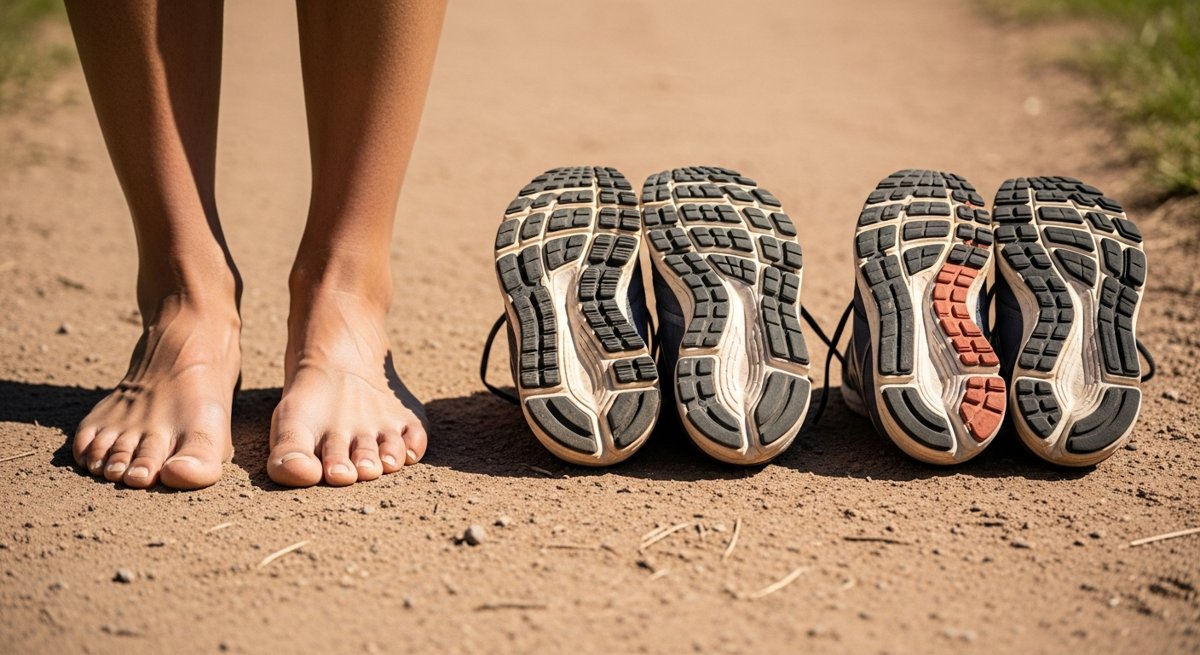
Zero Drop, Minimalist, Maximalist — What Actually Matters in a Running Shoe

Walk into any running store and you’ll get hit with three religions: zero-drop minimalists who think cushioning is the devil, max-stack pillow lovers who can’t fathom feeling the ground, and the marketing folks in the middle selling you whatever’s on the wall. All three will tell you they have the answer. None of them are asking the right question.

The right question isn’t “what’s the best running shoe?” It’s “what do my feet actually need to do their job?” Because here’s the secret nobody selling shoes wants you to hear: the shoe is just a tool. Some tools fix problems. Some tools cause them. Most do both — depending on the foot inside.

This is Part 2 of our Foot Mechanics series. If you missed Part 1 on why your feet are weak, go read that first. This post is about the shoe itself: what the buzzwords mean, what actually matters, and how to pick something that helps you instead of hurting you.

The Three Camps (And What They Get Right and Wrong)

1. Minimalist / Zero-Drop

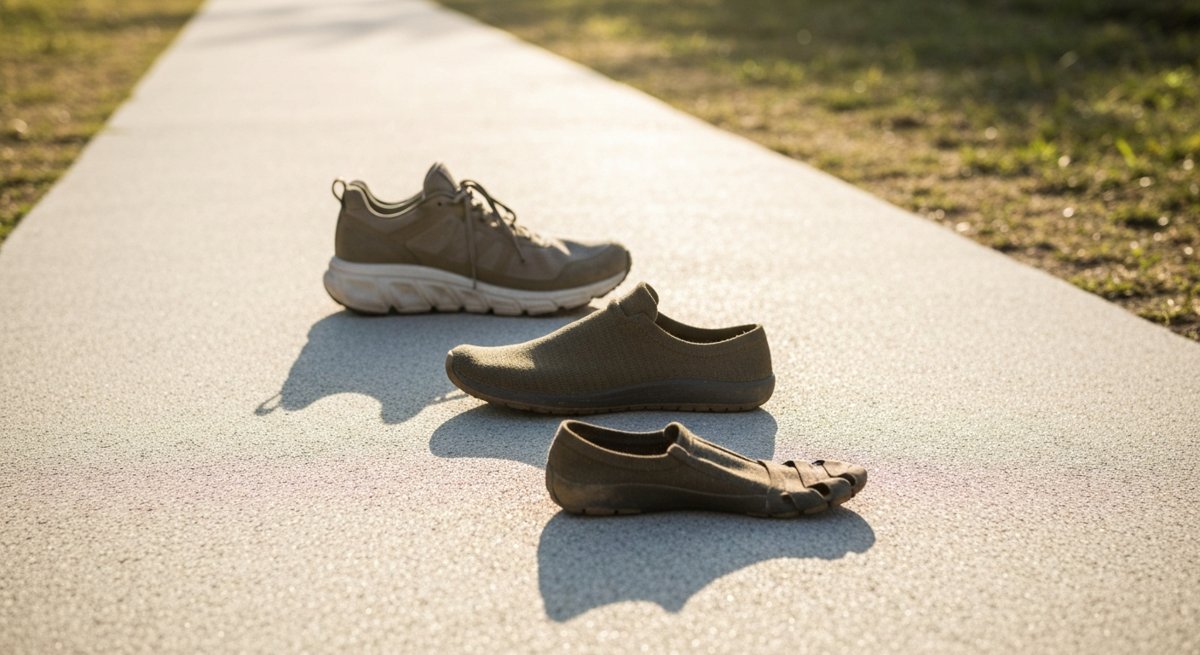
Heel and forefoot are the same height. Stack height (the foam under your foot) is low — usually 0-12mm. Wide toe box. Flexible sole. Think Altra, Vivobarefoot, Xero, and the original Vibram FiveFingers.

What they get right: Your foot has 26 bones, 33 joints, and over 100 muscles, tendons, and ligaments. It’s designed to move, splay, sense the ground, and absorb shock through that whole chain. Pile a 35mm slab of foam under it and you turn that sensory miracle into a numb stump. Zero-drop and wide toe boxes let the foot work like a foot.

Where they go wrong: Most people coming out of decades in cushioned shoes have weak feet, short calves, and tight Achilles tendons. If you jump straight from a 12mm-drop trainer into zero-drop, you will get hurt. The shoe didn’t break you — the mismatch between your tissues and the demand did. (We cover the transition plan in Part 4.)

2. Maximalist / High-Stack Cushion

Big foam stacks (30-50mm), often with a moderate to high heel-to-toe drop (8-12mm), and increasingly with a carbon plate in the midsole. Hoka built an empire on this. Nike Vaporfly turned it into a marathon-record-breaking weapon.

What they get right: For high-mileage road runners and people with cranky joints, that stack absorbs an absurd amount of impact. Carbon plates genuinely improve running economy — the science is real, not marketing. If your job is to grind out 50+ miles a week on concrete, maximalist shoes can keep you in the game.

Where they go wrong: All that foam between you and the ground kills proprioception — your foot’s ability to feel and react to the surface. Studies have shown that maximalist shoes can actually increase impact forces because you land harder when you can’t feel what you’re landing on. They also lock the foot in a rigid platform, so the intrinsic foot muscles atrophy. You become dependent on the shoe to do work your foot used to do.

3. Traditional Trainers

The middle of the road. Moderate stack (20-28mm), 8-10mm drop, some structure, some cushioning. Brooks Ghost, Asics Gel-Nimbus, Saucony Ride, the whole running-store wall.

What they get right: Nothing extreme. For a recreational runner doing 15-25 miles a week, they’re fine. They won’t fix your feet, but they probably won’t actively destroy them either.

Where they go wrong: They’re a compromise that doesn’t really commit to anything. Enough heel lift to keep your calves short. Enough cushioning to dampen your foot’s signal. Not enough to actually carry the load if you’re a heavy mileage runner. They’re the Toyota Camry of footwear — and that’s not always a compliment.

What Actually Matters (The Five Variables)

Forget the marketing categories. Here are the five things that actually change how a shoe interacts with your body.

Variable What It Means Why It Matters
Heel-to-toe drop The height difference between heel and forefoot (in mm) Higher drop = more pressure on the forefoot/knees, shortens calves over time. Lower drop = more demand on calves/Achilles but a more natural foot strike.
Stack height Total foam under your foot More stack = more impact absorption but less ground feel. Less stack = better proprioception but more honest about your form.
Toe box width How much room your toes have to splay Narrow boxes cause bunions, neuromas, and weak intrinsic muscles. Wide boxes let your foot work as a stable platform.
Flexibility Can you bend the shoe? Twist it? Stiff shoes lock the foot in place. Flexible shoes let the 33 joints in your foot actually move.
Weight Grams per shoe Heavier shoes = more energy cost per stride. For long days on feet, this compounds.

Notice “cushioning” isn’t on the list as a single variable. That’s because cushioning is the combination of stack height, foam density, and your weight. A 30mm stack of soft EVA foam feels nothing like a 30mm stack of dense PEBA. The number on the box doesn’t tell you what you’ll feel.

My Honest Opinion (Take It or Leave It)

Most adults benefit from a wide toe box and a moderately low drop (0-6mm). The maximum stack height should be set by what you’re doing and how much your tissues can currently handle — not by what’s trendy.

Here’s why: the toe box thing is non-negotiable. Squeezing your toes into a point for 8 hours a day in dress shoes and another 90 minutes in narrow running shoes is why half of America has hammertoes, bunions, and chronic plantar fasciitis. Wide toe boxes aren’t a preference. They’re an anatomical baseline.

Low drop matters because every millimeter of heel lift puts you in a slight forward lean, which shortens your calves and Achilles, loads your knees, and changes how your hips fire. You can get away with it for a while. You don’t get away with it forever.

But stack height? That depends on context. I run a hard surface long run in a moderately cushioned shoe. I do strength work and short runs barefoot or in something flat and flexible. I hike in something with grip and a wider platform but not a pillow. The shoe should match the demand.

How to Pick a Shoe Without Getting Conned

Walk into the store with this checklist. Ignore everything else.

  1. Try them on at the end of the day. Feet swell. A shoe that fits at 9 AM will be tight at 6 PM after a long run.
  2. Trace your foot on paper. Trace the shoe insole. Compare. The insole should be wider than your foot at the widest point — that’s your toe splay zone. If your foot is wider than the insole, the shoe is too narrow. Period.
  3. Flex test. Hold the heel, push the toe. The shoe should bend at the ball of the foot, where your foot bends — not in the middle of the arch.
  4. Twist test. Wring the shoe like a wet towel. Some give is good. A shoe that resists like a 2×4 will fight your foot’s natural motion.
  5. Check the drop on the spec sheet. Stores hide this. Look it up before you buy. Anything over 10mm should be a deliberate choice, not a default.
  6. Walk and jog around the store. If something feels weird in 2 minutes, it’ll feel terrible at mile 6.

The most expensive shoe in the store is not the best shoe for your foot. It’s the best shoe for the store’s margin. Don’t confuse the two.

What About the Carbon Plates Everyone’s Wearing?

Quick reality check. Carbon-plated super shoes (Vaporfly, Alphafly, Adios Pro, Endorphin Pro, etc.) are real. They make you 2-4% more efficient at race pace. For a sub-3-hour marathoner, that’s 5+ minutes. For a 4:30 marathoner, that’s also real time.

But: they’re race-day tools, not training tools. The plate locks your foot in a fixed-shape rocker. Train in them every day and you’ll get the same atrophy problem we talked about above — plus they break down fast (200-300 miles) and cost $250+. Use them for the workouts that matter. Train in something honest.

The Three-Shoe Rotation I Actually Recommend

If you’re a serious recreational runner — say, 20+ miles a week — here’s the setup that gives you the best of every camp without the downsides of any.

  1. A daily trainer with moderate cushion and a 4-8mm drop. This is your bread and butter. 60-70% of your miles. Brooks Glycerin, Saucony Ride, New Balance 880 territory.
  2. A minimalist or zero-drop shoe for short easy runs and strength work. Altra Escalante, Vivobarefoot Primus, Xero HFS. 20-30% of your miles. This keeps your feet strong.
  3. A “fast day” shoe — could be a super shoe or just a snappier, lighter trainer. Used for tempo runs, intervals, and races. 10-20% of your miles.

Rotating shoes isn’t just about variety — it’s about loading your tissues in different patterns so no single repetitive stress wears out one structure. Multiple studies have shown rotation reduces injury rate by 30-40%. It’s not a luxury. It’s a strategy.

The TL;DR

  • Wide toe box always. Non-negotiable. Your foot needs to splay.
  • Lower drop (0-8mm) for most people, most of the time. Long-term, your calves and knees will thank you.
  • Stack height depends on the job. Race day pillows, training day honesty.
  • Carbon plates are a tool, not a lifestyle. Use them for races, not for groceries.
  • Rotate. Two or three shoes for different jobs beats one shoe doing everything.
  • Don’t transition fast. Going from a 12mm-drop maximalist to a zero-drop minimalist in one week is how you get plantar fasciitis. Take 8-12 weeks. (Again: Part 4 walks you through this.)

This Week’s Challenge

Pull out every pair of shoes you own — dress shoes, running shoes, sneakers, boots. Trace your bare foot on a piece of paper. Now trace the insole of each shoe. How many of them are actually wider than your foot at the toes? If the answer is “none” or “one,” you just diagnosed a foot health problem you didn’t know you had. Fix that first. The right shoe matters more than the right training plan.

Next up in the series: Part 5 — Recovery From the Ground Up: What Your Feet Need After Hard Days. Because picking the right training shoe is half the battle. What you do with your feet after the run is the other half.
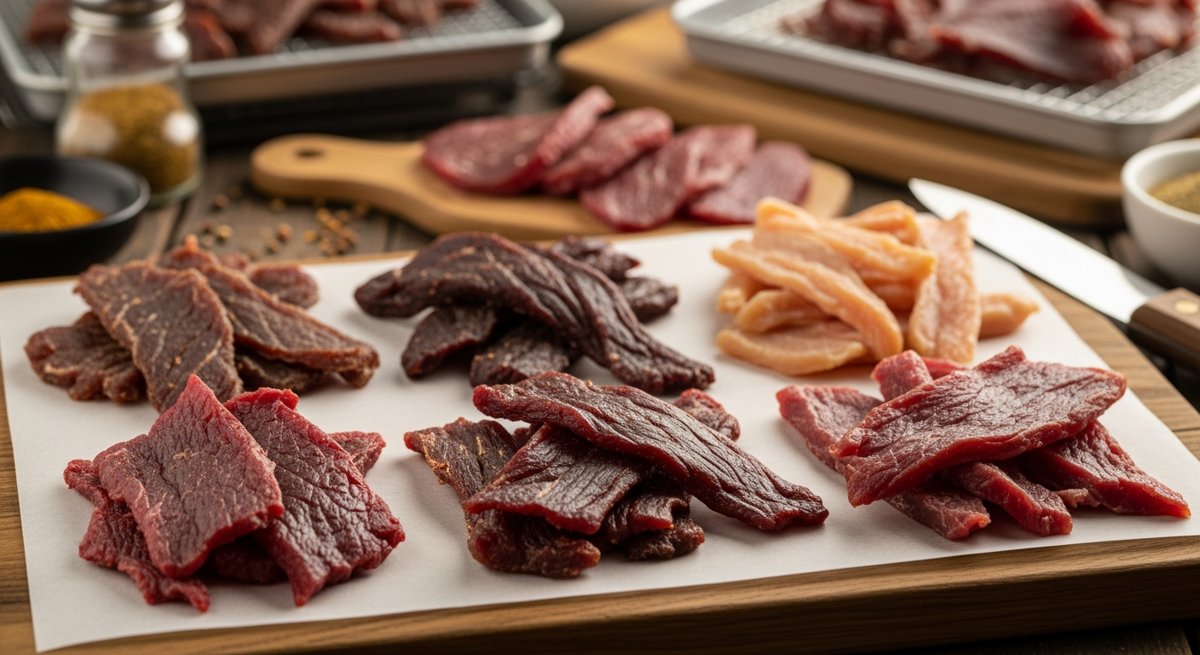

Jerky at Home: How to Dehydrate Beef, Venison, and Turkey (The Complete Guide)

A bag of decent grocery-store jerky runs $8 to $12 for what amounts to two real handfuls of meat. The good stuff — Chomps, Country Archer, anything labeled “grass-fed” — can hit $15 a bag. You can make better jerky at home for roughly $4 a pound, control every ingredient that goes into it, and stop pretending those tiny packets are a reasonable way to eat protein.

Here’s the whole playbook: beef, venison, and turkey. Three marinades, one machine, zero mystery.

Why Bother Making Your Own

Three reasons, in order of importance:

  1. Cost. A pound of eye of round runs $7–$9. You lose about half the weight to dehydration, so you end up with ~8 oz of finished jerky. That’s the equivalent of three or four store-bought bags ($25–$40 worth) for the price of one lean cut of beef.
  2. Ingredients. Read a jerky label sometime. Sodium nitrite, MSG, “natural flavors,” dextrose, maltodextrin, and enough sugar to qualify as candy. Yours has meat, salt, soy sauce, and whatever spices you actually like.
  3. Quality. Homemade jerky — properly dried, properly seasoned — is in a different league. It tastes like the animal, not a marinade injection.

My opinion: The cost argument matters, but the ingredient argument is the real win. If you’re trying to eat clean protein on the move, packaged jerky is one of the worst-value foods at the grocery store. You’re paying meat prices for sugar and preservatives.

What You Need

A dehydrator (or an oven, if you must)

A real dehydrator with a fan and an adjustable thermostat is the move. Look for one that hits at least 160°F — this is the FDA’s recommendation for safely killing pathogens in raw meat before drying. Stacked-tray dehydrators work; box-style with horizontal trays work better because airflow is more even.

If you don’t own one, an oven set to its lowest temperature (usually 170°F) with the door cracked open will work. It just ties up your oven for 4–8 hours and uses way more energy. Buy the dehydrator.

A sharp knife or a slicer

Even, thin slices are the whole game. If your slices are inconsistent, some pieces will be over-dried and some will still be soggy in the middle. A meat slicer is overkill unless you’re making jerky weekly. Otherwise, a sharp 8″ chef’s knife and 60 minutes of partial freezing (more on that below) is enough.

The meat — cut selection matters

  • Beef: Eye of round, top round, or bottom round. Lean cuts only. Fat doesn’t dry — it goes rancid. Trim every visible piece off before slicing.
  • Venison: Hindquarter muscles — top round, sirloin tip, eye of round. Same rule: trim hard, no silver skin, no fat.
  • Turkey: Breast only. Tenderloins work great because they’re already thin and uniform.

The Slicing Trick That Changes Everything

Put the meat in the freezer for 60–90 minutes before slicing. Not frozen solid — firm. You want it stiff enough that the knife glides through cleanly instead of squishing the muscle fibers.

Two slicing directions, two textures:

  • With the grain = chewy, traditional jerky texture. Better for backpacking because it holds up.
  • Against the grain = tender, breaks apart easily. Better for snacking at home, harder to tear when you’re walking.

Slice 1/8″ to 1/4″ thick. Thinner = faster drying and crispier finish. Thicker = chewier, takes longer. I default to about 3/16″ — call it the thickness of two stacked quarters.

Three Marinades That Actually Work

Mix marinade in a gallon zip-top bag, add sliced meat, squeeze the air out, and refrigerate 8–24 hours. Longer = saltier and more pronounced flavor. Don’t go past 24 hours or the texture starts to get mushy.

Each recipe is enough for about 2 pounds of sliced meat.

1. Classic Soy & Black Pepper (Beef)

  • 1/2 cup soy sauce
  • 1/4 cup Worcestershire
  • 2 tbsp brown sugar
  • 2 tsp coarse black pepper
  • 1 tsp garlic powder
  • 1 tsp onion powder
  • 1/2 tsp smoked paprika
  • 1/2 tsp red pepper flakes (optional)

2. Sweet Heat (Venison)

  • 1/3 cup soy sauce
  • 2 tbsp honey
  • 2 tbsp apple cider vinegar
  • 1 tbsp sriracha
  • 2 tsp garlic powder
  • 1 tsp ground ginger
  • 1 tsp coarse black pepper
  • 1/2 tsp cayenne

Venison takes spice well — it’s lean, gamey, and stands up to bigger flavors than beef. Don’t waste this marinade on store-bought beef.

3. Citrus Herb (Turkey)

  • 1/4 cup soy sauce
  • 2 tbsp olive oil
  • Juice and zest of 1 lemon
  • 2 tbsp Dijon mustard
  • 1 tbsp dried rosemary (or 2 tbsp fresh, chopped)
  • 2 tsp garlic powder
  • 1 tsp black pepper
  • 1 tsp salt

About curing salts: Most home jerky recipes don’t use Prague Powder #1 (sodium nitrite). The FDA recommends pre-heating meat to 160°F before dehydrating, which kills pathogens that nitrite would otherwise control. If you want maximum shelf life or you’re making something closer to commercial jerky, add 1/4 tsp Prague Powder #1 per pound of meat. Otherwise, skip it. I skip it.

The Drying Process, Start to Finish

  1. Pat the marinated slices dry with paper towels. Excess marinade on the surface = sticky, uneven drying. Don’t skip this.
  2. Pre-heat the meat to 160°F. Put the slices on a baking sheet in a 275°F oven for 10 minutes. This is the safety step. Don’t skip it just because you’re impatient.
  3. Arrange on dehydrator trays in a single layer, not touching. Airflow is everything.
  4. Dry at 160°F for 4–6 hours. Beef and venison usually finish around 5 hours. Turkey runs faster — check at 3 hours.
  5. Test doneness. Bend a cooled (not hot) piece. It should crack and show white fibers but not snap clean. If it’s bendy and shiny, keep going. If it shatters, you went too far — still edible, just brittle.

Storage — And the Step Almost Everyone Skips

After drying, let the jerky cool to room temperature, then put it in a paper bag (yes, a paper bag) for 24 hours. This step is called “conditioning.” It lets remaining moisture redistribute evenly so you don’t get a few wet pieces ruining the whole batch.

After 24 hours, check for any beads of moisture on the bag. If you see condensation, throw it back in the dehydrator for another hour.

Then store:

  • Vacuum-sealed at room temp: 1–2 months
  • Vacuum-sealed in the freezer: 6–12 months, no quality loss
  • Mason jar with an oxygen absorber: 3–4 months at room temp
  • Zip-top bag in the pantry: 1–2 weeks. Don’t kid yourself, it won’t last that long anyway.

The Cost Math, Spelled Out

Let’s run a 2-pound batch of beef jerky:

  • 2 lbs eye of round: ~$16
  • Marinade ingredients (pantry staples, prorated): ~$2
  • Electricity for 5 hours: ~$0.30
  • Total: ~$18.30 for about 16 oz of finished jerky

16 oz of grocery-store jerky at $10 per 2 oz bag = $80. You just saved $60 and got a better product. Do this twice a month and you’ve funded a decent dehydrator inside of six months.

Common Mistakes I See

  • Using fatty cuts. Chuck, ribeye, brisket trimmings — they all turn rancid in storage. Lean cuts only.
  • Skipping the 160°F pre-heat. Dehydrators alone don’t guarantee pathogen kill. It’s a 10-minute step. Just do it.
  • Inconsistent slicing. 1/8″ pieces next to 1/2″ pieces = some jerky, some shoe leather, some still raw in the middle.
  • Over-marinating. 24 hours max. Beyond that, the texture goes mushy and the salt overpowers everything.
  • Skipping the conditioning step. The paper bag move feels weird, but it’s the difference between jerky that lasts months and jerky that molds in a week.

Your Challenge This Week

Buy 2 pounds of eye of round on your next grocery run. About $16. That’s the entry fee.

Mix the classic soy & pepper marinade Saturday morning. Slice and bag the meat. Sunday morning, dry it. By Sunday afternoon, you have a week’s worth of high-protein snacks that cost you a third of what the gas station charges, taste better, and have ingredients you can pronounce.

Do this twice and you’ll never buy a $10 bag of jerky again.

If you hunt — venison jerky is the killer app for this. A backstrap and a hindquarter will keep you in protein snacks for months, and it’s the single best way I know to use up tough cuts that would otherwise sit in the freezer until next season.

One last thing: Once you start making your own, you’ll catch yourself reading every store-bought jerky label and getting mildly offended. That’s the goal. Keep building skills that make the convenient option look stupid.

Jerky is preservation 101. To go further — curing, canning, root cellars, and growing the food in the first place — The Self-Sufficient Backyard is the manual.

The Power of Boring Consistency: Why Motivation Is a Trap

Motivation is a liar. It shows up when you don’t need it and disappears the second things get hard. If you’ve been waiting to feel ready, feel inspired, feel like it — you’ve already lost the game.

The people you envy — the ones with the body, the business, the marriage, the bank account — they didn’t out-motivate you. They out-bored you. They did the same unsexy thing on Tuesday in February when nobody was watching and nothing felt good. That’s the whole secret. There isn’t a second one.

This post is about why boring consistency beats explosive effort every time, why motivation is actually working against you, and how to set up your life so showing up doesn’t require feeling like it.

The Lie You’ve Been Sold

Open Instagram. Open YouTube. Open TikTok. What do you see? Guys screaming about hustle. 4 AM cold plunges set to electronic music. Some life coach in a Lambo telling you that your mindset is the only thing holding you back.

It’s all selling the same lie: that you’re one hyped-up morning away from a different life. That if you just want it bad enough, the rest will fall into place.

It’s a lie because motivation is a feeling, and feelings are weather. They come, they go, you don’t control them. Building a life on top of motivation is like building a house on top of a cloud.

Here’s what nobody on your feed will tell you: the most successful people I know are kind of boring. They go to bed early. They eat the same breakfast. They train at the same time. They do the work whether they feel like it or not, and they’ve stopped having an opinion about whether they feel like it. The feeling is irrelevant. The reps still happen.

Why Boring Wins

Math. That’s the answer. It’s just math.

Run the numbers on a guy who works out 6 days a week for 3 weeks every January, then quits until next January. Over 5 years he’s done about 90 workouts. Now take a guy who trains 3 times a week, every week, no exceptions, no streak chasing, just three sessions. Over 5 years he’s done 780 workouts.

There is no level of motivation that closes that gap. The boring guy isn’t even working that hard. He’s just not stopping. And not stopping — that’s the entire skill.

The same math applies to everything: money saved, books read, miles rucked, sentences written, conversations with your kid, push-ups, prayers, sales calls. Volume over time crushes intensity in bursts. Always. It’s not close.

Motivation Is Actually the Enemy

Here’s the part that took me a while to accept: relying on motivation actively makes you weaker. Every time you only train when you feel like it, you teach your brain that the feeling is the prerequisite. No feeling, no action. You’re training the wrong nervous system.

The people who get strong — physically, financially, mentally — train the opposite reflex. They act first, the feeling follows. Or doesn’t. Doesn’t matter. The reps still happen.

Once you decouple action from feeling, you become genuinely dangerous. Bad day? Reps happen. Slept terribly? Reps happen. Marriage on fire, kid puked at 3 AM, work meeting got moved? Reps happen, maybe shorter, but they happen. That’s not discipline as a personality trait. That’s just an operating system you built once and now you don’t have to negotiate with yourself every morning.

How to Build the Boring Engine

Knowing motivation is a trap is step one. Step two is engineering your life so you don’t need it. Here’s the actual playbook.

1. Make the Bar Embarrassingly Low

If your daily target is “1 hour at the gym,” you will fail. Not because you’re weak — because life is chaos and an hour is a lot. Set the bar at 10 minutes. 5 pushups. One page. One sales call. Something so small that “I don’t have time” becomes obviously a lie you’re telling yourself.

Most days you’ll do way more. Some days you’ll only hit the minimum. That’s the whole point. The minimum is the protection against zero. Zero is what kills you. Zero compounds the wrong way.

2. Pick a Time and Defend It

Decision fatigue is real. Every morning you re-decide whether to train, whether to write, whether to eat well, you burn willpower you can’t get back. Pick a time, put it on the calendar, and stop thinking about it. 6 AM. 9 PM. Tuesday after work. Doesn’t matter — pick one and stop renegotiating.

Treat it like a meeting with someone who will fire you if you don’t show. Because eventually, you will. Your future self is the person paying the bill.

3. Track Something Stupid Simple

Get a wall calendar. The cheap kind. Every day you hit your minimum, put an X. That’s it. Don’t overthink it. Don’t use an app that gamifies your life into oblivion. An X on a calendar is one of the most powerful tools ever invented, and Jerry Seinfeld didn’t trademark it for a reason.

You’ll find yourself doing the work just to not break the chain. That’s not cheating. That’s leveraging human psychology against itself. Use whatever works.

4. Decouple From Outcome

If you started lifting last month and you’re still checking the mirror every morning waiting for abs, you’re going to quit. The outcome is too far away and too unreliable. You don’t control when results show up. You only control whether you showed up.

Switch your scoreboard. Don’t measure “did I lose 10 pounds this month.” Measure “did I hit 12 workouts this month.” One is in your control. One isn’t. Score yourself on the controllable one and the uncontrollable one starts taking care of itself.

5. Build Tolerance for Boredom

Most of consistency is just being okay with the fact that it’s not exciting. The first month is exciting. Month four through eighteen is just maintenance — the slog where most people quit. Real progress lives on the other side of that boredom.

Stop trying to optimize the boring out. The boring is the work. If you need it to be fun, you’ll keep program-hopping forever, chasing novelty like it’s a drug. It is a drug, by the way. Novelty hits the same dopamine receptors as a slot machine. The guy on his 800th boring squat day is just choosing a different vice.

What This Looks Like in Real Life

I’ll give you a real example. I know a guy who’s in better shape at 51 than most people are at 25. He doesn’t bio-hack. He doesn’t track macros. He doesn’t post about it. He walks his dog 45 minutes every morning, does 50 pushups before bed, lifts three times a week at the same gym at the same time, and eats roughly the same six meals on rotation.

He’s been doing this since his late twenties. That’s it. That’s the program. It would fit on a Post-it note. He would bore you to death if you tried to interview him about his “routine.” There’s no story there. Just twenty-three years of Tuesdays.

Meanwhile the rest of us are out here buying our seventh program, watching another podcast, trying to find the trick. The trick is there isn’t one. The trick is twenty-three years of Tuesdays.

The Mindset Shift That Changes Everything

Here’s the reframe that unlocks the rest of your life: stop trying to be motivated and start trying to be unstoppable.

Motivated is a state. Unstoppable is an identity. One depends on weather. The other depends on you deciding what kind of person you are and then refusing to negotiate. You don’t ask a brick wall if it feels like being a wall today. It’s a wall. That’s the whole job.

Become the wall. The motivation will visit sometimes — you’ll have great days, days where everything clicks, days where you feel ten feet tall. Enjoy them. But don’t depend on them. They are the bonus, not the foundation.

Your Challenge This Week

Pick one thing. Not three. Not a whole new lifestyle. One thing.

Set a minimum so small it’s almost insulting. 5 pushups. 10 minutes of reading. One glass of water before coffee. One walk after dinner.

Do it every day for the next 7 days. Hit the minimum even if you don’t feel like it. Especially if you don’t feel like it — those are the reps that count.

Put an X on a calendar each day. At the end of the week, look at the chain. That string of X’s is not a hack. It’s not a trick. It’s evidence. Evidence that you don’t need motivation to do hard things. Evidence that you’re the kind of person who shows up.

That evidence compounds. After 7 days you have a small thing. After 30 days you have a habit. After a year you have an identity. After 5 years you have a life that doesn’t look like everyone else’s, and you stopped noticing it changed because you were busy doing Tuesday.

Motivation got you to read this. Boring consistency is what gets you everything else.

Now close the tab and go do your 5 pushups.

Solar Power for Beginners: What a Starter System Actually Costs in 2026

Let me save you a weekend of YouTube rabbit holes and three hours on the phone with a sales rep who calls himself a “solar consultant.” Here’s what a real off-grid or backup solar setup actually costs in 2026 — broken down by what you’re trying to do, what gear you actually need, and where people waste money.

Spoiler: it’s cheaper than it was five years ago. It’s also more confusing, because the market is flooded with all-in-one units that range from genuinely good to garbage in a clever box. I’ll tell you which is which.

First: What Are You Actually Trying to Do?

99% of bad solar decisions happen because someone bought the wrong category of system. There are really only four:

  1. Tier 1 — Phone/Light Backup ($150–$400). Keep phones charged, run a fan, power a couple LED lights during a short outage. A small power station + one folding panel.
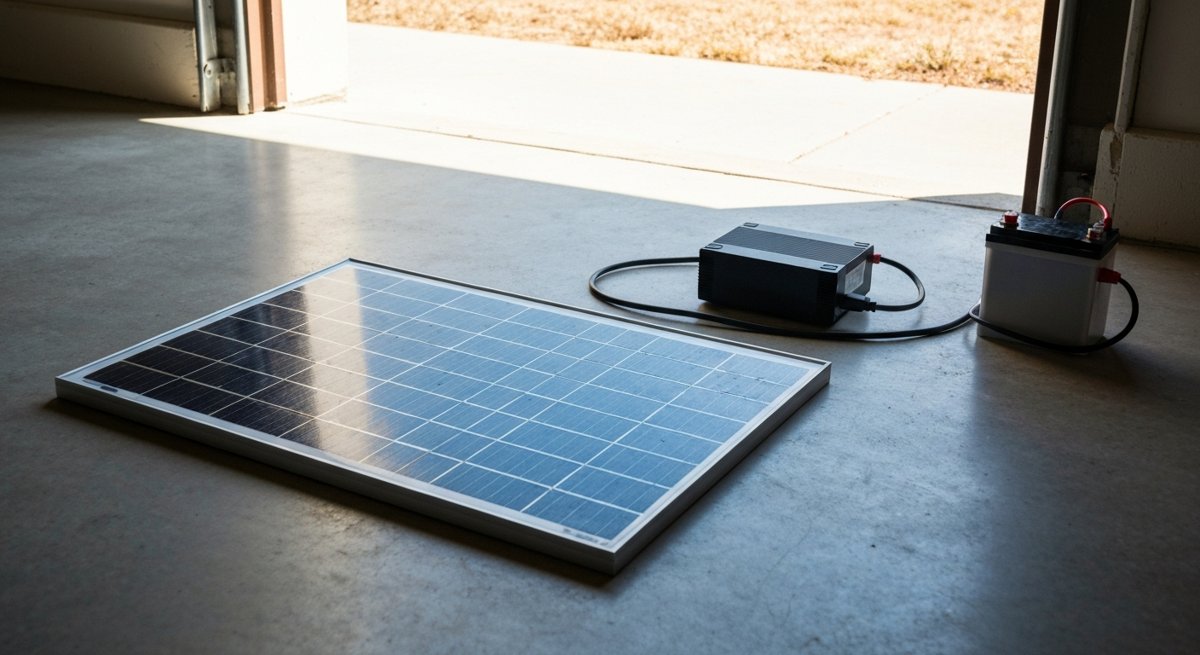
  2. Tier 2 — Fridge + Essentials Backup ($800–$2,500). Run a fridge, a CPAP, internet router, charge tools, lights for a few days. Mid-size power station (1,500–3,000Wh) plus 200–400W of panels.
  3. Tier 3 — Whole-Home Backup ($6,000–$15,000). Tied to your panel via transfer switch. Runs most of the house through outages. Larger battery bank, inverter, maybe rooftop solar.
  4. Tier 4 — True Off-Grid ($20,000+). No utility connection. Roof or ground array, battery bank, generator backup, the works.

If you don’t know which tier you need, you’re Tier 2. Almost everyone reading this is Tier 2. That’s where the real value lives — meaningful backup power, no electrician required, portable enough to take camping. Let’s break that down.

The Tier 2 Starter System (What Most People Should Build)

Here’s a real-world setup that handles a multi-day outage, runs a fridge, keeps phones and laptops alive, and powers a few lights and a fan. Total cost: about $1,400–$1,800 in 2026.

Component 1: A Power Station with LiFePO4 Batteries — $900–$1,200

This is the brain. It’s the battery, the inverter, the charge controller, and the outlets all in one box. Non-negotiable: it must be LiFePO4 (lithium iron phosphate), not standard lithium-ion. LiFePO4 lasts 3,000–6,000 cycles vs 500–1,000 for regular Li-ion, doesn’t catch fire if punctured, and handles temperature extremes way better. Brands I’d actually buy: EcoFlow Delta 2, Bluetti AC180, Anker Solix C1000, Jackery Explorer 1000 v2. Aim for at least 1,000Wh of capacity and 1,500W of continuous output. That’ll run a typical fridge plus a few small loads.

Component 2: Solar Panels — $300–$500

200–400W of foldable or rigid panels. Foldable is more versatile (you can chase the sun, pack them away), but rigid panels are cheaper per watt if you have a permanent spot. Two 200W foldable panels in parallel will give you a real-world 800–1,200Wh of charging per sunny day — enough to keep that 1,000Wh station topped off if you’re running modest loads.

Component 3: A Good Extension Cord and Heavy-Duty Outlet Strip — $50

Sounds boring, matters a lot. You need at least a 12-gauge outdoor extension cord to run from your power station (probably in the garage or by a window) to your fridge. Cheap 16-gauge cords will sag voltage and trip your inverter on startup surges.

Component 4: A Kill-A-Watt Meter — $30

Buy this before you buy a power station. Plug your fridge into it for 24 hours and read the actual daily watt-hours. Same for any other appliance you want to back up. Now you know exactly what size system you need. This $30 tool will save you from buying double the system you actually need — or half.

The Math Nobody Shows You

Here’s the formula that demystifies the whole thing:

Daily Wh you need = (watts of device) × (hours per day it runs)

Modern fridge: ~100W average, runs ~8 hrs/day cycling = 800 Wh/day
CPAP: 40W × 8 hrs = 320 Wh/night
Router + modem: 15W × 24 hrs = 360 Wh/day
Phones/laptop charging: ~150 Wh/day
3 LED lights: 10W × 5 hrs each = 150 Wh/day

Total essentials: ~1,800 Wh/day

So a 1,000Wh battery alone won’t last a full day of essentials. But pair it with 400W of solar in decent sun, and you’re generating 1,500–2,000 Wh/day of recharge. Now you’re sustainable. That’s why both halves of the system matter — battery alone is just a backup. Battery + panels is power independence.

Where People Waste Money

  • Buying gas-generator-sized systems for fridge-sized needs. You don’t need a 5,000Wh monster to ride out a 36-hour storm.
  • Cheap lead-acid setups. The math used to favor lead-acid on price. It doesn’t anymore. LiFePO4 is now cheaper over its lifetime, weighs a third as much, and doesn’t need to be vented.
  • Permanent rooftop installs for backup-only use. If you just want emergency power, don’t drill into your roof. A portable system is more flexible, moves with you, and works during a grid-down event without a special transfer switch.
  • Generic Amazon “1500W” panels. If a 200W panel costs $80, it’s not a 200W panel. Real-world output from no-name panels is often 40–60% of the sticker number.
  • Ignoring the inverter rating. A 1,000W inverter cannot start a fridge. Compressors have a startup surge 3–5x running watts. You need at least 1,500W continuous, with 3,000W surge.

My Honest Opinion on All-in-One Power Stations

I used to be a “build your own with separate components” snob. I’m not anymore. The modern all-in-one units are genuinely good — they pack a proper LiFePO4 battery, a pure sine wave inverter, an MPPT charge controller, and a battery management system into one box for less than you could build it for in 2026. Unless you’re going Tier 3 or Tier 4, just buy the all-in-one. Skip the 3 weekends of wiring, fuse-sizing, and second-guessing.

The only reason to DIY is if (a) you want a 5,000+ Wh bank, or (b) you genuinely enjoy this stuff. Both are fine. Just be honest with yourself.

A Word on Tax Credits

The federal Residential Clean Energy Credit currently covers 30% of the cost of solar systems — but only if they’re permanently installed on your home. Portable power stations don’t qualify. If you’re going Tier 3 (whole-home with rooftop), the 30% credit changes the math substantially. A $12,000 system effectively costs $8,400. Talk to a CPA before pulling the trigger, and don’t trust the installer’s word on what qualifies.

The Honest Truth About Payback Periods

Solar salespeople love to talk about “payback in 7 years.” For a backup-only Tier 2 system, the payback isn’t in dollars saved on your power bill — it’s in not losing $400 of fridge contents during an outage, being able to work during a multi-day storm, and not paying $1,500 for a generator + fuel + maintenance over 10 years. Frame it that way and a $1,500 system pays for itself the first time the grid goes down for more than 24 hours.

A Tier 3 whole-home install with grid sell-back? Real payback in some states is 8–12 years. In states with cheap power and no net metering, more like 18–25 years. Run the numbers for your zip code before anyone tries to sell you anything.

Your Challenge This Weekend

Do these three things before you buy anything:

  1. Buy a $30 Kill-A-Watt meter. Measure your fridge for 24 hours. Write down the kWh.
  2. Add up the daily Wh of every appliance you’d actually want during an outage. Be honest — you don’t need to run a hair dryer.
  3. Multiply that total by 1.5 to size your battery (gives margin for cloudy days and aging cells). That’s your target Wh.

Now you know what to buy. Not what a YouTube affiliate is pushing. Not what a salesperson commissioned on margin recommends. What you actually need.

Solar isn’t magic. It’s just math and decent equipment. Do the math, buy decent equipment, and you’ll never panic during a thunderstorm again.

Looking for gear that actually holds up? Check the BaseCampGoods shop for tested EDC and preparedness gear we’d put in our own kits.

Solar is one system; a self-reliant property runs on several. For the complete DIY blueprint — power, water, food, and storage, with no one upselling you — The Self-Sufficient Backyard is worth the read.

Water Purification Methods Ranked: Filters, Tablets, UV, and Boiling (Which Actually Works)

You can survive about three days without water. But here’s the part most people miss: drinking the wrong water can kill you faster than dehydration. Giardia. Cryptosporidium. E. coli. Norovirus. Heavy metals from old mining runoff. A clear mountain stream looks like Evian and tastes like betrayal.

So you boil it, right? Sometimes. Sometimes you can’t. Sometimes you’re moving fast, your fuel is wet, and you’ve got 800 mL of unknown creek water and 20 minutes before you need to be five miles down the trail. That’s why you need to actually understand your options — not just own a Sawyer because some YouTuber said so.

Here’s the honest ranking of the four main field methods, what each one actually kills, and when I’d reach for each one.

The Four Methods, Ranked Overall

  1. Boiling — most reliable, requires fuel + time
  2. Filtration (hollow fiber) — fastest in the field, no waiting
  3. Chemical tablets — lightest, slowest, tastes awful
  4. UV light — fast and clean, but fragile and battery-dependent

That’s the headline. Now let’s get into the why — because the right answer depends entirely on what you’re worried about.

#1. Boiling — The Gold Standard

Kills: Bacteria. Viruses. Protozoa (giardia, crypto). All of it. Anything biological dies in a rolling boil.

Does NOT remove: Chemicals, heavy metals, salt, sediment, or the taste of dead leaves.

How long: CDC says one minute at a rolling boil at sea level. Three minutes above 6,500 ft. That’s it. The “boil it for ten minutes” thing is folklore — by the time water hits 160°F, you’ve already killed everything that matters.

Why it wins: No moving parts. Nothing to break. Nothing to replace. If you have a pot and a heat source, you have safe water. Forever.

Why it loses sometimes: Fuel is heavy. Time is expensive. You can’t boil while you’re hiking. And in a true emergency — say, urban evac, no power — you might not have a stove at all.

My take: If I’m in a basecamp with a fire going, boiling is always the answer. It’s the most foolproof method humans have ever come up with. The only reason it’s not #1 in your pack is that it’s slow and fuel-dependent.

#2. Hollow-Fiber Filters — The Field Workhorse

The standouts: Sawyer Squeeze, Sawyer Mini, Katadyn BeFree, MSR Trail Shot.

Kills/removes: Bacteria and protozoa — 99.9999% of the bad stuff at the 0.1-micron level. The Sawyer Squeeze is rated to 100,000 gallons. That’s a lifetime of water from one filter the size of your thumb.

Does NOT remove: Viruses. This matters. In North America? Almost never an issue — viral contamination of backcountry water is extremely rare. In a sewage-contaminated urban flood, or anywhere overseas? You need more than a filter.

Why it wins: Drink immediately. No waiting, no taste, no fuel. Lightweight. Cheap (Sawyer Squeeze is around $40). Works in dirty water as long as you backflush it.

Why it loses sometimes: Freezing kills hollow-fiber filters. One night below 32°F with water still in the fibers and the filter is silently destroyed — no warning, just contaminated water next time. You also can’t filter saltwater or chemical contamination.

My take: This is what lives in my pack. Every hike, every overnight, every truck kit. The Sawyer Squeeze is the most cost-effective survival item I own. Just don’t let it freeze.

#3. Chemical Tablets — The Ultralight Backup

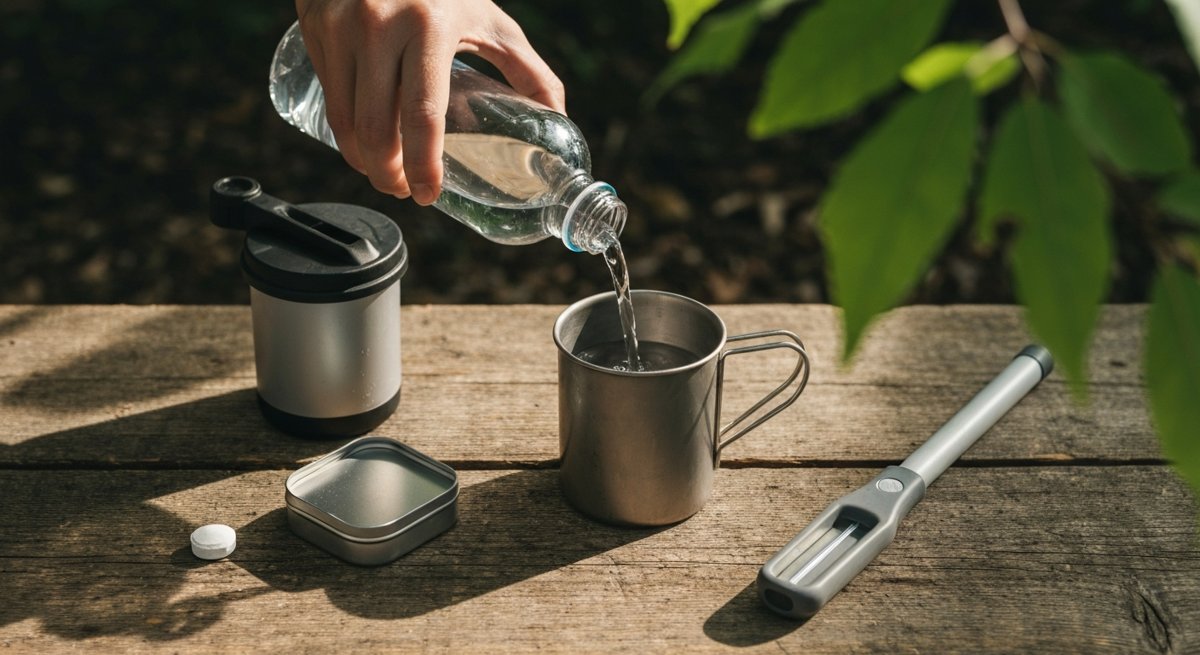
The standouts: Aquatabs (chlorine dioxide), Potable Aqua (iodine), Katadyn Micropur.

Kills: Chlorine dioxide tablets kill bacteria, viruses, AND crypto — which is rare for a single method. Iodine kills most things but is weak against crypto.

How long: 30 minutes for bacteria/viruses. Four hours for crypto in cold water. That’s the catch.

Why it wins: Weighs nothing. Lasts years on the shelf. Zero moving parts. Doesn’t care if it freezes. Throws into any kit and forgets about it until you need it. Pack of 30 tabs costs about $13.

Why it loses sometimes: Slow. Tastes like a pool. Doesn’t remove sediment. Iodine is contraindicated for pregnant women and people with thyroid issues. The wait time when you’re parched is brutal.

My take: Tablets are not your primary. They’re the redundancy. They live in the lid pocket of my pack and in my truck kit because they weigh nothing and they don’t break. If your filter freezes or clogs at the worst moment, the tablets save you.

#4. UV Light — Cool Tech, Wrong Tool

The standouts: SteriPEN Ultra, SteriPEN Adventurer Opti.

Kills: Everything biological — bacteria, viruses, protozoa. UV-C light scrambles their DNA and they can’t reproduce.

Why it wins on paper: 90 seconds, no chemicals, no flavor, no fuel.

Why it loses in reality: It’s a glass UV bulb in a battery-powered electronic device that you’re going to dip into cold water and toss around in a pack. The failure modes are not theoretical. Bulb breaks. Batteries die. Electronics get wet. Water must be clear — turbid water blocks the UV from reaching the pathogens, and you have no way to know if it worked.

My take: Cool gadget. Stays home. If I want belt-and-suspenders, I’d rather carry tablets AND a filter than rely on something with a battery and a glass bulb when I’m 30 miles from a road.

The Decision Matrix: What to Actually Use

Day hike in North America: Sawyer Squeeze. Done. That’s it.

Backcountry overnight: Sawyer + tablets as backup. Two methods, almost zero weight penalty.

Winter trip (below freezing): Tablets primary. Boiling at camp. Skip the filter — it’ll crack.

International travel / questionable city water: Filter + tablets. The combo kills viruses the filter misses.

Home emergency / urban evac: Boiling if power’s available. Bleach (2 drops per liter, wait 30 min) if not. Tablets if you have them.

Vehicle EDC / get-home bag: Tablets. They live in the bag for a decade and never complain.

The Sediment Problem Nobody Talks About

All four methods assume your water is reasonably clear. Murky water from a stock pond or a flood? You need to pre-filter first — through a bandana, a coffee filter, or by letting it settle for an hour in a separate container. Then purify. Skip this step and you’ll clog your filter, undertreat with tablets, or scatter the UV light. It’s the boring step everyone forgets.

The Layered Setup (What I Actually Run)

Redundancy isn’t paranoia — it’s how you don’t end up with giardia 12 miles from the trailhead. Here’s my actual three-tier setup, total weight under 5 ounces:

  • Primary: Sawyer Squeeze with a smartwater bottle as the dirty reservoir
  • Backup: 10-pack of Aquatabs in a tiny ziplock in the lid pocket
  • Camp: Titanium pot for boiling whenever I have a stove going

Three independent methods. Each covers what the others miss. If the filter freezes — tablets. If I’m out of tablets — boil. If I’m out of fuel — filter. The system never has a single point of failure.

The Takeaway

Pick two methods that fail in different ways. A filter and tablets. A pot and a filter. Whatever combination you can carry. The single-method survivalist is one freeze, one clog, or one dead battery away from drinking raw creek water and gambling with a parasite that ruins the next three weeks of their life.

Water is the one resource you can’t compromise on. Get this right and almost everything else gets easier.

Your Challenge This Week

Go look at your get-home bag, your truck, and your day pack. How many ways can you make water safe to drink with what’s in there right now? If the answer is “one” — or worse, “none” — fix that this weekend. A Sawyer Squeeze and a sleeve of Aquatabs is under $55 total and covers 90% of real-world scenarios you’ll ever face.

Want more practical survival gear breakdowns? Check out the BaseCamp Goods shop for vetted EDC, survival, and emergency kit essentials.

Knowing how to make water safe is field skill #1. For the long game — building catchment and storage you control, not just treating what you scavenge — The Self-Sufficient Backyard is the deeper resource.

The Shoe Transition Guide: How to Go Minimal Without Getting Injured

So you read about how modern shoes are wrecking your feet. Or a friend won’t shut up about their Vibrams. Or your knees hurt and the internet told you to go barefoot. Either way — you’re thinking about switching to minimalist shoes, and you want to know how to do it without ending up on crutches.

Good. Because the dirty secret of the minimalist shoe world is that most people who try them get hurt. Not because the shoes are bad. Because they rush.

Your feet have been in supportive, cushioned, heel-elevated shoes since you were a toddler. The muscles, tendons, and connective tissue that should be doing the work have been on vacation for 30-40 years. Then you buy a pair of Xero shoes, go for a 5-mile run on Saturday, and wake up Sunday with a screaming Achilles or a stress fracture in your metatarsal.

This is the guide I wish someone had handed me. It’s a 16-week plan. Yes, sixteen weeks. If that sounds long, you’re exactly the person who needs to read it.

Why You Can’t Just Switch

Three things are happening when you go from a traditional running shoe (10-12mm heel drop, heavy cushioning, motion control) to a minimalist shoe (0mm drop, thin sole, wide toe box):

  1. Your calves and Achilles take over. A heel-elevated shoe shortens your calf chain. Drop to zero, and suddenly those tissues are stretched longer than they’ve been in decades. They will revolt.
  2. Your foot muscles wake up. The arch isn’t supposed to be propped up by a shoe — it’s a spring made of 33 joints and 26 bones. Activating that system is like asking a sleeping muscle to do a max effort lift.
  3. Your gait changes whether you want it to or not. Most heel strikers naturally shift to a midfoot landing in minimalist shoes. That’s a different load pattern on different tissues that aren’t conditioned for it.

The fix isn’t toughness. It’s tissue adaptation time. Bone, tendon, and fascia adapt slowly. Muscle adapts in weeks. Connective tissue takes months. Push muscle past tissue, and tissue tears.

The 16-Week Transition Plan

This assumes you’re a reasonably active adult — you walk, maybe you run a couple times a week, no current injuries. If you’re dealing with plantar fasciitis or an Achilles issue right now, fix that first before starting this.

Weeks 1-4: Wear Them Around the House

That’s it. That’s the whole thing. Put on your new minimalist shoes (or just go barefoot) for an hour or two a day around the house. Cook dinner in them. Watch TV in them. Walk to the mailbox.

What you’re doing: letting the intrinsic foot muscles — the small ones inside your foot that control the arch — start firing again. You’ll notice some foot soreness, especially in the arch and the side of your big toe. That’s normal. That’s the muscles waking up.

Daily homework: 2 minutes of toe spreads (lift all toes, spread them, press them down individually), 2 minutes of calf raises off a step (slow eccentric on the way down).

Weeks 5-8: Short Walks Outside

Now take them outside. Start with 10-15 minute walks. Flat ground. Then build to 30 minutes. Then 45.

By the end of week 8, you should be able to walk a couple miles in minimalist shoes without your calves screaming the next morning. If you can’t — slow down. Repeat week 5 or 6 until you can.

Add to homework: single-leg balance work, 30 seconds per leg, twice a day. Eyes closed if you want to make it harder. Your foot is a sensory organ — it needs to relearn how to read the ground.

Weeks 9-12: Introduce Light Running (If You Run)

If you’re not a runner, skip this and just keep extending your walks, adding hills, and maybe some hiking. You’re done — you can wear minimalist shoes for daily life now.

If you do want to run, the first session is 500 meters. Not 500 yards. Half a kilometer. About 3-5 minutes of running. That’s the whole workout. Cool down by walking another mile.

Build by no more than 10% per week. Run every other day, not back-to-back. Run on grass, dirt, or track for the first month — pavement is the most punishing surface for minimalist running.

Watch your cadence. Most heel strikers run at 160-165 steps per minute. In minimalist shoes you want 170-180. Shorter steps. Land under your hips, not in front of you.

Weeks 13-16: Full Integration

By week 16 you should be doing 80-90% of your daily walking and easy running in minimalist shoes. Keep one pair of traditional shoes around for very long days on hard surfaces, race days, or when you need the cushion. There’s no prize for being a purist.

Warning Signs to Stop

Some discomfort is normal. These aren’t:

  • Sharp, localized pain in a bone (top of foot, shin). Could be a stress reaction. Back off for a week. If it persists, get imaging.
  • Achilles pain that worsens day-to-day instead of getting better. You’re loading faster than the tendon is adapting.
  • Knee pain you didn’t have before. Usually a cadence/form issue. Shorten your stride, increase your steps per minute.
  • Plantar fascia pain in the morning. The classic “first steps hurt” sign. Reduce volume by 50% for a week.

Soreness is fine. Stiffness is fine. Sharp pain, asymmetric pain, or pain that’s getting worse over weeks instead of better — that’s a stop sign.

A Few Honest Opinions

You probably don’t need to go fully zero-drop. Going from 12mm to 4mm captures most of the benefit with way less injury risk. Altras, some Topo models, and Lems all live in that 0-4mm range with a wide toe box and moderate cushion. For most people, that’s the sweet spot, not Vibrams.

The wide toe box matters more than the drop. If I could only change one thing about your shoes, it would be the toe box. Modern dress shoes and most running shoes squeeze your forefoot into a shape that doesn’t exist in nature. A wide toe box lets your foot splay on impact — that’s where most of the stability comes from. You can get most of the foot health benefit by just buying shoes that don’t taper.

Not everyone needs to do this. If you’re 55, you’ve been running comfortably in Hokas for a decade, and nothing hurts — you do not have a problem that needs solving. The pain-free system is the right system. This guide is for people whose current setup isn’t working, or who want to build resilience from the ground up.

The Daily Foot Maintenance That Actually Works

Whatever shoe you end up in, these three habits are worth more than any product:

  1. Walk barefoot at home. The cheapest, most effective foot strength program ever invented. Free. Do it.
  2. Roll a lacrosse ball or frozen water bottle under your arch for 60 seconds per foot every evening. Especially if you spent the day on hard floors.
  3. Calf raises off a step — 3 sets of 15, twice a week. Eccentric (slow down) is the key. This is bulletproof Achilles insurance.

The Challenge

For the next 7 days, every minute you’re at home, be barefoot. No house slippers, no flip-flops. Just feet on the floor.

Pay attention. Notice the floor temperature. Notice when you’re walking on the outside of your foot vs. the inside. Notice the tension in your toes when you go up stairs. Most people have spent so long with their feet padded and propped that they don’t realize how much information their feet are designed to give them.

If you can do that one week and your feet feel better — not worse — you’re ready to start week 1 of the transition. If your arches are screaming after two days, that’s your answer: your feet need more rebuilding before any new shoe is going to help.

Either way, you’ll have learned something real about your own body. Which is the point of all of this anyway.

This is Part 4 of the BaseCampGoods Foot Mechanics series. Previous: Your Feet Are Weak (And Your Shoes Did It) and How to Start Running Again Without Destroying Your Knees.

How to Smoke a Brisket: The Complete 14-Hour Guide (From Trim to Slice)

A great brisket isn’t a recipe. It’s a relationship. You spend fourteen hours with a piece of meat, and somewhere in hour eight you start having opinions about bark.

Here’s the truth nobody at the BBQ contest will tell you: smoking a brisket is one of the easiest things you’ll ever cook. The technique is simple. The variables are few. What people screw up is patience and panic — they peek too much, they crank the heat when it stalls, they slice it the wrong direction, and then they blame the smoker.

This is the guide I wish someone had given me before my first brisket (which was, for the record, a hockey puck of regret). Follow it and you’ll pull a 12-pound packer off the smoker that makes your neighbors find an excuse to come over.

What You Actually Need (And What You Don’t)

A smoker. That’s it. Offset, pellet, electric, kamado — doesn’t matter. Pitmasters will argue about this for hours and they’re all wrong, because brisket has been cooked over every kind of fire for 200 years and it still tastes great.

Other gear that actually matters:

  • An instant-read thermometer. Not optional. Brisket is done by feel and temperature, not time. If you’re cooking by the clock, you’re going to lose.
  • A leave-in probe thermometer. So you stop opening the lid every 20 minutes. Every peek costs you 15 minutes of cook time.
  • Pink butcher paper (unwaxed). Foil works, but paper gives you better bark. Buy a roll — it’s eight bucks and lasts forever.
  • A sharp boning knife. For trimming. A dull knife will turn a $90 brisket into ribbons of frustration.
  • A cooler. For resting. Yes, a regular Yeti-style cooler. You’ll see.

What you don’t need: injectors, marinades, fancy rubs with 17 ingredients, spritz bottles full of apple juice, or the “Texas crutch” foil boat that’s having a moment on YouTube. Salt, pepper, smoke, time. That’s the assignment.

Step 1: Buy the Right Cut (This Is Where Most People Lose)

You want a whole packer brisket. 12 to 14 pounds, untrimmed, with both the flat and the point still attached. Costco sells these for around $4/lb in a Cryovac bag. Don’t buy just the flat — the point is where the magic lives, and the fat between them is what bastes the meat for 14 hours.

When you pick it up, do the floppy test: hold it horizontally by one end. A good brisket flops like a wet towel. A stiff one means more connective tissue you’ll have to render. Choose grade Choice or Prime if you can. Wagyu is a flex; you don’t need it.

Step 2: Trim (The Night Before, ~30 Minutes)

Take the brisket out cold — cold fat trims clean, warm fat smears. Lay it fat-cap up.

  • Trim the fat cap down to about ¼ inch. Anything thicker won’t render and you’ll end up cutting flabby fat off slices later.
  • Flip it over. Remove the hard chunk of fat between the flat and the point (the “deckle”). Get rid of any silverskin you see.
  • Square off the corners and the thin edge of the flat. Those thin bits will dry out into jerky in hour 10. Save them for chili or trim tallow.
  • Round the corners so they don’t burn.

You should lose 1.5 to 2.5 pounds in trim. That’s normal. Save the fat — we’ll render it into tallow later (more on that).

Step 3: Season (5 Minutes)

Central Texas dry rub. Equal parts by volume of coarse kosher salt and 16-mesh black pepper. That’s it. If you want to get fancy, add a tablespoon of garlic powder. If you want to get stupid, add anything else.

Slather lightly with yellow mustard or hot sauce first — it’s a binder, you won’t taste it. Season heavily. Both sides. Edges too. Refrigerate uncovered overnight if you can — it dry-brines the meat and gives you better bark.

Step 4: The Cook (Hour 0 to ~8)

Fire up the smoker to 225°F. Use post oak if you can find it. Hickory, pecan, or a 50/50 with oak also works. Avoid mesquite unless you like a kick to the teeth.

Brisket goes on fat-side up if your heat source is below (most pellet grills, kamados). Fat-side down if heat comes from above or the side. The point of this rule: protect the meat from direct radiant heat with the fat cap.

Now do the hardest thing in barbecue: leave it alone. No spritzing, no peeking, no “just checking.” Set your leave-in probe in the thickest part of the flat and walk away. Drink coffee. Mow the lawn. Stop opening the lid.

Around hour 6 to 8, your internal temp will hit roughly 165°F and stall. This is the famous “stall.” The meat is sweating and evaporative cooling is keeping the temperature flat. Do not panic. Do not crank the heat. This is when bark forms.

Step 5: The Wrap (Hour 8-ish)

When the bark is dark mahogany and feels set when you poke it — not tacky — it’s wrap time. Internal temp will be 165-175°F.

Lay out two big sheets of pink butcher paper, overlapped. Drizzle a few tablespoons of beef tallow on the paper (this is where the trim from Step 2 pays off — render it down on the stovetop while the brisket cooks). Place brisket fat-side down. Wrap tight, like a burrito. Put it back on the smoker.

Wrapping speeds up the cook and protects against drying out. Paper lets some moisture escape so the bark stays bark instead of turning to mush. Foil traps everything and you’ll get pot-roast brisket. Don’t do it.

Step 6: Cook to Probe-Tender (Hour 10-13)

Now you cook by feel, not temperature. Slide a probe or skewer into the thickest part of the flat. It should slide in like room-temperature butter. Total resistance: zero. Internal temp will usually be 200-205°F — but a brisket done at 198 is done, and one that’s tough at 207 isn’t done.

Probe in three spots. If all three glide, pull it. If any one feels tight, give it another 30 minutes.

Step 7: Rest (Minimum 2 Hours. I’m Serious.)

This is where 80% of home cooks blow it. They pull a perfect brisket, get excited, slice it 20 minutes later, and watch all the juice run onto the cutting board.

Leave it wrapped. Vent the paper for 15 minutes (crack it open to release steam — otherwise it’ll keep cooking and turn mushy). Then close it back up, wrap in an old towel, and put it in an empty cooler. Close the lid.

Rest for at least 2 hours. 4 is better. You can hold it like this for up to 6 hours and it’ll still be over 140°F. The resting time is non-negotiable — it’s when the muscle fibers relax and reabsorb the juices. Skip it and you’ve wasted 14 hours of cooking.

Step 8: Slice (Don’t Mess This Up)

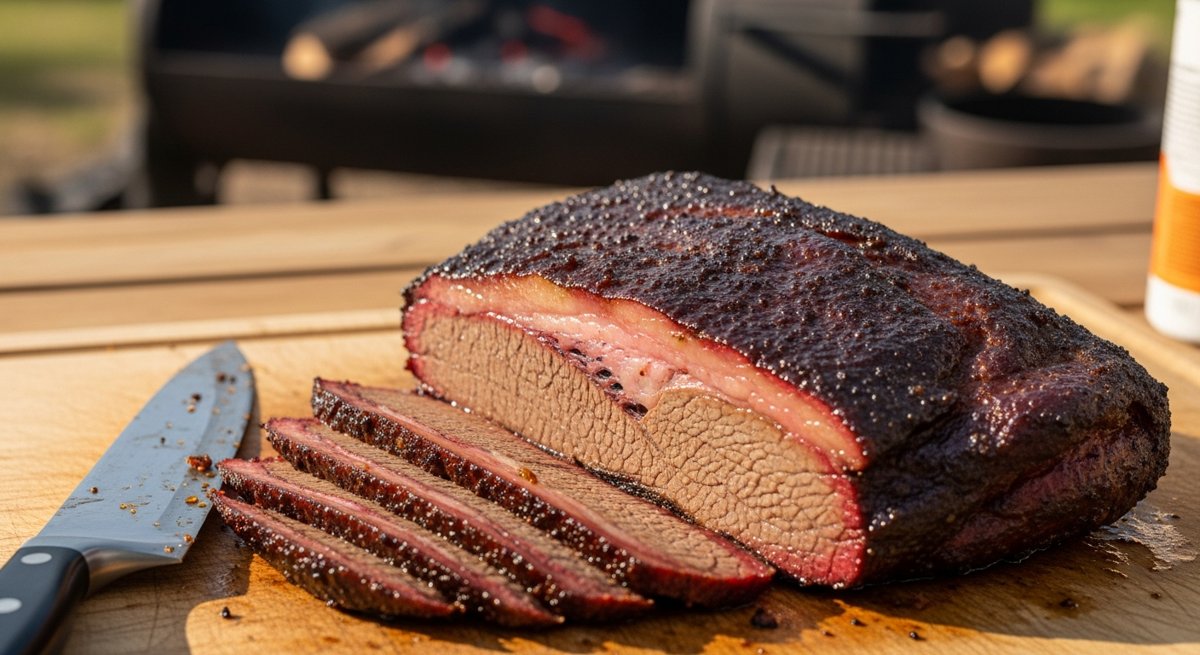
Unwrap on a big cutting board. Separate the point from the flat — you’ll see the fat seam between them. The grain runs different directions in each piece, which is why slicing a whole brisket as one log is amateur hour.

  • Flat: slice against the grain, pencil-thick (about ¼ inch).
  • Point: rotate 90° (the grain runs perpendicular to the flat). Slice thicker, or cube it for burnt ends.

A perfectly cooked slice should hold its shape when you pick it up, then pull apart with the gentlest tug. You want a quarter-inch pink smoke ring just under the bark. Don’t add sauce. If someone asks for sauce, you may judge them silently.

The 5 Mistakes That Ruin 90% of Briskets

  1. Cooking by time instead of temp/feel. “1.5 hours per pound” is a lie. Cook to probe-tender.
  2. Cranking the heat during the stall. Trust the stall. It’s working.
  3. Not resting long enough. 2 hours minimum. Yes, even though it smells incredible.
  4. Slicing with the grain. Look at the meat fibers before you cook. Mark the grain direction with a knife notch.
  5. Trimming too little fat. Quarter-inch cap. No exceptions.

Your Challenge

This weekend, buy a packer brisket. Trim it Friday night. Put it on at 4 AM Saturday. Cook to probe-tender, rest in a cooler until dinner, and feed eight people for less than $50 worth of meat.

The first one might be a 7/10. The second one will be an 8. By your fifth, you’ll be the friend people text on Tuesday asking what you’re doing Saturday.

Salt. Pepper. Smoke. Time. That’s the whole game. Stop overthinking it.

Stoicism for Regular People: 3 Ancient Ideas That Still Work in 2026

You don’t need a toga. You don’t need to read Marcus Aurelius in the original Greek. And you definitely don’t need to follow some bro on Twitter selling a $497 “Stoic Masculinity” course.

Stoicism is having a moment, and like most things having a moment on the internet, 90% of what people are saying about it is wrong. It’s been rebranded as cold plunges, suppressing emotions, and grinding through life like a charmless robot. That’s not what the Stoics taught. That’s just being a jerk who pretends suffering is a personality trait.

Real Stoicism is older than Christianity, was practiced by emperors and slaves alike, and survives because it actually works. It’s a practical operating system for handling the parts of life you didn’t sign up for — job loss, sick parents, traffic, the slow grind of being an adult with responsibilities.

Here are three Stoic ideas you can use this week. No philosophy degree required. No cold plunge necessary.

1. The Dichotomy of Control: Stop Wasting Energy on Things You Can’t Touch

Epictetus was born a slave. He had less control over his life than almost anyone you’ll ever meet. And he’s the guy who wrote the clearest sentence in all of Stoicism:

“Some things are up to us, and some things are not up to us.”

That’s the whole game. Every time you feel anxious, frustrated, or stuck — stop and ask one question: Is this in my control?

In your control: Your actions. Your effort. Your response. How prepared you are. What you say. What you do next.

Not in your control: Other people’s opinions. The economy. Traffic. Whether your boss is a jerk. Whether it rains on your camping trip. Whether the promotion comes through. The past. Most of the future.

Sounds obvious. It isn’t. Look at where your stress goes today and you’ll find that 80% of it is parked on things you literally cannot influence. You’re chewing on a problem like a dog with a bone, except the bone is plastic and you’re breaking your own teeth.

How to actually use it: When something bothers you, get a pen. Draw two columns. Write the situation. On the left, list everything that’s in your control. On the right, everything that isn’t. Then ignore the right column for the rest of the day. You’ll feel ridiculous for about ten minutes, and then you’ll feel free.

I do this when I’m catastrophizing about something at 11 PM. Works almost every time. The list of things I can actually do is usually three items long. The list of things I’m anxious about is twenty.

2. Negative Visualization: Pre-Game the Worst Case

The Stoics called it premeditatio malorum — the premeditation of evils. The modern self-help industry hates this because it sounds depressing. “Why would you imagine bad things happening? Manifest abundance, brother!”

Because manifesting abundance doesn’t work, and pretending bad things won’t happen is how people get steamrolled when they inevitably do.

Here’s how it actually goes: Spend two minutes a day imagining something you fear. Losing your job. Your car breaking down on a back road. Your kid getting hurt. Your spouse leaving. Not in a doom-scroll way — in a calm, detailed, problem-solving way. If this happened, what would I do? Who would I call? Do I have the savings? Do I have the skills?

Two things happen:

  • You stop being afraid of it. Most fears shrink in size the moment you stare at them and ask “what would I actually do?” The shapeless dread becomes a checklist.
  • You prepare. You realize you don’t have a flat tire kit in your truck. You don’t have three months of expenses saved. You don’t know first aid. So you fix it. Quietly. Before the day comes.

This is why I’m a big believer in real-world preparation — not the bunker-and-bullets kind, but the boring kind. Know how to start a fire without matches. Have a flashlight in your truck. Keep a basic first aid kit and a multi-tool in your everyday carry. The point isn’t paranoia. The point is that when something does go sideways — and it will, eventually — you’ve already mentally walked through it. You don’t panic. You execute.

There’s a bonus effect the Stoics talked about constantly: when you regularly imagine losing what you have, you start to actually appreciate it. Your kid’s annoying laugh. Your wife’s terrible playlist. Your beat-up old truck. You stop taking it for granted because you’ve already, in your head, lost it once today.

3. Memento Mori: Remember You’re Going to Die

I know. Heavy. Stay with me.

The Stoics had a phrase — memento mori, “remember that you must die.” Roman generals coming home from victory parades reportedly had a slave whisper it in their ear so they wouldn’t get too high on themselves. Marcus Aurelius wrote about it constantly in his private journal. You could leave life right now. Let that determine what you do and say and think.

It sounds morbid for about thirty seconds. Then it becomes the clearest filter for decision-making you’ll ever own.

Try this: Right now, do the math. If you live to 80, how many weekends do you have left? (Hint: take 80 minus your age, multiply by 52.) Write that number on a sticky note. Put it on your bathroom mirror.

If you’re 40, that’s about 2,000 weekends. That’s it. That’s the budget. Doesn’t feel infinite anymore, does it?

What this does — and this is the part the bros selling discipline courses miss entirely — is it makes you less serious about the small stuff and more serious about the big stuff. The petty fight with your brother-in-law? Who cares. The promotion you didn’t get? Will not matter in five years. The fact that you’ve been saying you’ll learn to weld / take that trip / call your dad more / start lifting again for the last three years? That matters. The clock is running.

Stoicism isn’t about not caring. It’s about caring about the right things. Memento mori is the tool that tells you which is which.

What Stoicism Isn’t

Before you go quote-tweeting Marcus Aurelius at your enemies, a quick reality check on what real Stoicism is NOT:

  • Not suppressing emotions. The Stoics were big on feeling things fully — they just didn’t want feelings to drive the car. Feel sad. Feel angry. Then choose what to do about it.
  • Not being cold or detached. Marcus Aurelius wrote love letters to his wife. Epictetus had close friends. The “stone-faced Stoic” thing is a meme, not the philosophy.
  • Not grinding 16 hours a day. The Stoics talked constantly about rest, friendship, food, conversation, walks. They weren’t trying to optimize their dopamine. They were trying to live well.
  • Not a personality. “I’m a Stoic” said out loud is almost always a red flag. It’s a practice, not a Twitter bio.

Your Challenge This Week

Pick one. Just one. Don’t try to become a Stoic monk by Friday.

  1. For the next 7 days, every time you feel stress rising, ask: Is this in my control? If no, drop it. If yes, do something about it.
  2. Once a day, spend 2 minutes imagining a worst-case scenario in detail. Plan your response. Then go on with your day.
  3. Do the weekend math. Write the number down. Put it where you’ll see it every morning.

Don’t journal about it. Don’t tell anyone you’re doing it. Just run the experiment for a week and notice if anything shifts.

My take: of the three, the dichotomy of control is the one that’s changed my life the most. It’s the simplest tool, and it’s the one I forget most often. Every time I remember it, I get an hour of my brain back.

Stoicism survived 2,400 years because it works on regular humans with regular problems. Not because it’s deep or impressive. Because some ideas are just true, and pretending they’re complicated is how people sell courses.

— Shelle

How to Build Raised Garden Beds That Last 10+ Years (Without Cedar Premium)

I’ve built raised beds three times in my life. The first set rotted in 4 years. The second set warped and split in 6. The third set is still standing strong at year 11 — and I’d bet on another decade easy. The difference wasn’t expensive lumber. It was four specific decisions I didn’t know to make the first two times around.

If you’re about to drop $400 on a single 4×8 cedar bed because that’s what every “homesteading expert” on Instagram swears by — pump the brakes. There’s a better way. It’s cheaper, lasts longer, and doesn’t require a single board of cedar.

Why Most Raised Beds Fail So Fast

Before we talk materials, let’s talk about what actually kills a raised bed. It’s not what most people think.

  • Wet wood-to-soil contact — Soil holds moisture against the wood 24/7. Even rot-resistant species lose to constant moisture.
  • Fasteners that fail before the wood does — Drywall screws and bright steel rust out in 2-3 years. Your bed falls apart while the boards are still solid.
  • Bowing from soil pressure — A full 4×8 bed has roughly 1,000 lbs of wet soil pushing outward. No bracing = bulging walls = cracked corners.
  • Ground contact at the bottom edge — That bottom board is sitting in a wet sponge year-round. It’s always the first thing to go.

Fix those four things and your bed will outlive your interest in gardening. Here’s how.

The Material Decision: Skip Cedar

Cedar is the default recommendation because it’s naturally rot-resistant and looks beautiful. Both true. But at $8-12 per linear foot of 2×10, a single 4×8 bed runs $300+ in lumber alone. And in wet climates, even cedar gives you 8-10 years tops.

My honest opinion after building dozens of beds: ground-contact rated pressure-treated lumber is the best value for a long-lasting bed. The modern stuff (ACQ or MCA-treated since 2003) does NOT use arsenic. The EPA, USDA, and multiple peer-reviewed studies have found no measurable health risk for growing food in modern PT lumber. I’ll die on this hill.

If you can’t get past the mental hurdle (totally fair — I’ve been there), the runner-up options ranked by longevity per dollar:

  1. Concrete block (CMU) — Lasts effectively forever. ~$2.50/block. Looks industrial but functional.
  2. Cinder/landscape block — Stackable, no mortar needed for short beds. 50+ year life.
  3. Black locust or Osage orange — If you can source it locally, these natives outlast cedar 3:1. Hard to find.
  4. Cedar — Beautiful, expensive, 8-12 years.
  5. Douglas fir or pine, untreated — Don’t bother. You’ll be rebuilding in 4 years.

For the rest of this guide, I’ll assume you’re going with 2×10 ground-contact PT lumber. The technique transfers to any wood.

The Build: A 4×8 Bed That Outlives the Dog

Materials List (~$95-110)

  • (3) 2x10x8′ ground-contact PT lumber — one cut in half for the short sides
  • (4) 4x4x12″ PT post offcuts for inside corner blocks
  • (1) box of 3″ structural screws — get the hot-dipped galvanized or ceramic-coated ones, NOT bright steel drywall screws
  • (2) 24″ lengths of #4 rebar for cross-bracing the middle
  • (1) roll of 6-mil black plastic sheeting or pond liner offcuts
  • (1) roll of hardware cloth (1/2″) if you have gophers/voles

Step 1 — Level the Ground (Don’t Skip This)

A bed that’s 2″ out of level will pool water on one side and dry out the other. Stake the corners, run a string line, and remove sod where needed. You’re not building a foundation — you just want the four corners within 1/2″ of each other.

Step 2 — Pre-Drill and Use the Right Screws

This is the single biggest upgrade from typical bed builds. Pre-drill every screw hole — PT lumber splits if you don’t, especially near the ends. Use 3″ structural screws rated for ACQ-treated wood (the box will say so). Bright steel drywall screws will literally dissolve in PT lumber within 18 months due to the copper in the treatment.

Step 3 — Inside Corner Blocks Instead of End Screws

Don’t screw the side boards into the end grain of the short boards. End grain holds screws about as well as wet cardboard. Instead, cut four 4×4 PT offcuts to your bed height and screw both adjoining boards into the 4×4. Now you have side grain holding everything together — roughly 5x stronger.

Step 4 — Brace the Middle with Rebar

For any bed longer than 6 feet, the long sides will bow outward as soil saturates. Drive two pieces of #4 rebar deep into the ground on the outside of each long board, at the 1/3 and 2/3 marks. Total cost: $4. Total bow over 10 years: zero.

Step 5 — The Plastic Liner Trick That Doubles Lifespan

Here’s the move that separates a 5-year bed from a 15-year bed: line the inside walls (not the bottom) with 6-mil black plastic or pond liner. Staple it to the top edge of the boards so soil moisture never touches the wood. You leave the bottom open for drainage and worm migration. The wood stays dry on the inside face. The outside dries quickly after rain. Decay rate drops by an order of magnitude.

If you’re in gopher or vole country, lay 1/2″ hardware cloth across the entire bottom before filling. Tack it up the sides 4 inches. Saves your root crops from being eaten from below — I learned this the expensive way after losing an entire carrot harvest in 2019.

Fill It Right (Hugelkultur-Lite)

A 4x8x10″ bed needs about 27 cubic feet of soil. At $8-10/bag for quality topsoil mix, you’re looking at $200+ to fill it. There’s a better way: layer it.

  1. Bottom 4-5 inches: Logs, branches, sticks, woody yard waste. Free. Decomposes slowly and acts like a sponge, holding water for dry spells.
  2. Next 2-3 inches: Leaves, grass clippings, kitchen scraps, cardboard. Free.
  3. Top 4-6 inches: Quality topsoil + compost mix. This is your actual root zone. Spend the money here.

First year, the wood layer settles and you’ll need to top it up with another inch or two of compost. By year two, you’ve got the best soil on the block.

The Annual Maintenance That Buys You Decades

Once a year — pick a date you’ll remember, mine is the first Saturday in November — do these three things:

  • Walk the bed and tighten any loose screws. PT lumber expands and contracts; corners will eventually back out slightly.
  • Top up with 2-3″ of compost. Beds shrink. Don’t fight it, just feed them.
  • Re-staple any loose liner sections. UV will eventually eat the top edge of exposed plastic — fold it inward under the soil if you see it cracking.

That’s it. 20 minutes per bed per year. In exchange, you get a structure that’ll feed your family for a decade or more.

The Real Cost Comparison

Here’s what 20 years of gardening actually costs by material choice for a single 4×8 bed:

  • Untreated pine: ~$60 every 4 years = $300 + 5 rebuilds of labor
  • Cedar: ~$320 every 10 years = $640 + 1 rebuild
  • PT lumber with liner method: ~$100 every 15+ years = $100-200 total
  • Concrete block: ~$120 once = $120 forever

Pretty straightforward math.

Your Weekend Challenge

Build one bed. Just one. Pick a 4×8 footprint, pick your material, and commit a Saturday to it. Don’t overthink the location — you’ll learn more from one season of actually growing something than from another year of “planning the garden.” The best raised bed is the one that’s actually in the ground.

If you build one this weekend using the techniques above, message me on the site or tag us — I want to see it. And in 15 years when you’re still pulling tomatoes out of it, you’ll thank yourself for spending the extra hour on the corner blocks and the liner.

— Shelle

Once the beds are built, the question is what to put in them. If you want plants that pull double duty — food and natural medicine — the Medicinal Garden Kit is a solid start on a backyard apothecary.

How to Start a Fire 5 Different Ways (When Matches Aren’t an Option)

Matches are a single point of failure. They get wet. They run out. The cardboard strike pad turns to mush after one rainstorm. If your entire fire-starting plan is "I have a Bic in my pocket," you don’t have a plan — you have a hope.

Fire is non-negotiable in a survival situation. It’s heat, water purification, signaling, cooking, and morale. Hypothermia kills more people in the backcountry than bears, snakes, and lightning combined. So you need redundancy — multiple ways to make fire, ideally using gear you already carry or stuff you can find on the ground.

Here are five methods that actually work, ranked by how practical they are when your hands are shaking and the sun is going down.

1. Ferro Rod (The One You Should Already Carry)

A ferrocerium rod is a small metal alloy stick that throws sparks at around 3,000°F when you scrape it with a sharp edge. It’s the single best non-match fire starter ever invented. Works wet. Works frozen. Works one-handed. Lasts for 10,000+ strikes. A decent one costs $15.

How to use it:

  1. Build your tinder bundle FIRST. Dry grass, birch bark, fatwood shavings, or — my favorite — a cotton ball smeared with petroleum jelly.
  2. Hold the ferro rod against the tinder. Don’t pull the rod up — scrape the striker DOWN the rod toward the tinder. This puts sparks where you want them.
  3. Use the spine of your knife (90° angle) or the dedicated striker. Never the sharp edge — you’ll dull your blade.
  4. Press hard, scrape fast. Sparks should rain into the tinder.

My take: If you spend any time outdoors and don’t carry a ferro rod, you’re cosplaying. They weigh nothing, fit in any pocket, and will outlive you. Get one. Practice with it before you need it.

2. Battery + Steel Wool (The Junk Drawer Special)

This one feels like cheating. A 9V battery and a wad of fine steel wool (grade 0000 works best) gives you instant fire. Touch the wool to both terminals — the current heats the fibers until they ignite. Glowing red, orange, then flame.

What works:

  • 9V battery is ideal because both terminals are on the same side
  • AA/AAA work too — bridge them with a foil gum wrapper (cut into a narrow hourglass shape, foil side down)
  • Phone batteries can be punctured with a knife — DO NOT do this unless you actually need fire and don’t mind a small lithium fire show

Why I like it: Most of us carry batteries everywhere — flashlights, smoke detectors, kid’s toys. Steel wool packs into a tiny ziplock and weighs nothing. Toss both in your truck kit and you’ve got a backup that doesn’t depend on dexterity, weather, or skill.

3. Solar / Lens Method (Free Fire, If the Sun Cooperates)

A magnifying glass, a Fresnel lens (the credit-card-sized kind that lives in a wallet), eyeglasses with strong prescription lenses, the bottom of a clear soda bottle filled with water, even a polished soda can bottom buffed with chocolate or toothpaste — all of these can focus sunlight into a pinpoint hot enough to ignite tinder.

How to do it right:

  1. Use the blackest, driest tinder you can find. Char cloth is gold. Punky wood, dry mushroom, or dark fungus also works.
  2. Tilt the lens until the dot of focused light becomes the smallest, brightest pinpoint possible.
  3. Hold steady. Within 10–30 seconds you’ll see smoke. Don’t move until you do.
  4. Once it smolders, transfer to your tinder bundle and gently blow.

The catch: Needs direct sun. Useless at night, in shade, or under cloud cover — which is when you usually need fire most. But it costs zero fuel and lasts forever, so it belongs in your kit as a backup-to-the-backup. A Fresnel lens weighs less than a postage stamp.

4. Flint and Steel With Char Cloth (The 1700s Method That Still Works)

Before matches existed, this is how everyone made fire for about 300 years. A piece of high-carbon steel struck against a hard, sharp-edged stone (flint, quartz, chert, even the bottom of a broken porcelain mug) throws small sparks. Catch those sparks on char cloth — partially burned cotton — and you have an ember.

To make char cloth at home:

  1. Cut 100% cotton fabric (old t-shirt, denim, canvas) into 2-inch squares.
  2. Pack into an Altoids tin. Punch one small hole in the lid.
  3. Put the tin on coals or a campfire for 5–10 minutes. Smoke will pour out the hole, then stop.
  4. Let it cool sealed. Inside: black, fragile cloth that catches a spark instantly.

Why bother: Steel and flint never wear out. The whole kit lives in a tin smaller than your palm. It’s also the most satisfying way to make fire — you’ll feel like Daniel Boone the first time it works. And once you can do it, you understand fire in a way matches don’t teach you.

5. Bow Drill (The Last Resort That Will Humble You)

Pure friction fire. No metal, no chemistry, no sun. Just sticks, cordage, and lung-burning effort. This is the method everyone romanticizes and almost no one can actually do under pressure. I include it because if you have nothing else, you have your hands and the woods.

You need four pieces:

  • Spindle: Straight, dry, soft wood — cottonwood, willow, cedar — about 8 inches long, thumb-thick
  • Fireboard: Same wood, flat, with a small divot near one edge and a V-notch cut into the side
  • Bow: A flexible stick with cordage (paracord, shoelace, or improvised from inner bark) tied loosely
  • Bearing block: A hard piece of wood, stone, or bone with a divot to press the spindle from above

The technique: Loop the cord once around the spindle. Press the spindle into the fireboard with the bearing block. Saw the bow back and forth — long, smooth strokes — applying steady downward pressure. Black dust collects in the V-notch. Speed up. When you see smoke pouring out, keep going for another 20 seconds. Then carefully tip the smoldering dust ball into your tinder bundle and blow.

Honest opinion: Don’t trust your life to this method unless you’ve successfully done it ten times in good weather. It’s a humbling skill — humidity, wrong wood, bad form, or a tired arm will all kill the attempt. Learn it as a hedge, not a primary plan.

The Real Lesson: Tinder Matters More Than Spark

All five of these methods give you a spark or an ember. None of them give you fire. The bridge between spark and flame is tinder — and 90% of failed fires fail at tinder, not at ignition.

Always carry pre-made tinder:

  • Cotton balls + petroleum jelly (cheapest, lightest, burns 4+ minutes)
  • Dryer lint (free, takes a spark instantly)
  • Fatwood shavings (resin-soaked pine, almost waterproof)
  • Char cloth (catches a spark like nothing else)

Stuff a small Altoids tin with two or three of these and tape it shut. That tin is more useful than any single fire-starting tool.

Your Challenge This Weekend

Pick ONE method from this list — not the one that sounds coolest, the one you actually have gear for. Go to your backyard, your driveway, a parking lot. Make a fire. Time yourself.

If you can’t do it in good weather with no pressure, you can’t do it in the rain at night with hypothermia setting in. Skill in the field is built in the backyard.

Start with the ferro rod. It’s the highest leverage tool in your survival kit, and it’s the one you’ll actually use 99% of the time. The other four are insurance against the day your insurance fails.

Stay sharp. Stay warm.