How to Start Running Again Without Destroying Your Knees: A 12-Week Comeback Plan

This is Part 3 of the Foot Mechanics series. Part 1 covered why your feet are weak. Today: how to actually start running again without wrecking yourself in the first month.

The Truth Nobody Tells You About “Just Going for a Run”

Here’s the thing nobody warns you about when you decide to “get back into running”: your cardiovascular system recovers faster than your tendons. Your lungs and heart will feel ready around week three. Your Achilles, your patellar tendon, your shins, and the connective tissue in your knees? Those things adapt on a timeline measured in months, not weeks.

This mismatch is exactly why so many comeback runners end up in a boot at week six. They feel good, so they push. The engine can handle it. The chassis can’t.

If you’ve been sedentary for a year or more, you don’t have a fitness problem. You have a tissue tolerance problem. And the fix isn’t more willpower — it’s a smarter ramp-up.

Before You Run a Single Step: The 2-Week Prep Phase

I know, I know. You want to lace up tomorrow morning and pound out three miles. Don’t. The two weeks before you start running are arguably more important than the first month of running itself.

Walk first. A lot. For two weeks, walk 30-45 minutes a day, four or five days a week. Brisk pace. This re-introduces your tissues to impact and load without the 2.5-3x bodyweight forces that running creates. Boring? Yes. Effective? Absolutely.

While you’re doing this, add three things to your routine:

  • Calf raises: 3 sets of 15, both straight-leg and bent-knee, every other day. Your Achilles and soleus are the #1 injury site for returning runners.
  • Single-leg balance work: 30 seconds per leg, three rounds, daily. Brush your teeth on one foot. It rebuilds the ankle stability you lost on the couch.
  • Glute bridges: 3 sets of 20. Weak glutes are the actual cause of most “knee pain” — your knees just take the hit when your hips can’t do their job.

Do this for 14 days. Now you’re ready to actually run.

The 12-Week Knee-Friendly Comeback Plan

This is a walk-run progression. It’s based on the same principle as Couch to 5K, but stretched longer because most C25K dropouts blow out a tendon around week 5. We’re going to be the tortoise. The tortoise finishes the race.

Three sessions per week. Never two days in a row. Tissue adaptation happens on the off days, not the on days.

Weeks 1-2: The “Are You Kidding Me” Phase

Walk 4 minutes, jog 1 minute. Repeat 5 times. That’s 25 minutes total. Yes, that’s it. If it feels insultingly easy, you’re doing it right. The point right now isn’t fitness — it’s loading your tendons in a controlled way.

Weeks 3-4: The Ramp Begins

Walk 3 minutes, jog 2 minutes. Repeat 5 times. By the end of week 4 you’ll have logged roughly 60 minutes of cumulative running. That’s the magic number where most people start to feel like a runner again.

Weeks 5-6: The Danger Zone

Walk 2 minutes, jog 3 minutes. Repeat 5 times. This is where overuse injuries historically peak. If anything starts hinting at pain — shin tightness, knee twinge, Achilles soreness that lingers more than 24 hours — repeat the previous week instead of progressing. No ego. The plan bends, you don’t break.

Weeks 7-8: The Tipping Point

Walk 1 minute, jog 4 minutes. Repeat 5 times. You’re now mostly running. This is also the week most people start adding distance instead of effort. Don’t. Keep it to 25 minutes. The clock matters more than the mileage.

Weeks 9-10: Continuous Running

25 minutes of continuous jogging, three times a week. Pace should be conversational — you can speak a full sentence without gasping. If you can’t, you’re going too fast. Slow down. Almost everyone is going too fast.

Weeks 11-12: Time to Build

Now you bump duration: 30 minutes, then 35, then 40. Keep two of your three weekly runs short (25-30 min) and make one a longer effort. Congratulations — you are a runner again.

The Five Things That Actually Save Your Knees

Knee pain in returning runners is almost never a knee problem. It’s a load problem, a cadence problem, or a hip problem masquerading as a knee problem. Here’s what actually helps:

1. Increase your cadence

Most beginner runners overstride — landing with their foot way out in front of their body. This creates a braking force that hammers your knees on every step. The fix is counterintuitive: take shorter, faster steps. Aim for 170-180 steps per minute. Use a metronome app or a playlist matched to 170-180 BPM. This single change has rescued more knees than any shoe ever has.

2. Run on softer surfaces — but not all the time

Grass, dirt, and rubberized tracks reduce impact. They’re great for two of your three weekly runs. But you also need some pavement, because trails build uneven, multi-directional stress that your knees actually need to adapt to. Don’t avoid pavement entirely — just don’t live on it.

3. Strength train. Seriously.

Two short sessions a week of squats, deadlifts, lunges, and single-leg work will protect your knees more than any brace, sleeve, or expensive shoe. Stronger hips and quads mean less rotational stress at the knee. This is non-negotiable for anyone over 35.

4. Sleep like it’s part of the program

Tendon repair is hormonally driven, and growth hormone spikes in deep sleep. Seven hours minimum. The runners who get injured most aren’t the ones who train hardest — they’re the ones who recover worst.

5. Listen to the 24-hour rule

Mild soreness the day after a run is normal. Pain that’s still there 24 hours later, or that gets worse during a run instead of better, is your tissue waving a red flag. Take a rest day. Two if needed. A skipped run costs you nothing. An MRI costs you six weeks.

A Word on Shoes

I’ll go deeper on this in Part 4 of the series, but for now: don’t switch to minimalist shoes mid-comeback. If you’ve been wearing cushioned trainers for years, your calves and Achilles are not ready for zero drop. Start with whatever you’ve been wearing. Get through this 12-week plan. Then, slowly, transition. We’ll cover that whole process next.

What you can do now: replace your running shoes every 300-500 miles. The foam degrades long before the upper looks worn. Old shoes don’t cause injury directly, but they remove the cushioning your tissues are still counting on.

My Honest Opinion

The single biggest mistake comeback runners make isn’t going too far. It’s going too fast on each individual run. Slow down. Slow way down. Run so slow that strangers give you concerned looks. Run so slow that your friends question whether you should call it running.

Easy mileage is the foundation. Speed is the dessert. People skip the dinner and wonder why they’re hungry.

You don’t need a Garmin to do this. You don’t need carbon-plated super shoes. You don’t need a coach. You need consistency, patience, and the willingness to let two weeks of walking happen before you take your first jogging step. That’s it.

Your Challenge This Week

Don’t start the plan tomorrow. Start the prep phase tomorrow. Walk 30 minutes. Do your calf raises. Do your glute bridges. Then again the day after. Build the tissue tolerance first. In two weeks, you’ll be ready to start the actual 12-week plan — and you’ll be the rare comeback runner who makes it to week 12 without a single injury setback.

Next in the Foot Mechanics series: The Shoe Transition Guide — how to safely move toward minimalist shoes once you’ve rebuilt your base.


Creatine: The One Supplement That Actually Works (and How to Take It)

Let me save you about $400 a year. Walk into any supplement store and you’ll see walls of powders promising you everything from “explosive pumps” to “alpha test boosting.” Ninety-five percent of it is hopium in a plastic tub. There is, however, one supplement that has been studied to death for forty years, costs about thirteen cents a day, and actually does what it says. That’s creatine.

I’ll cut to the chase: I take it. My wife takes it. My 60-year-old dad takes it. If you train, lift heavy things, ruck, or just want to age without turning to dust, creatine should already be in your kitchen. If it’s not, you’re being weird about the easiest win in fitness.

What Creatine Actually Is

Creatine isn’t some lab-made chemical from a Russian doping lab. Your body already makes about a gram of it per day in your liver and kidneys, and you pull another gram or two out of red meat and fish. It lives inside your muscle cells where it does one job: donate a phosphate group to ADP, recycling it back into ATP — the molecule that fuels short, hard efforts.

Translation: more creatine in your muscles = more juice in the tank for sets 3, 4, and 5. That’s it. That’s the magic. It’s not a stimulant. It’s not a hormone. It’s a battery that lets you do one or two more reps, which over weeks and months compounds into noticeably more muscle and noticeably more strength.

What the Research Actually Shows

Creatine monohydrate is the most studied sports supplement in human history. Not “most marketed” — most studied. Over 1,000 peer-reviewed trials. The consensus is boring and consistent:

  • 5–15% increase in strength over 4–12 weeks compared to placebo.
  • 1–2 kg of lean mass in the first month (some is water inside the muscle cell — that’s fine, that’s also performance).
  • Better high-intensity work capacity — more reps, more sets, faster recovery between them.
  • Cognitive benefits in sleep-deprived and aging populations — improved working memory and reaction time.
  • Potential neuroprotective effects — promising work in Parkinson’s, depression, and traumatic brain injury, though not conclusive yet.

It’s also one of the safest supplements ever tested. The “creatine destroys your kidneys” myth refuses to die, but if you actually look at the literature you’ll find decades of studies in healthy adults showing zero kidney impact at standard doses. If you have existing kidney disease, talk to your doctor. Everyone else: you’re fine.

Which Type to Buy (Hint: The Cheap One)

Supplement companies have invented at least a dozen “advanced” forms of creatine — HCL, ethyl ester, buffered (Kre-Alkalyn), nitrate, magnesium chelate. They charge two to four times more for them. And in head-to-head trials, every single one of them either performs the same as plain old creatine monohydrate, or worse.

Buy creatine monohydrate. That’s it. If you want to be extra picky, look for “Creapure” on the label — it’s a German-manufactured form with the highest purity certification. A 1 kg tub costs around $30 and lasts six to eight months. That’s roughly 13 cents per day.

Don’t pay $50 for “next-gen pH-optimized hydro-soluble” creatine. The molecule that gets absorbed into your muscle cell is the same either way. It’s literally just marketing with a metallic label.

How to Actually Take It

This is where people overcomplicate the simplest supplement on Earth. Here’s the entire protocol:

The dose: 5 grams per day. One rounded teaspoon. Every day. Forever.

The timing: Doesn’t matter. Morning coffee, post-workout shake, with dinner — muscle storage builds up over weeks. One missed day means nothing.

The liquid: Water, coffee, juice, protein shake. Doesn’t matter. The “creatine and caffeine cancel out” myth was based on one flawed 1996 study and has been debunked dozens of times since.

Do You Need to “Load”?

Old-school protocols had you slam 20 g/day for 5–7 days to saturate your muscles fast, then drop to 5 g maintenance. It works. It also gives some people stomach upset, and the only thing you gain is reaching full saturation in one week instead of three to four. Same destination, different on-ramp.

If you’re impatient, load. If you’re not, don’t. The end result is identical after a month.

Do You Need to Cycle Off?

No. Your body doesn’t “downregulate” creatine production in any way that comes back to bite you. Take it daily, year-round. Stop only if you stop training and don’t care about the cognitive benefits.

What to Expect (and What’s Hype)

Real, expected effects in weeks 2–8:

  • Your last few reps feel crisper. You’re getting an extra rep or two on heavy sets.
  • Muscles look slightly fuller — that’s intracellular water, which is exactly what you want.
  • Recovery between sets is noticeably better. Less gasping during a 4×8 squat session.
  • Scale might go up 1–3 lbs in the first two weeks. That’s water in muscle. Not fat.

Stuff creatine does NOT do:

  • Make you bloated or “puffy” in the face. It goes into muscle, not under your skin.
  • Cause hair loss. One small 2009 rugby study suggested a DHT bump and the internet ran with it. Never replicated.
  • Replace training. You still have to lift the bar.
  • Turn you into a different human. It’s a 5–15% edge, not a steroid.
The honest framing: Creatine doesn’t build the muscle. Your training does. Creatine just lets you train slightly harder, slightly more often, with slightly better recovery. Over a year, “slightly” turns into “significantly.”

Who Should Be Taking This

Honestly? Almost everyone over 30 who moves their body for a living or a hobby.

  • Lifters and athletes: Obvious. This is what it was made for.
  • Ruckers, hikers, manual laborers: Anything with repeated hard efforts benefits.
  • People over 50: Sarcopenia — age-related muscle loss — is brutal. Creatine plus resistance training is the best one-two punch we have for it.
  • Vegetarians and vegans: You make less endogenous creatine because you don’t eat meat. You’ll feel the difference more than anyone.
  • Anyone chronically sleep-deprived: Parents, shift workers, students. There’s solid evidence creatine helps cognitive performance under sleep deprivation.

The only “maybe skip it” case is a competitive endurance athlete worried about a small water-weight gain affecting power-to-weight ratio. For everyone else, the cost-benefit is absurd.

The Common Mistakes I See

  1. Stopping after two weeks because “it didn’t work.” Saturation takes 3–4 weeks without loading. Be patient.
  2. Buying flavored creatine blends. You’re paying 3x for sugar and dye. Buy plain monohydrate and mix it with whatever you already drink.
  3. Taking it only on workout days. Saturation is a steady-state thing. Daily, including rest days.
  4. Drinking 4 liters of water “to support kidney function.” Drink normal amounts of water. Your kidneys are not in danger.
  5. Doubling up after missing a day. Unnecessary. Just take your 5 g and move on.

My Honest Take

I’m cynical about the supplement industry. Most of it is overpriced placebo dressed up with sponsored athletes who’d look exactly the same without it. Creatine is the exception. It’s the one bottle on my counter that has earned its spot through forty years of replication, not marketing budget.

Five grams. Every day. About thirty dollars every six months. If you train and you’re not on it, you are leaving free strength, free recovery, and probably some free cognition on the table for no reason at all.

Your Challenge This Week

Buy a 1 kg tub of plain creatine monohydrate (Creapure if you can find it, any reputable brand if not). Put it next to your coffee maker. Take 5 grams every morning for the next 30 days alongside your training.

If you don’t notice a difference in the gym by week four, I’ll be genuinely surprised. And if you do — welcome to the boring, effective side of supplementation.

Not medical advice. If you have kidney disease, are pregnant, or are under 18, talk to your doctor first. Everyone else: it’s just creatine, relax.

How to Break a Bad Habit in 30 Days: The Replacement Method That Actually Works

You don’t break a bad habit. You replace it. That single sentence is the difference between people who quit smoking, drinking, doomscrolling, or whatever it is they’re trying to drop — and people who white-knuckle it for two weeks, fail, and decide they’re just "not the disciplined type."

You’re disciplined. You’re running the wrong playbook. Here’s the one that works.

Why Willpower Alone Loses Every Time

Habits aren’t moral failures. They’re loops. Neurologists have been mapping this for thirty years and it always shakes out the same way: cue, routine, reward. Something triggers you (stress, boredom, 3 PM, a notification), you run the routine (cigarette, beer, phone, snack), you get a reward (relief, dopamine, distraction).

Trying to "just stop" the routine leaves the cue and the reward orphaned. Your brain knows something is supposed to happen there. It will hunt for it. That’s not weakness — that’s a feature of the hardware you’re running on.

The replacement method works because it respects the wiring. You keep the cue. You keep the reward. You swap the middle.

The 30-Day Replacement Protocol

Pick one habit. Not three. Not five. One. People who try to overhaul their whole life on a Monday are back to baseline by Friday. This protocol works because it’s narrow.

Day 1–3: Stalk the Habit

Before you change anything, watch it happen. For three days, every time you do the thing, write down four things on your phone:

  • Time — when did it hit?
  • Location — where were you?
  • Emotion — what were you feeling 60 seconds before?
  • Who — alone or with someone?

By day three, you’ll see the pattern. Almost everyone is shocked. The cigarettes weren’t random — they were 10 AM after the morning meeting and 9 PM after the kids went down. The beer wasn’t "every night" — it was specifically the moment you walked in the door from work. The phone wasn’t constant — it was every time you sat down on the couch.

You can’t replace what you can’t see. This step is non-negotiable.

Day 4: Engineer the Swap

Now you design the replacement. The new routine has to satisfy three rules:

  1. It triggers on the same cue. If the cue is "sat down on couch," your replacement happens when you sit down on the couch.
  2. It delivers a similar reward. Stress relief gets replaced with something that relieves stress. Distraction gets replaced with something that distracts. Don’t swap a depressant for a productivity app — that’s not a replacement, that’s a punishment.
  3. It’s easier to start than the old habit. If the new habit requires more friction to begin, you’ll lose. The old groove is paved. Yours is gravel. Make it short gravel.

Some real swaps that work:

  • Evening drink → flavored sparkling water in the same glass, at the same time, in the same chair. The ritual is the point.
  • Phone-on-couch → a paperback book left on the cushion. Physical object in the cue location.
  • Cigarette after meals → 4-7-8 breathing for 90 seconds, then a piece of gum.
  • Stress-snacking → 20 pushups or a walk around the block. You’re discharging the same nervous-system spike.
  • Doom-scrolling at 11 PM → reading a single chapter of something fiction. Not self-help. Not the news. Fiction.

Day 5–14: The Ugly Phase

This is where most people quit, so let me be straight with you: it’s going to feel stupid for about a week. The new routine will feel hollow. The reward will feel cheap. You’ll be convinced the replacement isn’t working.

It is working. You’re just measuring it against a neural pathway that’s been carved over years. The new groove takes about ten days to feel like anything at all. Don’t quit before it does.

Two things help here:

  • Stack accountability. Tell one person what you’re doing. Not Instagram. One person who’s going to ask you about it on day 8.
  • Track only the replacement, not the old habit. Don’t count days clean. Count days you executed the swap. The frame matters — you’re not abstaining, you’re building.

Day 15–21: The Real Test

Around day 15, you’re going to have a bad day. Real bad. Work blew up, kid had a meltdown, you slept four hours. The old habit will whisper. This is the moment.

Have a pre-decided response. Not "I’ll figure it out." A specific sentence you’ve written down: "When today goes sideways, I will [specific action] before I do anything else."

Decisions made in calm beat decisions made in stress every single time. Pre-commit. It’s not weakness — it’s strategy.

Day 22–30: Reinforce, Don’t Celebrate

By day 22 the replacement starts feeling default. Here’s where people sabotage themselves: they "test" the old habit. Just one. To prove they can.

Don’t. The neural pathway you’ve been letting fade is one rep away from full bandwidth. The point of 30 days isn’t to "earn" the old thing back. It’s to make the new thing automatic enough that you don’t think about it.

Day 30 isn’t a finish line. It’s a checkpoint where you ask: do I want to keep building this, or pick a new one?

The Part Nobody Tells You

You will fail at this at some point. Probably more than once. The question isn’t whether you slip — the question is whether you slip and quit, or slip and restart on the same day.

The research on habit change is brutally clear on this: a single missed day has almost zero impact on long-term success. Two missed days in a row drops your odds by roughly 30%. The streak isn’t sacred. The return is sacred.

If you blow it on day 12, day 13 starts at 7 AM. Not next Monday. Not "after the wedding." Tomorrow morning, you run the swap. That’s the whole game.

The shortcut nobody talks about: Most relapses don’t happen because the habit was too strong. They happen because the cue was still loaded and the replacement was too far away. Put the running shoes by the door. Put the book on the couch. Pre-stage the swap so it’s the path of least resistance.

My Opinion, For What It’s Worth

Most habit advice is about identity. "Become the kind of person who doesn’t smoke." That works for some people. For most of us, it’s too abstract. Identity is a result, not a lever.

The replacement method is mechanical. Cue, swap, reward. You’re not trying to become a new person — you’re rewiring one specific loop. The identity stuff shows up on its own about six months later. You just look up one day and realize you haven’t thought about the old habit in weeks.

That’s how it actually goes. Not a thunderclap moment of transformation. Just a slow, boring, mechanical swap that compounds.

Common Mistakes That Sink People

  • Replacing one bad habit with another bad habit. Quitting smoking by eating two pints of ice cream a night isn’t progress, it’s reshuffling.
  • Picking too many habits at once. The brain has a limited budget for behavior change. Spend it in one place.
  • Making the new habit too ambitious. "Replace beer with a 5-mile run" isn’t a swap, it’s a fantasy. Match the energy of the old habit, not the energy of the person you wish you were.
  • Hiding the cue instead of replacing the routine. Throwing out all your beer works for a week. The cue (5 PM, work stress) is still there. You need a new routine, not just an absent one.
  • Quitting because you slipped once. See above. Day 13 starts at 7 AM.

Why This Matters

You’re not trying to be a saint. You’re trying to be someone who can trust their own word. The habit isn’t the point — the habit is the rep. Every time you run the swap when the cue hits, you’re depositing a small amount of evidence that you do what you say you’ll do.

That stack compounds. After 30 days of one habit, you’ve got data. After 90 days of three, you’ve got a different relationship with yourself. After a year, you barely recognize the version of you that quit on Tuesday because the new routine "wasn’t working."

Your Challenge

Today: Pick one habit. Just one. Write it down on paper, not your phone. Paper is heavier.

This week: Run the three-day stalking exercise. Cue, time, emotion, who. No changes yet — just watch.

Day 4: Design your swap. Same cue, similar reward, lower friction. Pre-stage it.

Day 30: Report back to yourself. Pick the next one or run it again.

Discipline isn’t a personality trait. It’s a protocol. Run the protocol.

Raising Chickens for Eggs: Startup Costs, Timeline, and What Nobody Tells You

Everybody romanticizes backyard chickens. Fluffy hens, fresh eggs, kids learning where food comes from. It’s a great picture. The reality is dirtier, louder, and a lot more expensive than the Pinterest version — but it’s also one of the most rewarding things you can do on a quarter acre or more. I’ve raised chickens long enough to know the rosy version is a lie of omission. Here’s the real math, the real timeline, and the stuff most “starter guides” leave out because it would scare you off.

The Real Startup Cost (Not the Fantasy)

Online guides love to tell you that you can start raising chickens for “under $200.” That number is either dishonest or assumes you already have a pile of free pallets, scrap lumber, and a chicken-friendly neighbor giving you hens. Here’s what it actually costs to start a small backyard flock of 4–6 hens, doing it right the first time:

Item Budget Build Do-It-Right Build
Coop (4–6 hens) $300 (DIY) $800–1,200 (prefab or quality DIY)
Run / fencing (hardware cloth, posts) $150 $350
Feeders, waterers, nest boxes $60 $120
Brooder setup (heat plate, tub, bedding) $80 $130
6 chicks (sexed pullets) $30 $45
First 6 months of feed $120 $160 (organic)
TOTAL ~$740 ~$1,605–$2,005

My honest opinion: the budget build is where 80% of new chicken keepers start, and 60% of them rebuild within two years because their first coop fell apart, leaked, or got compromised by a raccoon. Spend the money on the coop and the hardware cloth. You can cheap out on feeders. You cannot cheap out on what’s keeping predators from eating your hens at 2 a.m.

The Timeline From Chick to First Egg

This is where the romantic picture gets wrecked. You don’t get eggs in a month. You get eggs in five to seven months, and even then they’re tiny and inconsistent for the first few weeks. Here’s the realistic timeline:

  • Week 0–6: Brooder phase. Chicks live indoors (garage, mudroom, spare bathtub) under a heat plate. They smell. They generate dust. They double in size every week. You will be cleaning a brooder every other day.
  • Week 6–10: Awkward teenager phase. They’re feathered enough to move outside but too small to be fully predator-safe. Most losses happen here.
  • Week 10–18: Pullet phase. They look like chickens. They act like chickens. They produce zero eggs. You’re spending ~$30/month on feed and getting nothing back.
  • Week 18–24: First eggs. Usually small, sometimes shell-less, occasionally laid in weird places. Production ramps over 4–6 weeks.
  • Week 24–28: Reliable laying. A healthy hen now lays 4–6 eggs per week.

If you start chicks in March, you’ll get reliable eggs in late August. Plan accordingly.

The Cost Per Egg Is Not Cheaper Than the Store

Let’s just kill this myth right now. Six hens at peak production give you about 24 eggs per week. That’s 1,250 eggs per year. Annual feed cost runs around $400–$500 for a small flock. Add bedding, supplements, mite treatments, and the inevitable replacement of one hen per year, and you’re at $600/year minimum.

$600 ÷ 1,250 eggs = about $0.48 per egg. That’s $5.76 a dozen. Store eggs are cheaper most weeks. Pasture-raised organic eggs at the farmer’s market are about the same.

So why do it? You’re not raising chickens to save money. You’re raising them because:

  • You know exactly what they ate.
  • The yolks are orange, not yellow — and they taste like food, not Styrofoam.
  • You have eggs when the supply chain hiccups.
  • Kids learn where food comes from in the most direct way possible.
  • The flock turns kitchen scraps and yard pests into protein.

Those are real benefits. Saving money is not.

What Nobody Tells You

This is the section most “how to raise chickens” articles skip. Here’s what you’ll actually deal with:

1. Predators are relentless and creative

Raccoons can open simple latches. Hawks watch your run from the trees. A single weasel can wipe out an entire flock in a night through a hole the size of a quarter. You need hardware cloth, not chicken wire — chicken wire keeps chickens in, not predators out. Bury it 12 inches down and out, or use an apron skirt. Use carabiners on every coop latch.

2. They stop laying in winter

Hens need ~14 hours of daylight to lay consistently. From November through February in most of the U.S., production drops 60–80%. You can run a coop light on a timer to keep production up, but it shortens the hen’s productive lifespan. Your call.

3. They get sick in ways that look like nothing, then die fast

A chicken that “looks a little off” today is often dead by tomorrow. They hide illness until they can’t anymore. Common issues: respiratory infections, egg binding, sour crop, mites, and Marek’s disease. Find a vet or experienced keeper before you need one — most regular vets won’t see chickens.

4. The smell is real

A clean, well-ventilated coop with deep-litter management barely smells. A neglected coop smells like an outhouse on day three. The difference is one bag of pine shavings every few weeks and stirring the bedding once a week. Don’t be the neighbor who ruins backyard chickens for everyone.

5. You’re going to have to deal with death

Hens get old, get sick, get eaten, or stop laying around year 4. You’ll either be culling, paying for vet visits, or burying birds. Know that going in. It’s part of the deal. If you can’t, get your eggs from someone who can.

Best Breeds for Beginners

Stick with dual-purpose, cold-hardy, docile breeds for your first flock. These are the workhorses:

  • Buff Orpington — calm, cold-hardy, good layers (~200 eggs/year), great with kids.
  • Black Australorp — the production champion. 250–300 eggs/year. Quiet and friendly.
  • Plymouth Rock (Barred Rock) — hardy, beautiful, ~250 eggs/year. Tolerates heat and cold.
  • Easter Egger — lays blue/green eggs. Hardy, friendly, great novelty bird in the mix.
  • Rhode Island Red — tough, productive, but can be bossy. Avoid in mixed flocks if you’re new.

Skip the fancy breeds (Silkies, Polish, Frizzles) for your first flock. They’re harder to keep healthy and lay fewer eggs.

Your First-Year Checklist

If you’re seriously considering this, here’s the order of operations:

  1. Check local zoning. Many cities allow hens but ban roosters. HOAs vary wildly.
  2. Build or buy the coop before you order chicks. You’ll need it sooner than you think.
  3. Order sexed pullets from a hatchery in late winter for spring delivery.
  4. Set up the brooder with a heat plate (not a heat lamp — fire risk is real).
  5. Predator-proof the run with hardware cloth, buried apron, and locking latches.
  6. Find a chicken-savvy vet or experienced keeper in your network before an emergency.
  7. Plan for vacation coverage — chickens need daily care.

The Takeaway

Backyard chickens are not a money-saving project. They’re a food sovereignty project. You’re trading dollars for control, knowledge, and the kind of skill that doesn’t get returned to the manufacturer. That’s a deal I’ll take every time.

If you’re going to do it, do it once and do it right. Build the coop you won’t have to rebuild. Buy the breeds that actually lay. Predator-proof like a raccoon’s reading the blueprints. And know that your first egg, sometime around month six, will probably be the most expensive egg you’ve ever eaten — and the best one.

Your challenge this week: Walk your property. Pick the spot for a coop. Measure it. Check your zoning rules. Don’t buy anything yet. Just commit to whether this is real or romantic. The answer determines everything else.

Chickens are usually the first livestock on a self-reliant property — rarely the last. The Self-Sufficient Backyard maps out how eggs, garden, water, and energy fit together into one working homestead.

The 10 Knots Every Adult Should Know (and When to Actually Use Each)

There are roughly 4,000 knots in the world. You need ten. Maybe twelve if you’re feeling fancy. The rest are variations, edge cases, or someone showing off at a sailing convention.

Here’s the truth: most adults can’t tie a single knot beyond the one in their shoes — and even that one is usually wrong (more on that later). That’s a problem. Knots aren’t a hobby. They’re a quiet, useful skill that pays you back the first time you need to tow a stuck truck, secure a load that won’t shift, or rig a tarp in the rain when the wind decides to be a jerk.

I’m going to give you ten knots. Each one with a clear purpose, when to grab it, and when to walk past it. Learn them in order. Practice each one until you can tie it in the dark, in the cold, with one hand pinned. Because that’s when you’ll actually need it.

Before You Tie Anything: Three Rules

  1. Dress your knots. A knot pulled tight without first arranging the strands neatly is half its strength. Pull it snug, look at it, then load it.
  2. Leave a tail. At least four times the rope’s diameter. A short tail is how knots come undone at the worst possible moment.
  3. The right knot beats the strong knot. A bowline tied wrong is worse than a square knot tied right. Match the knot to the job.

1. The Bowline — The King of Knots

When to use it: Anytime you need a fixed loop at the end of a rope that won’t slip, won’t tighten under load, and unties easily after.

If you only learn one knot from this list, learn the bowline. Mountaineers use it. Sailors use it. Rescue workers use it. It’s the knot you tie around your waist if someone’s pulling you out of a hole.

The classic memory trick: the rabbit comes out of the hole, around the tree, and back down the hole. Sounds dumb, works perfectly. Practice it 50 times. Then practice it 50 more times with your eyes closed.

2. The Figure 8 (and Figure 8 on a Bight)

When to use it: A stopper at the end of a line, or a fixed loop you trust your life to.

Climbers use the figure 8 follow-through to tie into their harness because it’s nearly impossible to tie wrong in a way that fails — you can see the mistake. The figure 8 on a bight (tied in a loop in the middle of the rope) is the go-to for anchor points and clipping in.

This is the "I’d rather be alive than fancy" knot. Use it.

3. The Two Half Hitches

When to use it: Tying a rope to a post, ring, tree, or bumper. Quickly. Reliably. With minimal thinking.

Two half hitches is the workhorse of tying-things-to-other-things. It cinches down on the object, holds under steady load, and is fast. Add a third hitch for slippery rope or critical loads.

This is the knot you use when you’re tarping a load in the truck bed and it’s about to rain.

4. The Taut-Line Hitch

When to use it: Tarp ridgelines, tent guy lines, anything you need to adjust after tying.

The genius of this knot: it slides freely when you push it with your hand, but grips like a vise under load. Set up a tarp, tie taut-line hitches at the corners, and you can tighten the whole rig by sliding the hitches up the line.

If you camp, hike, or rig shelters, this knot replaces the dumb plastic tensioners that come with cheap tents.

5. The Trucker’s Hitch

When to use it: Cinching down a load on a truck, trailer, roof rack, or canoe. Anywhere you need real mechanical advantage with rope.

This is the closest thing to a ratchet strap you can build with rope alone. It gives you roughly 3:1 mechanical advantage. Tie it once and you’ll never again wonder if your kayak is about to pull a yard sale on the highway.

Real-world test: If you can’t trucker’s-hitch a load down well enough that you can’t move it by hand from any direction, you’re not done tying.

6. The Clove Hitch

When to use it: Quick attachment to a post or pole when the load is steady and pulling perpendicular.

Fast to tie, fast to untie, perfect for temporary tasks like lashing a pole or hanging a lantern. Don’t trust it as your only knot for critical loads — it can roll loose when the load shifts. But for a hundred small jobs, it’s perfect.

7. The Square Knot (Reef Knot)

When to use it: Joining two ropes of the same diameter, under light, steady load. Bandages. Stuff sacks. Bundling firewood.

And here’s the truth most people don’t want to hear: the square knot is dangerous when used to join ropes for anything that matters. It can capsize and slip under uneven load. It’s a binding knot, not a bend. Use it for tying a bundle, not for tying your safety line.

Bonus: your shoelaces are square knots. If yours come untied constantly, you’re tying a granny knot — the slipped, weaker version. Reverse the direction of your second loop and you’ll never tie your shoes wrong again.

8. The Sheet Bend

When to use it: Joining two ropes of different diameters, or a rope to a loop.

This is what you should reach for instead of a square knot when you need to join two ropes. It works with mismatched ropes, holds under load, and unties cleanly. Double it (the double sheet bend) for slippery synthetic rope.

9. The Prusik Hitch

When to use it: Climbing a fixed rope. Backing up a rappel. Hauling. Self-rescue.

The prusik is a friction hitch tied with a small loop of cord around a larger rope. Slide it freely, weight it, it locks. This is how rescuers and climbers ascend ropes. It’s also how you build a 3:1 haul system to drag a stuck truck or a fallen tree.

You probably won’t use it weekly. You’ll be glad you know it the day you need it.

10. The Constrictor Knot

When to use it: Permanently binding something tight. Hose clamps. Sausage ties. Closing the end of a rope to keep it from fraying. Temporary "weld" on a torn item.

The constrictor is the world’s most aggressive binding knot. Once you cinch it down, it’s basically there forever — you’ll cut it off rather than untie it. That’s the point. When you need something to stay bound, this is the knot.

The Bonus Two (If You’re Hungry for More)

  • The Alpine Butterfly: A loop in the middle of a rope, tied without access to either end. Perfect for isolating a damaged section of rope or building an anchor point mid-line.
  • The Bowline on a Bight: A double-loop bowline tied in the middle of a rope. Useful for improvised harnesses and equalized anchors.

How to Actually Learn These

Here’s what I’ve learned from teaching knots to grown adults: watching a YouTube video doesn’t count as learning. Your hands need to do it. Cold, wet, half-asleep, with the rope slipping — that’s the only way the knowledge gets locked in.

  1. Buy 10 feet of cheap 1/4" nylon utility rope. Cut it into two 5-foot pieces. Keep them on your desk.
  2. Pick one knot per week. Tie it 20 times in the morning. 20 times before bed.
  3. By the end of week 10, you’ll know all of these in your fingers, not just your head.
My honest opinion: Modern adults are over-equipped and under-skilled. We’ve got $400 jackets and $200 multitools, but we can’t tie a tarp ridgeline that won’t sag overnight. A spool of paracord and ten knots will out-perform a $300 gadget every single time. Spend the rope money. Skip the gadget.

Why This Matters

You don’t need to be a survivalist to need knots. You need to tow a friend’s car. Lash a Christmas tree to your roof. Set up a hammock on a trip. Bind a torn pack strap until you can fix it. Build a clothesline. Tie down a tarp before a storm. Hang a deer to age. Build a gate that closes properly. Rescue a dog out of a creek.

The world is held together by string. The people who know how to tie it are the people who fix problems instead of waiting for someone else to.

Your Challenge

Get a length of rope by the end of this week. By Sunday night, learn one knot from this list cold — tied 20 times, eyes closed by the last 5. Start with the bowline. Send the next person who asks "can you tie this?" into mild shock.

Then tie the next knot next week. By July, you’ll be the one people call when something needs tying. That’s a useful kind of person to be.

Your Feet Are Weak (And Your Shoes Did It): The Honest Guide to Rebuilding Foot Strength

Look down at your feet. Right now. Those things at the end of your legs that hit the ground 7,000+ times a day, carry you through every workout, and absorb the entire weight of your existence — when was the last time you actually trained them?

Yeah. That is what I thought.

Here is the deal: your feet have 26 bones, 33 joints, and over 100 muscles, tendons, and ligaments — roughly a quarter of all the bones in your body. They are engineering marvels. And most of us have shoved them into padded coffins since we were toddlers, then wonder why our knees ache, our hips are tight, our balance is garbage, and plantar fasciitis hits us at 35 like a freight train.

This is not another “go barefoot and you will be enlightened” post. I am not telling you to throw out your boots and start running on gravel tomorrow. I am telling you something simpler and harder: your feet are weak, your shoes made them that way, and you can fix it. Here is how.

Why Your Shoes Are the Problem

Modern shoes are designed around three principles: cushion, support, and motion control. Sounds great, right? It is not. Here is what each one actually does:

  • Cushion dampens the feedback your feet send to your brain about how to land. So you land harder. So they add more cushion. So you land harder still.
  • Arch support does the work your foot intrinsic muscles are supposed to do — so those muscles atrophy, like any muscle a brace replaces.
  • Motion control stops your foot from doing what feet are designed to do: spread, pronate, and act as a shock-absorbing spring.

A 2017 study in Nature (Holowka and Lieberman) compared habitually barefoot populations to shod ones. The barefoot group had significantly stronger arches, better balance, and dramatically lower rates of common foot pathologies. Not because their feet are magic. Because they actually use their feet.

My take? The shoe industry has spent 50 years selling you a solution to a problem they created. Your feet are not broken. They are untrained.

The 5-Minute Test: How Weak Are Your Feet?

Before you fix anything, let us see what we are working with. These four tests take five minutes total. No equipment.

Test 1: Single-Leg Balance (Eyes Closed)

Stand on one foot, close your eyes, start a timer. Goal: 30 seconds without your foot grabbing wildly at the floor. If you cannot make 10 seconds, your intrinsic foot muscles and proprioception are toast.

Test 2: Toe Spread

Sit down, look at your feet. Try to spread your toes like a fan — actively, no help from your hands. Big toe out, pinky toe out, gaps between every toe. Most adults can barely move their toes independently. That is not normal — that is atrophy.

Test 3: Arch Doming (Short Foot)

Stand. Without curling your toes, try to “shorten” your foot by pulling the ball of your foot toward your heel. Your arch should rise. If nothing happens, your tibialis posterior and intrinsics are offline. This is the muscle that creates your arch — not your shoe.

Test 4: Heel Raise Hold

Single-leg calf raise, hold the top position. Goal: 25 reps with a 2-second hold per side. Most people gas out at 8-10. Strong calves and feet share most of the same plumbing.

If you bombed all four — congrats, you are normal. And you have got room to grow.

The Daily 10-Minute Foot Reset

You do not need a program. You need a habit. Do this every morning while your coffee brews. Barefoot. On a hard floor. Ten minutes total.

1. Toe Spreads and Lifts (2 min)

Sit or stand. Lift only your big toe, keeping the others down. Then reverse — keep the big toe down, lift the other four. Then spread all toes wide and hold 5 seconds. This will feel impossible the first week. Do it anyway. The pathways come back fast.

2. Short Foot Holds (2 min)

Standing, dome your arch (test 3 above) and hold 10 seconds. Repeat 10 times per foot. This rebuilds your arch the way nature intended — actively, not passively. If you have been told you have flat feet, this is the single most important exercise in this article.

3. Calf Raises, Slow Tempo (3 min)

3 sets of 15. 3 seconds up, 3 seconds down. Both legs at first; progress to single-leg when you can hit 25 doubles cleanly. Edge of a step for full range. Your Achilles will thank you. Your knees will thank you. Your future self will thank you.

4. Single-Leg Balance (2 min)

30 seconds per side, eyes open. Then 30 seconds per side, eyes closed. Brush your teeth on one foot. Make coffee on one foot. Make balance a default mode, not an exercise.

5. Towel Scrunches (1 min)

Throw a hand towel on the floor. Scrunch it toward you using only your toes. Then push it back out. Boring? Yes. Effective? Stupidly so. The fastest way to wake up dormant intrinsics I have ever seen.

Real Talk: Should You Switch to Minimalist Shoes?

Maybe. But not the way most people do it.

Here is what happens 90% of the time: someone reads an article like this one, buys a pair of Vibrams, runs five miles in them on Saturday, and limps for two weeks with a metatarsal stress fracture. Your feet have been in casts for 30 years. You do not take a cast off and run a marathon.

My honest opinion after a decade of swapping in and out of minimalist footwear: spend more time barefoot at home, not less time in shoes outside. Take your shoes off the second you walk in the door. Walk around the yard barefoot in the morning. Do your foot work barefoot. Get a pair of zero-drop, wide-toe-box shoes for casual wear (Altra, Lems, Xero — pick one) and use them as your “training wheels” while you transition.

Save the running and lifting in barefoot shoes for after you can pass the four tests above. We will cover the actual transition protocol in Part 3 of this series.

What Happens When You Actually Do This

A few things, in roughly this order:

  1. Week 1-2: Your calves will be sore. Not pulled, not injured — just awake for the first time in a decade.
  2. Week 3-4: Balance improves measurably. You stop wobbling on the single-leg test. Stairs feel different.
  3. Month 2: Knee pain (if you had any) often quietly disappears. Knees inherit problems from feet and hips. Fix the feet, the knees relax.
  4. Month 3+: Your gait changes. You land softer. You feel the ground. You realize you have been numb from the ankles down your whole life.

I am not promising miracles. I am telling you what tens of thousands of athletes, runners, and physical therapists already know: foot strength is the most under-trained, highest-leverage muscle group in the body. Ten minutes a day. That is the whole ask.

The Challenge

For the next 30 days, do the 10-Minute Foot Reset every morning. No exceptions. No “I will start Monday.” Tomorrow morning, before coffee, on the kitchen floor.

Re-take the four tests on day 30. I bet you will double your single-leg balance time and add 10+ reps to your heel raises. Drop me a line and tell me what changed.

This is Part 1 of our Foot Mechanics series. Up next: how to choose between zero-drop, minimalist, and maximalist shoes — and why the spec sheet matters more than the marketing.

Your feet carried you for free your entire life. Pay them back with ten minutes a day.

The $50/Week High-Protein Grocery List (No Supplements Required)

Let’s get one thing straight: you don’t need a $400/month supplement stack to hit your protein targets. You don’t need bro powders. You don’t need three different brands of “grass-fed micro-filtered hydrolyzed isolate.” You need a grocery list, fifty bucks, and the willingness to actually cook.

I’ve run this exact list for the last six months on weeks I was tight on cash, and I still hit 160+ grams of protein per day. No magic. No suffering. Just food that works.

Here’s the breakdown — what to buy, what it costs, what it gets you, and how to actually eat it.

The Rules Before the List

Three ground rules so we’re playing the same game:

  1. One person, one week, ~150g protein/day target. Scale up for a household — but the per-dollar math holds.
  2. Aldi, Walmart, or Costco prices. If you only shop at Whole Foods, this list will run you $90. That’s on you.
  3. No supplements counted. No protein powder, no bars, no pre-workout. This is real food only.

The List

The $50 Build

5 lbs whole chicken thighs (bone-in) $8.00
2 lbs 80/20 ground beef $9.00
2 dozen eggs $6.00
2 lbs cottage cheese (large tub) $5.00
1 lb dry lentils $2.50
1 lb dry black beans $2.00
2 cans tuna (chunk light, in water) $2.50
32 oz plain Greek yogurt $5.00
2 lbs frozen mixed vegetables $4.00
5 lbs rice (long grain or jasmine) $4.00
1 lb oats $2.00
TOTAL $50.00

That’s roughly 1,100g of protein across the week. Divide by 7 — you’re sitting at ~160g/day, which is plenty for an average-sized adult building muscle.

Why These Specific Items

Chicken thighs over breasts

I’ll die on this hill. Bone-in, skin-on thighs cost half what breasts do, taste better, don’t dry out, and the fat helps you actually feel full. The “lean breast for lean gains” thing is a myth left over from 1990s bodybuilding. Get the thighs.

80/20 ground beef

Drain the fat after browning if you’re worried about calories. Otherwise, leave it. The fat carries flavor and satiety. 90/10 costs 40% more for marginal benefit.

Eggs — still the GOAT

Cheapest complete protein on the planet. Six bucks for 24 eggs = 25 cents apiece for 6g of high-bioavailability protein. Eat the whole egg. The yolk-fear era is over.

Cottage cheese — the comeback kid

28g of protein per cup, casein-based so it digests slow, and it’s three bucks a tub. Mix it with hot sauce and eat it on toast. Mix it with honey and berries for dessert. Stop sleeping on it.

Lentils and black beans

Dry beans are stupid cheap and double as your fiber + carb source. One pound of dry lentils makes about 6 cups cooked and packs roughly 100g of protein for $2.50. That’s 4 cents per gram of protein. Try beating that.

A Sample Day

Here’s what an actual day on this list looks like — not “theoretical macros,” but food you’d put in your mouth.

Breakfast: 4 scrambled eggs + 1/2 cup oats with Greek yogurt and a spoonful of honey
~45g protein

Lunch: Tuna mixed with cottage cheese (don’t knock it), hot sauce, on rice with frozen veg
~45g protein

Dinner: Two chicken thighs + cup of lentils + frozen broccoli, all sheet-panned in the oven
~55g protein

Snack: Cottage cheese with whatever fruit’s on sale
~25g protein

Daily total: ~170g protein. Cost: about $7.

The Sunday Cook-Off

This list only works if you actually prep. Two hours on Sunday will save you from twelve trips to Chipotle on Wednesday at 1pm.

  1. Roast all 5 lbs of chicken thighs on two sheet pans at 425°F for 35 minutes. Salt, pepper, paprika. Done.
  2. Brown the 2 lbs of ground beef in a single pan with onion and garlic. Portion into containers.
  3. Cook a giant pot of rice (3 cups dry → ~9 cups cooked).
  4. Simmer the lentils for 25 minutes with a bay leaf and salt. Drain.
  5. Hard-boil 8 eggs for grab-and-go protein.

Now you’ve got assemble-your-own bowls all week. Mix and match the proteins, swap the seasonings (taco seasoning Monday, soy + ginger Tuesday, BBQ Wednesday), and you’ll never feel like you’re eating the same meal twice.

What I’d Add If You Have $20 More

If you can stretch the budget to $70, here’s where the next dollars go:

  • $5 — A bag of frozen wild salmon fillets. Omega-3s + change of pace.
  • $4 — Block of cheddar cheese. Slice it, melt it, eat it. Calorie-dense, easy.
  • $3 — Bag of apples. Fiber + sanity.
  • $5 — Real butter. Cook everything in it. Stop using “vegetable spread.”
  • $3 — Peanut butter. Cheap calories, decent protein, makes oatmeal not suck.

My Honest Take

The fitness industry wants you to believe protein is expensive. It’s not. Convenience is expensive. Pre-cooked rotisserie chicken, individually-portioned protein shakes, “macro-friendly” frozen meals — that’s what’s expensive. Whole food, cooked once a week, is shockingly cheap.

If you’re broke and trying to build muscle, you don’t have a budget problem. You have a cooking problem. Fix the cooking and the budget takes care of itself.

Your Challenge This Week

Print the list. Take $50 cash to your nearest non-fancy grocery store. Buy only what’s on the list — no impulse adds, no substitutions for “just this once” snacks. Cook it Sunday afternoon. Eat from it for seven days. Track your protein with any free app.

Report back to yourself next Sunday: did you hit 150g/day every day? If yes — congrats, you just unlocked a permanent skill. If no — figure out which meal you skipped and fix it next week. That’s the whole game.

The 5 AM Club Is Overrated: How to Find YOUR Most Productive Hours

Let me say the quiet part loud: the 5 AM club is a marketing scheme dressed up as discipline. Wake up before the sun, drink lemon water, journal, meditate, work out, conquer the world before breakfast — sold to you in book form by a guy who has never had to drive a forklift third shift.

Here is the thing nobody on LinkedIn wants to admit. Some of us are wired for early mornings. Some of us are wired to do our best thinking at 11 PM with a strong cup of coffee and one lamp on. Forcing yourself into someone else’s schedule is not discipline. It is cosplay.

This post is about finding YOUR productive hours — the real ones, not the aspirational ones — and then defending them like they pay your mortgage. Because they do.

What Science Actually Says About Chronotypes

Your body runs on a circadian rhythm controlled by a tiny cluster of cells in your brain called the suprachiasmatic nucleus. Yours is genetically calibrated, mostly through a gene called PER3. About 40% of people are morning-leaning. About 30% are evening-leaning. The other 30% are somewhere in the middle.

This is not a willpower thing. Researchers like Till Roenneberg at Ludwig-Maximilian University have spent decades documenting “social jetlag” — the gap between when your body wants to sleep and when society demands you be awake. Force a night owl into a 5 AM schedule and you do not get a Navy SEAL. You get a tired person making worse decisions.

The 5 AM club is not discipline. It is one chronotype’s preference being marketed as universal virtue.

The Four Chronotypes (Which One Are You?)

Sleep researcher Michael Breus broke chronotypes into four animals. It is reductive but useful. Read these and be honest about which one you are — not which one you wish you were.

The Lion (about 15% of people)

Wakes up early naturally, peak energy from 6 AM to noon, fades by 9 PM. These are the people who actually thrive at 5 AM. They are not better than you. They are just on a different schedule. Famous lions include most farmers and a lot of CEOs over 60.

The Bear (about 50% of people)

The default human. Wakes with the sun, peaks late morning to mid-afternoon, ready for bed by 11 PM. If you have no idea what you are, you are probably a bear. The 9-to-5 was built for bears.

The Wolf (about 15% of people)

Hates mornings, comes alive after 4 PM, does best creative work between 8 PM and midnight. Wolves get told they are lazy their entire lives. They are not lazy. They are nocturnal. A lot of writers, programmers, and surgeons (yes, surgeons) are wolves.

The Dolphin (about 10% of people)

Light sleepers, often anxious, fragmented sleep, but laser-focused in the late morning. Dolphins frequently get diagnosed with insomnia when they are really just dolphins.

How to Actually Figure Out Your Productive Hours

Stop guessing. Run a two-week experiment. This is the only way.

For 14 days, every morning, write down two things in a notebook (paper, not phone — phones lie):

  1. What time you woke up naturally — without an alarm. If you cannot do this on weekdays, do it on weekends and project from there.
  2. Three energy ratings per day: 9 AM, 1 PM, 8 PM. Rate yourself 1-10 on mental sharpness. Not how you feel. How well you can think.

After two weeks, look at the pattern. You will see your peak window with brutal clarity. For me it is 9 AM to noon and then again 8 PM to 10 PM — classic bear with a wolf streak. The 2-4 PM slot? Garbage. I would not solve a math problem in that window if you paid me.

The trap: most productivity advice tells you to schedule your hardest work first thing in the morning. If you are a wolf, that is the worst possible advice. You will spend your peak hours (8 PM) watching Netflix because someone told you “winners do their hard work in the morning.”

The Productive Hours Audit

Once you know your peak window, audit your current week. How much of your peak window are you spending on:

  • Email and Slack (the productivity equivalent of fast food)
  • Meetings that should have been emails
  • Other people’s priorities
  • Mindless scrolling
  • Errands that could be done at 3 PM when your brain is mush anyway

Most people spend their peak two hours answering emails and their worst hours trying to do real work. Then they wonder why they feel like frauds. You are not a fraud. You are using a Ferrari to deliver pizzas.

Defending Your Peak Window

Once you know when you are sharp, you have to defend that time like a junkyard dog. This is the actual discipline part. Forget waking up at 5 AM. The real discipline is saying no to things that steal your peak hours.

If your peak is… Defend by…
5 AM – 9 AM (Lion) No phone until 7 AM. Hard tasks first. Meetings after 10.
10 AM – 1 PM (Bear) Block calendar 10-12. No meetings. Email at 1 PM only.
4 PM – 8 PM (Wolf) Light work in AM. Cut non-essential evening plans. Protect dinner-to-bed.
11 AM – 2 PM (Dolphin) Slow morning. Coffee. No early meetings. Hard work at 11.

The Things That Actually Move the Needle (Regardless of Chronotype)

I have studied this for myself for years and tried every variation. Here is what works no matter when your peak hits:

1. Get sunlight in your eyes within 30 minutes of waking.

This is the single highest-leverage habit for setting your circadian rhythm. Not bright kitchen lights. Outside. Even if it is cloudy. Five minutes minimum. This anchors your peak window so it shows up consistently.

2. Stop drinking caffeine within 8 hours of bed.

Caffeine has a half-life of 5-7 hours. Your 4 PM coffee is still 25% active at midnight. You will fall asleep but the sleep will be cheap.

3. Eat your biggest meal away from your peak window.

Digestion steals blood from your brain. If your peak is 10 AM, do not eat a giant breakfast at 9. Coffee, protein, and carbs after the work is done. If your peak is 8 PM, do not eat a big dinner at 6.

4. One hard thing per peak window. That is it.

Your brain can do approximately one cognitively demanding task per peak window. Not three. One. Pick the one that matters most and treat the rest of the day as logistics.

The discipline is not when you wake up. The discipline is using your sharpest hours on the work that actually matters.

What About Shift Workers and Parents?

I hear you. If you work nights, or you have a 2-year-old who treats sleep like a rumor, you are not running a clean experiment. Here is what to do:

  • Shift workers: Find your peak relative to your wake time, not the clock. If you wake at 4 PM, your peak is probably 6-9 PM and 11 PM-1 AM. Same biology, different clock.
  • Parents of small children: You are in survival mode. Run the audit when your kid is in school or daycare. Once they sleep through the night, your real chronotype will reassert itself within 6 weeks.
  • Recovering from years of bad sleep: Give yourself a full month of consistent sleep before trusting the data. Sleep debt distorts everything.

My Honest Take

I tried the 5 AM thing for a year. Got up, journaled, worked out, drank the lemon water. Made me miserable, made my work worse, made me a worse husband. I am a bear who fakes lion energy until about 11 AM, then I am dialed in until 1 PM, then I work in 90-minute focused blocks with breaks until 5. Evening is for family, reading, and second-shift creative work if the day demanded it.

That schedule is not impressive. It is not Instagram-worthy. There is no #grindset hashtag for “wakes up at 6:45 like a normal adult.” But it is sustainable, and it has produced more output than any 5 AM phase ever did. Sustainable beats heroic, every time.

Your Challenge This Week

Run the 14-day chronotype audit. Notebook by your bed. Three energy ratings a day. No alarm on weekends. At the end of two weeks, identify your real peak window — and then look at your calendar and see how much of that window you are wasting on things that do not matter.

Then book one hour, in your peak window, this week, and protect it like your life depends on it. Phone in another room. No email. No meetings. One important thing.

That hour will outperform a month of 5 AM mornings. I promise you.

Stop trying to be someone else’s morning person. Be your own version of dialed-in. That is the actual discipline. The clock on the wall does not care when you do your best work — only the work cares.

Door Reinforcement 101: The $30 Fix That Stops Most Home Break-Ins

Here’s a stat that should make you uncomfortable: the FBI estimates that 34% of burglars enter through the front door. Not a window. Not a side entrance. The front door — the one you lock every night and assume is doing its job.

The problem isn’t your lock. It’s the frame. Most residential door frames are held together by 3/4-inch screws driven into soft pine trim. One solid kick — sometimes less — and the whole thing splits like firewood. Your deadbolt is still locked. It’s just lying on the floor with a chunk of wood attached to it.

The good news? Fixing this is absurdly cheap, takes about an hour, and requires nothing more than a drill and a screwdriver. This is hands-down the highest-impact home security upgrade you can make this weekend.

Why Your Door Frame Is the Weak Link

Builders don’t frame doors for security. They frame them for cost and speed. The typical interior and exterior door frame setup uses:

  • Short screws (3/4″ to 1″) that only bite into the soft door jamb trim — not the structural framing behind it
  • A tiny strike plate held by two small screws — the little metal rectangle where your deadbolt tongue goes
  • No reinforcement around the hinge side, which is just as vulnerable to forced entry

When someone kicks a door, the force concentrates on the strike plate area. Those short screws rip out of the trim instantly. It doesn’t matter if you have a $200 smart lock — the frame gives up before the lock does.

The Fix: A Door Reinforcement Kit (Under $30)

What you need is a door jamb reinforcement kit. Several companies make them — Door Armor, StrikeMaster, EverJamb — and they all work on the same principle: replace the weak points with heavy-gauge steel plates secured by 3.5-inch screws that anchor into the wall studs.

A typical kit includes three components:

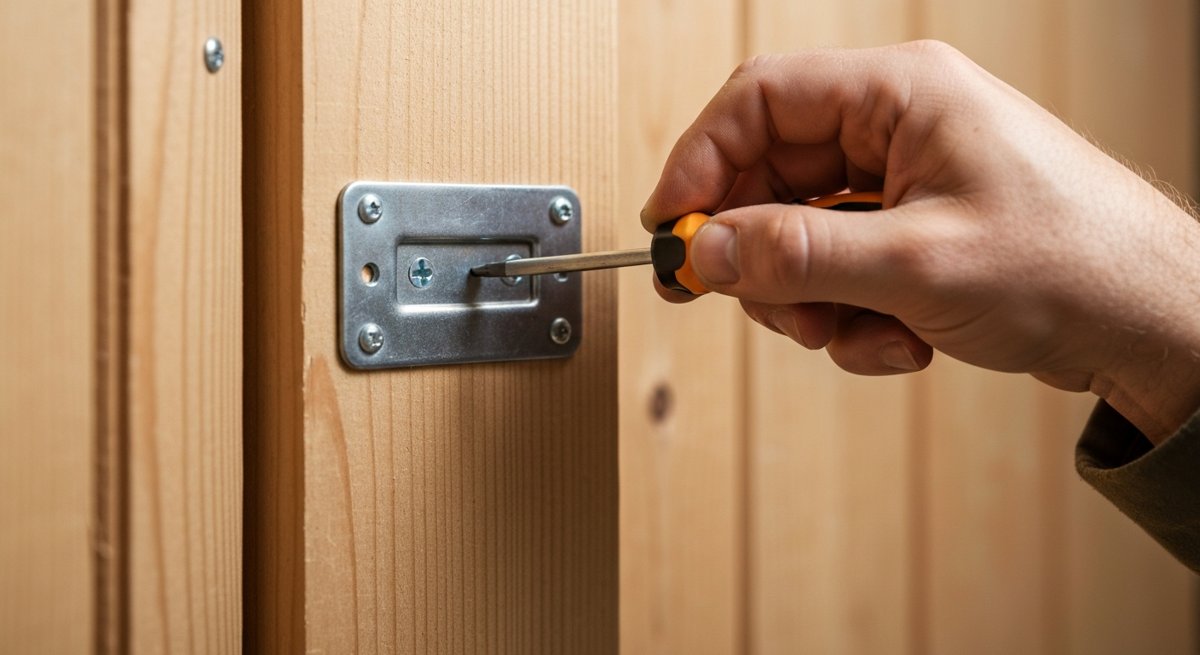
  1. A full-length strike plate — Instead of that little 1×3-inch plate, you get a steel plate that runs 36-48 inches along the door jamb. It distributes kick force across a much larger area and is held by multiple 3.5″ screws sunk into the stud.
  2. Hinge reinforcement plates — Steel plates that sit behind your existing hinges, again anchored with long screws into the stud. This prevents the door from being pried from the hinge side.
  3. A door edge shield — Some kits include a steel wrap for the door edge itself around the deadbolt area, preventing the door from splitting at the bolt.

Total cost: $25-$45 depending on the kit. Total install time: 45 minutes to an hour if you take your time.

Step-by-Step Install

Tools you need: drill/driver, a #2 Phillips or square bit (usually included), a pencil, and maybe a chisel if you’re fitting a recessed plate.

Step 1: Replace the Strike Plate

Remove your existing strike plate (the two screws next to the deadbolt hole in the frame). Hold the new reinforcement plate in position — it should center over the deadbolt and knob holes. Mark your screw holes with a pencil. Pre-drill pilot holes using a 1/8″ bit, going at least 3 inches deep. Drive the 3.5″ screws in until snug. Don’t overtighten — you want firm contact, not crushed wood.

Step 2: Reinforce the Hinges

Remove one hinge at a time (don’t take them all off — your door will fall). Pull the short screws and replace them with the 3.5″ screws from the kit. If your kit includes hinge shield plates, slide them behind the hinge before re-securing. Do this for all three hinges (or however many you have).

Step 3: Install the Door Edge Shield (If Included)

This is a U-shaped steel channel that wraps around the edge of the door where the deadbolt passes through. It prevents the wood from splitting if someone tries to spread the frame apart. Slide it over the edge, mark, drill, and screw it in place.

Step 4: Test Everything

Close the door. Lock and unlock the deadbolt. Make sure nothing binds or rubs. If the deadbolt is tight, you may need to slightly adjust the plate position or enlarge the bolt pocket with a chisel. Close, lock, and shoulder-check the door gently — it should feel noticeably more solid.

Don’t Forget Your Other Entry Points

Once the front door is hardened, walk your property and think about these:

  • Back door and side doors: Same reinforcement kit treatment. Every exterior door gets one.
  • Garage entry door: This is the one people forget. The door from your garage into your house is often a hollow-core interior door with a basic knob lock. If someone gets into your garage (opener cloned, side door forced), they’re walking through this door without even trying. Replace it with a solid-core door and deadbolt, then reinforce the frame.
  • Sliding glass doors: A reinforcement kit won’t help here, but a simple security bar (the rod that sits in the track) is cheap insurance. You can also install a secondary lock that pins the door to the frame.

The Layered Thinking

Door reinforcement isn’t a silver bullet. Nothing is. But it fits into what security professionals call defense in depth — layers that each buy you time and deter a different threat level.

  • Layer 1 — Deterrence: Lighting, visible cameras, signs, maintained property (signals someone is home and paying attention)
  • Layer 2 — Delay: Reinforced doors, quality locks, window security film, thorny landscaping under windows
  • Layer 3 — Detection: Alarm system, motion sensors, dogs, alert neighbors
  • Layer 4 — Response: Your plan for what happens when layers 1-3 fail

Door reinforcement lives in Layer 2. Its job is to make forced entry take longer and make more noise — long enough for detection systems to trigger and for you to respond. A reinforced door doesn’t have to be impenetrable. It just has to be harder than the next house.

My Honest Take

I think most people drastically overspend on cameras and smart home gadgets while ignoring the physical basics. A $300 Ring setup watching your front door doesn’t stop anyone from kicking it in — it just gives you a nice video of it happening. Meanwhile, $30 of steel and long screws would have actually prevented the entry.

Cameras are great for Layer 1 (deterrence) and Layer 3 (detection). But if you haven’t addressed Layer 2 first, you’ve built a very expensive notification system for a problem you could have physically prevented.

Start with the physical. Reinforce your doors. Then add the tech on top.

Your Weekend Challenge

Do this before Sunday night:

  1. Walk to your front door. Look at the strike plate. Count the screws and estimate their length.
  2. Open the door and look at the hinge screws. Are they short brass/gold screws? Those are the builder-grade ones.
  3. Go to your hardware store or order a door reinforcement kit online. Budget: $25-$45.
  4. Install it. One hour. One drill. Done.
  5. Then do the same for every exterior door in your house, including the one from the garage.

Bottom line: Your front door is probably held together by hope and half-inch screws. For less than the cost of a pizza, you can make it genuinely resistant to forced entry. That’s not prepper fantasy — that’s just smart homeownership.

How to Build a Rainwater Collection System for Under $50 (Step-by-Step)

Most people look at their roof during a rainstorm and think nothing of it. Meanwhile, thousands of gallons of free, clean-enough water are pouring off the edges and disappearing into the ground. That’s water you could be using for your garden, your livestock, washing gear, or — with proper filtration — even drinking.

A basic rainwater collection system isn’t complicated. It isn’t expensive. And once it’s set up, it works every single time it rains without you lifting a finger. Here’s how to build one this weekend for under fifty bucks.

Why Bother Collecting Rainwater?

Let’s put some numbers on it. A 1,000-square-foot roof section in an area that gets 30 inches of rain per year will yield roughly 18,000 gallons annually. That’s not a typo. The formula is simple: 1 inch of rain on 1,000 sq ft of roof = about 600 gallons.

Even a modest setup with a single barrel captures 50+ gallons per decent rainstorm. That’s enough to keep a small garden watered for a week in the summer.

Beyond the free water, there are real practical reasons:

  • Rainwater is better for plants. No chlorine, no fluoride, no mineral buildup. Your garden will genuinely grow better with it.
  • It reduces your water bill. Outdoor watering can account for 30-50% of residential water use in summer months.
  • It’s a backup supply. Municipal water fails. Wells run dry. Having 200 gallons stored isn’t paranoia — it’s planning.
  • It reduces runoff. Less water flooding your yard, less erosion, less strain on storm drains.

What You Need (The Sub-$50 Shopping List)

You don’t need a fancy commercial rain barrel system. Here’s what actually works:

Item Approx Cost Where to Find
55-gallon food-grade barrel $15–25 Facebook Marketplace, car washes, food distributors
3/4″ brass spigot $6–8 Hardware store
3/4″ bulkhead fitting (or rubber washers + lock nut) $4–6 Hardware store
Window screen mesh (for inlet filter) $4 Hardware store
Downspout diverter OR flexible downspout adapter $8–12 Hardware store / Amazon
Overflow fitting + short hose $5 Hardware store
Teflon tape, silicone sealant $3 Already in your garage, hopefully
Total $35–50

Pro tip on the barrel: Food-grade is non-negotiable. You want barrels that held juice concentrate, soy sauce, vinegar — not chemicals. Most car washes sell their used soap barrels for $10-15 and those work great too. Avoid anything that held industrial chemicals, obviously.

The Build: Step by Step

Step 1: Pick Your Location

Find a downspout that drains from the largest roof section possible — more square footage means more water per storm. The ground needs to be level and firm. A full 55-gallon barrel weighs about 460 pounds, so don’t put it on soft dirt or a wobbly deck.

Ideally, you want it elevated. Even 12-18 inches of elevation (a couple of cinder blocks or a small wooden platform) gives you gravity-fed pressure through the spigot. This matters if you want to run a hose from it without a pump.

Step 2: Prep the Barrel

You need three holes:

  1. Inlet hole (top): Cut a hole in the lid large enough for your downspout adapter to fit through — typically 3-4 inches. If the barrel has a removable lid, even easier. Secure window screen mesh over this opening with a hose clamp or zip ties. This keeps mosquitoes, leaves, and debris out.
  2. Spigot hole (bottom): Drill a 7/8″ hole about 3-4 inches from the bottom of the barrel. Install the bulkhead fitting from inside, add the spigot on the outside. Teflon tape on all threads, silicone around the exterior seal. Let it cure 24 hours.
  3. Overflow hole (top): Drill another hole about 2 inches from the top on the opposite side from the inlet. Install a bulkhead fitting and attach a short garden hose to direct overflow away from your foundation. This is the hole people skip — and then wonder why water is pouring over the top and pooling next to their house.

Step 3: Connect to the Downspout

You have two options here:

Option A — Flexible adapter (easiest): Cut the downspout above barrel height. Attach a flexible corrugated adapter that runs from the cut downspout into the top of your barrel. Takes about 10 minutes.

Option B — Diverter (better): Install an inline diverter on the downspout. These redirect water to the barrel when it’s raining and automatically bypass when the barrel is full. Slightly more work to install, but much cleaner and you don’t lose your normal downspout function.

I’d go with Option B if you can. The extra 15 minutes of installation saves you from having to think about it ever again.

Step 4: Set It and Forget It

Place the barrel on your platform, connect everything, and wait for rain. After the first rain, check for leaks around the spigot and overflow fittings. Tighten as needed. That’s it. You’re collecting water.

Mistakes That’ll Bite You

  • Skipping the screen mesh. Congratulations, you just built a mosquito breeding facility. Always screen the inlet. No exceptions.
  • No overflow plan. Water WILL overflow. Direct it somewhere intentional — a garden bed, a rain garden, or at minimum away from your foundation.
  • Using a non-food-grade barrel. Those blue chemical drums are cheap for a reason. The residue leaches into the water. If you’re watering food crops, this matters a lot.
  • Forgetting about winter. In freeze zones, drain your barrel before the first hard freeze or the expanding ice will crack it. Disconnect the downspout adapter and store the barrel upside down.
  • Not checking local regulations. Most states allow residential rainwater collection, but a handful have restrictions (looking at you, Colorado — though even they relaxed their rules). Spend 5 minutes checking before you build.

Scaling Up (When You’re Hooked)

One barrel is a start. Most people who build one end up with three within a year. You can daisy-chain barrels by connecting the overflow of one to the inlet of the next. Same concept, just more capacity.

For serious storage, 275-gallon IBC totes (Intermediate Bulk Containers) show up on Marketplace for $50-75. They’re ugly, but one tote holds five times what a barrel does. Paint it dark or build a simple screen fence around it.

And if you’re thinking about drinking the water — you absolutely can, but you need proper filtration. A first-flush diverter (dumps the first gallon of dirty roof water), a sediment filter, and a quality activated carbon or ceramic filter will get you there. That’s a separate project, but the collection system is the same.

The Takeaway

Here’s my honest take: rainwater collection is one of the highest-return, lowest-effort self-sufficiency projects you can do. You spend a Saturday afternoon and $40, and from that point forward, the sky literally delivers free water to your property every time it rains. No ongoing cost. No maintenance beyond cleaning the screen once a season.

It won’t make you fully water-independent, but it changes how you think about resources on your property. And that shift in thinking — from consumer to collector — is where real self-sufficiency starts.

Your challenge: This weekend, go look at your downspouts during the next rain. Pick the one dumping the most water. That’s where your first barrel goes. Get the barrel this week, build it next Saturday. By the end of the month, you’ll be collecting water without thinking about it.

Rain catchment is the first step toward water independence. For the bigger picture — storage, filtration, gravity feed, and the rest of an off-grid water plan — The Self-Sufficient Backyard lays it out start to finish.